
Related Manuals for Lennox MiniAir 10


Summary of Contents for Lennox MiniAir 10
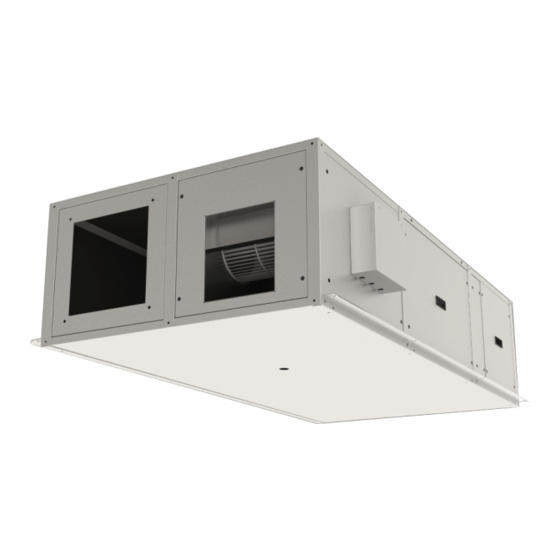
- Page 1 Installation, operating and maintenance MINIAIR / MINIAIR + Providing indoor climate comfort MINIAIR-IOM-0507-E...
- Page 3 SYMBOLOGY ATTENTION DANGER HIGH RISK OF ELECTRIC SHOCK ATTENTION: AUTHORIZED PERSONNEL ONLY IOM / MINIAIR-0507...
-
Page 4: Table Of Contents
NDEX MiniAir 1 – P ECTION RESENTATION Manual Presentation page 4 Unit Identification page 4 2 – T ECTION ECHNICAL CHARACTERISTICS Unit dimensions page 5 Unit technical data page 6 3 – T ECTION RANSPORTATION Packing page 6 Transportation page 6 Checklist page 6 Storing... - Page 5 12 – T ECTION RANSPORTATION 12.1 Packing page 21 12.2 Transportation page 22 12.3 Checklist page 22 12.4 Storing page 22 13 – I & C ECTION NSTALLATION ONNECTION 13.1 Definition page 22 13.2 Safety regulations page 22 13.3 Preliminary operations page 23 13.4 Choosing place of installation page 23...
-
Page 6: Manual Presentation
This instruction manual supplies the necessary information for the transportation, the installation, operation and maintenance of the MINIAIR apparatus as supplied by the company LENNOX (from this point named as the supplier). It supplies the user with as much information as is normally useful for a correct and secure installation of the unit. -
Page 7: Unit Dimensions
2 – T ECTION ECHNICAL FEATURES 2.1 Unit Dimensions Model 1070 1400 1400 1680 1780 2000 2 R ¾” ¾” ¾” ¾” ¾” 1” 1” ¾” ¾” 1” 1” 1” 1 ¼” 1 ¼” ¾” 1” 1” 1” 1 ¼” 1 ¼”... -
Page 8: Section 12 - Transportation
2.2 Unit technical data Model Airflow rate 1040 2150 2740 3360 3950 5070 6450 External static pressure () 1 m sound pressure level dB (A) Motor power 2 x 350 2 x 350 2 x 350 2 x 420 3 x 420 Max. -
Page 9: Section 13 - Installation & Connection
4 – I & C ECTION NSTALLATION ONNECTION 4.1 Definition CLIENT– The client is the person, activity or the society, that has bought or hired the apparatus, and intends to utilise the machinery for its intended use. USER / OPERATOR – The User or Operator, is the actual person that has been authorised by the client to utilise the apparatus. -
Page 10: Preliminary Operations
Spare parts must correspond to the requirements specified by Manufacturer. In case of dismantling of the unit, respect the anti-pollution regulations in force. N.B. The installer and the user of the apparatus must take into account, and solve problems, connected with any other type of risk that may occur to the unit. -
Page 11: Miniair Unit Positioning
4.6 MINIAIR unit positioning The unit is equipped with anti-vibration support plates. As follows are indications the various sequence of assembly: Carry out the drilling of the ceiling, and fit the four M8 threaded bolts as indicated in the diagram. Position the unit on the four bolts using the supplied fixing plates. -
Page 12: Duct Connection
4.7 Duct connection IMPORTANT: IT IS IMPORTANT NOT TO PLACE IN OPERATION THE UNIT IF THE FAN OUTLETS ARE NOT DUCTED OR NOT PROTECTED BY A SAFETY NET ADHERING WITH REGULATION UNI 9219 OR SUCCESSIVE. The Ducts must be the correct dimension based on the functions of system and the air diffusion characteristics of the unit fans. -
Page 13: Electrical Connection
The trap must have a tap for correct cleaning of the lower part, and must allow an easy disassembly. The path of the condensation drainage tube must always have a gradient toward external. Insure that the condensation run-off tube does not interfere with discharge of the unit. 4.8.2 Water humidifier connection The evaporative pack section is feeded by water public network (no water pump inside);... -
Page 14: Section 15 - Pre -Start Checklist
The electrical wiring diagrams of the ordered unit are supplied with it when delivered and they are related to the real accessory selection. 5 – P ECTION RE START HECKLIST 5.1 Checks prior to Start-up Before turning on the apparatus verify the following: ... -
Page 15: Yearly Maintenance
6.1.2 Bag filter section check The soft bag filters are high performance type and require periodical checking, as a marked deterioration may occur during usage, especially at the point where they are attached to the main frame. This is due to the continuous deformation, and for the weight of the dust caught. -
Page 16: Material Disposal
8 – S ECTION PARE ARTS 8.1 Spare part order In the following table there are the codes of the unit components that might be replaced; the Customer must refer to these codes for the possible spare part order. See 2.2 paragraph for the used quantity in the specific model. Model Direct driven fan 03305021... -
Page 17: Manual Presentation
This instruction manual supplies the necessary information for the transportation, the installation, operation and maintenance of the MINIAIR+ apparatus as supplied by the company LENNOX (from this point named as the supplier). It supplies the user with as much information as is normally useful for a correct and secure installation of the unit. -
Page 18: Packing Dimensions
11.3 Packing dimensions Model A (mm) 1150 1350 1450 1700 1700 1700 B (mm) 1230 1230 1230 C (mm) L (mm) H (mm) L1 (mm) H1 (mm) D (mm) E (mm) F (mm) G (mm) G ¾ G ¾ G ¾... -
Page 19: Unit Technical Data
11.4 Unit technical data MINIAIR+ MINIAIR+ MINIAIR+ MINIAIR+ MINIAIR+ MINIAIR+ MINIAIR+ MINIAIR+ Model Air flow 1000 1400 1900 2500 3200 4000 Available static pressure Liv. Sound pressure dB (A) 59.5 57,5 60,5 Section 1.02 MINIAIR+ MINIAIR+ MINIAIR+ MINIAIR+ MINIAIR+ MINIAIR+ MINIAIR+ Fans INIAIR+... -
Page 20: Accessories Technical Data
11.5 Accessories technical data 11.5.1 Water coil for reheating Section 1.03 Coil code SKW 10 SKW 14 SKW 19 SKW 25 SKW 30 SKW 40 Geometry 25 22 25 22 25 22 25 22 25 22 25 22 Tubes per row N °... -
Page 21: Possible Positioning
11.6 Possible positioning For each size available, four possible positions for the recuperators are available. Depending on the net configuration, and available space, one of the four possibilities below may be employed 11.6.1 Horizontal unit orientation Tipo "A" - Type "A" Tipo "B"... - Page 22 11.6.3 Vertical unit with post-heating coil Tipo "A" - Type "A" Tipo "B" - Type "B" Mandata aria preriscaldata Ripresa aria ambiente Imput pre heated air Internal air duction Espulsione Mandata aria preriscaldata aria viziata Air blow-out Imput pre heated air Aspirazione Ripresa aria di rinnovo...
-
Page 23: By-Pass For De-Frosting Or Free-Cooling
11.7 By-pass for de-frosting or free-cooling For MINIAIR+ 03-06-10-14-19-25-30 models the structure has a presplitting allowing defrosting by-pass or free cooling to be carried out. Free cooling. When the external temperature is close to the internal temperature the recuperator may be bypassed inserting renewal air directly in the room. -
Page 24: Iom / Miniair
12.2 Transportation For the lifting and transportation of the unit, use adequate equipment, according to the 89/391/CEE regulations and successive modifications. Each individual machine weight is listed in this manual. Avoid rotation without control. 12.3 Checklist Upon reception of the apparatus, we suggest that a complete control is carried out, to verify that the unit is intact and complete, and no damage has been sustained during transport. -
Page 25: Preliminary Operations
The maintenance and the substitution of damaged or consumed parts must be carried out only by specialised personnel, following the indications found within this manual. Spare parts must correspond to the requirements specified by Manufacturer. In case of dismantling of the unit, respect the anti-pollution regulations in force. N.B. - Page 26 Min 500 Model Section 1.04 A 13.5 Machine positioning IOM / MINIAIR-0507...
-
Page 27: Duct Connection
Model Section 1.05 A 1276 1276 1100 1230 1380 1630 1630 1160 1160 1036 1036 1196 1346 1496 1746 1746 To aid the regular flow of the condensation, it is advised to install the apparatus with a 3 mm inclination towards the condensation outlet. -
Page 28: Hydraulic Connection
13.7 Hydraulic connections The installation and connecting of the piping is an operation that must be done correctly, otherwise it may compromise the performance of the system. At worst it may cause irreversible damage to the machine. These operations are to be effectuated by qualified personnel. - Page 29 13.8 Electrical connections Before commencing any operation, insure that the general power supply has been isolated Qualified personnel according to the supplied schemes must carry out the electrical connections at the control panel. Insure that the voltage and the frequency shown on the technical plate correspond to the connecting power supply.
- Page 30 Technical characteristics Power supply: 230 +/- 10% Vac ; 50/60Hz Manual : On / Off Control: Manual : Min/ Med / Max Relay capacity: 6A with resistive load 13.9.2 PCU Control panel Adaptable for wall installation, the PCU Control Panel allows environmental temperature control, for both summer and winter.
- Page 31 14 – E ECTION LECTRICAL CHEMES 14.1 MINIAIR+ 03-06 direct connection COMUNE / COMMON RELE' ALTA VELOCITA' / HIGH SPEED RELE' BASSA VELOCITA' / LOW SPEED RELE' NELLO SCHEMA E' INDICATO IL FUNZIONAMENTO ALLA MINIMA VELOCITA'. IL FUNZIONAMENTO ALL' ALTA VELOCITA' COLLEGARE IL NEUTRO CON IL MORSETTO 2. THE DIAGRAM SHOWS OPERATION AT THE LOW SPEED.
-
Page 32: Miniair+ 03-06 Connection With Ske & Pcu Control Panel
14.3 MINIAIR+ 03-06 connection with SKE & PCU control panel 10 11 12 3 F1 COMUNE / COMMON ALTA VELOCITA' / HIGH SPEED SOLO CON RKE06 BASSA VELOCITA' / LOW SPEED QUADRO COMANDO SKE SINGOLA / DOPPIA RESISTENZA QUADRO COMANDO VENTILATORI SKE CONTROL CABINET CONTROL PANEL FAN I COLLEGAMENTI A CURA DELL'INSTALLATORE SONO INDICATI A TRATTEGGIO. - Page 33 14.5 MINIAIR+ 10-14-19-25 connection with CVU speed control 4 5 6 3 F1 V1 V2 COMUNE / COMMON ALTA VELOCITA' / HIGH SPEED MEDIA VELOCITA' / MEDIUM SPEED BASSA VELOCITA' / LOW SPEED I COLLEGAMENTI A CURA DELL'INSTALLATORE SONO INDICATI A TRATTEGGIO. TUTTE LE LINEE DEVONO ESSERE PROTETTE ALL'ORIGINE A CURA DELL'INSTALLATORE THE CONNECTION TO BE CARRIED OUT BY THE INSTALLER ARE SHOWN BY THE DOTTER LINE.
- Page 34 14.7 MINIAIR+ 30 direct connection 3 F1 V3 N I COLLEGAMENTI A CURA DELL'INSTALLATORE SONO INDICATI A TRATTEGGIO. TUTTE LE LINEE DEVONO ESSERE PROTETTE ALL'ORIGINE A CURA DELL'INSTALLATORE THE CONNECTION TO BE CARRIED OUT BY THE INSTALLER ARE SHOWN BY THE DOTTER LINE. ALL THE CONNECTIONS MUST BE PROTECTED ST THE SOURCE BY THE INSTALLER.
-
Page 35: Miniair+ 30 Connection With Ske & Pcu Control Panel
14.9 MINIAIR+ 30 connection with SKE & PCU control panel 10 11 12 13 3 F1 KMR2 V3 N KMR1 QUADRO COMANDO SKE SINGOLA / DOPPIA RESISTENZA SKE CONTROL CABINET QUADRO COMANDO VENTILATORI CONTROL PANEL FAN I COLLEGAMENTI A CURA DELL'INSTALLATORE SONO INDICATI A TRATTEGGIO. TUTTE LE LINEE DEVONO ESSERE PROTETTE ALL'ORIGINE A CURA DELL'INSTALLATORE THE CONNECTION TO BE CARRIED OUT BY THE INSTALLER ARE SHOWN BY THE DOTTER LINE. - Page 36 14.11 MINIAIR+ 40 connection with CVU speed control 14.12 MINIAIR+ 30 connection with SKE & PCU control panel IOM / MINIAIR-0507...
-
Page 37: Checks Prior To Initial Start-Up
15 – P TART HECKLIST ECTION 6.1 Checks prior to initial start-up Before turning on the apparatus verify the following: Fixing of unit to ceiling; Connection of ducts; Correct condensation run-off; Connection of mains supply; Closing of all electrical clamps. 16 –... -
Page 38: Yearly Maintenance
To remove filter, dis-assemble the guides and extract filter. For the cleaning, utilize a vacuum cleaner or wash with normal detergent and warm water, allow to dry well. Remember to assemble the filter before operating the unit. 16.1.2 Recuperator Checklist Verify that the plate exchanger does not demonstrate signs of impurity, as this may lower significantly its efficiency. -
Page 39: Material Disposal
17 – T ECTION ROUBLESHOOTING 17.1 Finding Faults SYMPTOMS REASON Power supply not present The thermostat switches are not in their exact functioning The motor does position not turn Material/foreign bodies blocking moving parts Loose electrical connections Loss of ... - Page 42 BELGIUM, LUXEMBOURG PORTUGAL Due to Lennox’s ongoing commitment to quality, www.lennoxbelgium.com www.lennoxportugal.com the Specifications, Ratings and Dimensions are subject to change without notice and without incurring liability. CZECH REPUBLIC RUSSIA Improper installation, adjustment, alteration, www.lennox.cz www.lennoxrussia.com service or maintenance can cause property damage or personal injury.