Table of Contents
Advertisement
INSTALLATION COMMISSIONING AND SERVICING INSTRUCTIONS
WALL HUNG RSF GAS FIRED CONDENSING COMBINATION BOILER
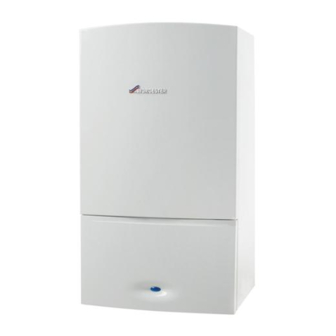
Greenstar CDi Compact
FOR SEALED CENTRAL HEATING SYSTEMS AND MAINS FED DOMESTIC HOT WATER
The appliances are for use with:
Natural Gas or L.P.G. (Cat.II 2H 3P type C13, C33 & 53)
Natural Gas: 28CDi Compact GC number 47-406-44
32CDi Compact GC number 47-406-46
36CDi Compact GC number 47-406-48
L.P.G.: 28CDi Compact GC number 47-406-45
32CDi Compact GC number 47-406-47
36CDi Compact GC number 47-406-49
UK/IE
Advertisement
Table of Contents

Related Manuals for Worcester Greenstar CDi Compact


Summary of Contents for Worcester Greenstar CDi Compact
- Page 1 INSTALLATION COMMISSIONING AND SERVICING INSTRUCTIONS WALL HUNG RSF GAS FIRED CONDENSING COMBINATION BOILER Greenstar CDi Compact FOR SEALED CENTRAL HEATING SYSTEMS AND MAINS FED DOMESTIC HOT WATER The appliances are for use with: Natural Gas or L.P.G. (Cat.II 2H 3P type C13, C33 & 53)
-
Page 2: Table Of Contents
CONTENTS CONTENTS 5.5.1 Checking the gas inlet pressure ....33 KEY TO SYMBOLS AND SAFETY INSTRUCTIONS ... 3 5.5.2 Checking the gas rate . -
Page 3: Key To Symbols And Safety Instructions
If you are in any doubt, contact the Worcester Technical helpline (0844 892 3366). The following keywords are defined and can be used in this document: Please leave these instructions with the completed BENCHMARK •... -
Page 4: Safety Precautions
KEY TO SYMBOLS AND SAFETY INSTRUCTIONS SAFETY PRECAUTIONS INSTALLATION REGULATIONS Current Gas Safety (Installation & Use) Regulations: IF YOU SMELL GAS All gas appliances must be installed by a competent person in A gas leak could potentially cause an explosion. If you smell gas, observe accordance with the above regulations. -
Page 5: Appliance Information
1. Wall hung gas-fired condensing combi boiler for central heating and domestic hot water 2. Wall mounting frame 3. Integral Filling Loop kit 4. Hardware literature pack: – Greenstar CDi Compact Installation, Commissioning and Servicing Instructions – User guide – Boiler fascia guide – Wall mounting template –... -
Page 6: Layout
APPLIANCE INFORMATION LAYOUT 6720646608-02.4Wo 47 46 45 44 43 42 41 Fig. 1 Main boiler components 6 720 803 800 (2012/11) - Page 7 • Galvanised steel wall mounting frame • Standard wall frame provides vertical pipe route behind the boiler • Compatible with all Worcester standard and intelligent controls • Condensfit II flue systems 60/100 and 80/125 mm allows plume re-direction as standard and ability to attach plume management kits...
-
Page 8: Technical Data
91.9 91.9 Table 5 Technical data * Greenstar CDi Compact boilers are fitted with a flow ** All Worcester Greenstar boilers are tested in an regulator set to achieve a 40°C temperature rise. This acoustic chamber to sound level and there may some ensures comfortable bathing during the colder winter differences in situ dependant on installation site i.e. -
Page 9: Pre-Installation
▶ In cases where all attempts to find a micro leak have back flow prevention valve fitted, a mini expansion vessel (1) should failed, Worcester, Bosch Group supports the use of be connected to the mains water inlet pipe (2) between the non- Fernox F4 leak sealer. -
Page 10: Water Systems And Pipe Work
PRE-INSTALLATION SEALED PRIMARY SYSTEM: NOTICE: Artificially softened water must not be used to fill the central heating system. • The CH sealed system must be filled using a WRAS approved filling loop or comply with figure 2 for system fill. •... -
Page 11: Condensate Pipe Work
PRE-INSTALLATION CONDENSATE PIPE WORK NOTICE: ▶ Where a new or replacement boiler is being installed, access to an internal “gravity discharge” point should be one of the factors considered in determining boiler location. ▶ The condensate pipe must be nominally 22mm Ø... - Page 12 PRE-INSTALLATION Where the pipe terminates over an open drain or gully, the pipe should Continued - Key to condensate illustrations terminate below the grating level, but above water level, in order to PVCu strap on fitting minimise “wind chill” at the open end. 100mm Ø...
-
Page 13: Pressure Relief Pipe Work
PRE-INSTALLATION BOILER LOCATION AND CLEARANCES 3.6.1 INSTALLATION This boiler is only suitable for installing internally within a property at a suitable location onto a fixed, rigid surface at least the same size as the boiler and capable of supporting the boiler weight. NOTICE: No surface protection is required against heat transfer 500mm min. -
Page 14: Plumbing Manifold
Part number: 7 716 192 713. • To cover the pipe work under the boiler, down to the counter top, an optional Worcester accessory the Below Boiler Pipe Cover can be used, Part number: 7 716 192 608. Fig. 16 Plumbing manifold... -
Page 15: Flue Options
PRE-INSTALLATION FLUE OPTIONS Part number Flue Description 7 716 191 082 60/100 Telescopic horizontal flue assembly CAUTION: Non accessible flue systems: 7 716 191 171 60/100 Longer telescopic horizontal flue assembly ▶ Where a flue system is not going to be accessible, 7 719 003 702 80/125 Telescopic horizontal flue assembly provision must be made for service and inspection. - Page 16 PRE-INSTALLATION 350 mm - 570 mm 130 mm Min 500 mm 300 mm Flat roof 6720643895-12.1Wo 6 720 803 800 (2012/11)
-
Page 17: Flue Terminal Positions
PRE-INSTALLATION FLUE TERMINAL POSITIONS All measurements in millimetres 52mm 104mm 1,500 1,500 300 300 300 300 1,200 Boundary Line Fig. 17 Flue terminal positions NOTICE: ▶ All measurements are the minimum clearances required. ▶ Terminals must be positioned so to avoid combustion products entering the building. ▶... -
Page 18: Plume Management Terminal Positions
PRE-INSTALLATION 3.10 PLUME MANAGEMENT TERMINAL POSITIONS All measurements in millimetres Flue terminal guard 7 716 191 176 ±45° Plume re-direction: 180° Flue Exhaust Outlet 1,500 Air Intake ±80° 1,200 Boundary Line Fig. 18 Plume terminal positions NOTICE: ▶ All measurements are the minimum clearances required. ▶... -
Page 19: Determine The Plume Management System Length
INSTALLATION 3.10.1 DETERMINE THE PLUME MANAGEMENT SYSTEM LENGTH Refer to figure 20 to determine the appropriate plume length (M) versus the flue length (L). Effective straight flue length for telescopic flue with plume The lengths for both plume and flue are the effective lengths, which management includes the effective length of any bends plus the straight lengths. -
Page 20: Wall Mounting Template & Flue Opening
INSTALLATION is used make sure the outer carton is not pierced and that the ▶ Clear any debris from the site. implement is used in such a way so that it may not cause personal injury. • All sharp objects must be covered or the blade retracted after use and put away in a safe place. -
Page 21: Pre-Plumbing Boiler Connections
INSTALLATION 4. Remove the protective cardboard (5) from over the isolating valves. Refer to Figure 26. The connector (1) in the wiring 5. Remove the protective cardboard (6) from around the expansion harness is provided for the installation of the Domestic vessel. - Page 22 INSTALLATION 6720646608-111.2Wo Fig. 28 PRV pipe connection Once the wall frame has been mounted the PRV discharge pipe can be fitted. Fig. 30 Fitting the Filling link CH return connection Blanking plugs x 2 Filling link assembly Filling key White control screw Filter M4 screws and washers x 4 DHW inlet connection...
-
Page 23: Hanging The Boiler
INSTALLATION ▶ Connect the system pipes using the compression nuts and olives supplied in the Literature/Hardware pack. 1. CH flow (22mm), 2. DHW outlet (15mm), 3. Gas inlet (22mm bonded washer), 4. Domestic Cold Water inlet (15mm), 5. CH return (22mm), ▶... -
Page 24: Flue Installation
INSTALLATION ▶ Hang the boiler on to the wall mounting frame utilising the two CONNECTING THE SIPHON OUTLET mounting points positioned left and right at the top rear of the 1. Push the black rubber siphon discharge hose, onto the wall frame appliance. -
Page 25: Measuring The Flue (Standard Flue)
INSTALLATION 4.6.1 MEASURING THE FLUE (STANDARD FLUE): To reduce the flue length further: ▶ Measure from the outside of the wall to the centre line of the flue turret 265 mm to determine length L. ▶ Subtract 50mm from the length L to give the correct dimension to the flue elbow connection. -
Page 26: Flue Terminal Plume Re-Direction
INSTALLATION 4.6.4 FLUE TERMINAL PLUME RE-DIRECTION: The flue discharge can be re-directed allowing some plume redirection control, alternatively, a complete plume management system can be fitted to the flue terminal. RE-DIRECTING THE FLUE DISCHARGE 1. Unclip (1 & 2) the terminal end and rotate through 180°. NOTICE: DO NOT rotate the complete terminal assembly. -
Page 27: Electrical
INSTALLATION 6720643895-119.1Wo Fig. 47 Plume distance to opening Fig. 48 Removing the installer access cover Opening in building Flue discharge Low voltage connections Plume deflector Mains voltage connections Minimum 1500mm from an opening in the building Fuse carrier - 5A Table 10 Key to figure 47 Low voltage connections ELECTRICAL... -
Page 28: Mounting Optional Plug-In Controls
(3) in the control panel. DHW. All Worcester twin channel digital controls 2. Align the clips on the back of the Programmer/Timer with the slots in provide this functionality. -
Page 29: New Complete System Installations
Fig. 55 Two room thermostats, one integrated timer for a small dwelling, less than 150m , using either a third party programmer or a Worcester programmer. 4.7.3 EXISTING INSTALLATIONS For boiler replacements on an existing system, it is not necessary to zone... -
Page 30: Commissioning
Wiring to Part L MAINS zoned controls SUPPLY 230V 230V FR FS LR LR Plug in Worcester timer. (see timer operating Fig. 59 Frost Thermostat 230V 230V FR FS LR LR instructions for installation) Fig. 57 Room thermostat with plug in timer... -
Page 31: Filling The System
3. Fill the system via a WRAS approved filling loop or the optional Worcester Integral Filling Link accessory to 1 bar then close the filling The pH value of the system water must be less than 8 or loop valve(s). -
Page 32: Boiler Start Up Screens
COMMISSIONING 12 13 Fig. 60 Control panel 5.4.1 BOILER START UP SCREENS Key to figure 60 On initial start up, the following screens are displayed: Spanner/return button 1. All the symbols are displayed for approximately two seconds. Service engineer symbol 2. -
Page 33: Commissioning
COMMISSIONING ▶ As soon as an adjustment is made, the screen will light up and the COMMISSIONING relevant information will be displayed. NOTICE: The combustion settings on this gas-fired SCREEN DISPLAY DESCRIPTION boiler have been checked, adjusted and preset at the All possible screen symbols This screen is displayed briefly factory for operation on the gas type defined on the data... -
Page 34: Checking The Gas Rate
COMMISSIONING ≈ ≈ Regulator Gas Control L.P.G. valve °C reset °F 32 - 45 mbar 28 - 41 mbar Boiler inlet 2.5 mbar 1.5 mbar °C drop drop °F 29.5 - 42.5 mbar 6720644744-45.1Wo Fig. 65 L.P.G. pressures Fig. 63 Setting boiler to maximum NOTICE: ▶... -
Page 35: Domestic Hot Water
COMMISSIONING ▶ Do not allow the product to come into contact with the electrical 5.7.2 SECURING THE CONTROL PANEL wiring. 4. Raise the control panel. 5. Push the control panel up to engage the top edge under the case. DOMESTIC HOT WATER 6. -
Page 36: Hand Over
▶ Have you shown the customer how to safely isolate the boiler ▶ Have you advised the customer where they can find information on the Worcester, Bosch Group website , www.worcester-bosch.co.uk. NOTICE: CO/CO ANALYSER ▶ Advise the customer that the varying external temperatures will affect ▶... -
Page 37: Checking Flue Integrity
SERVICE AND SPARES CHECKING FLUE INTEGRITY COMPONENT ACCESS The integrity of the flue system and performance of the boiler can be To gain access to the components, remove the outer case: checked via the flue turret sample points. 1. Remove the two screws securing the control panel. 2. -
Page 38: Fan Pressure Test
DHW circuit to ensure that If the boiler, after completing the above checks, fails the fan pressure test then contact Worcester, Bosch Group for advice. the boiler will not cycle on low heating demands. This is to allow sufficient time for the setting procedure. -
Page 39: Flue Gas Analysis
0.5% to minus 1.0% COMBUSTION TEST When running in maximum output, and the water CO/CO settings for Greenstar CDi Compact temperature is 65°C or less, the boiler will operate both CO/CO must be measured after 10 minutes. -
Page 40: Cleaning The Siphon
SERVICE AND SPARES 6.7.1 CLEANING THE SIPHON 6.7.2 CLEANING THE PRIMARY HEAT EXCHANGER 1. Protect the controller from water ingress and disconnect the black SINGLE BLADED TOOL AND BRUSH discharge hose from the wall frame connector. Use a suitable blade to clean the heat exchanger channels. 2. -
Page 41: Replacement Of Parts
SERVICE AND SPARES ▶ Use the brush to dislodge the debris and pour water down the REPLACEMENT OF PARTS channels to flush out the debris. CAUTION: Mains supplies: ▶ Turn off the gas supply and isolate the mains supplies before starting any work on the boiler and observe all relevant safety precautions. -
Page 42: Draining The Boiler
SERVICE AND SPARES 6.8.3 SYPHON REMOVAL 1. Disconnect the discharge hose from the wall frame connector. 2. Rotate the siphon body clockwise to release the bayonet connection. 3. Pull the siphon body down and away from the boiler. Fig. 85 Syphon removal 6.8.4 PRIMARY SENSOR (CH NTC) ▶... -
Page 43: Maximum Safety Sensor (Ntc)
SERVICE AND SPARES 6.8.5 MAXIMUM SAFETY SENSOR (NTC) 6.8.7 AUTO AIR VENT ▶ Disconnect the lead to the Maximum safety sensor. Ensure that the boiler has been fully drained. 1. Remove the screw securing the sensor. 1. Remove the spring clip completely. 2. -
Page 44: Fan Assembly
SERVICE AND SPARES 6.8.9 FAN ASSEMBLY SUMP SEAL 1. Place seal on sump interface. CAUTION: Component replacement: 2. Be sure the ear lugs of the seal are mounted on the lugs of the sump. ▶ After replacement of a gas related component, where Before placing the flue pipe. -
Page 45: Air/Gas Flap Valve Assembly
SERVICE AND SPARES FAN REMOVAL 6.8.10 AIR/GAS FLAP VALVE ASSEMBLY 1. Remove the single screw securing the air/gas flap valve assembly. The boiler case is shown removed to aid clarity. 2. Pull the flap assembly away from the housing. 3. Rotate the exhaust pipe anticlockwise to gain access to the fan assembly securing screws. -
Page 46: Burner Housing, Burner/ Gasket
SERVICE AND SPARES Fig. 98 Electrode assembly 6.8.13 BURNER HOUSING, BURNER/ GASKET The front two bolts retaining the burner housing are NOT captive and will drop out when the nuts are removed. To remove the burner housing. Fig. 100 Burner and gasket 1. -
Page 47: Diverter Valve Motor And Diverter Valve Removal
SERVICE AND SPARES 4. Lift the heat exchanger until the lower connection clears the hole in the air box. 5. Pull the heat exchanger towards you to remove. CAUTION: Component replacement: ▶ After replacement of a gas related component, where a gasket or seal has been disturbed or replaced, check for gas tightness using a gas sniffer/analyser. -
Page 48: Flow Sensor, Flow Restrictor And Filter Removal
SERVICE AND SPARES Fig. 107 Flow regulator assembly 6.8.20 PRESSURE GAUGE ▶ Ensure that the boiler is fully drained. 1. Carefully prise the lugs apart. 2. Remove the pressure gauge. 3. Withdraw the spring clip from the pressure sensing head housing. 4. -
Page 49: Drain Tap
SERVICE AND SPARES 6.8.22 DRAIN TAP ▶ When replacing the DHW pressure relief valve, re-use the deflector from the old PRV. ▶ Ensure that the boiler is full drained down. ▶ The drain tap rotates anticlockwise for a ¼ turn to open. 1. -
Page 50: Bypass Valve
SERVICE AND SPARES 5. Remove the two screws securing the CH pressure relief valve mounting. 6. Remove the screws securing the hydraulic block assembly. Fig. 114 Hydraulic block 6.8.27 BYPASS VALVE Remove the hydraulic block from the boiler. 1. Remove the clip on the return connection. 2. -
Page 51: Replacing The Control Unit
SERVICE AND SPARES 6.8.29 REPLACING THE CONTROL UNIT REMOVING THE CONTROL UNIT ▶ Support the control unit and detach the control unit support strap. The control unit is supplied in a plastic housing. The 1. Release the two catches underneath the panel. complete unit must be replaced. - Page 52 SERVICE AND SPARES EXPANSION VESSEL REPLACEMENT (BOILER FITTED) 2. Pull the expansion vessel towards you and down to remove. ▶ Isolate the power from the boiler. ▶ Lower the control panel into the service position. ▶ Isolate the boiler from the heating system using the service valves. ▶...
-
Page 53: Short Parts List
SERVICE AND SPARES SHORT PARTS LIST Fan 8 718 603 05A By pass valve 8 716 106 434 0 Gas Valve 8 718 600 04A 0 Control panel 8 718 686 274 0 Flue overheat thermostat 8 717 206 213 0 Electrodes (including gasket) 8 718 600 28A 0 Burner seal 8 718 600 24A 0 Spark generator 8 718 688 015 0... -
Page 54: Fault Finding And Diagnosis
TURBINE DHW INLET NTC PRE WIRED LINK (PREHEAT OPTION) Fuse, slow 230V 230V FR FS LR LR F 5A H 230 V Worcester 24V controls point CH TEMPERATURE DHW TEMPERATURE CONTROL EMS BUS point CONTROL DIAGNOSTIC LCD DISPLAY INPUT HCM (at rear of PCB) 6720646608-03.3Wo... -
Page 55: Central Heating Function
FAULT FINDING AND DIAGNOSIS CENTRAL HEATING FUNCTION Fig. 123 Central Heating function 6 720 803 800 (2012/11) -
Page 56: Preheat And Dhw Function
FAULT FINDING AND DIAGNOSIS PREHEAT AND DHW FUNCTION Fig. 124 PreHeat and DHW function 6 720 803 800 (2012/11) -
Page 57: Protection Function
FAULT FINDING AND DIAGNOSIS PROTECTION FUNCTION Fig. 125 Protection function 6 720 803 800 (2012/11) -
Page 58: Information And Service Menus
FAULT FINDING AND DIAGNOSIS INFORMATION AND SERVICE MENUS STATUS CODES During normal boiler operation various Status codes can be displayed by pressing the button. The first screen of the Information menu displays the current Status code, this will change as the boiler runs through the various modes and sequences. These are not always faults, but just provide information concerning the current status of the boiler. - Page 59 FAULT FINDING AND DIAGNOSIS Status Fault codes codes Power up mode Temperature difference between flow and safety sensor exceeding limit Internal error Airflow present during last 24 hours Ionisation signal present during last 24 hours Flow temperature exceeded 95° Safety sensor temperature exceeded 95° Sensor test failed AD converter error, unstable measurement Recycle timing error...
-
Page 60: Selecting The Information Menu
FAULT FINDING AND DIAGNOSIS Status Fault codes codes CH: Boil Detect, large delta T despite minimum burner load Flow sensor shorted 351 'E2' Flow sensor disconnected Burn temporarily blocked due to no 20 minute continuous OFF time in last 24 hours. Overpressure setting erased Primary Heat Exchanger air venting program active - approx. - Page 61 FAULT FINDING AND DIAGNOSIS Heat Control Module The last three digits of the HCM are Current status Every operation and mode of the (HCM) number. displayed: boiler has a related boiler status code. 332 = 28kW Combi N.G. The boiler status code is displayed on 333 = 28kW Combi L.P.G.
-
Page 62: Selecting Service Menus
1 to 4 option pump maps 2.1H Minimum pump This parameter is only visible Not applicable for Greenstar CDi Compact. speed (pump when 2.1C is set to 0 and 2.1D Initially Menu 1 will be displayed, but will contain no options. -
Page 63: Reset To Factory Settings
FAULT FINDING AND DIAGNOSIS Para Parameter Description Updated valve °C 2.3C Anti fast cycle flow This sets the temperature drop temperature before the burner re-starts, 6°K hysteresis is the default. This is used in ~5 s (negative tolerance conjunction with the “Anti fast only) cycle time”... -
Page 64: Using The Test Menu
FAULT FINDING AND DIAGNOSIS °C °C reset reset °F °F Menu 1 Menu 1 °C °C °F °F Menu 3 Test 1 °C reset °F °C Menu 3 reset °F Test 1 °C °C °F °F 3.1A kW 6720646608-79.1Wo Fig. 130 Menu 3 selection Fig. - Page 65 FAULT FINDING AND DIAGNOSIS TESTING THE COMPONENT RESETTING THE TEST COMPONENT ▶ Select a component to test. After completing the test: ▶ Press the button, the value 0 will flash. ▶ Press the button, the value 1 will flash. ▶ Use the arrow button to change the value to a flashing 1.
- Page 66 FAULT FINDING AND DIAGNOSIS Note that it could be up to 10 seconds after the button is Test pressed before the selected component responds. Igniter test. The igniter will spark for a maximum Checking the igniter of 30 seconds. The spark will be spark.
-
Page 67: Fault Codes
FAULT FINDING AND DIAGNOSIS FAULT CODES Should a fault develop with this boiler (or the system), the boiler will enter a locking or blocking condition, and fault code information will be generated as described in this section. Locking error The boiler display will flash a warning triangle and fault code. At the same time a (static) cause code will also be displayed. Manual intervention is required following clearance of the fault: ▶... - Page 68 FAULT FINDING AND DIAGNOSIS Cause Fault codes codes Description Reset type Possible cause Internal error Call Worcester, Bosch Group Technical helpline 0844 892 3366 Gas valve error Reset button Leaking gas valve 242 - 256 Internal error Call Worcester, Bosch Group...
- Page 69 FAULT FINDING AND DIAGNOSIS Fault Cause code code Description Possible cause MAX thermostat activated Flue gas thermostat overheat. Flow temperature exceeds 95°C Primary overheat - boiler waits for temperature to reduce; if not it becomes a Locking error. Safety temperature exceeds 95°C Main heat exchanger safety sensor overheat - boiler will wait for the temperature to reduce;...
- Page 70 Failure to install and commission according to the manufacturer’s instructions and complete this Benchmark Commissioning Checklist will invalidate the warranty. This does not affect the customer’s statutory rights. If yes, and if required by the manufacturer, has a water scale reducer been fitted? CONDENSING BOILERS ONLY The condensate drain has been installed in accordance with the manufacturer’s instructions and/or BS5546/BS6798 If the condensate pipe terminates externally has the pipe diameter been increased and weatherproof insulation fitted?
-
Page 71: Service Record
Service Record It is recommended that your heating system is serviced regularly and that the appropriate Service Interval Record is completed. Service Provider Before completing the appropriate Service Record below, please ensure you have carried out the service as described in the manufacturer’s instructions. - Page 72 LITERATURE: 0844 892 9800 TRAINING: 01905 752526 SALES: 01905 752640 Worcester, Bosch Group Cotswold Way, Warndon, Worcester WR4 9SW. Tel. 0844 892 9900 Worcester, Bosch Group is a brand name of Bosch Thermotechnology Ltd. worcester-bosch.co.uk 6 720 803 800 (2012/11)