Table of Contents
Advertisement
Quick Links
Advertisement
Table of Contents

Related Manuals for Planar PS4662T


Summary of Contents for Planar PS4662T
- Page 1 Planar PS Series User Guide PS4662T PS5562 PS5562T PS6562 PS6562T...
- Page 2 Planar employees. When you purchase a Planar product, you get more than a display, you get the service and support you need to maximize your investment. To find the latest warranty and service information regarding your Planar product, please visit http://www.planar.com/support...
-
Page 3: Table Of Contents
Planar PS Series - Standard Inputs........ - Page 4 Website........... .63 Planar PS Series User Guide...
-
Page 5: Introduction
Introduction Ranging in size from 46” – 65”, the Planar® PS Series is a line of professional large format Full HD (1080p) LCD displays that features narrow bezels and integrated touch options. Engineered from the ground up for extended commercial use, each Planar PS Series model is recommended for up to 24x7 operation and comes standard with a durable metal bezel. -
Page 6: Safety Information
Safety Information Safety Information Before using the Planar PS Series, please read this manual thoroughly to help protect against damage to property, and to ensure personnel safety. • Be sure to observe the following instructions. • For your safety, be sure to observe ALL the warnings detailed in this manual. -
Page 7: Important Safety Instructions
Keep the packing material in case the equipment should ever need to be shipped. Wall mounts must be secure. The wall must be strong enough to hold all displays, brackets and cables. Planar PS Series User Guide... -
Page 8: Recommended Usage
When using high-contrast images, reposition the images frequently. • Turn off the LCD when it is not in use. To use your source computer’s Power Options Properties, set up your computer to turn off the display when not in use. Planar PS Series User Guide... - Page 9 The following models are warranted for 24 x 7 usage: • 46”: PS4662T • 55”: PS5562, PS5562T • 65”: PS6562, PS6562T Planar recommends turning off the power for 4 hours per day for optimal performance. For complete warranty details, please visit www.planar.com/warranty. Important Waste Disposal Information Please recycle or dispose of all electronic waste in accordance with local, state, and federal laws.
-
Page 10: Vesa Mounts, General Description
VESA Mounts, General Description VESA mounts are used to secure the Planar PS Series for display. The display can be installed using a variety of VESA mounts available through Planar. If you do not have a VESA mount and would like to purchase one, contact Planar. -
Page 11: Cleaning The Display
• If the surface requires additional cleaning, use LCD screen cleaner or LCD wipes, which are available at most electronics stores. • Do not let cleaner seep into the display, as it may cause electrical shock or damage. Planar PS Series User Guide... -
Page 12: Package Contents
One per box. HDMI cable HDMI cable. USB cable Connects to a PC for touch functionality (touch models only). AC power Power cord. cord IR extender Used to receive signals from the cable remote control. Planar PS Series User Guide... - Page 13 Package Contents Part Description Number Picture Remote Used to control the display (AAA control batteries included). Quick Start Quick Start Guide. Guide Planar PS Series User Guide...
-
Page 14: Planar Ps Series - Standard Inputs
Planar PS Series - Standard Inputs Planar PS Series - Standard Inputs Touch USB (for Touch version) RS232 DisplayPort HDMI 1 HDMI 2 PC Audio In Audio Out Planar PS Series User Guide... -
Page 15: Installing The Display
If your installation included a lot of construction or dust, it is highly recommended that you clean all of the screens after the wall installation and configuration are complete. Planar PS Series User Guide... -
Page 16: Operating The Display
The OSD keypad is located on the rear of the display. OSD Keypad Buttons Descriptions Power Power on/Power off Source Source selection (toggle) Menu Right/Increase value Menu Left/Decrease value Menu Up Menu Down Menu/Exit Menu/Exit Planar PS Series User Guide... -
Page 17: Remote Control Receiver
The remote control receiver is located near the keypad on the rear of the display. Use the IR extender cable for operating the remote from the front of the display. Power ON standby indicator, Remote control receiver Planar PS Series User Guide... -
Page 18: Led Indicators
Installations where the display is tilted downward or upward at an angle may also be prone to these issues and are not recommended. Planar PS Series User Guide... -
Page 19: Using The Remote Control
Using the Remote Control Using the Remote Control Below is a picture of the remote control and its corresponding Hex codes. See the following page for button descriptions and Hex codes. Planar PS Series User Guide... - Page 20 Opens the Brightness slider CONTRAST 16559 0x40AF18E7 Opens the Contrast slider AUTO 16559 0x40AF1EE1 Auto adjust on VGA SOURCE 16559 0x40AF0FF0 Opens the source menu VOLUME - 16559 0x40AF1BE4 Volume decrease VOLUME + 16559 0x40AF1DE2 Volume increase Planar PS Series User Guide...
-
Page 21: Changing The Remote Control Battery
Align and insert two AAA batteries according to their plus and minus ports (as indicated in the remote control). Close the battery cover. Replace the battery cover in the direction of the arrow and snap it back into place. Planar PS Series User Guide... -
Page 22: Turning The Display On
• Press the source button on the display’s keypad. Use the arrow buttons ( ) to select one of the following input sources and press ENTER HDMI HDMI DISPLAYPORT Note: When the display cannot find a source, a “No signal” message will appear. Planar PS Series User Guide... -
Page 23: Navigating Through The Menus
Increase or decrease the brightness of picture. Press or to select the desired level. Range: 0~100; Default: 50 Contrast Increase or decrease the contrast of picture. Press or to select the desired level. Range: 0~100; Default: 50 Planar PS Series User Guide... - Page 24 Select whether the display will automatically scan for a Main Input source. Options: On, Off; Default: Off Select Source Select the input source. Options: VGA, HDMI1, HDMI2, DisplayPort HDMI RGB Range Select RGB range for HDMI sources. Options: Auto, Full, Limited; Default: Auto Planar PS Series User Guide...
-
Page 25: Audio Menu
Adjust the sound in high tones (treble). Press or to select the desired level. Range: -6~+6 Default: 0 Balance Adjust the balance of the left and right speakers. Press or to select the desired level. Range: -6~+6 Default: 0 Planar PS Series User Guide... - Page 26 Audio Menu Audio Input Select the audio source for the Main input. Options: DisplayPort, HDMI1, HDMI2, Line-In Internal Speakers Turn the internal speaker on or off. Default: On Planar PS Series User Guide...
-
Page 27: Basic Menu
Submenu to adjust the time in seconds before the OSD menu disappears. Press or to select the desired level. Options: 5 sec, 10 sec, 20 sec, 30 sec, 60 sec; Default: 30 sec Planar PS Series User Guide... - Page 28 Splash Screen Select whether a splash screen appears when the monitor is powered up. Options: On, Off; Default: On Message Box Select whether a message box is displayed on screen. Options: On, Off Default: On Planar PS Series User Guide...
- Page 29 Current Time Set the year, month, day, and time of day. Timer Mode Select how to configure the timer events. Options: User Mode, Workday Mode, Everyday Mode; Default: User Mode Planar PS Series User Guide...
- Page 30 Basic Menu Real Time Clock Submenu – User Mode User Mode Select the power on/off time for each day of the week. Options: Disable, Enable Use the arrow keys to specify the on and off times. Planar PS Series User Guide...
- Page 31 Basic Menu Real Time Clock Submenu – Workday Mode Workday Mode Select the power on/off time for Monday–Friday, Saturday, and Sunday. Options: Disable, Enable Use the arrow keys to specify the on and off times. Planar PS Series User Guide...
- Page 32 Basic Menu Real Time Clock Submenu – Everyday Mode Everyday Mode Select the power on/off time for all days of the week. Options: Disable, Enable Use the arrow keys to specify the on and off times. Planar PS Series User Guide...
-
Page 33: Advanced Menu
Adjust the clock of the displayed signal (VGA source only). Press or to select the desired level. Range: 0~100 Pixel Orbit Create slight frame motion to help avoid image retention. Options: On, Off; Default: Off Planar PS Series User Guide... - Page 34 Note: For Wake on VGA and Wake on All, the display will enter power saving mode if no signal is received for 5 minutes. Ethernet Setup See the “Ethernet Setup” section on page 31. Factory Reset Restore all settings to their default. Options: No, Yes; Default: No Planar PS Series User Guide...
- Page 35 Enable an automatic alert when the source is changed. Options: No, Yes; Default: No Signal Lost Alert Enable an automatic alert when the video signal is lost. Options: No, Yes; Default: No Load Default Load default communication settings. Options: No, Yes; Default: No Planar PS Series User Guide...
- Page 36 Communication menu. Consult your system administrator if you do not know how to configure the parameters shown in the menu. The default settings are shown below. Item Setting Dynamic IP Disable Static IP Address 192.168.2.1 Subnet Mask 255.255.255.0 Gateway 192.168.2.1 DNS Addr. 192.168.2.1 Planar PS Series User Guide...
-
Page 37: System Menu
System Menu System Menu This read-only menu provides information on the active sources and the latest firmware version. Planar PS Series User Guide... -
Page 38: Using The Touch Screen
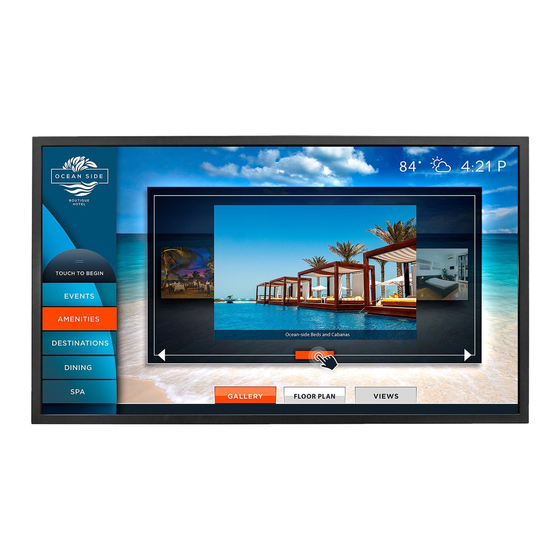
You can use the touch screen to control your Windows, Mac or Linux operating system. The Planar PS Series is HID compliant, delivering up to 10 points of touch on both Windows and Linux without a driver. Single touch only is supported for Mac operating systems. -
Page 39: Lan Control
LAN Control The Planar PS Series supports extending access to the RS232 commands over a network connection using a virtual COM port (VCOM). The VCOM driver can be found on http://www.planar.com/support. Note: RS232 commands over LAN can be achieved by opening a TCP connection to Port 23 to the display. -
Page 40: Installation
Installation Installation Use the following instructions to install the VCOM driver. Launch the vcomsetup.exe file. You may see a security warning similar to the following example. Click Run to continue. Planar PS Series User Guide... - Page 41 The vcomsetup.exe installer installs both the VCOM virtual serial port and also a utility (WinPcap) for finding your displays on the network. Follow the steps in the two installers, accepting defaults and license agreements as needed. Planar PS Series User Guide...
- Page 42 When the installers are finished, you will see a VCOM icon on your desktop and you find two new folders in your start menu: IC Plus corp (with VCOM sub folder) and WinPcap. If you need to uninstall the software, there are shortcuts to uninstall from these menus. Planar PS Series User Guide...
-
Page 43: Configuring Vcom
COM ports. Open a browser Configure the Search for the and link to the display’s IP display’s in same Search by display’s web address domain IP address service Planar PS Series User Guide... - Page 44 COM ports and select the display to which you want to map each virtual COM port. Create a Remove an virtual existing virtual COM port COM port Planar PS Series User Guide...
-
Page 45: Function Descriptions
Search By IP On the Device Info page, click the Search by IP icon. This function searches for any devices in the given IP address range. Any devices found will be listed in the Device Info table. Planar PS Series User Guide... - Page 46 Guide instead of this function. Note: To cancel this function, scroll to the bottom and click the Cancel button. Click the Web icon to launch your default browser and link it to the display’s web service. Planar PS Series User Guide...
- Page 47 Select the display you want to control from the table and accept defaults, as shown. Make a note of the COM number assigned to the new VCOM port. Click OK to create the new port. The new port appears in the COM Mapping table. Planar PS Series User Guide...
- Page 48 You can view details for the virtual COM port device using Device Manager, shown below. Removing a COM Port On the COM Mapping page, select the COM port you want to delete and click the button. REMOVE Planar PS Series User Guide...
-
Page 49: Setting Up Email Alerts
The default ID is admin and the default password is system. Note: Cookies and JavaScript must be enabled in your browser. Note: If your session times out or if you enter an incorrect ID or password, you will see the following message. Planar PS Series User Guide... - Page 50 Login When you first login, you will see the System Status page, as shown here. Planar PS Series User Guide...
-
Page 51: Administrator
Administrator Administrator Click on the word Administrator under the Planar logo to show/hide these menu items. Authentication Configuration Set user ID and password for login to the web service. System IP Configuration You can view and/or change the network settings here. However, for best results, we recommend that you use the on-screen display menus. -
Page 52: System Status
LOAD After a few seconds, you will see a green box with the message “Setting Saved RESET.” Click the button to restart the network interface. RESET Planar PS Series User Guide... -
Page 53: Firmware Update And Boot Loader Upgrade
WARNING! Do not use the controls in these two sections unless you have received a specific procedure and firmware from Planar. Following improper procedures can disable the net- work interface and require factory repair service. Planar PS Series User Guide... -
Page 54: Tcp Mode, Udp Mode And Uart
TCP Mode, UDP Mode and UART TCP Mode, UDP Mode and UART For normal operation, you will not need to change any settings on these pages. If you do need to change information, Planar’s Technical Support Department will provide you with more information. SMTP... -
Page 55: Reset Device
The SMTP 04 and 05 warnings are not used. Reset Device Click the button to reboot the network interface. Note that the current RESET settings are not changed. Planar PS Series User Guide... -
Page 56: Signal Compatibility
VESA CVT-R 1680x1050 49.974 54.121 119.500 x VESA CVT 1680x1050 59.954 65.290 146.250 x VESA CVT EDTV 480p 31.469 27.000 ITU-R BT.1358, CEA-861-F Format 17 & 18 576p 31.250 27.000 SMPTE 125M, CEA-861-F Format 6 & Planar PS Series User Guide... - Page 57 SMPTE 274M, CEA-861-F Format 5 720p 37.500 74.250 SMPTE 296M, CEA-861-F Format 19 720p 45.000 74.250 SMPTE 296M, CEA-861-F Format 4 1080p 56.250 148.500 x SMPTE 274M, CEA-861-F Format 31 1080p 67.500 148.500 x SMPTE 274M, CEA-861-F Format 16 Planar PS Series User Guide...
-
Page 58: Specifications
64 lbs (29 kg) Standard: 68 lbs (31 kg) Standard: 83 lbs (38 kg) Touch: 86 lbs (39 kg) Touch: 109 lbs (49 kg) Mounting VESA 400 mm x 400 mm Fanless Speakers 10W x 2 built-in Planar PS Series User Guide... - Page 59 50-60 Hz Environment Storage Temperature Min -4°F ~ Max 140°F (-20°C ~ 60°C) Operating Temperature Min 32°F ~ Max 104°F (0-40°C) at up to 3000 m Humidity 20-85% RH Approvals FCC Class A, cTUVus, CE Planar PS Series User Guide...
-
Page 60: Dimensions
12.21 310.3 AC POWER IN (IEC C14) 21.04 1.43 534.5 36.25 4X M8x1.25 15mm 2X SPEAKER 2X SPEAKER 42.08 1068.9 40.35 1025.0 ACTIVE AREA 21.8 24.43 620.5 22.72 577.0 1176 ACTIVE AREA 21.8 22.0 22.0 Planar PS Series User Guide... -
Page 61: Ps5562
130.4 57.4 66.6 15.75 400.0 14.23 361.4 24.65 3.44 626.0 87.4 4X M8x1.25 15mm 2X SPEAKER 2X SPEAKER 49.29 1252.0 47.87 1216.0 18.0 ACTIVE AREA 28.46 722.8 27.04 1397 686.8 ACTIVE AREA 18.0 18.0 18.0 Planar PS Series User Guide... -
Page 62: Ps5562T
14.28 AC POWER IN 362.6 (IEC C14) 24.79 3.44 629.6 4X M8x1.25 15mm 87.4 2X SPEAKER 2X SPEAKER 49.57 1259.2 47.91 1217.0 ACTIVE AREA 21.1 28.55 725.2 1396 26.89 683.0 ACTIVE AREA 21.1 21.1 21.1 Planar PS Series User Guide... -
Page 63: Ps6562
15.75 400.0 16.52 419.6 AC POWER IN (IEC C14) 2X SPEAKER 1.57 4X M8x1.25 15mm 39.9 28.82 732.1 57.65 1464.2 56.31 1430.4 ACTIVE AREA 16.9 33.04 839.2 31.71 1640 805.4 ACTIVE AREA 16.9 16.9 16.9 Planar PS Series User Guide... -
Page 64: Ps6562T
15.75 400.0 16.79 AC POWER IN 426.4 (IEC C14) 1.84 2X SPEAKER 8X M8x1.25 15mm 46.7 29.07 738.4 58.14 1476.8 56.50 1435.2 ACTIVE AREA 21.9 33.57 852.8 1646 31.94 811.2 ACTIVE AREA 21.9 21.9 21.9 Planar PS Series User Guide... -
Page 65: Troubleshooting
Troubleshooting Symptoms, Possible Causes and Solutions Below are different symptoms that you might encounter as you install your Planar PS Series display. First look at the different symptoms to see if you can find your issue. And then look at the possible cause and try the suggested solution(s). If you still are not able to resolve your issue, please contact Planar’s Technical Support Department. - Page 66 Symptom: The Picture Color Looks Poor Symptom: The Picture Color Looks Poor Solution Check the picture settings. Reset the display. Planar PS Series User Guide...
-
Page 67: Accessing Planar's Technical Support
Accessing Planar’s Technical Support Website Go to http://www.planar.com/support to locate the following support documents and resources: • User Guide • RS232 User Manual • Touchscreen drivers • Standard warranties • Planar support hotline number and email Planar PS Series User Guide... - Page 68 Accessing Planar’s Technical Support Website Planar PS Series User Guide...
- Page 69 19 input source selecting, 18 recommended usage, 4 installation, 11 remote control safety precautions, 3 changing the batteries, 17 introduction, 1 using, 15 ip system configuration, 47 resetting the network interface, 51 Planar PS Series User Guide...
- Page 70 34 troubleshooting, 54 turning off the displays, 18 turning on the displays, 18 using the remote, 15 VCOM configuration, 39 driver installation, 36 vesa mounts, 6 volume, 18 warranty Planar PS Series User Guide...