Table of Contents
Advertisement
Available languages
Available languages
Advertisement
Chapters
Table of Contents

Related Manuals for Electrolux TW L4 E


Summary of Contents for Electrolux TW L4 E
- Page 1 ..................... TW L4 E DE WÄSCHETROCKNER BENUTZERINFORMATION FR SÈCHE-LINGE NOTICE D'UTILISATION IT ASCIUGABIANCHERIA ISTRUZIONI PER L’USO EN TUMBLE DRYER USER MANUAL...
-
Page 2: Table Of Contents
2 electrolux Electrolux. Thinking of you. Mehr zu unserem Denken finden Sie unter www.electrolux.com INHALT Sicherheitshinweise Tipps und Hinweise Gerätebeschreibung Reinigung und Pflege Zubehör Fehlersuche Bedienfeld Technische Daten Vor der ersten Inbetriebnahme Montage Programme Umwelttipps Gebrauch des Geräts Änderungen vorbehalten. - Page 3 3 Dunstabzug von mit Gas oder sonstigen se. Stellen Sie sicher, dass der Netzste- Brennstoffen betriebenen Geräten ge- cker nach der Montage noch zugänglich währleistet wird. ist. • Wenn der Wäschetrockner auf einer • Ziehen Sie nicht am Netzkabel, um das Waschmaschine aufgestellt wird, muss Gerät von der Spannungsversorgung zu...
- Page 4 4 electrolux delt worden sind, müssen vor dem • Schalten Sie vor Reinigungsarbeiten im- Trocknen in heißem Wasser und unter mer das Gerät aus und ziehen Sie den Zugabe einer höheren Waschmitteldosie- Netzstecker aus der Steckdose. rung gewaschen werden. • Reinigen Sie das Gerät nicht mit einem •...
-
Page 5: Gerätebeschreibung
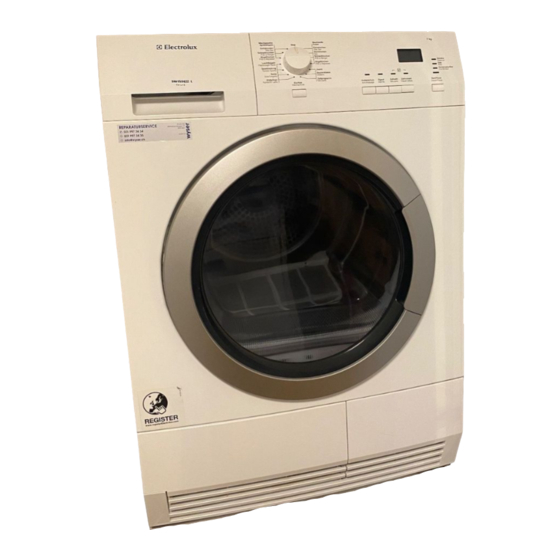
5 GERÄTEBESCHREIBUNG Wasserbehälter Schraubfüße Bedienfeld Zugangstür zum Wärmetauscher Einfülltür (Türanschlag wechselbar) Abdeckung des Wärmetauscherfilters Hauptfilter Verriegelungsknopf Schiebetaste zum Öffnen der Wärme- Typenschild tauschertür Luftschlitze... -
Page 6: Zubehör
6 electrolux ZUBEHÖR BAUSATZ WASCH-TROCKEN-SÄULE werden. Der Schlauch darf keine Schleife bilden. Kürzen Sie den Schlauch bei Bedarf. Lesen Sie aufmerksam die dem Zubehör beiliegende Anleitung. SOCKEL MIT SCHUBLADE Zubehörbezeichnung: SKP11, STA8, STA9 Sie erhalten den Bausatz bei Ihrem Ver- tragshändler. -
Page 7: Bedienfeld
7 Website, ob das Zubehör mit Ihrem Gerät • Wolle kompatibel ist. • Stofftieren Trockenkorb zum sicheren Trocknen im • Dessous Wäschetrockner von: Lesen Sie aufmerksam die dem Zubehör • Turnschuhen beiliegende Anleitung. BEDIENFELD Programmwahlschalter Display Taste Ein/Aus Taste Start/Pause Taste Knitterschutz Kontrolllampen: Wasserbehälter leeren ,... - Page 8 8 electrolux Pfle- Bela- Verfügbare Programme Wäscheart gesym- Funktionen dung Schranktrocken Zum Trocknen von Kleidungsstücken aus alle außer: 7 kg Baumwolle. Trockengrad: Schranktrocken. Zeitwahl Zum Trocknen von Kleidungsstücken aus alle außer: 7 kg Bügeltrocken Baumwolle. Trockengrad: Bügelwäsche. Zeitwahl Zum Trocknen von Freizeitkleidung wie Jeans, Sweatshirts mit unterschiedlicher Ma- alle außer:...
-
Page 9: Gebrauch Des Geräts
9 Reinigen Sie den Wärmetauscherfilter nach jedem dritten Trockengang. 3) Nur mit Trockenkorb – siehe ZUBEHÖR GEBRAUCH DES GERÄTS VORBEREITEN DER WÄSCHE EINFÜLLEN DER WÄSCHE 1. Ziehen Sie die Gerätetür auf. Wichtig! Nur Textilien trocknen, die für 2. Legen Sie die Wäsche locker ein. - Page 10 10 electrolux SONDERFUNKTIONEN 2. Drücken Sie die Taste Zeitvorwahl wie- derholt, bis die gewünschte Startzeit- Zusammen mit dem Programm können Sie verzögerung im Display angezeigt wird eine oder mehrere Sonderfunktionen ein- (z. B. , wenn das Programm nach stellen. einer Verzögerung von 12 Stunden ge- Drücken Sie die entsprechende Taste, um...
-
Page 11: Tipps Und Hinweise
11 AM ENDE DES PROGRAMMS 2. Öffnen Sie die Gerätetür. 3. Entnehmen Sie die Wäsche. Nach Abschluss des Trockenprogramms 4. Schließen Sie die Gerätetür. blinkt das Symbol im Display. Ist die Funktion Signal eingeschaltet, ertönt etwa Wichtig! Nach jedem Trockenprogramm: eine Minute lang eine akustische Signalfol- •... -
Page 12: Reinigung Und Pflege
12 electrolux REINIGUNG UND PFLEGE REINIGEN DES HAUPTFILTERS Der Filter hält Flusen zurück. Die Flusen lösen sich während des Trockengangs Am Ende eines jeden Programms leuchtet von der Wäsche. die Kontrolllampe (Hauptfilter reinigen), um darauf hinzuweisen, dass der Hauptfilter gereinigt werden muss. - Page 13 13 5. Reinigen Sie den Filter bei Bedarf mit einer Bürste und warmem Wasser. Schließen Sie den Filter. 6. Entfernen Sie die Flusen vom Filterso- ckel. Hierfür können Sie einen Staub- sauger benutzen. 7. Setzen Sie den Filter in den Filterso- ckel.
- Page 14 14 electrolux Das Kondenswasser kann als destillier- Das Reinigungsintervall der Filter hängt vom tes Wasser verwendet werden, z. B. Wäschetyp und der -menge ab. zum Bügeln mit einem Dampfbügelei- Trocken Sie stets die maximale Beladungs- sen. Filtern Sie das Kondenswasser menge, reinigen Sie die Filter nach jedem gegebenenfalls (z.
- Page 15 15 5. Ziehen Sie den Hauptfilter nach oben. Halten Sie den Wärmetauscherfilter fest und ziehen Sie ihn aus dem unte- ren Fach heraus. 6. Drücken Sie auf den Haken, um den Filter zu öffnen. 7. Reinigen Sie den Filter mit der feuchten Hand.
- Page 16 16 electrolux 8. Reinigen Sie den kleinen Filter im So- ckel. 9. Entfernen Sie, je nach Bedarf, alle 6 Monate die Flusen aus dem Wärme- tauscherfach. Hierfür können Sie einen Staubsauger benutzen. 10. Setzen Sie den kleinen Filter und den Wärmetauscherfilter wieder ein.
-
Page 17: Fehlersuche
17 BEDIENFELD UND GEHÄUSE Vorsicht! Verwenden Sie keine REINIGEN Möbelreiniger oder Reinigungsmittel, die eine Korrosion des Geräts Verwenden Sie einen handelsüblichen neut- verursachen können. ralen Reiniger zur Reinigung des Bedien- felds und Gehäuses. Verwenden Sie zur Reinigung ein feuchtes Tuch. -
Page 18: Technische Daten
18 electrolux Mögliche Ursache Abhilfe Problem Keine Trom- Kontaktieren Sie den Kundendienst und melbeleuch- Defekte Trommelbeleuchtung. lassen Sie die Trommelbeleuchtung austauschen. tung. Ungewöhnli- Die voraussichtliche Programmdauer Dieser Vorgang erfolgt automatisch; es cher Zeitab- wird unter Berücksichtigung der Menge handelt sich nicht um eine Gerätestö- lauf im Dis- und des Feuchtegrades der Wäsche er-... -
Page 19: Montage
19 Frequenz 50 Hz Erforderliche Sicherung Gesamte Leistungsaufnahme 900 W Energie-Effizienzklasse 1,85 kWh Energieverbrauch kWh/Trockengang 121,8 kWh Jährlicher Energieverbrauch Verwendungsart Haushalt Zulässige Umgebungstemperatur + 5 °C bis + 35 °C 1) 7 kg Baumwollwäsche, geschleudert mit 1000 U/min gemäß EN 61121 2) Summe des ungefähren Energieverbrauchs zum Trocknen von:... -
Page 20: Umwelttipps
20 electrolux TÜRANSCHLAG DER EINFÜLLTÜR den. So kann die Wäsche in einigen Fällen WECHSELN einfacher eingelegt und entnommen wer- den. (Siehe separates Blatt.) Die Einfülltür kann vom Benutzer an der ge- genüberliegenden Seite angebracht wer- UMWELTTIPPS Wohin mit den Altgeräten? -
Page 21: Instructions De Sécurité
21 Electrolux. Thinking of you. Partagez notre imagination sur www.electrolux.com SOMMAIRE Instructions de sécurité Conseils Description de l'appareil Entretien et nettoyage Accessoires En cas d'anomalie de fonctionnement Bandeau de commande Caractéristiques techniques Avant la première utilisation Installation Programmes En matière de protection de... - Page 22 22 electrolux • Si le sèche-linge est placé au-dessus UTILISATION d'un lave-linge, utilisez le kit de superpo- Avertissement Risque d'incendie, sition. Le kit de superposition, disponible d'explosion, de choc électrique ou auprès d'un revendeur agréé, ne peut d'endommagement de l'appareil être utilisé...
- Page 23 23 • Si vous avez lavé votre linge avec un pro- de lavage neutres. N'utilisez pas de pro- duit détachant, lancez un cycle de rinça- duits abrasifs, de tampons à récurer, de ge supplémentaire avant de démarrer le solvants ou d'objets métalliques.
-
Page 24: Description De L'appareil
24 electrolux DESCRIPTION DE L'APPAREIL Bac d'eau de condensation Pieds réglables Bandeau de commande Trappe du condenseur thermique Hublot (réversible) Couvercle des filtres du condenseur thermique Filtre principal Manette de verrouillage Levier coulissant pour ouvrir la trappe Plaque signalétique du condenseur thermique... -
Page 25: Accessoires
25 ACCESSOIRES KIT DE SUPERPOSITION Le tuyau doit être installé à une hauteur comprise entre 50 cm au minimum et 1 m au maximum du niveau du sol. Ce tuyau ne doit pas faire de boucle. Si nécessaire, ré- duisez la longueur du tuyau. -
Page 26: Bandeau De Commande
26 electrolux Il est disponible chez votre magasin ven- • chaussures de sport deur agréé (peut se fixer à certains types de • laine sèche-linge). Vérifiez auprès de votre ven- • peluches deur ou sur le site Internet que l'accessoire •... - Page 27 27 Éti- quette d'en- Char- Fonctions Programmes Propriétés tretien disponibles texti- Séchage de vêtements en coton. Niveau de tous sauf : Très Sec 7 kg séchage : très sec. Minuterie Séchage de vêtements en coton. Niveau de tous sauf : 7 kg séchage : bien sec.
-
Page 28: Utilisation De L'appareil
28 electrolux Éti- quette d'en- Char- Fonctions Programmes Propriétés tretien disponibles texti- tous sauf : Séchage de la soie/lingerie au moyen d'air Soie / Lingerie 1 kg Anti-froissage chaud et d'un mouvement délicat. et Minuterie Pour rafraîchir les vêtements en laine. Les vê- Alarme et Mi- tements seront doux et confortables. - Page 29 29 • si la touche Départ/Pause n'a pas été ac- tes. Cette fonction empêche le froissage du tionnée dans un délai de 5 minutes. linge. Le linge peut être retiré au cours de la • 5 minutes après la fin du programme.
-
Page 30: Conseils
30 electrolux Pour activer le programme, appuyez sur la • après avoir appuyé sur la touche Départ/ touche Départ/Pause . Le voyant au-des- Pause , ce qui désactive toutes les tou- sus de la touche passe au rouge. ches et le sélecteur de programme CHANGEMENT DE PROGRAMME À... -
Page 31: Entretien Et Nettoyage
31 4. Pour mémoriser le réglage, appuyez si- 1. Tournez le sélecteur de programme sur multanément sur les touches Anti-frois- un programme disponible. sage et Minuterie . 2. Appuyez simultanément sur les tou- ches Anti-froissage et Départ Différé et SYMBOLE DE RAPPEL DE VIDANGE maintenez l'appui jusqu'à... - Page 32 32 electrolux 4. Nettoyez le filtre après vous être hu- mecté la main. 5. Au besoin, nettoyez le filtre à l'eau tiè- de à l'aide d'une brosse. Refermez le filtre. 6. Enlevez les peluches du logement du filtre. Un aspirateur peut être utilisé à...
- Page 33 33 Pour vidanger le bac d'eau de condensa- tion : 1. Tirez sur le bac d'eau de condensation et maintenez-le en position horizontale. 2. Sortez le raccord en plastique et vidan- gez le bac d'eau de condensation dans un évier ou un réceptacle équiva- lent.
- Page 34 34 electrolux 3. Tournez le loquet pour déverrouiller le capot du condenseur thermique. 4. Abaissez le capot des filtres du con- denseur thermique. 5. Soulevez le filtre principal. Tenez le filtre du condenseur thermique et sortez-le du compartiment inférieur.
- Page 35 35 6. Poussez sur le crochet pour ouvrir le filtre. 7. Nettoyez le filtre après vous être hu- mecté la main. Au besoin, nettoyez le filtre à l'eau tiède à l'aide d'une brosse. Refermez le filtre. 8. Nettoyez le petit filtre situé à la base.
- Page 36 36 electrolux 9. Si nécessaire, une fois tous les 6 mois, retirez les peluches du compartiment du condenseur thermique. Vous pou- vez utiliser un aspirateur. 10. Remettez en place le petit filtre et le fil- tre du condenseur thermique. 11. Fermez le capot du condenseur ther- mique.
-
Page 37: En Cas D'anomalie De Fonctionnement
37 EN CAS D'ANOMALIE DE FONCTIONNEMENT EN CAS D'ANOMALIE DE FONCTIONNEMENT Cause probable Solution Problème Branchez l'appareil sur le secteur. Véri- Le sèche-linge n'est pas branché élec- fiez le fusible dans la boîte à fusibles (in- triquement. stallation domestique). -
Page 38: Caractéristiques Techniques
38 electrolux Cause probable Solution Problème Sélectionnez la durée du programme. La durée doit être proportionnelle à la charge. Pour sécher un seul article ou Il n'y a pas assez de linge. de petites quantités de linge, nous vous Cycle de sé- recommandons d'utiliser des durées... -
Page 39: Installation
39 hauteur x largeur x profondeur 850 x 600 x 600 mm (maximum 640 mm) capacité du tambour 118 l profondeur maximale avec hublot ouvert 1090 mm largeur maximale avec hublot ouvert 950 mm hauteur réglable 850 mm (+ 15 mm - réglage des pieds) -
Page 40: En Matière De Protection De L'environnement
40 electrolux RÉVERSIBILITÉ DE LA PORTE 600 mm L'utilisateur peut installer le hublot de sorte qu'il s'ouvre dans l'autre sens. Cela est utile si l'espace autour de l'appareil est restreint et rend le chargement et le retrait du linge 600 mm difficile. -
Page 41: Istruzioni Di Sicurezza
41 Electrolux. Thinking of you. Per conoscere meglio il nostro modo di pensare, visitate il sito www.electrolux.com INDICE Istruzioni di sicurezza Consigli e suggerimenti utili Descrizione del prodotto Pulizia e cura Accessori Risoluzione dei problemi Pannello dei comandi Dati tecnici... - Page 42 42 electrolux in colonna, disponibile presso il proprio ri- UTILIZZO venditore autorizzato, può essere utilizza- Avvertenza! Vi è il rischio di incendio, to solo con l'apparecchiatura indicata esplosione, scosse elettriche o danni nelle istruzioni, fornite con gli accessori. all'apparecchiatura Leggerle attentamente prima di passare all'installazione (fare riferimento al libretto •...
-
Page 43: Descrizione Del Prodotto
43 • Rispettare il volume massimo di 7 kg per • Staccare la spina dall'alimentazione elet- il carico (fare riferimento al capitolo "Ta- trica. bella programmi"). • Tagliare il cavo di rete e smaltirlo. • Non introdurre nell'asciugabiancheria ca- •... -
Page 44: Accessori
44 electrolux Porta (reversibile) Sportello dello scambiatore di calore Filtro principale Coperchio dei filtri dello scambiatore di calore Far scorrere il tasto per aprire lo spor- Manopola di blocco tello dello scambiatore di calore Fessure per il ricircolo dell'aria Targhetta dei dati... -
Page 45: Pannello Dei Comandi
45 CESTELLO DI ASCIUGATURA Disponibile presso il vostro rivenditore auto- rizzato (può essere collegato ad alcuni tipi di asciugabiancheria). Verificare con il riven- ditore o sul sito Web se l'accessorio sia compatibile con la propria apparecchiatura. Il cestello permette di eseguire un’asciuga- tura sicura all’interno dell’asciugabianche-... -
Page 46: Programmi
46 electrolux PROGRAMMI Tipo di Carico Funzioni di- Programmi Proprietà tessu- sponibili Cotoni (Baumwolle) Tutti tranne: Extra (Extra- Asciugatura di indumenti in cotone. Grado di 7 kg Tempo (Zeit- trocken) asciugatura: Extra. wahl) Asciugatura in- Tutti tranne: Asciugatura di indumenti in cotone. Grado di... -
Page 47: Uso Dell'apparecchiatura
47 Tipo di Carico Funzioni di- Programmi Proprietà tessu- sponibili Asciugatura di capi sportivi, tessuti sottili e Tutti tranne: Sport (Sportk- 2 kg leggeri, microfibra, poliestere, che non richie- Tempo (Zeit- leidung) dono stiratura. wahl) Tutti tranne: Antipiega Asciugatura di capi in seta con aria calda e... - Page 48 48 electrolux Attenzione Fare attenzione a non incastrare la biancheria tra la porta e la guarnizione di gomma. ACCENSIONE DELL'APPARECCHIATURA Premere il pulsante On/Off (Ein/Aus) per at- tivare o disattivare l’apparecchiatura. Quan- do l'apparecchiatura è accesa, sul display Quando la funzione è attivata, si accende il vengono visualizzate alcune indicazioni.
-
Page 49: Consigli E Suggerimenti Utili
49 3. Per attivare la funzione Partenza Ritar- Tempo (Zeitwahl) e Partenza Ritardata (Zeit- data (Zeitvorwahl) , premere il tasto Av- vorwahl) finché il simbolo non compare vio/Pausa (Start/Pause) . Il display mo- sul display. Per disattivarla premere nuova- stra lo scorrere del tempo. -
Page 50: Pulizia E Cura
50 electrolux duttività all’interno dell’apparecchiatura. Se SPIA DEL CONTENITORE si conosce il valore della conduttività DELL’ACQUA PIENO dell’acqua, è possibile regolare il sensore Per impostazione predefinita, il LED di indi- per un’asciugatura perfetta. cazione è sempre acceso. Viene visualizzata Per modificare la conduttività del sensore: al termine del ciclo o quando il contenitore 1. - Page 51 51 3. Aprire il filtro. 4. Pulire il filtro con la mano bagnata. 5. Se necessario, pulire il filtro sotto l'ac- qua corrente con uno spazzolino. Chiudere il filtro. 6. Rimuovere la lanugine dall'attacco del filtro. Per questo può essere usato un aspirapolvere.
- Page 52 52 electrolux Se il contenitore dell'acqua di condensa è Per svuotare automaticamente il conte- pieno, il programma si interrompe automati- nitore dell'acqua di condensa è possi- camente e il LED svuotare il contenitore bile installare un accessorio (vedere il dell'acqua di condensa si accende. Per...
- Page 53 53 3. Ruotare il blocco per sbloccare il co- perchio dello scambiatore di calore. 4. Abbassare il coperchio dei filtri dello scambiatore di calore. 5. Sollevare il filtro principale. Mantenere il filtro dello scambiatore di calore ed estrarlo dalla parte inferiore dello scom-...
- Page 54 54 electrolux 6. Premere la levetta per aprire il filtro. 7. Pulire il filtro con la mano bagnata. Se necessario, pulire il filtro sotto l'acqua corrente con uno spazzolino. Chiudere il filtro. 8. Pulire il filtro piccolo dalla base.
- Page 55 55 9. Se necessario, una volta ogni 6 mesi, rimuovere la lanugine dallo scomparto dello scambiatore di calore. È possibile utilizzare un aspirapolvere. 10. Riposizionare il filtro piccolo e il filtro dello scambiatore di calore. 11. Chiudere il coperchio dello scambiato- re di calore.
-
Page 56: Risoluzione Dei Problemi
56 electrolux RISOLUZIONE DEI PROBLEMI RISOLUZIONE DEI PROBLEMI Causa possibile Soluzione Problema Inserire la spina nella presa. Controllare L'asciugabiancheria non è collegata il fusibile nella scatola elettrica (installa- all’alimentazione. zione domestica) La porta è aperta. Chiudere la porta. L'asciuga- biancheria Il pulsante On / Off non è... -
Page 57: Dati Tecnici
57 Causa possibile Soluzione Problema Impostare la durata del programma. La durata deve tenere conto del carico. Volume di biancheria troppo ridotto. Asciugatura di un capo o un carico di Ciclo di asciu- biancheria ridotto; si consiglia di utilizza- gatura troppo re durate brevi. -
Page 58: Installazione
58 electrolux temperatura ambiente per il corretto funziona- da + 5°C a + 35°C mento 1) 7 kg di cotone, centrifugato a 1000 giri/min con riferimento a EN 61121 2) La somma del consumo di energia per asciugare: 150 kg della biancheria di cotone con il programma Normale + 280 kg con il programma Pronto Stiro + 150 kg della biancheria sintetica con il programma Normale. -
Page 59: Considerazioni Ambientali
59 CONSIDERAZIONI AMBIENTALI Dove portare gli apparecchi fuori Il simbolo sul prodotto o sulla confezione uso? indica che il prodotto non deve essere In qualsiasi negozio che vende considerato come un normale rifiuto apparecchi nuovi oppure si domestico, ma deve essere portato nel... -
Page 60: Safety Instructions
60 electrolux Electrolux. Thinking of you. Share more of our thinking at www.electrolux.com CONTENTS Safety instructions Hints and tips Product description Care and cleaning Accessories Troubleshooting Control panel Technical information Before first use Installation Programmes Environment concerns Using the appliance Subject to change without notice. - Page 61 61 gases into the room from appliances and spread out all items, so that the heat burning other fuels, including open fires. can dissipate. • The appliance can be installed as free- • If you use fabric softener or similar prod-...
-
Page 62: Product Description
62 electrolux • Do not use water spray and steam to Compressor clean the appliance. Warning! Risk of damage of the • Clean the appliance with a moist soft appliance. cloth. Only use neutral detergents. Do not use abrasive products, abrasive •... -
Page 63: Accessories
63 ACCESSORIES STACKING KIT m from floor level. The hose cannot be in loop. Decrease the length of the hose if necessary. Read carefully the instructions supplied with the accessory. PEDESTAL WITH THE DRAWER Accessory name: SKP11, STA8, STA9 Available from your authorized vendor. -
Page 64: Control Panel
64 electrolux Drying rack accessory let to dry safely in the • soft toys tumble dryer: • lingerie • sport shoes Read carefully the instructions supplied with • wool the accessory. CONTROL PANEL The programme dial The display The On/Off (Ein/Aus) push button... - Page 65 65 Load Available Fabric Programmes Properties functions mark Cupboard Dry all except: To dry cotton pieces of clothing. Drying level: (Schranktrock- 7 kg Time Drying cupboard dry. (Zeitwahl) all except: Iron Dry (Bügel- To dry cotton pieces of clothing. Drying level:...
-
Page 66: Using The Appliance
66 electrolux Load Available Fabric Programmes Properties functions mark Buzzer (Sig- nal) , Time To refresh the cloths made of wool . The Drying (Zeit- Wool Refresh cloths become soft and cosy. We recom- 1 kg (Wollpflege) mend to remove the cloths immediately after... - Page 67 67 Use the programme dial to set the pro- 10 min. to maximum of 2 hours (in 10 min. gramme. The possible time to complete the steps). programme come into view on the display. THE DELAY START (ZEITVORWAHL) The drying time you see is related to...
-
Page 68: Hints And Tips
68 electrolux • before you push the Start/Pause button - To remove the laundry: the appliance cannot start 1. Push the On/Off (Ein/Aus) button for 2 • after you push the Start/Pause button - seconds to deactivate the appliance. all the push buttons and the programme 2. -
Page 69: Care And Cleaning
69 CARE AND CLEANING CLEANING THE PRIMARY FILTER The filter collects the fluff. The fluff oc- curs while the cloths are dried in the At the end of each cycle the applicable indi- tumble dryer. cator (clean the primary filter) is on to tell you that the primary filter must be cleaned. - Page 70 70 electrolux 5. If necessary clean the filter with warm water using a brush. Close the filter. 6. Remove fluff from the filter socket. For this a vacuum cleaner can be used. 7. Put the filter inside the filter socket.
- Page 71 71 CLEANING THE HEAT EXCHANGER The frequency to clean the filters is related FILTERS to the laundry type and its quantity. If you dry with the maximum load, clean the If the applicable indicator (clean the heat filters after each 3 cycles.
- Page 72 72 electrolux 5. Lift the primary filter. Hold the heat ex- changer filter and pull it out from the bottom compartment. 6. Push the hook to open the filter. 7. Use a moist hand to clean the filter. If necessary clean the filter with warm water using a brush.
- Page 73 73 8. Clean the small filter from the base 9. If necessary, one time for each 6 months, remove the fluff from the heat exchanger compartment. You can use a vacuum cleaner. 10. Put the small filter and heat exchanger filter back.
-
Page 74: Troubleshooting
74 electrolux TROUBLESHOOTING TROUBLESHOOTING Possible cause Remedy Problem The tumble dryer is not connected to Connect in at mains socket. Check fuse mains supply. in fuse box (domestic installation). The loading door is opened. Close the loading door. The tumble dryer does The On/Off button was not pushed. -
Page 75: Technical Information
75 Possible cause Remedy Problem The laundry not spun sufficiently. Spin correctly the laundry. Very high room temperature - this is not If possible, lower the room temperature. the appliance malfunction. 1) If there is an error message on the display (e.g. E51): Turn the tumble dryer off and on. Make a selection of the new programme. -
Page 76: Environment Concerns
76 electrolux INSTALLATION UNDER A COUNTER The appliance can be installed as free- standing or below the kitchen counter with correct space (see picture). 15mm 600 mm 600 mm > 850 mm UNPACKING Caution! Before use all parts of the transport pack- aging must be removed. - Page 77 77...
- Page 78 78 electrolux...
- Page 79 79...
- Page 80 136924780-C-012013...