Table of Contents
Advertisement
Advertisement
Table of Contents
Troubleshooting

Related Manuals for Raymarine Quantum Radome


Summary of Contents for Raymarine Quantum Radome
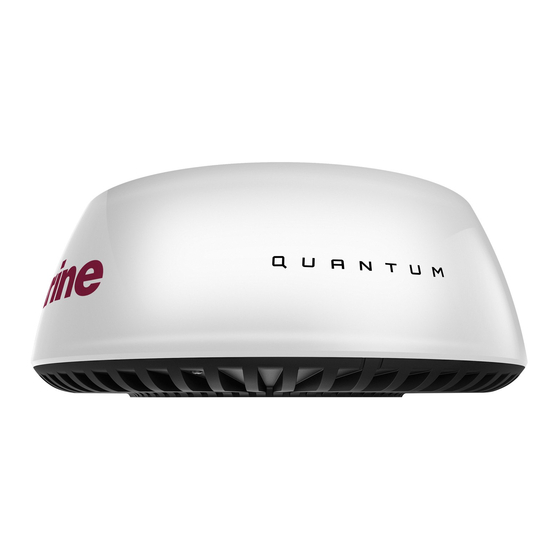
- Page 1 Quantum™ Radar INSTALLATION INSTRUCTIONS...
- Page 2 Trademark and patents notice Raymarine, Tacktick, Clear Pulse, Truzoom, HSB, SeaTalk, SeaTalk , SeaTalk , Micronet, Raytech, Gear Up, Marine Shield, Seahawk, Autohelm, Automagic, and Visionality are registered or claimed trademarks of Raymarine Belgium. FLIR, DownVision, SideVision, Dragonfly, Quantum, Instalert, Infrared Everywhere, and The World’s Sixth Sense are registered or claimed trademarks of FLIR Systems, Inc.
-
Page 3: Table Of Contents
Cable types and length ......26 instructions ..........12 Routing cables ........26 2.2 Parts supplied........13 Strain relief ..........26 2.3 Quantum Radome product Circuit isolation........26 overview ..........13 Cable shielding........27 Multiple Quantum Radar scanners... 13 Suppression ferrites ........ 27 Chapter 3 Planning the 4.3 Connections overview ....... - Page 4 Routing cables ........34 8.2 Unit cleaning instructions ....52 Strain relief ..........34 Chapter 9 Technical support ....53 Circuit isolation........34 9.1 Raymarine product support and Cable shielding........34 servicing ..........54 Suppression ferrites ........ 34 9.2 Operation instructions ....... 55 5.2 Power cable routing (Wi-Fi variant...
-
Page 5: Chapter 1 Important Information
Raymarine approved installer. A certified installation qualifies for enhanced product warranty benefits. Warning: High voltages Contact your Raymarine dealer for further details, and refer to the separate warranty document packed This product may contain high voltages. with your product. -
Page 6: Icnirp Guidelines
Disclaimer When choosing a suitable location for the product Raymarine does not warrant that this product is you should aim to maintain the maximum possible error-free or that it is compatible with products distance from any compasses. Typically this distance manufactured by any person or entity other than should be at least 1 m (3 ft) in all directions. -
Page 7: Warranty Registration
To the best of our knowledge, the information in this document was correct at the time it was produced. However, Raymarine cannot accept liability for any inaccuracies or omissions it may contain. In addition, our policy of continuous product improvement may change specifications without n otice. -
Page 8: Chapter 2 Document And Product Information
Chapter 2: Document and product information Chapter contents • 2.1 Document information on page 12 • 2.2 Parts supplied on page 13 • 2.3 Quantum Radome product overview on page 13 Document and product information... -
Page 9: Document Information
This document contains important information related to the installation of your Raymarine product. Document illustrations The document includes information to help you: • plan your installation and ensure you have all the Your product may differ slightly from that shown necessary equipment;... -
Page 10: Parts Supplied
• Data connection via Wi-Fi, or (E70210 only) provided here. Please be aware that, from time Raynet cable. to time, Raymarine may supply certain products • Radar image display and control via Raymarine as special “bundle”, “package”, or “promotional” multifunction display. variants, which may contain different accessories compared to the core product variants described •... -
Page 11: Chapter 3 Planning The Installation
Chapter 3: Planning the installation Chapter contents • 3.1 Installation checklist on page 16 • 3.2 Required additional components on page 16 • 3.3 Multifunction display compatibility on page 17 • 3.4 Multifunction display software requirements on page 17 • 3.5 Tools required on page 18 •... -
Page 12: Installation Checklist
Installation Task and requires the following additional components for Plan your system. full operation. Obtain all required equipment and tools. • Compatible Raymarine multifunction display. Refer to Compatible multifunction displays Site all equipment. a list of compatible multifunction displays. Route all cables. -
Page 13: Multifunction Display Compatibility
Ensure that the unit has a reliable power supply and that the update process is not interrupted. Damage caused by incomplete updates Non-Wi-Fi multifunction displays are not covered by Raymarine warranty. E70076 (a65) and E70077 (a67) aSeries By downloading the software update LightHouse multifunction displays do NOT package, you agree to these terms. -
Page 14: Tools Required
3.5 Tools required 3.6 Typical systems Product installation requires the following tools: Note: The following illustrations show the various products that can be connected in a typical system. These systems are shown as an example only and may differ from your planned installation. •... -
Page 15: Product Dimensions
3.7 Product dimensions 3.8 Location requirements The optimum height for the Quantum ™ scanner is a location that is high enough above the waterline to give a long range line-of-sight to the horizon, but not so high as to be adversely affected by the vessel's pitching and rolling. -
Page 16: Radar Scanner Mounting Angle
Radar scanner mounting angle 3.9 Quantum Wi-Fi only installation requirements Ensure the Radar scanner rotates parallel to the water line. Whilst the Wi-Fi performance has been tested and The Radar beam from the Radar scanner is proven in many different installation scenarios, the approximately 20°... -
Page 17: Wi-Fi Signal Reflection
In the example above the maximum distance with take, whilst your connection may appear reliable it acceptable Wi-Fi performance was 15 metres (49 may quickly degrade when you take your vessel out feet), due to the heavy fiberglass coach roof that the into open water. -
Page 18: Pre-Installation Site Survey - Wi-Fi Analyzer
Raymarine app • other Wi-Fi enabled products • transmitting products that send wireless signals in You can also use Raymarine apps such as the same frequency range RayControl or RayView to assess the reliability of the Wi-Fi connection at the desired installation •... - Page 19 9. For networks with multiple MFDs, repeat steps 1 to 9 for each MFD in your network. Wi-Fi signal strength Wi-Fi signal strength is measured in decibel-milliwatts (dBm). The signal strength of the network you are currently connected to is usually represented graphically by a Wi-Fi symbol.
-
Page 20: Chapter 4 Cables And Connections (Quantum Variant With Raynet)
Chapter 4: Cables and connections (Quantum variant with RayNet) Chapter contents • 4.1 Wi-Fi only Quantum variants on page 26 • 4.2 General cabling guidance on page 26 • 4.3 Connections overview on page 27 • 4.4 Power connection on page 30 •... -
Page 21: Wi-Fi Only Quantum Variants
• Unless otherwise stated use only standard cables section. of the correct type, supplied by Raymarine. • Ensure that any non-Raymarine cables are of the correct quality and gauge. For example, longer power cable runs may require larger wire gauges to minimize voltage drop along the run. -
Page 22: Cable Shielding
Wi-Fi. Suppression ferrites 12V / 24V power Supplied with your • Raymarine cables may be pre-fitted or supplied supply. product. with suppression ferrites. These are important for correct EMC performance. If ferrites are supplied separately to the cables (i.e. -
Page 23: Cable Routing - Platform Mount
• Using separate power and data cables. • Using an existing combined power / data cable from an older Raymarine Digital radar scanner. In this scenario, the A80308 Y-adapter accessory is required (not supplied with the scanner). -
Page 24: Making Connections
Using an existing combined power / data cable routing illustrations in this section. Cable routing from an older Raymarine Digital Radar depends on whether you mount the scanner on a platform or on a pole, and on whether you are using a Y-adapter to connect to an existing combined power / data Digital Radar cable. -
Page 25: Power Connection
4.4 Power connection • Raymarine recommends a minimum wire gauge of 14AWG (2.08mm ) for any length of cable extension. • For all lengths of extension to the power cable, ensure there is a continuous minimum voltage at the product’s power connector of 10.8V with a fully flat battery at 11V. - Page 26 Ensure that you observe the separate grounding advice provided in the product’s documentation. More information Raymarine recommends that best practice is observed in all vessel electrical installations, as detailed in the following standards: • BMEA Code of Practice for Electrical and Electronic Installations in Boats •...
-
Page 27: Network Connection
4.5 Network connection Multiple multifunction display configuration A Raymarine network switch can be used to connect The scanner must be connected to a compatible the unit to more than 1 multifunction display. Raymarine multifunction display (MFD), either via Wi-Fi, or via a physical RayNet cable connection. -
Page 28: Chapter 5 Cables And Connections (Quantum Variant With Wi-Fi Only)
Chapter 5: Cables and connections (Quantum variant with Wi-Fi only) Chapter contents • 5.1 General cabling guidance on page 34 • 5.2 Power cable routing (Wi-Fi variant only) on page 35 • 5.3 Power connection on page 35 Cables and connections (Quantum variant with Wi-Fi only) -
Page 29: General Cabling Guidance
• Unless otherwise stated use only standard cables of the correct type, supplied by Raymarine. Cable shielding • Ensure that any non-Raymarine cables are of the correct quality and gauge. For example, longer Ensure that all data cables are properly shielded power cable runs may require larger wire gauges that the cable shielding is intact (e.g. -
Page 30: Power Cable Routing (Wi-Fi Variant Only)
• The suitable fuse rating for the thermal breaker is dependent on the number of devices you are connecting. If in doubt consult an authorized Raymarine dealer. • Your product’s power cable may have a fitted in-line fuse, if not then you must add an in-line fuse / breaker to the positive wire of your products power connection. -
Page 31: Power Distribution
• Raymarine recommends a minimum wire gauge of 14AWG (2.08mm ) for any length of cable extension. • For all lengths of extension to the power cable, ensure there is a continuous minimum voltage at the product’s power connector of 10.8V with a fully flat battery at 11V. - Page 32 Ensure that you observe the separate grounding advice provided in the product’s documentation. More information Raymarine recommends that best practice is observed in all vessel electrical installations, as detailed in the following standards: • BMEA Code of Practice for Electrical and Electronic Installations in Boats •...
-
Page 33: Chapter 6 Mounting
Chapter 6: Mounting Chapter contents • 6.1 Mounting pre-requisite: "breather" holes on page 40 • 6.2 Mounting the scanner on page 40 • 6.3 Radar scanner protection — sailing vessels on page 42 Mounting... -
Page 34: Mounting Pre-Requisite: "Breather" Holes
6.1 Mounting pre-requisite: 6.2 Mounting the scanner "breather" holes Use a mounting location that: • Is robust enough to support the Quantum ™ The base of the unit features a "breather", a series of scanner, under seagoing conditions. small holes which allow air to circulate between the underside of the unit and the mounting surface. -
Page 35: Multiple Quantum Radar Scanners
Multiple Quantum Radar scanners 6. Ensuring that the bolts have a minimum insertion in the scanner base of 16mm (0.63 in.), and Only 1 (one) Quantum ™ Radar scanner can be used a maximum of 22mm(0.87in.) (allowing for at any one time, per networked system. washers), secure the scanner with the 4 bolts, flat washers and spring washers provided, as If you have more than one Quantum... -
Page 36: Radar Scanner Protection - Sailing Vessels
Note: The Radar guard shown in the illustration above is provided as an example only. The exact • Raymarine strongly recommends that you check design and positioning of the Radar guard is the condition and security of the bracket mounting... -
Page 37: Chapter 7 System Checks And Troubleshooting
Chapter 7: System checks and troubleshooting Chapter contents • 7.1 Post installation procedures on page 44 • 7.2 Troubleshooting on page 46 System checks and troubleshooting... -
Page 38: Post Installation Procedures
MFDs which have the strongest signal, as identified during the pre-installation site survey. • Ask your local Raymarine authorized installer to Usually these will be the MFDs closest to and / or check the installation. -
Page 39: Mfd Access Point Connection When Connected To Quantum Wi-Fi
10. Open a Radar application page. the scanner will switch to Standby mode within 5 seconds. When the connection to the MFD is restored, return the scanner to Transmit mode using the Radar: Tx option on the MFD’s Shortcut screen. For a full description of all the Radar modes and associated on-screen status symbols, refer to the Radar scanner status symbols topic in the Radar... -
Page 40: Troubleshooting
All Raymarine products are, prior to packing and shipping, subjected to comprehensive test and quality assurance programs. However, if you experience problems with the operation of your... -
Page 41: Troubleshooting Procedure
Ensure power supply thermal breaker has not tripped or fuse has not blown. If necessary, reset breaker or replace fuse ONCE ONLY. If breaker keeps tripping or fuse keeps blowing, contact a Raymarine authorized dealer for assistance. Ensure power supply maintains the correct voltage when the system is switched on. -
Page 42: Wi-Fi Troubleshooting
this information and keep in a secure location. You Possible cause Possible solutions should also keep the Radar scanner packaging in a Incorrect network credentials Ensure you are using the safe place for future reference. correct passphrase, the Wi-Fi network’s passphrase can be Wi-Fi troubleshooting found in the Wi-Fi settings on the broadcasting device (the... - Page 43 Mobile application running slowly or not at all dropping out Possible cause Possible solutions Possible cause Possible solutions Raymarine app not installed Install mobile app from • Move devices closer Wi-Fi performance degrades relevant app store. over distance so products together.
-
Page 44: Chapter 8 Maintenance
Chapter 8: Maintenance Chapter contents • 8.1 Maintenance on page 52 • 8.2 Unit cleaning instructions on page 52 Maintenance... -
Page 45: Maintenance
8.1 Maintenance 8.2 Unit cleaning instructions Once a year: The unit does not require regular cleaning. However, if you find it necessary to clean the unit, please follow 1. Power-off the Radar. the steps below: 2. Remove one of the antenna-securing bolts and 1. -
Page 46: Chapter 9 Technical Support
Chapter 9: Technical support Chapter contents • 9.1 Raymarine product support and servicing on page 54 • 9.2 Operation instructions on page 55 • 9.3 Viewing product information on page 55 Technical support... -
Page 47: Operation Instructions
9.2 Operation instructions 9.3 Viewing product information For detailed operation instructions for your product, You can view information about your unit from the refer to the documentation that accompanies your Diagnostics menu on a compatible multifunction display. display. This option displays information such as product serial number and software version. -
Page 48: Chapter 10: Technical Specification
Chapter 10: Technical specification Chapter contents • 10.1 Technical specification on page 58 Technical specification... -
Page 49: Technical Specification
10.1 Technical specification Receiver IF bandwidth: 26 MHz Approvals Less than 4 dB Noise figure: Approvals: Certification: USA: 47CFR FCC Part 2 & Part 80 Antenna Certificate of Approval Canada: RSS238 Iss. 1 Type: Patch Array Technical Acceptance Beamwidth (nominal) Horizontal: 4.9°... -
Page 50: Chapter 11 Spares And Accessories
Chapter 11: Spares and accessories Chapter contents • 11.1 Quantum Radar accessories on page 60 • 11.2 Network hardware on page 60 • 11.3 Network cable connector types on page 61 • 11.4 RayNet to RayNet cables and connectors on page 62 •... -
Page 51: Quantum Radar Accessories
11.1 Quantum Radar accessories 11.2 Network hardware The following accessories are available for the Part Quantum ™ Radar scanner: num- Item Notes Accessories HS5 RayNet A80007 5–port switch for network Item Part number network switch connection of multiple devices featuring RayNet A80309 10m (32.8ft.) Quantum ™... -
Page 52: Network Cable Connector Types
11.3 Network cable connector types There are 2 types of network cable connector — RayNet, and RJ45 SeaTalk RJ45 SeaTalk connector. RayNet connector. Spares and accessories... -
Page 53: Raynet To Raynet Cables And Connectors
11.4 RayNet to RayNet cables and connectors Description Typical use Quantity Standard RayNet connection cable Suitable for connecting all RayNet equipment directly to with a RayNet (female) socket on both LightHouse multifunction displays featuring a RayNet ends. connector. Can also be used to connect RayNet equipment via a RayNet network switch (e.g. -
Page 54: Raynet To Rj45 Adapter Cables
Raymarine products with an RJ45 connection (e.g. radar scanner, thermal camera or DSM300) to a LightHouse MFD or RayNet network switch (e.g. the HS5). Rely on premium marine electronics & navigation by Raymarine if you’re looking for quality and efficiency. Spares and accessories...