Table of Contents
Advertisement
Look what you can do with the TM-2
By using the TM-2 in conjunction with separately sold pads or acoustic drum triggers, you can easily play the
internal sounds or your own audio files.
• Use with acoustic drums to play electronic sounds or percussion
• Enhance an acoustic kick, or layer claps onto a snare
• Play songs or loops
• Connect the TM-2 via MIDI with your V-Drums, and play your favorite drum sounds (WAV files)
Owner's Manual (this document)
Read this first. It explains the basic things you need to
know in order to use the TM-2.
PDF Manual (download from the Web)
• Sound List
This lists the TM-2's internal sounds and the effect
parameters.
To obtain the PDF manual
1.
Enter the following URL in your computer.
http://www.roland.com/manuals/
2.
Choose "TM-2" as the product name.
English
Deutsch
Français
Italiano
Español
Português
Nederlands
Advertisement
Table of Contents

Related Manuals for Roland TM-2


Summary of Contents for Roland TM-2
- Page 1 Nederlands Look what you can do with the TM-2 By using the TM-2 in conjunction with separately sold pads or acoustic drum triggers, you can easily play the internal sounds or your own audio files. • Use with acoustic drums to play electronic sounds or percussion •...
-
Page 2: Table Of Contents
Copying a Kit/Instrument Settings ....13 reproduced in any form without the written permission of Overall Settings for the TM-2 ....14 ROLAND CORPORATION. -
Page 3: Quick Start
Use the [-][+] buttons to select a kit. Strike the pads to play the kit. Play audio files p. 10 Copy your audio files (WAV, 44.1 kHz) to the Roland/TM-2/WAVE folder of an SD/SDHC card, and assign them to pads so that they can be played. -
Page 4: Installing Batteries
Remove the mounting plate when installing or removing batteries. * Use only the screws that are included with the TM-2. Using any other screws may cause malfunctions. * When turning the unit over, be careful so as to protect the knobs from damage. -
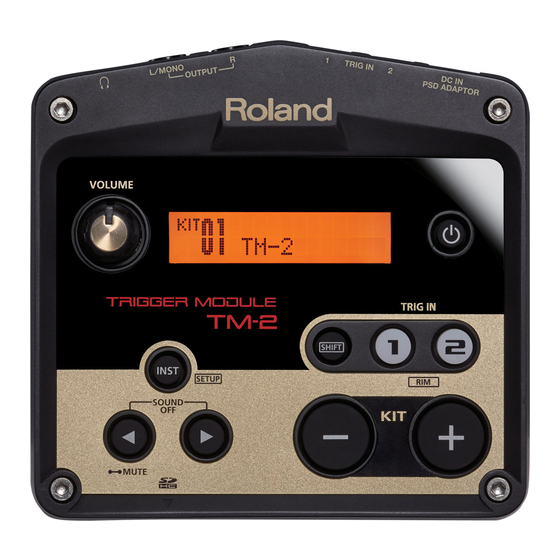
Page 5: Panel Descriptions
Panel Descriptions Display [ ] (Power) button When you turn on the power, the display shows the kit number Turns the power on/off. Hold down the button until the power and name. If you press the [INST] button, the display shows turns on or off. -
Page 6: Connecting Your Equipment
Hold down the [ ] (power) button until the power turns on or off. * After you’ve made connections correctly, be sure to turn on the power in the order of the TM-2 first, and then the connected system. Powering-on in the incorrect order may cause malfunctions or damage. When turning the power off, power-off the connected system first, and then the TM-2. -
Page 7: Connecting Pads
Connecting Pads Connecting Pads To make connections, use the cables included with the pad or acoustic drum trigger. * Subsequently, acoustic drum triggers are called “drum triggers. ” We use the term “pads” to include drum triggers. Connecting examples TRIG IN 1 TRIG IN 2 Example HEAD... -
Page 8: Selecting A Kit
Selecting a Kit Your choice of sounds (instruments) assigned to the connected pads are saved as a “kit. ” The TM-2 lets you easily select and play 99 different kits. KIT 99 KIT 01 TRIG IN 1 TRIG IN 2... -
Page 9: Playing Sounds (Instruments)
“NO CARD” and “NO WAVE” If the TM-2 can’t produce sound because no SD card is inserted, the screen indicates “NO CARD. ” If the corresponding audio file is not found on the SD card, the screen indicates “NO WAVE. ” A confirmation screen appears when you attempt to change the... -
Page 10: Playing Audio Files
* Never insert or remove an SD card while this unit is turned on. Doing so may corrupt the data on the SD card. * In order to play audio files from the SD card, the SD card must remain inserted in the TM-2. If the SD card is not inserted, the screen indicates “NO CARD. -
Page 11: Editing The Instruments
Editing the Instruments You can adjust a variety of settings (parameters) such as the instrument’s volume and pitch. This process is called “editing. ” You can also edit the audio files on an SD card in the same way. * Editing will not modify the audio files that are on the SD card. Use the [-] [+] buttons to select a kit. -
Page 12: Using A Kit Effect
DELAY Stereo delay A virtual tape echo that produces a realistic tape delay sound. This simulates the tape echo section of a TAPE ECHO Roland RE-201 Space Echo. CHORUS This applies a chorus effect. FLANGER The flanging effect gives a twisting, jet-airplane-like character to the sound. -
Page 13: Naming A Kit
Naming a Kit Here’s how to assign a name to a kit. Use the [-] [+] buttons to select a kit. Press the [INST] button. Use the [>] button to select “UTILITY,” and press the [+] button. Press the [+] button once again. The KIT NAME screen will appear. -
Page 14: Overall Settings For The Tm-2
Overall Settings for the TM-2 Here’s how to make overall settings that apply to the entire TM-2, such as display and MIDI channel. Hold down the [SHIFT] button and press the [INST] button. Use the [<] [>] buttons to select “SYSTEM” and press the [+] button. -
Page 15: Saving A Backup To The Sd Card
Saving a Backup to the SD Card Backup will save all kits, all settings of the TM-2, and the pad and drum trigger settings. It is convenient to switch between backups when you’re playing with different bands or at different live events. -
Page 16: Adjusting The Connected Pads
Adjusting the Connected Pads Here’s how to adjust the connected pads or drum triggers. If the “Input” and “Type” parameters are set correctly, the other parameters are set appropriately for the specified type. You can also make more detailed adjustments if you like. If you’ve connected a drum trigger, adjust parameters such as “Threshold”, “Curve”, and “RetrgCancel”... -
Page 17: Formatting An Sd Card
Adjusting the Connected Pads Parameter Explanation This parameter prevents a single strike from triggering two notes (retriggering). In particular since a drum trigger produces an irregular waveform, the sound may also be A: Retriggering triggered at point ‘A’ in the illustration. This phenomenon is more likely to occur while the waveform is decaying, RetrgCancel and unintended triggering is prevented by detecting the... -
Page 18: Troubleshooting
Keep the number of audio files in a folder to 300 or the folder? fewer. Do not create a second-level or lower folder. Problems with MIDI Set the MIDI channels of the TM-2 and external MIDI Is the MIDI channel set correctly? p. 14 device to the same setting. -
Page 19: Main Specifications
Co.,Ltd. eCROS is a trademark of eSOL Co., Ltd. in Japan. medium of said content or making them available on a computer • Roland and V-Drums are either registered trademarks or trademarks network. of Roland Corporation in the United States and/or other countries. -
Page 20: Using The Unit Safely
• Roland assumes no liability concerning the restoration of any stored content that has been lost. • Never strike or apply strong pressure to the display. - Page 21 For the USA FEDERAL COMMUNICATIONS COMMISSION RADIO FREQUENCY INTERFERENCE STATEMENT This equipment has been tested and found to comply with the limits for a Class B digital device, pursuant to Part 15 of the FCC Rules. These limits are designed to provide reasonable protection against harmful interference in a residential installation.
- Page 22 For EU Countries For China...