
Related Manuals for Spirit CE900


Summary of Contents for Spirit CE900
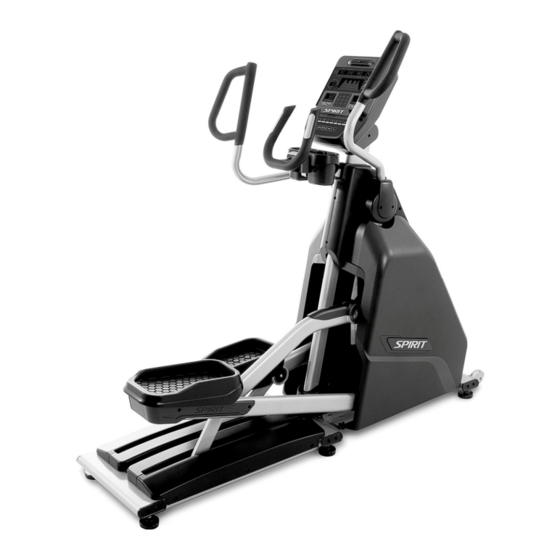
- Page 1 CE900 Elliptical OWNER’S MANUAL Please carefully read this entire manual before operating your new elliptical.
-
Page 2: Table Of Contents
TABLE OF CONTENTS Important Safety Instructions………………………………………………………………… Important Operation Instructions…………………………………………………………….. Assembly Instructions…………………………………………………………….…………… 4 Getting On / Off Your Elliptical…………………………………………………….…………… 10 Console Operation…………………………………………………………….……....Using heart rate transmitter………………………………………………………..... General Maintenance………………………………………………………………………… Exploded View Diagram………………………………………………………………………. Parts List..………………………………………………………………………………………. 24 ATTENTION This elliptical is intended for residential use only and is warranted for this application. Any other application voids this warranty in its entirety. -
Page 3: Important Safety Instructions
IMPORTANT SAFETY INSTRUCTIONS WARNING - Read all instructions before using this appliance. DANGER - To reduce the risk of electric shock disconnect your elliptical from the electrical outlet prior to cleaning and/or service work. WARNING - Heart rate monitoring systems may be inaccurate. Over exercising may result in serious injury or death. -
Page 4: Important Electrical Instructions
IMPORTANT ELECTRICAL INSTRUCTIONS WARNING! NEVER remove any cover without first disconnecting DC power. lf voltage varies by ten percent (10%) or more, the performance of your elliptical may be affected. Such conditions are not covered under your warranty. If you suspect the voltage is low, contact your local power company or a licensed electrician for proper testing. -
Page 5: Assembly Instructions
ASSEMBLY INSTRUCTIONS UNPACKING 1. Cut the straps, then along the dotted line on the bottom of the box; lift the box over the unit and unpack. 2. Locate the hardware package. The hardware is separated into four steps. Remove the tools first. Remove the hardware for each step as needed to avoid confusion. - Page 6 STEP 1 #46– 3.5 ×12mm #54 – M10 × 20mm #57 –Ø10 × 2T Sheet Metal Screw Socket Head Cap Bolt Split Washer (4pcs) (2pcs) (12pcs) #58 – Ø4 × 14 × 1.0T #65 – Ø3/8" × Ø19 × 1.5T Flat Washer (2pcs) Flat Washer (4pcs) STEP 2...
- Page 7 STEP 1 1. Unwind wiring harness and run wires up through CONSOLE MAST (9). Bolt CONSOLE MAST (9) to MAIN FRAME (1) using 4 BOLTS (54), 4 LOCK WASHERS (57), and 4 WASHERS (65). Do not pinch wires. 2. Run wires from CENTER HANDLEBARS (11) through HANDLEBAR BRACKET (10), into CONSOLE MAST (9) and out the top.
- Page 8 STEP 2 1. Install 2 U-NUTS (78) to LEFT CONSOLE MAST COVER (100). 2. Attach CONSOLE MAST COVERS (100 & 101) to MAIN FRAME (1) using 2 SELF-TAPPING SCREWS (47). Use 2 SCREWS (49) to connect covers to each other. 3.
- Page 9 STEP 3 1. Install LEFT SIDE HANDLEBAR (2) to SWING ARM (12). a) First install 2 longer BOLTS (44) with a WASHER (63) on both sides of SWING ARM (12) and a NUT (71). Do not tighten yet. b) Then install 1 SHORTER BOLT (43) with a WASHER (63) through the SWING ARM (12) and CROSSTRAINING HANDLEBAR (2), using a CURVED WASHER (68) and a NUT (71) on the back side.
- Page 10 STEP 4 1. Attach CONSOLE BRACKET COVERS (91 & 92) to CONSOLE MAST (9) using 2 SCREWS (49). Connect covers together using 2 SELF-TAPPING SCREWS (46). 2. Attach left SWING ARM HINGE COVER (93) to SWING ARM (12) using 2 SCREWS (49). Repeat for right side.
-
Page 11: Getting On / Off Your Elliptical
GETTING ON / OFF YOUR ELLIPTICAL IMPORTANT The elliptical comes with two Dual Action Handles and a Stationary Handlebar. Always hold the Stationary Handlebar when getting on and off the elliptical. First time users should familiarize themselves with using the elliptical by using the Stationary Handlebar first and then progressing to the Dual Action Handles. - Page 12 Correct Position Your body should be in an upright position so that your back is straight. Keep your head up to minimize neck and upper back strain. Always try and use the elliptical in a rhythmical and smooth motion. If you find yourself feeling uncomfortable, or experience a surging type feeling, there is probably too much tension.
-
Page 13: Console Operation
POWER Spirit Fitness commercial elliptical trainers have a built-in generator for power and do not need to be plugged into an AC outlet. To power up the elliptical trainer simply start to pedal, the console will turn on automatically. -
Page 14: Quick Start
QUICK START This is the quickest way to start a workout. After the console powers up you just press the Start key to begin. This will initiate the Quick Start mode. In Quick Start the Time will count up from zero, all workout data will start to accrue and the workload may be adjusted manually by pressing the Up and Down buttons. - Page 15 NUMBER KEY PAD When you are in the data set-up mode setting new data such as age, weight etc., you can use these keys to enter the numbers quickly. The console includes a built-in fan to help keep you cool. To turn the fan on, press the key on the upper right side of the console.
-
Page 16: Preset Programs
PRESET PROGRAMS The elliptical trainer has five different programs that have been designed for a variety of workouts. These five programs have factory preset work level profiles for achieving different goals. HILL This program follows a triangle or pyramid type of gradual progression from approximately 10% of maximum effort (the level that you chose before starting this program) up to a maximum effort which lasts for 10% of the total workout time, then a gradual regression of resistance back to approximately 10% of maximum effort. - Page 17 PROGRAMMING PRESET PROGRAMS Select the desired program button then press the Enter key. The Message Window will ask you to enter your Age. You may adjust the age setting, using the Up and Down keys,then press the Enter key to accept the new number and proceed on to the next screen.
- Page 18 7. The Message window will now display the total time for the HIIT workout; now press Start to begin. There is a 3-minute warm-up period before the first Sprint begins. The resistance level during warm-up is set to 5 but can be adjusted manually. 8.
- Page 19 HEART RATE PROGRAM OPERATION Heart rate information is read via pulse grips or wireless chest strap. To start the HR program, follow the instructions below or just press the HR key then the Enter button and follow the directions in the Message Window. Press the HR key then press the Enter key.
-
Page 20: Heart Rate Training
HEART RATE TRAINING The old motto, “no pain, no gain”, is a myth that has been overpowered by the benefits of exercising comfortably. A great deal of this success has been promoted by the use of heart rate monitors. With the proper use of a heart rate monitor, many people find that their usual choice of exercise intensity was either too high or too low and exercise is much more enjoyable by maintaining their heart rate in the desired benefit range. -
Page 21: Rate Of Perceived Exertion
RATE OF PERCEIVED EXERTION Heart rate is important but listening to your body also has a lot of advantages. There are more variables involved in how hard you should workout than just heart rate. Your stress level, physical health, emotional health, temperature, humidity, the time of day, the last time you ate and what you ate, all contribute to the intensity at which you should workout. -
Page 22: Using Heart Rate Transmitter
USING HEART RATE TRANSMITTER (Optional) How to wear your wireless chest strap transmitter: 1. Attach the transmitter to the elastic strap using the locking parts. 2. Adjust the strap as tightly as possible as long as the strap is not too tight to remain comfortable. -
Page 23: General Maintenance
GENERAL MAINTENANCE 1. Wipe down all areas in the sweat path with a damp cloth after each workout. 2. If a squeak, thump, clicking or rough feeling develops the main cause is most likely one of two reasons: 1) The hardware was not sufficiently tightened during assembly. All bolts that were installed during assembly need to be tightened as much as possible. -
Page 24: Exploded View Diagram
EXPLODED VIEW DIAGRAM... -
Page 25: Parts List
PARTS LIST DESCRIPTION O'TY Main Frame Seat Handle Bar (L) Seat Handle Bar (R) Connecting Arm (L) Connecting Arm (R) Pedal Arm (L) Pedal Arm (R) Crank Arm Assembly Console Mast Handpulse Assembly Handpulse Assembly Seat Handle Bar Idler Wheel Assembly Aluminum Track Flywheel Pulley(Ø400×32) Arbor... - Page 26 DESCRIPTION O'TY M5 × P0.8 × 12L_Phillips Head Screw M8 × 12m/m_Button Head Socket Bolt M8 × P1.25 × 15m/m_Button Head Socket Bolt M10 × P1.5 × 15m/m_Button Head Socket Bolt M10 × 20m/m_Button Head Socket Bolt M10 × P1.5 × 20m/m_Socket Head Cap Bolt 5/16"...
- Page 27 DESCRIPTION O'TY Slide Wheel Cover B Protective Rubber Drink Bottle Holder 100 Console Mast Cover(L) 101 Console Mast Cover(R) 102 Side Case (L) 103 Side Case (R) 104 Side Case Plate(L) 105 Side Case Plate(R) 106 Console Mast Inner Cover(L) 107 Console Mast Inner Cover(R) 108 Front Shroud 109 Power Switch Cover...