Table of Contents
Advertisement
Advertisement
Table of Contents

Related Manuals for Bosch WAT28660GB


Summary of Contents for Bosch WAT28660GB
- Page 1 Washing machine WAT ... en Instruction Manual and Installation Instructions...
-
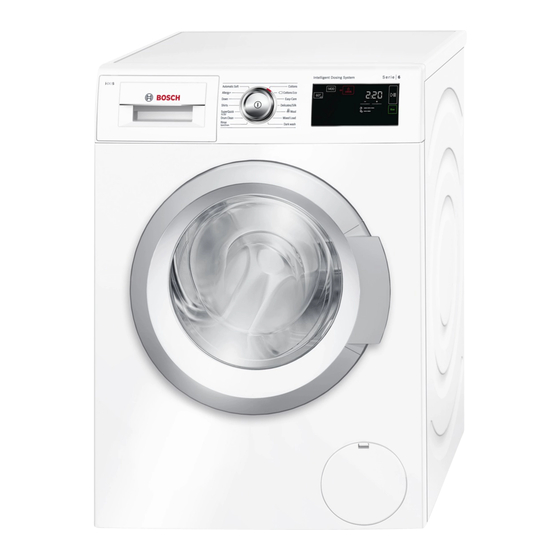
Page 2: Your New Washing Machine
Your new washing machine Display rules : Warning! You have chosen a Bosch washing machine. This combination of symbol and signal word indicates a possibly dangerous Please take a few minutes to read and situation. Not heeding the warning can become familiar with the advantages of cause death or injuries. -
Page 3: Table Of Contents
Contents e n I n s t r u c t i o n M a n u a l a n d I n s t a l l a t i o n I n s t r u c t i o n s Switching on the appliance/selecting a Intended use. -
Page 4: Intended Use
Intended use The drain pump is blocked, emergency Intended use draining ..... . 27 The drain hose at the siphon is blocked For private domestic use only. -
Page 5: Safety Instructions
Safety instructions Reaching into the drum while Safety instructions ■ it is still turning may cause hand injuries. Electrical safety Do not reach into the drum S a f e t y i n s t r u c t i o n s when it is turning. -
Page 6: Environmental Protection
Environmental protection – Destroy the lock on the Environmental washing machine door. protection Warning Packaging/used appliance Risk of suffocation! E n v i r o n m e n t a l p r o t e c t i o n Children may become wrapped Dispose of packaging in an in packaging/film or packing... - Page 7 Environmental protection The displays provide information about the relative level of energy and water consumption in the selected programmes. The more display segments are visible, the higher the respective consumption. This enables you to compare the consumption levels of the different programmes when choosing your programme settings and decide on an energy- and water-saving...
-
Page 8: Getting To Know The Appliance
Getting to know the appliance Getting to know the appliance Washing machine G e t t i n g t o k n o w t h e a p p l i a n c e Detergent drawer ~ Page 17 Controls Loading door with door handle 9S Open the loading door... -
Page 9: Controls
Getting to know the appliance Controls 8 Touch display ( Main switch This shows you the programme You can use the # button to information and selection options switch the appliance on and off. for settings, and you can select 0 Programme selector the settings by touching the You can turn the programme... - Page 10 Getting to know the appliance Display and control panels Display for ad- Setting justment values i-Dos i L, K, J, off Dosage quantity for fabric softener Speed SpeedPerfect EcoPerfect +1, +2, +3 , off Water&Rinse+; + additional rinse cycles ë Easy-Iron Prewash E 3 sec...
-
Page 11: Laundry
Laundry Some examples of soiling levels can Laundry be found on ~ Page 13. – Light: Do not prewash, select the P repare the laundry Speed setting if necessary L a u n d r y – Normal Caution! – Heavy: Load less laundry, select Damage to the appliance/fabrics a program with prewash –... -
Page 12: Dyeing/Bleaching
Detergent Dyeing/bleaching Detergent Dye should only be used in normal C orrect selection of detergent household quantities. Salt may damage D e t e r g e n t stainless steel. Always follow the dye The care label is crucial for selecting manufacturer's instructions. -
Page 13: Saving Energy And Detergent
Programme default settings Saving energy and detergent Programme default For light and normal soiling, you can settings save energy (lower washing temperature) and detergent. The programme default settings are P r o g r a m m e d e f a u l t s e t t i n g s displayed and can be changed in the Saving Soiling/note... -
Page 14: I-Dos Settings
Programme default settings increments of 30 minutes and up to a i-DOS w for detergent maximum of 24 h (h=hour). Adjustment values for the dosage After the programme starts, the quantity selected time, e.g. 8.5 h is displayed Light: and counted down until the washing For lightly soiled laundry programme starts. -
Page 15: Memory Programme
Additional programme settings Memory programme Additional programme settings â You can save a selected programme with your favourite settings here. You can find an overview of all of the A d d i t i o n a l p r o g r a m m e s e t t i n g s additional settings that can be selected To store: depending on the programme on the... -
Page 16: Water&Rinse
Operating the appliance Water&Rinse+ Operating the appliance ë Adjustment values: Preparing the washing + 1 rinse O p e r a t i n g t h e a p p l i a n c e machine + 2 rinses + 3 rinses The washing machine must be Note:... -
Page 17: Change The Programme Default Settings
Operating the appliance In appliances with a drum light: Placing laundry into the drum The drum is lit after switching on the Warning appliance, after opening and closing the Danger of death! door and after starting a programme. Items of laundry pretreated with The light switches off automatically. -
Page 18: Start The Programme
Operating the appliance For programmes without intelligent being changed inadvertently in the dosing, or as required (in which case, control panel. set intelligent dosing to "off"), detergent To activate/deactivate the childproof can be added manually to the left-hand lock, touch and hold the control panel compartment. -
Page 19: Changing The Programme
Operating the appliance For safety reasons, the door remains Turn off the tap. ■ locked when the water level or Not required for AquaStop Note: temperature is high, or while the models. drum is turning, and it is not possible Notes to add laundry during this time. -
Page 20: Intelligent Dosing System
Intelligent dosing system Do not mix different liquid ■ Intelligent dosing detergents. If changing your liquid detergent (type, manufacturer, etc.), system empty the dispenser completely and clean it. ~ Page 25 Intelligent dosing system in Do not use products containing I n t e l l i g e n t d o s i n g s y s t e m ■... -
Page 21: Everyday Use
Intelligent dosing system Everyday use again, even if the washing machine is switched off. Displays: Topping up the detergent/ fabric softener: If the display for the selected intelligent dosing flashes, this means that the amount of detergent or fabric softener in the dispenser is below the minimum fill level. -
Page 22: Manual Dosage
Intelligent dosing system If large amounts of foam are My water hardness: ■ repeatedly created during washing, please check your basic dosage and dosage quantity settings. Certain types of liquid detergent can also create excessive amounts of foam. If your basic dosage and dosage quantity settings are correct, we advise you to use a different Below is an example of detergent... -
Page 23: Appliance Settings
Appliance settings If swallowed accidentally, seek medical Appliance settings advice. You can change the following settings Caution! A p p l i a n c e s e t t i n g s in the control and display panel: Damage to the appliance Cleaning agents and agents for The volume of the information signal... -
Page 24: Changing The Brightness Of The Touch
Sensors Changing the brightness of Sensors the touch display A utomatic load sensing Touch œ again. The display for the S e n s o r s touch display's brightness B and the The automatic load sensing function preset brightness light up. adapts the water consumption ideally to each programme depending on the Change the adjustment value by... -
Page 25: Cleaning And Maintenance
Cleaning and maintenance Remove the detergent residue ■ Cleaning and immediately. Do not clean with a water jet. maintenance ■ Drum Warning C l e a n i n g a n d m a i n t e n a n c e Danger of death! Use chlorine-free cleaning agents, do There is a risk of electric shock if you... - Page 26 Cleaning and maintenance c) To empty the dispensers, Caution! carefully pull off each of the Risk of damage to the detergent sealing plugs and empty the drawer. contents into a suitable container. The detergent drawer contains electrical components. These may become damaged if they come into contact with water.
-
Page 27: The Drain Pump Is Blocked, Emergency Draining
Cleaning and maintenance h) Clean the inside of the detergent- drawer housing. i) Push the detergent drawer in completely. Carefully unscrew the pump cover; remaining water may leak out. Clean the interior, pump cover thread and pump housing. The impeller in the drain pump must be able to rotate. -
Page 28: Filter In The Water Supply Blocked
Cleaning and maintenance Clean the drain hose and siphon b) For standard and Aqua-Secure connecting piece. models, clean the filter on the rear of the appliance: Disconnect the hose from the rear of the appliance. Use pliers to remove the filter and then clean it. -
Page 29: Faults And What To Do About Them
Faults and what to do about them. Wait until the drum has stopped turning. Faults and what to do Caution! about them. Water damage Any escaping water may cause water Emergency release damage. F a u l t s a n d w h a t t o d o a b o u t t h e m . E.g. - Page 30 Faults and what to do about them. Display Cause/remedy ù lights up Detergent drawer has been pulled out. r lights up Water pressure too low, may increase the programme duration. r flashes No water supply: Turn the tap on fully, ■...
-
Page 31: Faults And What To Do About Them
Faults and what to do about them. Faults and what to do about them. Faults Cause/remedy Water is running out. Attach the drain hose correctly or replace it. ■ Tighten the threaded joint on the inlet hose. ■ Water not flowing in. Programme does not start? ■... - Page 32 Faults and what to do about them. Faults Cause/remedy The length of the pro- Not a fault – the programme sequence is optimised for the specific washing gramme changes during process. This may change the length of the programme shown on the display the wash cycle.
-
Page 33: After-Sales Service
After-sales service After-sales service Technical data If you cannot rectify a fault yourself, Dimensions: A f t e r - s a l e s s e r v i c e T e c h n i c a l d a t a contact customer services. -
Page 34: Positioning And Connecting
Positioning and connecting P Water supply hose on standard/Aqua- Positioning and Secure models connecting *depending on the model Included with the appliance In addition, a hose clamp ( 24 - 40 mm P o s i t i o n i n g a n d c o n n e c t i n g diameter, available from specialist Check the machine for transport Note:... -
Page 35: Installation Surface
Positioning and connecting leaks and water damage, you must Installing the appliance in a follow the instructions in this section. kitchenette Notes Warning In addition to the safety information ■ Danger of death! listed here, the local water and There is a risk of electric shock if you electricity supplier may have special touch live components. -
Page 36: Hose And Cable Lengths
Positioning and connecting Unscrew and remove all four transport brace screws. Remove the sleeves. To do this, remove the mains cable from the holders. The following are available from Tip: specialist dealers/the after-sales service: An extension for Aqua-Stop or cold ■... -
Page 37: Water Outlet
Positioning and connecting Only tighten the screw connections Open the water tap carefully, Note: ■ by hand. If the screw connections checking the leak tightness of the connection points. The screw are tightened too much with a tool (pliers), the thread may be connection is under mains water damaged. -
Page 38: Levelling
Positioning and connecting In doing so, hold the foot tight and do not adjust its height. The lock nuts on all four appliance feet must be screwed tightly against the housing. Drainage into a siphon ■ The connection point must be secured using a hose clamp with a diameter of 24 - 40 mm (available from specialist dealers). -
Page 39: Before Washing For The First Time
Positioning and connecting The mains cable is only replaced by Open the detergent drawer. ■ a qualified electrician (if this is Pour approx. 1 litre of water into the necessary). Replacement mains left-hand compartment. cables are available from the after- Pour standard detergent into the left- sales service. -
Page 40: Aqua-Stop Warranty
Aqua-Stop warranty Fitting the transportation securing Aqua-Stop warranty means: Remove the covers and keep them Only for appliances with Aqua-Stop in a safe place. A q u a - S t o p w a r r a n t y If required, use a screwdriver. - Page 42 0344 892 8979 (Calls charged at local or mobile rate.) 01450 2655 (0.03 € per minute at peak. Off peak 0.0088 € per minute.) You can find the contact information for all countries in the attached after-sales service directory. Robert Bosch Hausgeräte GmbH Carl-Wery-Straße 34 81739 München, GERMANY *9001096259*...