Bosch 500 Series Use And Care Manual / Installation Instructions
Hide thumbs
Also See for 500 Series:
- User manual ,
- Use and care manual (80 pages) ,
- Service manual (41 pages)
Table of Contents
Advertisement
Advertisement
Table of Contents

Related Manuals for Bosch 500 Series


Summary of Contents for Bosch 500 Series
- Page 1 en-us Use and Care Manual, Installation Instructions Washer WAT28401UC...
- Page 2 Welcome to Your New Washer! Congratulations on your selection of a new Bosch washer for your laundry needs. We are confident you will enjoy the superior performance and reliability. Please do not hesitate to contact our Customer Service department if you have any questions or comments about your new washer.
-
Page 3: Table Of Contents
Using the cycle selector to choose a wash cycle ..20 Additional information on products, accessories, Changing default cycle settings ........20 replacement parts and services can be found at www.bosch-home.com and in the online shop Selecting additional cycle settings ......... 20 www.bosch-eshop.com Loading the laundry ............20 Filling the detergent and additives compartments .. -
Page 4: Important Information
Please take a moment to record the following basic the maintenance and care mentioned in this manual. If information about your new Bosch washer. you have a problem with your washer, please consult This information will be helpful in the event you need to ~ Troubleshooting;... -
Page 5: Your Washing Machine Is Intended For
Your washing machine is intended for Only household use and in a non-commercial When measuring all detergents/stain removers/ ▯ ▯ environment. laundry care products be sure to follow the manufacturer's instructions. Household use only washing machine-washable ▯ textiles. Children must not do any laundry without supervision. ▯... -
Page 6: Important Safety Instructions
▯ WASHING MACHINE, FOLLOW BASIC PRECAUTIONS recommended by the clothing manufacturer. INCLUDING THE FOLLOWING Make sure all water connections to the washing ▯ Bosch washers are provided with an Operating, Care machine have shut-off valves that readily ▯... -
Page 7: Introduction To Your New Washer
Introduction to your new washer Web Site WARNING Visit our web site at www.bosch-home.com/us for more information and to view a selection of our products. RISK OF FIRE, ELECTRIC SHOCK OR INJURY To reduce the risk of fire, electric shock or injury to... -
Page 8: Environmentally Friendly Use Of Your Washer
Energy-saving mode: The display panel lighting goes Your new Bosch washing machine is designed to use ▯ out after a few minutes and Start/Pause flashes. To water, energy and detergent in a highly efficient way to activate the display, touch any button. -
Page 9: Installation Types
Installation types Stand alone (shown) or Side-by-Side Stacked washer and dryer A Bosch dryer of the same dimensions can be placed on top of the washer to save space. Use the special washer-dryer stacking kits (noted in Bosch Dryer User Manuals) which can be purchased from customer service or your local dealer. -
Page 10: Installation Instructions
If front of the appliance is covered ventilation openings Under counter (Less Desirable) must be installed. E & F are minimum area sizes 63 sq.in. 404 sq.cm 63 sq.in. 404 sq.cm G & H actual spacing dimensions for min. open area sizes 3 in. -
Page 11: Tools Needed
Tools needed Parts provided with your washer The following tools may be helpful during installation of Back side of the washing mashine your washer. 13mm socket for removing the transport bolts. ▯ 17mm wrench for adjusting the appliance feet. ▯ Bubble level for leveling the appliance. -
Page 12: Set Up On A Pedestal With Drawer
Importance of installing on a solid, level floor Hot water AquaShield ® hose Your new Bosch washing machine utilizes high spin Cold water AquaShield ® hose speeds to achieve superior water removal from your laundry resulting in reduced drying time. It is important to... -
Page 13: Remove The Transport Bolts
Remove the transport bolts Place covers over the transport bolt holes Four plastic covers are provided in the small parts bag included with your washer. Separate these covers and CAUTION install one in each hole where the transport bolts were removed. - Page 14 Only use the new water supply hose shipped with your Attach this end to water tap. Hand tighten only. ▯ washer. Never use old used hoses. The water supply hoses must not be kinked, bent, or ▯ pinched causing hose damage or restricting water flow.
- Page 15 Position hoses as shown when routing hoses to left side Water drain hose connection of washer (facing from front). NOTICES Do not reuse an old drain hose. Only use the drain ▯ hose and parts included with your washer. Do not kink or modify the water drain hose. ▯...
-
Page 16: Leveling The Washer
Leveling the washer Wash Basin Importance of leveling the washer WARNING Your new washer uses high spin speeds to remove water at the end of the wash cycle. It is important that your SCALDING washer is level and that all four washer feet press with When washing at high temperatures, there is a risk equal pressure against the floor. -
Page 17: Electrical Connection
Electrical connection Do not modify the plug provided with the appliance. If ▯ the plug will not fit into the outlet have a properly grounded outlet installed by a qualified electrician. Do WARNING not cut, remove or bypass the grounding prong on the washer power cord plug. -
Page 18: Transporting The Washer
Transporting the washer Before transporting the washer Disconnect the washer power cord from the wall outlet. Turn off the water supply to the washer. Disconnect water supply lines from the tap. Disconnect the drain hose from the drain location. Install the transport bolt assemblies as shown in the following images. -
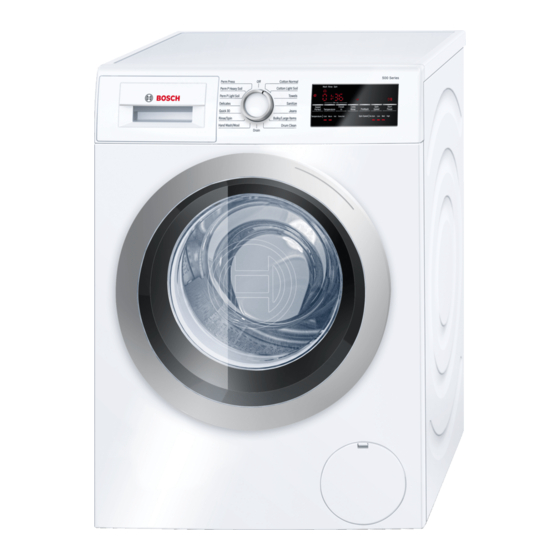
Page 19: Getting To Know Your Appliance
Getting to know your appliance Control panel Program Selector Start/Pause starts or pauses the selected program for selecting a program and on/off switch; ▯ lit steady - program running, can be paused turns in both directions. ▯ blinking - Options can be changed; program ▯... -
Page 20: Operating Instructions
Operating Instructions Changing default cycle settings WARNING You can use the default settings or change them to your desired settings. To reduce the risk of fire, electric shock, or injury to Touch the appropriate button until the desired setting is persons, read the Important Safety Instructions and displayed. -
Page 21: Filling The Detergent And Additives Compartments
Recommended Load Size Filling Recommended maximum load size can be found: ~ Standard features and helpful information; Page 7 WARNING IRRITATION OF EYES/SKIN! When opening the detergent drawer during operation, detergent or laundry care products may spray out. Open the drawer carefully. In case of contact with detergent or laundry care products, rinse the eyes or skin thoroughly. -
Page 22: Starting The Cycle
Selecting a different cycle Open the detergent dispenser tray. Add detergent or additive. If you have inadvertently started the wrong cycle, you can change this as follows: Avoid overfilling the compartment to prevent early dispensing. Touch Start/Pause. Close the detergent dispenser tray completely before Select another cycle. -
Page 23: Removing Laundry/Switching The Appliance Off
Removing laundry/switching the appliance off Open the front door of the washer and remove the laundry. Turn the cycle selector to the Off position. Appliance is switched off. Turn off the water tap. NOTICES Do not leave any laundry in the drum. It can shrink or ▯... -
Page 24: Laundry
Laundry Preparing the laundry Check the care labels on each laundry item prior to washing. Choose an appropriate wash cycle that does NOTICE: Damage to the appliance/fabrics not exceed the temperature recommended. Foreign objects (e.g. coins, paper-clips, needles, nails) may damage the laundry or components in the washing Determining degree of soiling machine. -
Page 25: Laundry Detergents And Additives
Dab with a soapy solution. Do not rub. Removing stains ▯ Remove/pretreat stains as soon as possible after they Select an appropriate wash cycle and wash the item. ▯ ▯ have occurred. Several washing cycles may be required in order to remove stubborn or dried-in stains. -
Page 26: Program Selection Table
Program selection table Programs Max. Selectable program set- Type of laundry Additional program settings Load tings, ; Information up to: default settings (bold) Temperature Spin speed full load Extra hot Sturdy fabric, cotton or linen SpeedPerfect, Prewash, Extra Cotton Normal High fabric that withstands very hot Rinse +1, +2... -
Page 27: Starching
Programs Max. Selectable program set- Type of laundry Additional program settings Load tings, ; Information up to: default settings (bold) Temperature Spin speed High Easy-care fabrics made of cot- Quick 30 load ton, linen, synthetic fibers or (approx. 30 Warm blended fabrics;... -
Page 28: Default Program And Option Settings
Default Program and Option settings At the factory, temperature and spin speed options, and No Spin: This option eliminates the final spin and the cycle duration ("Finish in" time) are pre-set for all cycles. load remains saturated with the final rinse water. The pump is activated to remove all residual water. -
Page 29: Cleaning And Maintenance
Cleaning and maintenance Cleaning the detergent dispenser tray Your washer is designed to give you many years of service. Observe the following instructions to maintain If there is a buildup of residual detergent or additives, or and protect your washer and keep it in top operating if the softener compartment is not rinsed out well condition. -
Page 30: Cleaning The Drain Pump
Cleaning the drain pump Clean the strainers at the water tap end of the hose WARNING RISK OF SCALDING Risk of hot water injury to skin! Allow the water to cool down prior to actuating the emergency door lock release. You are responsible for ensuring all safety precautions are followed when draining water from washer and/or manually opening the washer door. - Page 31 Open and remove the service cover. Turn the pump cover counterclockwise to remove it. A small amount of residual water may flow out when the cover is removed. Clean the interior of the pump housing, removing any debris or foreign objects. Check to be sure the impeller wheel at the back of the pump housing can now turn freely.
-
Page 32: Troubleshooting
Troubleshooting Emergency door lock release Loosen screws and remove the protective foil. The washing machine door can then be opened. In the event of a power interruption the program will Pull the emergency release downwards with a tool and continue running when the power supply has been release. - Page 33 Determing the Problem Problem Possible cause(s) Solution(s) Washer door cannot be Child lock is activated. Deactivated Child lock (touch and hold Temperature opened. and Finish in for approximately 3 seconds). A power failure occured. If a cycle is interrupted by a power failure, it will resume when the power is restored.
- Page 34 Problem Possible cause(s) Solution(s) Water has not drained Suds may be excessive (usually Use less detergent for future loads. Be sure to use completely. due to too much detergent or non- only high efficiency HE-detergents. HE detergent being used). Pump is blocked. Check and clean the drain pump, water drain hose and/or the drain pipe.
-
Page 35: Error Messages
Error messages Display Fault Measure Door not closed properly. Check to be sure no laundry is caught in the washer flashes è door. Close the door securely. Cold water tap not turned on. Turn on the cold water tap. Supply hose for cold water kinked Eliminate the cause, replace the hose if damaged. -
Page 36: Statement Of Limited Product Warranty
Bosch will have no way for Bosch to notify you in the unlikely event of a responsibility or liability for repairs or work performed by safety notice or product recall. - Page 37 Warranty Exclusions: The warranty coverage described In no event shall Bosch have any liability or responsibility herein excludes all defects or damage that are not the whatsoever for damage to surrounding property, direct fault of Bosch, including without limitation, one or...
- Page 40 1901 Main Street, Suite 600 • Irvine, CA 92614 • 1-800-944-2904 *9001002426* www.bosch-home.com • © 2012 BSH Home Appliances 9001002426 9502...