Table of Contents
Advertisement
Quick Links
Dear Customer,
Thank you for choosing the Oregon Scientific ATC2K.
Designed and engineered with extreme precision,
the Oregon Scientific ATC2K allows you to record cool action movie footage.
We recommend parents assist their children when using their
Oregon Scientific ATC2K. This manual uses technical
information to allow you to achieve the best results.
Some children may require your guidance setting up,
learning and understanding how to use the different features of the ATC2K.
OREGON SCIENTIFIC and associated trademarks and trade dress are owned by OREGON SCIENTIFIC, Inc.
© 2008 OREGON SCIENTIFIC, Inc. All Rights Reserved.
Oregon Scientific ATC2K
I . Quick Start
• • • • • • •• • • • • • • • • • •• • • • • • • • • • •• • • • • • • • • • •• • • • • • • • • • •• • • • • • • • • • •• • • • • • • • • • •• •••••••• ••••••••• ••••••••• •••••••• •••••••••
II . Camera Precautions
• • • • • • •• • • • • • • • • • •• • • • • • • • • • •• • • • • • • • • • •• • • • • • • • • • •• • • • •••• •••••••• ••••••••• ••••••••• •••••••• ••••••
• Waterproof Feature
• • • • • • •• • • • • • • • • • •• • • • • • • • • • •• • • • • • • • • • • •• • • • • • • • • • •• • • • • • •••••• ••••••••• •••••••• ••••••••• •••••••• ••••
III . Technical Specifications
• • • • • • •• • • • • • • • • • •• • • • • • • • • • •• • • • • • • • • • • •• • • • • • • ••••••• •••••••• ••••••••• ••••••••• •••••••• ••
IV . Computer System Requirements
V . Camera Description
• • • • • •• • • • • • • • • • •• • • • • • • • • • • •• • • • • • • • • • •• • • • • • • • • • •• • • • • • •••••• •••••••• ••••••••• ••••••••• •••••••• •••
VI . Camera Mounting Description
VII . Camera Usage
• • • • • • • • •• • • • • • • • • • •• • • • • • • • • • •• • • • • • • • • • •• • • • • • • • • • •• • • • • • • • • • •••••••• ••••••••• ••••••••• •••••••• ••••••••• •
• Battery Installation
• • • • • • •• • • • • • • • • • •• • • • • • • • • • •• • • • • • • • • • • •• • • • • • • • • • •• • • • • • •••••• ••••••••• •••••••• ••••••••• •••••••• ••••
• Turning On/Off the Camera
• • • • • • • •• • • • • • • • • • • •• • • • • • • • • • •• • • • • • • • • • •• •• ••••••••• •••••••• ••••••••• •••••••• •••••••
• Inserting/Removing the SD Card
• Taking Video Footage
• • • • • • • •• • • • • • • • • • •• • • • • • • • • • •• • • • • • • • • • •• • • • • • • • • • •• • • ••• ••••••••• •••••••• ••••••••• ••••••••• •••••
VIII . Menu Settings
• • • • •• • • • • • • • • • •• • • • • • • • • • •• • • • • • • • • • •• • • • • • • • • • • •• • • • • • • • • • •• •• ••••••••• •••••••• ••••••••• •••••••• •••••••
• Resolution
• • • • • • • • • • •• • • • • • • • • • •• • • • • • • • • • •• • • • • • • • • • •• • • • • • • • • • •• • • • • • • • • • •• • • • • • • • • • ••••••••• •••••••• ••••••••• ••••••••• ••••••••
• Privacy Mode
• • • • • • • • • •• • • • • • • • • • •• • • • • • • • • • •• • • • • • • • • • •• • • • • • • • • • •• • • • • • • • • • •• • • • •••• ••••••••• •••••••• ••••••••• ••••••••• •••••
• Sound Recording
• • • • •• • • • • • • • • • •• • • • • • • • • • •• • • • • • • • • • •• • • • • • • • • • •• • • • • • • • • • •• • ••• •••••••• ••••••••• •••••••• ••••••••• •••••••
• Deleting video footage
• • • • • • • •• • • • • • • • • • •• • • • • • • • • • • •• • • • • • • • • • •• • • • • • • • • • •• ••••••••• •••••••• ••••••••• ••••••••• ••••••••
• Setting Date/Time
• • • • •• • • • • • • • • • •• • • • • • • • • • •• • • • • • • • • • •• • • • • • • • • • • •• • • • • • • • • • •• •• ••••••••• •••••••• ••••••••• •••••••• •••••••
• SD Memory Card
• • • • •• • • • • • • • • • •• • • • • • • • • • •• • • • • • • • • • •• • • • • • • • • • • •• • • • • • • • • • •• •• ••••••••• •••••••• ••••••••• •••••••• •••••••
IX . Connecting to a computer
• • • • • • • •• • • • • • • • • • •• • • • • • • • • • •• • • • • • • • • • •• • ••• •••••••• ••••••••• •••••••• ••••••••• •••••••
X . Playing back video footage on a TV
XI . Troubleshooting
• • • • •• • • • • • • • • • •• • • • • • • • • • •• • • • • • • • • • •• • • • • • • • • • • •• • • • • • • • • • •• •• ••••••••• •••••••• ••••••••• •••••••• •••••••
• • • • • • • • •• • • • • • • • • • •• • • • • • • • • • •• •••••••• ••••••••• ••••••••• •••••••• ••••••••
• • • • • •• • • • • • • • • • • •• • • • • • • • • • •• • • • • • •••••• ••••••••• •••••••• ••••••••• •••••••• •••
• • • • • • •• • • • • • • • • • •• • • • • • • • • • •• • • • •••• •••••••• ••••••••• ••••••••• •••••••• ••••••
• • • • • • •• • • • • • • • • • •• • • • • • • • • •••••••• •••••••• ••••••••• ••••••••• •••••••• •
1
1
2
5
6
7
9
11
11
12
13
14
15
17
18
19
19
20
21
23
24
25
Advertisement
Table of Contents

Related Manuals for Oregon Scientific ATC2K


Summary of Contents for Oregon Scientific ATC2K
- Page 1 XI . Troubleshooting OREGON SCIENTIFIC and associated trademarks and trade dress are owned by OREGON SCIENTIFIC, Inc. • • • • •• • • • • • • • • • •• • • • • • • • • • •• • • • • • • • • • •• • • • • • • • • • • •• • • • • • • • • • •• •• ••••••••• •••••••• ••••••••• •••••••• •••••••...
-
Page 2: Quick Start
• Clean the lens with a soft cloth to remove fingerprints or dust. The ATC2K camera is waterproof up to 3m (10ft). Oregon Scientific will not assume • We recommend using Alkaline batteries in temperatures between 32°F to 104°F (0°C any responsibility for camera malfunction caused by liquid entering the camera as a result of misuse by the user. - Page 3 Precaution: Liquid may get inside the camera if the battery cover is not firmly Follow the steps below to keep the camera waterproof. closed Step 1: Apply silicon grease (included). • If the camera gets wet, wipe the liquid off as soon as possible with a dry cloth. •...
-
Page 4: Technical Specifications
III) Technical Specifications IV) Computer System Requirements Minimum System Requirements • Sensor resolution 640x480 VGA CMOS sensor • Pentium III 800 MHz or higher • Built-in memory 32MB • Windows 2000, Windows XP, Windows Vista and Apple Mac X 10.4 and 10.3 •... -
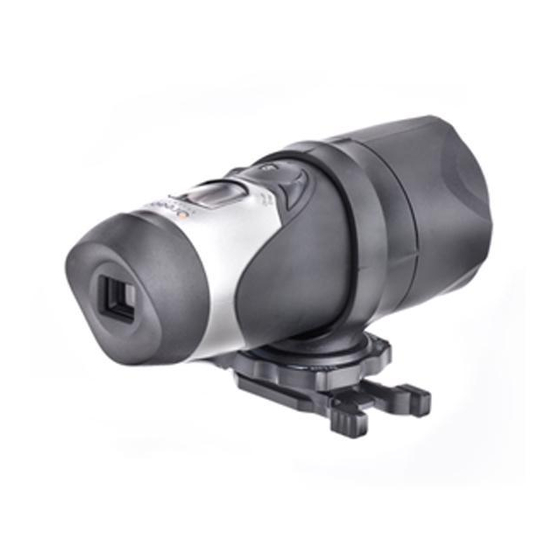
Page 5: Camera Description
V) Camera Description 17. Silicon grease container 18. LCD screen 19. ON/OFF 1. Lens 20. Movie shutter button & 2. Camera grip Confirm button 3. Screw 21. Menu button & Select button 4. Nut 22. Mini-USB port 5. Handlebar grip 23. -
Page 6: Camera Mounting Description
Mounting the camera using the velcro strap: VI) Camera Mounting Description 1. Attach the rubber patch to the bottom of the helmet grip. The camera can be mounted in a number of ways using the straps and the velcro patch 2+3. -
Page 7: Camera Usage
Do not mix old and new batteries together. Replace Note: Ensure that the ATC2K is turned off during the insertion or the both batteries at the same time. removal of the SD card. The card and the data may be damaged if the SD b) Remove the batteries if the camera is not going to be card is inserted or removed while the camera is on. - Page 8 SD card insertion/removal Taking Video Footage Insert: 1. Aim at what you want to record. 1. Turn the ATC2K off 2. Press and hold the 'Movie shutter button' for 2 2. Unscrew the cover at the end of the unit.
-
Page 9: Menu Settings
5. The different mode icons are shown in the table below. VIII) Menu Settings 1. Press and hold the Menu button for 2 seconds (one beeping sound) Icon Title Description to start selecting options. High resolution Large video format/ 2. You can shift through different shooting modes by (640x480 pixels) less storage capability pressing the Menu button... -
Page 10: Privacy Mode
Privacy Mode Resolution 640 x 480, 320 x 240 pixels resolution This mode allows the user to disable the sound features. To change the resolution, press the Menu button until the The privacy icon will be flashing and the current mode it is in will not desired resolution icon is displayed on the LCD screen. - Page 11 Sound Recording Setting Date/Time (Clock Set) Once you have entered this mode the icon will keep flashing and Shift to the Date icon in the Menu mode by pressing the Menu button “LO” will be shown on screen. “LO” means sound is being repeatedly.
-
Page 12: Sd Memory Card
51 s 1min 36 s Memory To use an SD memory card, turn off the ATC2K and insert the SD memory card. When the camera is turned on again the SD card icon will be displayed on the LCD screen. -
Page 13: Connecting To A Computer
5. "AV" appears on the ATC2K screen. TV mode is automatically activated 4. The ATC2K drive appears in the [My Computer] folder. when the AV cable is connected to the ATC2K. Once the cable is *If you are connecting the camera to a PC for the first time, the required connected, the function keys will be shown on the TV screen. -
Page 14: Troubleshooting
-Do the batteries need replacing? -Ensure each end of the AV cable is properly and firmly connected to After the ATC2K is connected to my PC, it cannot find the new drive in ATC2K and to your television. the, 'My Computer' folder -Ensure the ATC2K and television are both turned on. - Page 15 Further Help Oregon Scientific, Inc. We make every effort to ensure the accuracy and appropriateness of the information provided on our products. We encourage you to contact our 19861 SW 95th Avenue Tualatin, OR 97062, USA Technical Support Team at atc@oregonscientific.com with any problems Website: www2.oregonscientific.com...