Table of Contents
Advertisement
Advertisement
Table of Contents

Related Manuals for Humminbird HELIX 5 G2 SERIES


Summary of Contents for Humminbird HELIX 5 G2 SERIES
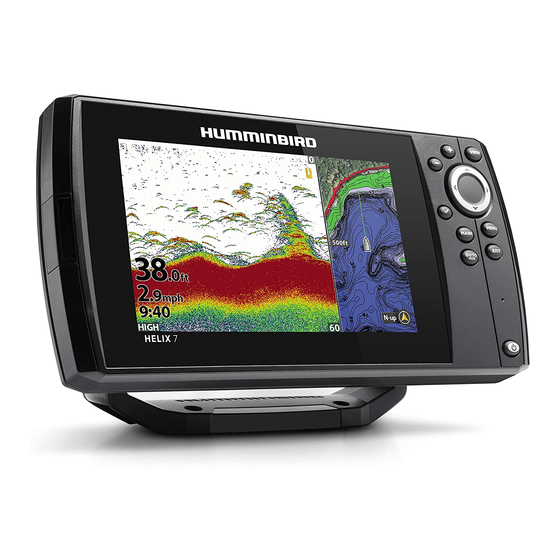
- Page 1 HELIX 5 HELIX 7 G2 Series Operations Manual 532509-1EN_A...
-
Page 2: Warnings
HANK Thank you for choosing Humminbird®, the #1 name in marine electronics. Humminbird has built its reputation by designing and manufacturing top quality, thoroughly reliable marine equipment. Your Humminbird is designed for trouble-free use in even the harshest marine environment. We encourage you to read this manual carefully in order to get the full benefit from all the features and applications of your Humminbird product. - Page 3 360 Imaging®, AUTOCHART®, AUTOCHART® LIVE, ChartSelect®, Contour XD™, Down Imaging®, DualBeam PLUS™, Fish ID+™, HELIX®, Humminbird®, HumminbirdPC™, LakeMaster®, Real Time Sonar™, RTS™, RTS Window™, Side Imaging®, SI™, Structure ID™, SwitchFire®, UniMap™, WhiteLine™, X-Press™ Menu, are trademarked by or registered trademarks of Johnson Outdoors Marine Electronics, Inc.
-
Page 4: Table Of Contents
Customize the Down Imaging View ......79 Using Humminbird Manuals on your Mobile Device or PC Adjust Settings While you Fish ......82 Review Down Imaging History and Zoom In/Zoom Out . - Page 5 Adjust the Map Display Settings ......186 Manage your Control Head Update Software Maintenance Troubleshooting Specifications Contact Humminbird...
-
Page 7: Introduction
HELIX CHIRP SI GPS G2 Accessories: For the latest list of accessories that are compatible with your control head, visit our Web site at humminbird.com. Register and Update: It is important to register your products and keep your software up to date. Visit our Web site at humminbird.com to set up an account, update control head and accessory software, and purchase additional equipment. -
Page 8: Using Humminbird Manuals On Your Mobile Device Or Pc
OBILE EVICE OR The Humminbird manuals for your control head and accessories can be downloaded to your mobile device or PC. If you prefer to use a hard copy for reference, this manual may be printed. Download the Manual to your Mobile Device 1. - Page 9 Using the Manual search for bookmarks key words panel (Ctrl + F) Introduction...
-
Page 10: Getting Started
The procedures in this section describe how to get started with your control head. Some of the settings in this section are a one- time set up, and other settings (such as checking the GPS reception) you will use each time you hit the water. Power On Follow the instructions below to power on your Humminbird control head. 1. Press the POWER key. - Page 11 3. Select Normal. Press the RIGHT Cursor key. Normal mode is required for on-the-water operation. If a functioning transducer is connected Normal to the control head, Normal will be selected automatically, and your control head can be used on the water. To learn how to use your control head, select Simulator.
- Page 12 1. Use the Cursor Control key to change the settings. 2. Close: Press the EXIT key. The available languages are determined by your Humminbird model. Language WARNING! Do NOT enable Asian Mode if you do not require Asian languages. Before you select Asian Mode, contact Customer Service for important information.
- Page 13 NOTE: The menus for installed accessories are typically included in the Accessory tab in the Main Menu. See your accessory guide for details. For the latest list of accessories that are compatible with your control head, visit our Web site at humminbird.com.
- Page 14 Check GPS Reception If your control head includes internal GPS, or if it is connected to an External GPS receiver, use the instructions in this section to confirm the control head has GPS reception. 1. Press and hold the VIEW key. 2.
- Page 15 Set Alarms When an alarm is turned on, an alert will sound or display on the control head to indicate the threshold has been exceeded. Turn on Alarms and Adjust Settings 1. Main Menu: Press the MENU key twice. To open the Main Menu from a System View, press the MENU key once. 2.
- Page 16 Reset the Triplog The Triplog includes the timer for elapsed time, distance traveled since last reset, and average speed. Use the following instructions to reset the triplog. To display the Triplog as a digital readout, see Views: Display Digital Readouts. 1.
- Page 17 Change Units of Measurement Use the instructions in this section to change the units of measurement format. You can also change the time and date format, language, and installation offsets from this menu. See Manage your Control Head for more information. 1.
-
Page 18: Helix Control Head
HELIX C ONTROL HELIX 5 SONAR G2 and HELIX 5 DI G2 VIEW MENU EXIT HELIX 7 G2 Series Models with GPS The Control Head... - Page 19 MARK Control Head Keys The available keys are determined by your control head model. Press the MARK key to save a waypoint at the boat Your control head might not include all the keys shown in this position. If the cursor is active, press the MARK key section.
- Page 20 microSD Card Slot The microSD card slot on your control head is compatible with a microSD card (separate purchase required) to update software, add detailed charts to your control head, import/export navigation data, and save sonar recordings and screen snapshots. Software Updates: For details, see Update Software.
- Page 21 Removing the Card Slot Cover Installing a microSD Card (magnified view) notch facing down The Control Head...
-
Page 22: Menu System Overview
Open the Main Menu The main menu is divided into tabbed categories (Alarms, Sonar, Opening the Main Menu Navigation, Chart, Humminbird Chart, Setup, Views, and Accessories). The available tabs and menus are determined by your model and the connected accessories. -
Page 23: Select A Menu
Select a Menu Use the Cursor Control key to select a menu in the Main Menu or X-Press Menu. Select a Tab (Main Menu) Select a Menu 1. Press the RIGHT or LEFT Cursor keys. 1. Press the DOWN or UP Cursor keys. Select a Tab Select a Menu Change a Menu Setting... -
Page 24: Tips For Using The Menu System
Start an Action/Open a Submenu Start an Action or Open a Submenu 1. If a menu has a right arrow on it, press the RIGHT Cursor key to start the action or open the submenu. Tips for Using the Menu System You can move through the menu system quickly using the following tips. -
Page 25: Change The User Mode (Normal Or Advanced)
Change the User Mode (Normal or Advanced) The User Mode determines how many menus are shown in the menu system. Select Normal to see fewer menus that are used more often. Select Advanced to see all the menus available in the menu system. Main Menu (Advanced User Mode): Instructions in this manual marked with Main Menu (Advanced User Mode) indicate that the menu system User Mode must be set to Advanced for the selected menu to be shown. -
Page 26: Views
IEWS The HELIX control head has many options to display data on-screen, and the data can be displayed in a variety of ways. There are also several ways to quickly display a view on-screen. Display a View The available views on your control head are determined by the model you’ve purchased and the connected transducer. Display a View from the Views X-Press Menu 1. -
Page 27: Show Your Favorite Views
Display the Next/Previous View Next View: Press the VIEW key repeatedly until the view you want is displayed on-screen. Previous View: Press the EXIT key repeatedly until the view you want is displayed on-screen. Show your Favorite Views You can display or hide any view so that each time you press the VIEW key, only your favorite views are displayed on the screen. Show/Hide a View Main Menu: Views Tab 1. -
Page 28: Display Digital Readouts
Display Digital Readouts Digital Readout data can be displayed as an overlay, or it can be displayed in data boxes on the views. You can also choose which digital readouts you want to display. The format and readouts you choose will be applied to all views. Accessories: The available digital readouts are determined by the installed equipment, so if you connect accessories, additional readouts will be available. - Page 29 Digital Readouts with Overlay Selected (Sonar View) speed temperature depth Digital Readouts with Overlay Selected (Chart View) speed Course Over Ground (COG) Distance to Go (DTG) Views...
- Page 30 Customize Digital Readouts If you have Digital Readouts set to Boxes, you can select the data that will be displayed in each box. Use the Select Readouts menu to set your standard digital readouts. Use the Select Nav Readouts menu to set the digital readouts that will be displayed during navigation.
- Page 31 Understand Digital Readouts The following table displays the digital readouts that are available in the Select Readouts menu or the Select Nav Readouts menu. The available digital readouts are determined by the installed equipment. Navigation Label Name Description Readout The direction to a destination waypoint measured in degrees from Bearing Bearing north.
-
Page 32: Combo Views
Combo views display two views (or more) on the screen at the same time. To change the settings, select menus or actions, or change the size of either view, you must select the view as the Active Pane from the X-Press menu. The available combo views are determined by your Humminbird model. Selecting an Active Pane of the Chart/Sonar Combo View... -
Page 33: Sonar Overview (Sonar, Di, Si, Chirp)
A functioning transducer must be attached to the control head to enable sonar functions. To purchase accessory transducers, visit our Web site at humminbird.com. NOTE: Depth capability is affected by such factors as boat speed, wave action, bottom hardness, water conditions, and transducer installation. - Page 34 CHIRP Side Imaging Sonar (HELIX CHIRP SI GPS G2) The CHIRP Side Imaging transducer allows you to operate the beams at different frequency ranges. CHIRP sonar sends continuous sonar pulses at varying 86˚ 86˚ frequencies to provide more detailed returns and better target separation. For 455kHz 455kHz more frequency range information, see Set Up Sonar: Adjust 2D CHIRP and...
- Page 35 Down Imaging Sonar (HELIX DI G2, HELIX CHIRP DI GPS G2) The Down Imaging transducer scans the water with razor-thin, high-definition beams. The beams are wide (side to side) but very thin front to back. The Down Imaging beams (shown in green) can be operated at two frequencies: 455 kHz (75°) or 800 kHz (45°).
-
Page 36: Set Up Sonar (Sonar, Di, Si, Chirp)
See Getting Started: Quick Setup for more information. NOTE: To see the latest transducers that are compatible with your control head, visit our Web site at humminbird.com. 1. Main Menu: Press the MENU key twice. Select the Sonar tab. - Page 37 Change the Max Depth The Max Depth was set when you first configured the unit with the Quick Setup dialog box (see Getting Started: Quick Setup). Use the instructions in this section to adjust the maximum depth setting. 1. Main Menu (Advanced User Mode): Press the MENU key twice. Select the Sonar tab. 2.
- Page 38 Select Frequencies for the 2D Sonar View Use the instructions in this section to select the transducer beams that will be used for the traditional 2D Sonar views. NOTE: If you have a CHIRP model, the menus in this section are available when CHIRP Mode is turned off (see Adjust 2D CHIRP). Select Beams for the (2D) Sonar View If the installed transducer includes more than one beam, you can select which beam(s) will be displayed in the 2D Sonar view.
- Page 39 HELIX DI G2, HELIX CHIRP DI GPS G2 Display Frequency Options for the Sonar View 45° 800kHz 75° 455kHz 16° 455kHz 28° 200kHz Select an Imaging Frequency (Down Imaging models only) Use the following instructions to choose an imaging frequency that will be used for the Down Imaging View. For the best overall image quality and depth, select 455 kHz.
- Page 40 Select High Frequency (455 kHz) for 440 kHz - 490 kHz (455 kHz) the most detail at shallow depths. NOTE: Accessory transducers may include additional menu options. For information about accessory transducers, visit our Web site at humminbird.com. Set up Sonar...
- Page 41 Adjust Imaging CHIRP (CHIRP DI and CHIRP SI models only) You can use the settings included with your control head, or you can adjust the CHIRP frequencies that will be used for the Side Imaging and Down Imaging Views. Turn on/off Imaging CHIRP To use Imaging CHIRP sonar, Imaging CHIRP Mode must be turned on.
-
Page 42: Display A Sonar View On-Screen
ISPLAY A ONAR CREEN There are a variety of views available to display sonar data. You can customize the view by showing or hiding information (see Customize the Sonar View), and you can adjust the sonar settings to refine the information displayed on-screen (see Adjust Sonar Display Settings and Adjust Settings While you Fish). - Page 43 Display a Sonar Combo View 1. Press and hold the VIEW key. 2. To open a Sonar Combo View, select Sonar. To open a Chart Combo View (Sonar and Chart together), select Chart. 3. Select a view to display on-screen. Sonar >...
-
Page 44: Understand The Sonar Views
NDERSTAND THE ONAR IEWS As the boat moves, the unit charts the changes in depth on the display to create a profile of the bottom contour. The Sonar View displays the sonar return intensity with different colors. Strong returns often result from rocky or hard bottoms (compacted sediment, rocks, fallen trees), while weaker returns often result from soft bottoms (sand, mud), vegetation, and small fish. -
Page 45: Customize The Sonar View
USTOMIZE THE ONAR You can customize the sonar views by showing or hiding information, such as the temperature graph, depth lines, color bar, and RTS Window. You can also change the color palette. Customizing the Sonar View temperature graph depth lines temperature (digital readout overlay) - Page 46 Show/Hide the Frequency Label The Frequency Label displays the currently selected frequencies. See Set up Sonar. 1. Main Menu: Press the MENU key twice. Select the Sonar tab. 2. Select Frequency Label. 3. Select On (show) or Off (hide). 2D Sonar View Displaying CHIRP Data selected selected display...
- Page 47 Customize the RTS Window The RTS Window plots the depth and intensity of a sonar return. It updates at the fastest rate possible for depth conditions and shows only the returns from the bottom, structure, and fish that are within the transducer beam. When you use the cursor to review sonar history, the sonar history will freeze, but the RTS Window will continue to display sonar returns in real time.
- Page 48 Change the View Colors The Sonar Colors menu changes the colors used to display sonar returns on the view. Sonar View with Customized Sonar Colors color bar with sonar colors set to palette 4 Strong Weak RTS Window Change the Sonar Colors Palette 1.
- Page 49 Adjusting the Contrast The high Contrast setting uses the top portion of palette. color bar Select a Range of the Palette (Contrast) Contrast allows you to choose a range of the Sonar Colors palette to display sonar returns. To see the current palette, display the Color Bar on the Sonar View.
-
Page 50: Adjust Sonar Display Settings
DJUST ONAR ISPLAY ETTINGS Use the instructions in this section to adjust how the sonar returns are shown on the Sonar View, so you can tune into what you want to see in the display. The settings in this section are optional. You can use the default display settings for the Sonar View, or you can customize it with your preferences. - Page 51 Turn on/off Fish ID+ Settings Fish ID+ uses advanced signal processing to interpret sonar returns and will display a fish symbol on the Sonar View when very selective requirements are met. Also, if Fish ID+ is turned on, you can adjust the sensitivity used for detection and receive alerts with the Fish ID Alarm turned on.
- Page 52 Adjust the Fish ID Sensitivity Use Fish ID Sensitivity to adjust the threshold used for detecting a fish with Fish ID+. To display only larger species of fish as fish symbols, select a low setting. To see smaller fish species or baitfish, select a high setting. Fish ID+ must be turned on to enable this menu.
- Page 53 Set the Bottom View Display Bottom View selects the method used to represent bottom and structure on the display. Bottom View is also affected by the palette selected in Sonar Colors (see Customize the Sonar View: Change the View Colors). Bottom View set to WhiteLine color bar with sonar colors...
-
Page 54: Adjust Settings While You Fish
DJUST ETTINGS WHILE YOU ONAR RESS The X-Press Menu provides menu options to adjust the sensitivity and range as you fish. You can also control how fast the sonar history scrolls across the screen. The menus allow you to see more or less of the sonar returns from the transducer beams as you adjust each setting. - Page 55 Adjust the Sensitivity Sensitivity controls how much detail is shown on the view. To eliminate the clutter from the display that is sometimes present in murky or muddy water, decrease the sensitivity. When operating in very clear water or greater depths, increase the sensitivity to see weaker returns.
- Page 56 Adjust Beam Sensitivity Your control head model may allow you to adjust the sensitivity of individual frequencies. The available frequencies are determined by your control head model and the installed transducer. Use the following instructions to adjust a single beam. 1.
- Page 57 Set the Upper/Lower Range Upper Range and Lower Range control how much of the water column is displayed on the view. For example, if you are only interested in the area between 20 and 50 feet deep, set the Upper Range to 20 and the Lower Range to 50. The view will not display sonar returns outside of the set ranges, and greater detail for the selected range will be displayed.
- Page 58 Change the Sonar Colors Palette The Sonar X-Press Menu allows you to quickly change the display palette while you fish. See Customize the Sonar View: Change the View Colors for more information. 1. Sonar X-Press Menu: With a Sonar View displayed on-screen, press the MENU key once. 2.
-
Page 59: Compare Sonar Beams (Split Sonar View)
Split Sonar View displays sonar returns from each down beam frequency on separate sides of the view. You can use this view to make side by side comparisons between the sonar returns from both beams. The beams are determined by your Humminbird model and the installed transducer. -
Page 60: Review Sonar History
EVIEW ONAR ISTORY Press any arrow on the Cursor Control key, and the sonar history will freeze and the cursor will display on-screen. If you move the cursor over a sonar return, digital readouts for the cursor position are displayed on the view. The RTS Window continues to update at the fastest rate possible for depth conditions (see Customize the Sonar View). -
Page 61: Zoom In/Zoom Out
Use the Sonar Zoom View to see a magnified view of the bottom and structure. For example, if there are fish close to the bottom or near structure (tree, vegetation, etc.), Sonar Zoom View makes it easier to see the separate sonar returns that might be displayed close together. - Page 62 Magnifying Sonar Returns in Sonar Zoom View (Bottom Lock Off) zoom level upper range, zoom view upper range, full range view zoomed full range view zoom preview range lower range, zoom view lower range, full range view ZOOM In ZOOM Out ZOOM In Move the Cursor Sonar (2D)
- Page 63 Zoom In/Zoom Out using the X-Press Menu If your control head does not include ZOOM keys, you will use the Zoom Level menu to use the ZOOM feature. Magnify Bottom Structure (Zoom In/Out) 1. Display the Sonar Zoom View on-screen. 2.
- Page 64 Adjust Sonar Zoom View Display Settings Turn on/off Bottom Lock Use Bottom Lock and Bottom Range to focus on the bottom and control how much of the water column is shown in Sonar Zoom View. Bottom Lock continuously graphs the bottom at a constant point on the display regardless of changes in depth. This “flattens” out the bottom contour but is effective at showing fish on or near the bottom.
-
Page 65: Navigation In Sonar Views
AVIGATION IN ONAR IEWS To mark waypoints and start navigation, the control head must have a GPS Fix from a connected or internal GPS receiver. See Getting Started for more information. Mark a Waypoint You can mark a waypoint at the boat position or the cursor position. Waypoints are saved to the Waypoint Management dialog box (see Manage your Navigation Data). - Page 66 Navigate to a Position Use the instructions in this section to start navigation to a position in the view. See Navigation Overview for more information about these features. Navigate to the Cursor Position 1. Use the Cursor Control key to move the cursor to a position on the view. 2.
- Page 67 Starting Navigation to the Cursor Position cursor depth depth below cursor distance to cursor position bearing to cursor position cursor digital readouts cursor Press Twice to Move the Cursor Start Navigation Sonar (2D)
-
Page 68: Display The Circular Flasher View On-Screen
ISPLAY THE IRCULAR LASHER CREEN Circular Flasher View provides two ways to view sonar data in traditional flasher format. The view is controlled by the Ice Fishing Mode menu in the Sonar tab. Display the Circular Flasher View 1. Press and hold the VIEW key. 2. -
Page 69: Understand The Circular Flasher View
NDERSTAND THE IRCULAR LASHER You can use the Circular Flasher View with Ice Fishing Mode turned on or off. When Ice Fishing Mode is turned on, the view is maximized with information you need for ice fishing, including the depth, connected battery power percentage, and related menu settings. -
Page 70: Adjust Settings While You Fish
DJUST ETTINGS WHILE YOU ONAR RESS The X-Press Menu provides menu options to adjust the sensitivity and range as you fish. The menus allow you to see more or less of the sonar returns from the transducer beams as you adjust each setting. Also, you can use key shortcuts on the view. Adjusting Settings from the X-Press Menu (HELIX CHIRP SI GPS G2) Adjust the Sensitivity Sensitivity controls how much detail is shown on the view. - Page 71 Select a Range of the Palette (Contrast) Contrast allows you to choose a range of the Color Palette to display sonar returns. You can see a preview of the palette in the Color Palette menu. For details, see Change the Sonar Colors Palette. When Contrast is set to 20 (default), the entire palette is used to display weak and strong sonar returns.
- Page 72 Change the Sonar Colors Palette The X-Press Menu allows you to quickly change the display palette while you fish. If Ice Fishing Mode is on, additional palettes are available (F1, F2, F3). The Color Palette menu shows a preview of the palette, and the weak to strong sonar return range is displayed from left to right.
- Page 73 Turn on Jigging Mode if you’ve selected Medium or Medium/High Frequency in the 2D CHIRP Display Frequency menu (with 2D CHIRP Mode turned on), or if you've selected 83 kHz or 83/200 kHz in the 2D Display Frequency menu (with 2D CHIRP Mode turned off). When Jigging Mode is turned on, the sonar returns are refined on the view, and the chart speed slows down to show more detail.
-
Page 74: Move The Depth Cursor
OVE THE EPTH URSOR Use the Depth Cursor to identify a depth on the Circular Flasher View. NOTE: Ice Fishing Mode must be turned on to enable this feature (see Display the Circular Flasher View On-Screen). 1. Activate: Press the DOWN Cursor key, and the purple cursor line will display on the dial. 2. -
Page 75: Zoom In/Out In Circular Flasher View
UT IN IRCULAR LASHER The Zoom feature displays a 2x magnified view of the area you choose on the Circular Flasher View. NOTE: Ice Fishing Mode must be turned on to enable this feature (see Display the Circular Flasher View On-Screen). ZOOM In/Out using the ZOOM Keys 1. - Page 76 Magnifying Sonar Returns in the Circular Flasher View normal view zoom line (reading the full depth (upper limit) of the water column) zoom line zoom view (lower limit) (2X magnification) ZOOM In Move the Zoom Range Circular Flasher...
-
Page 77: Display A Down Imaging View On-Screen
ISPLAY A MAGING CREEN MAGING AND MAGING MODELS ONLY There are a variety of views available to display Down Imaging data. You can also customize the view by showing or hiding information (see Customize the Down Imaging View), and you can adjust the sonar settings to refine the information displayed on-screen (see Adjust Settings While you Fish). -
Page 78: Understand The Down Imaging View
NDERSTAND THE MAGING The images you see on the Down Imaging display are produced using sonar technology. Each time the unit pings, a strip of data representing all the echoes received by the transducer are put together on the display to form the image that you see. Like traditional 2D Sonar, the sonar history scrolls left across the screen. -
Page 79: Customize The Down Imaging View
USTOMIZE THE MAGING You can customize the Down Imaging views by showing or hiding information, such as depth lines, temperature graph, and digital readouts. You can also change the color palette. Customizing the Down Imaging View temperature graph digital readouts set to boxes depth lines... - Page 80 Change the View Colors The DI Colors menu changes the palette used to display sonar returns on the view. Down Imaging View with Palette 10 Selected (DI Colors) Change the Down Imaging Colors Palette 1. Down Imaging X-Press Menu: With a Down Imaging View displayed on-screen, press the MENU key once. 2.
- Page 81 Show/Hide the Frequency Label The Frequency Label displays the currently selected frequencies. See Set up Sonar. 1. Main Menu: Press the MENU key twice. Select the Sonar tab. 2. Select Frequency Label. 3. Select On (show) or Off (hide). Down Imaging View with the Frequency Label Turned On selected display frequency Down Imaging Sonar...
-
Page 82: Adjust Settings While You Fish
DJUST ETTINGS WHILE YOU MAGING RESS The X-Press Menu provides menu options to adjust the sensitivity and range as you fish. You can also control how fast the sonar history scrolls across the screen. The menus allow you to see more or less of the sonar returns from the transducer beams as you adjust each setting. - Page 83 Adjust Sensitivity Sensitivity controls how much detail is shown on the view. You can adjust sensitivity from the X-Press Menu or the DI Enhance menu (see Enhance the Down Imaging View). The sensitivity can also be adjusted using the +/− ZOOM keys. Decrease the sensitivity to eliminate the clutter from the display that is sometimes present in murky or muddy water.
- Page 84 Enhance the Down Imaging View The DI Enhance menu allows you to adjust the sensitivity, contrast, and sharpness on the Down Imaging View. As you adjust each setting, the changes are displayed immediately on the view. Enhancing the Down Imaging View Enhance the Down Imaging View 1.
- Page 85 Set the Upper/Lower Range Upper Range and Lower Range control how much of the water column is displayed on the view. For example, if you are only interested in the area between 20 and 50 feet deep, set the Upper Range to 20 and the Lower Range to 50. The view will not display sonar returns outside of the set ranges, and greater detail for the selected range will be displayed.
-
Page 86: Review Down Imaging History And Zoom In/Zoom Out
EVIEW MAGING ISTORY AND In addition to adjusting the sonar settings while you fish, you can freeze the sonar history, magnify sonar returns, and review position information. Freeze the Down Imaging View Press any arrow on the Cursor Control key, and the sonar history will freeze and the cursor will display on-screen. If you move the cursor over a sonar return, digital readouts for the cursor position are displayed on the view. - Page 87 Zooming into the Down Imaging History cursor depth depth below cursor distance to cursor position bearing to cursor position cursor digital zoom level readouts zoom box can be moved with the Cursor Control key ZOOM In ZOOM Out Move the Cursor Down Imaging Sonar...
-
Page 88: Navigation In Down Imaging Views
AVIGATION IN MAGING IEWS To mark waypoints and start navigation, the control head must have a GPS Fix from a connected or internal GPS receiver. See Getting Started for more information. Mark a Waypoint You can mark a waypoint at the boat position or the cursor position. Waypoints are saved to the Waypoint Management dialog box (see Manage your Navigation Data). - Page 89 Navigate to a Position Use the instructions in this section to start navigation to a position in the view. See Navigation Overview for more information about these features. Navigate to the Cursor Position 1. Use the Cursor Control key to move the cursor to a position on the view. 2.
-
Page 90: Display A Side Imaging View On-Screen
ISPLAY A MAGING CREEN ( HELIX CHIRP SI GPS G2 ONLY There are a variety of views available to display Side Imaging data. You can also customize the view by showing or hiding information (see Customize the Side Imaging View), and you can adjust the sonar settings to maximize the information displayed on-screen (see Adjust Settings While you Fish). -
Page 91: Understand The Side Imaging View
NDERSTAND THE MAGING Side Imaging beams “illuminate” the bottom contour, structure, and fish. The side beam coverage is very thin from front to back, yet very wide from top to bottom. The bottom composition determines the intensity of the sonar return, and upward slopes that face the transducer reflect sonar better than downward slopes that face away from the transducer. - Page 92 Side Imaging View, variations in the width of the water column show variations in the distance to the bottom as the boat passes over. For Best Side Imaging Performance • Boat Speed: trolling • Straight line navigation • Minimum turning time and wave turbulence Also, see humminbird.com for tutorials and Side Imaging videos. Side Imaging Sonar...
-
Page 93: Customize The Side Imaging View
USTOMIZE THE MAGING The settings in this section are optional. You can use the default settings for the view, or you can customize it with your preferences. Showing Digital Readouts and SI Range Lines range numbers digital readouts set to boxes range lines Show/Hide SI Range Lines SI Range Lines divide each side beam range into equal sections on the Side Imaging View. - Page 94 Change the View Colors The SI Colors menu changes the colors used to display sonar returns on the view. 1. Side Imaging X-Press Menu: With a Side Imaging View displayed on-screen, press the MENU key once. 2. Select SI Colors. 3.
- Page 95 Show/Hide the Frequency Label The Frequency Label displays the currently selected frequencies. See Set up Sonar. 1. Main Menu: Press the MENU key twice. Select the Sonar tab. 2. Select Frequency Label. 3. Select On (show) or Off (hide). Side Imaging View with the Frequency Label Turned On selected display frequency Side Imaging Sonar...
-
Page 96: Adjust Settings While You Fish
DJUST ETTINGS WHILE YOU MAGING RESS The X-Press Menu provides menu options to adjust the sensitivity and range as you fish. You can also control how fast the sonar history scrolls down the screen. The menu options allow you to see more or less of the sonar returns from the transducer beams as you adjust each setting. - Page 97 Adjusting the Sensitivity using the +/−ZOOM Keys Increase Sensitivity Decrease Sensitivity Side Imaging Sonar...
- Page 98 Enhance the Side Imaging View The SI Enhance menu allows you to adjust the sensitivity, contrast, and sharpness on the Side Imaging View. As you adjust each setting, the changes are displayed immediately on the view, so you can fine tune the display. You can also turn on/off the Contour Mode from this menu so the water column is displayed or hidden on the view.
- Page 99 Sensitivity controls how much detail is shown on the view. Decrease the sensitivity to eliminate the clutter from the display that is sometimes present in murky or muddy water. When Sensitivity operating in very clear water or greater depths, increase the sensitivity to see weaker returns that may be of interest.
- Page 100 Adjust the Side Imaging Range SI Range sets the deepest range that will be displayed on the Side Imaging views. Choose a low range number to focus on a shorter distance of the water column and see greater detail on the view. Choose a higher range number to see farther into the water and see an overview of details on the screen.
- Page 101 Change the Chart Speed Chart Speed controls how fast the sonar history moves down the view and how much detail is shown. 1. Side Imaging X-Press Menu: With a Side Imaging View displayed on-screen, press the MENU key once. 2. Select Chart Speed. 3.
-
Page 102: Review Side Imaging History And Zoom In/Out
EVIEW MAGING ISTORY AND In addition to adjusting the sonar settings while you fish, you can freeze the sonar history, magnify sonar returns, and review position information. Freeze the Side Imaging View Press any arrow on the Cursor Control key, and the sonar history will freeze and the cursor will display on-screen. If you move the cursor over a sonar return, digital readouts for the cursor position are displayed on the view. - Page 103 Zooming into the Side Imaging History cursor depth depth below cursor distance to cursor position bearing to cursor position cursor digital zoom level readouts zoom box can be moved with the Cursor Control key ZOOM In ZOOM Out Move the Cursor Side Imaging Sonar...
-
Page 104: Navigation In Side Imaging Views
AVIGATION IN MAGING IEWS To mark waypoints and start navigation, the control head must have a GPS Fix from a connected or internal GPS receiver. See Getting Started for more information. Turn on/off SI Navigation SI Navigation controls how the boat icon is displayed in Side Imaging Views. See Navigate to a Position for more information. If SI Navigation is turned on, an arrow icon indicates the direction the boat needs to turn to reach the next waypoint during navigation. - Page 105 Navigating to a Waypoint direction to turn the boat to reach the next waypoint (SI Navigation On) navigation digital readouts next waypoint Press Twice to Move the Cursor Start Navigation Cancel Navigation 1. Press the MENU key once. 2. Select Cancel Navigation. Press the RIGHT Cursor key. Side Imaging Sonar...
-
Page 106: Manage Screen Snapshots And Recordings
Use this view to review the snapshot and recording file details, start recording, and adjust the recording settings. NOTE: Also, this feature can be helpful in troubleshooting any sonar-related issues. If you contact Humminbird Customer Service for sonar troubleshooting assistance, you may be asked to perform one of the tasks in this section. See Email Files to Customer Service for details. - Page 107 Take Screen Snapshots Screen Snapshots are saved pictures of the view on the screen. The screen snapshot will include the menus, dialog boxes, warnings, and messages that were active when the screen snapshot was taken. If Screen Snapshot Waypoint is turned on, a waypoint will also be saved at the boat or cursor location when you take a screen snapshot.
- Page 108 Manage Saved Screen Snapshots Saved Screen Snapshots can be viewed from the Snapshot and Recording View. If Screen Snapshot Waypoint is turned on when the screen snapshot is taken, you can view the saved file from the Chart View. NOTE: A microSD card must be installed in the control head to use the Snapshot and Recording features. Display a Saved Screen Snapshot from Snapshot and Recording View 1.
- Page 109 Display a Saved Screen Snapshot from Chart View If Screen Snapshot Waypoint is turned on when the screen snapshot is taken, you can view the saved file from the Chart View (see Enable Marking a Waypoint with each Screen Snapshot). 1.
- Page 110 Record and Playback The Recording feature records active sonar information. When the recording is played back, the views that were active during the recording are available in Playback. You can play a saved recording from the Snapshot and Recording View. NOTE: A microSD card must be installed in the control head to use the Snapshot and Recording features.
- Page 111 Play a Recording 1. Display the Screen Snapshot and Recording View on-screen. 2. Select a Recording: Press the UP or DOWN Cursor keys to scroll through the saved files. 3. Start Playback: Press the RIGHT Cursor key. Navigation is cancelled during playback. Use Different Views: To use different views on the control head and continue playback, press the EXIT key.
- Page 112 Adjust Playback Speed 1. X-Press Menu: From any view, press the MENU key once. 2. Select Playback Speed. 3. Press the RIGHT or LEFT keys to adjust playback speed or pause. Adjusting the Playback Speed Side Imaging recording playing indicates Playback is in progress Stop Playback 1.
- Page 113 Email Files to Customer Service If you’re working with Humminbird Customer Service to troubleshoot a sonar-related issue, they may ask you to send a screen snapshot or recording to them for review. Use the instructions in this section to email a saved screen snapshot or recording to Humminbird Customer Service.
-
Page 114: Chart Overview
HART VERVIEW To enable the chart and navigation features, the control head must have a GPS Fix from an internal or external GPS receiver (see Getting Started to check the sensor reception). Some of these features also require a compass/heading sensor to be connected to the control head. -
Page 115: Display A Chart View On-Screen
ISPLAY A HART CREEN There are a variety of views available to display charts and navigation. The views can be customized and displayed as a Combo View. Display a Chart View or Bird’s Eye View 1. Press and hold the VIEW key. 2. -
Page 116: Select A Map Source
Use Set Map Offset to move the chart position on-screen and correct a position error in the cartography. This setting applies to all charts, not just the chart that requires correction. NOTE: This feature is not available with Humminbird LakeMaster map cards. 1. Display a Chart View on-screen. - Page 117 6. Follow the on-screen prompts. Clear Map Offset: Select Main Menu (Advanced User Mode) > Chart tab > Clear Map Offset. Select a New Map (optional) If the installed map card includes additional maps, use the following instructions to display map borders and select a different map. 1.
- Page 118 Set up Humminbird ChartSelect ChartSelect allows you to purchase a Humminbird chart online and download it to a blank microSD Card. Visit chartselect.humminbird.com for more information and to download the ChartSelect User Guide. Encrypt a microSD Card Use the Encrypt SD Card menu to prepare a blank microSD card for ChartSelect.
- Page 119 Set up Humminbird LakeMaster When a Humminbird LakeMaster map card is installed and selected as the map source, additional menus are added to the menu system. The menu options are determined by the map card you purchased. Compatible Map Sources: Humminbird LakeMaster, LakeMaster PLUS, ZeroLine Map Card, AUTOCHART PC, etc. Visit our Web site at humminbird.com for compatibility details and updates.
- Page 120 Chart tab (see Customize the Chart View) and/or the Platinum tab. Compatible Map Sources: Navionics Gold, HotMaps, HotMaps Premium, and Platinum+. Visit our Web site at humminbird.com for compatibility details and updates.
-
Page 121: Customize The Bird's Eye View
’ USTOMIZE THE Navaids on Bird’s Eye View allows you to add navigational aids to the Bird’s Eye View, such as lights or buoys. The available settings are determined by the installed map card and the selected map source. Chart/Bird’s Eye Combo View Bird’s Eye View Chart View 3D view... -
Page 122: Customize The Chart Instrument View
USTOMIZE THE HART NSTRUMENT The Chart Instrument View displays a digital compass and XTE (Cross Track Error) graphic on the Chart View. If a compass is not installed, the COG (Course Over Ground) provides the data source for the digital compass. The Chart Instrument View shares the same menu settings as the Chart View. -
Page 123: Customize The Chart View
USTOMIZE THE HART The settings in this section are optional. You can use the default settings for the chart appearance and map source, or you can customize the Chart View. Customizing the Chart View course projection line set to COG/SOG latitude line shaded... - Page 124 Show/Hide the Course Projection Line The course projection line is an arrow or line extending from the bow of the boat icon. It projects the current course and shows where the boat will go if you continue on your present course. 1.
- Page 125 Customize the Chart Detail Level Use the following instructions to add or hide chart details and navaids on the Chart View and the Bird’s Eye View. Navionics Chart Displayed with Chart Detail set to Navigation navaid map scale chart info map border (dotted black line)
- Page 126 Select Custom Chart Layers 1. Main Menu (Advanced User Mode): Press the MENU key twice. Select the Chart tab. 2. Select Chart Detail Level. 3. Select Custom. 4. Press the DOWN Cursor key. 5. Select Custom Chart Layers. Press the RIGHT Cursor key. 6.
-
Page 127: Display Humminbird Lakemaster
NOTE: A Humminbird LakeMaster map card must be installed and selected as the map source to enable these features. For details and additional features related to your LakeMaster map card, visit our Web site at humminbird.com to download the accessory guide. - Page 128 Display or hide the water contour lines in the Chart View. This feature is also affected by the Water Level Offset setting. See Select a Map Source: Set up Humminbird LakeMaster. 1. Main Menu: Press the MENU key twice. Select the HB Chart tab.
-
Page 129: Change The Chart Orientation And Motion Mode
HANGE THE HART RIENTATION AND OTION The Chart View pans automatically so the boat is always centered on the view. The settings in this section allow you to change the chart orientation, zoom the view automatically, set the north reference, and see more or less of the view based on the speed or range setting. - Page 130 Set the Bearing North Reference North Reference allows you to have the bearing displayed as True North or Magnetic North. 1. Main Menu: Press the MENU key twice. Select the Nav tab. 2. Select North Reference. 3. Select True North or Magnetic North. Turn on/off Auto Zoom Turn on Auto Zoom to zoom the Chart View automatically based on the speed of the boat.
-
Page 131: Navigation Overview
There are many ways to start navigation or edit navigation data with your Humminbird control head. The instructions in this section review navigation features on the chart views. To use navigation features from the Waypoint Management dialog box, see Manage your Navigation Data. - Page 132 Shifting the Eye Point and Zooming in Bird’s Eye View boat icon ZOOM In ZOOM Out Exit Move the Eye Point Navigation Overview...
-
Page 133: Navigation Alarms Overview
AVIGATION LARMS VERVIEW When an alarm is turned on, an alert will sound or display on the control head to indicate the threshold has been exceeded. When you set the Off Course Alarm, Arrival Alarm, and Drift Alarm, the limits are shown on the Chart View. Turn on Alarms and Adjust Settings 1. -
Page 134: Man Overboard (Mob) Navigation
(MOB) N VERBOARD AVIGATION As soon as you know that you have a man overboard (MOB), activate Man Overboard navigation to maximize the chances for a successful rescue. Man Overboard navigation marks the approximate point where the person went overboard and starts continuous navigation toward the Man Overboard waypoint. - Page 135 When Man Overboard is activated, any current navigation will be cancelled and the current route will be discarded without notification. Man Overboard navigation will begin immediately, and you will see the following on the screen: Chart View: The view will switch to Chart View automatically. Man Overboard Waypoint: A waypoint is created at the boat’s current position, regardless of whether the chart cursor is active or not.
-
Page 136: Waypoints
AYPOINTS Waypoints are saved latitude/longitude positions. They mark a position of interest such as your favorite fishing area, structure, or marker buoy. The control head saves the position and allows you to edit the waypoint name, icon, and more (see Manage your Navigation Data). - Page 137 Show/Hide Waypoint Proximity Flags Waypoint flags show the distance from the boat (or active cursor) to each waypoint. If set to visible, the waypoint flags for the ten closest waypoints to the boat or cursor will be shown on the Chart View. 1.
- Page 138 Mark Waypoints Waypoints can be marked at the boat position or cursor position. To edit the waypoint, see Edit a Waypoint in the Chart View or Manage your Navigation Data. Mark a Waypoint at the Boat Position 1. Press the MARK key. Mark a Waypoint at the Cursor Position 1.
- Page 139 Select a Waypoint in the Chart View You can select a saved waypoint using the menu system or using the cursor on the Chart View. Select a Saved Waypoint on the Chart View 1. Use the Cursor Control key to move the cursor to a waypoint on the Chart View. Edit: Press the MENU key.
- Page 140 Edit a Waypoint You can edit a waypoint as you mark it or after it is saved. The instructions in this section show you how to edit a waypoint in the Chart View. To edit a waypoint or a group of waypoints from the Waypoint Management dialog box, see Manage your Navigation Data. Mark and Edit Waypoints (on-the-go) Use the instructions in this section to edit a waypoint as soon as you mark it.
- Page 141 Changing the Waypoint Name Move from Space to Space Select a Letter, Number, or Symbol Save 6. Save: Select Save. Press the RIGHT Cursor key. 7. Close: Press the EXIT key. Change the Waypoint Position in the Chart View 1. Use the Cursor Control key to move the cursor to a waypoint on the Chart View. 2.
- Page 142 Waypoint with Target Displayed selected waypoint target Remove a Target 1. Chart X-Press Menu: With a Chart View displayed on-screen, press the MENU key once. 2. Select Remove Target. Press the RIGHT Cursor key. Show/Hide a Waypoint Trolling Grid Use the instructions in this section to display a trolling grid on a selected waypoint. Display a Trolling Grid 1.
- Page 143 Delete a Waypoint in the Chart View Use the following instructions to select a waypoint and delete it. 1. Use the Cursor Control key to move the cursor to a waypoint on the Chart View. 2. Press the MENU key. 3.
- Page 144 Navigate to a Saved Position If you press the GOTO key, you can choose to start navigation from a list of saved waypoints and routes. 1. Press the GOTO key. 2. Select Nav Data. Press the RIGHT Cursor key. 3. Use the Cursor Control key to select a saved waypoint or route. 4.
-
Page 145: Routes
OUTES Routes link two or more waypoints together to create a path for navigation. A route represents your intended navigation and shows the shortest path from each data point to the next. The distance between each waypoint is a route leg. You can save 47 routes (with 50 waypoints each) to the control head. - Page 146 Save the Current Route A route must have at least two waypoints to be saved as a route. 1. Chart X-Press Menu: With a Chart View displayed on-screen, press the MENU key once. 2. Select Save Current Route. Press the RIGHT Cursor key. 3.
- Page 147 Reset XTE (Cross Track Error) Use Reset XTE to recalculate the cross track error (XTE) from the boat’s current position to the next waypoint in the route. For example, if you’ve deviated from a route to navigate around an island, select Reset XTE to update the control head’s course calculations from the current boat position instead of from the previous waypoint in the route.
- Page 148 Selecting a Saved Route on the Chart View cursor digital readouts selected route name current track selected route (red) Select a Waypoint Open the Go To Menu on a Route Navigate to a Saved Position If you press the GOTO key, you can choose to start navigation from a list of saved waypoints and routes. 1.
- Page 149 Edit a Saved Route You can edit the route name and display it or hide it on the Chart View. To edit routes from the Waypoint Management dialog box, see Manage your Navigation Data. 1. Use the Cursor Control key to move the cursor to a waypoint on the route. Press the MENU key. If the route was saved recently, you don’t have to select it first.
-
Page 150: Tracks
RACKS A track is a collection of track points that contains the boat’s detailed position history at set intervals. The Current Track shows the position history since the control head was powered on. You can clear the Current Track or save it at any time. To change the track point interval, edit saved tracks, and create track settings, see Manage your Navigation Data. - Page 151 3. Use the Cursor Control key to change the following: To show all tracks on the chart, select Visible. To hide tracks, select Hidden. If you choose Visibility Hidden, the control head continues to save trackpoints, but the track will not be displayed on the view.
- Page 152 Clear the Current Track Use the following instructions to clear the current track on the view and start a new track at the present boat position. 1. Chart X-Press Menu: With a Chart View displayed on-screen, press the MENU key once. 2.
-
Page 153: Search
EARCH There are many ways to search the area for ports, tide stations, and current stations. You can also search for information based on the cursor position. The search options and the search area distance are determined by the installed map card and selected map source. - Page 154 Use this menu to display a lake other than your current location. The lake map displayed on the Chart View is based on the GPS latitude/longitude position and the Humminbird LakeMaster map card installed in the control head. GPS reception is required for the correct lake to be displayed.
-
Page 155: Manage Your Navigation Data
ANAGE YOUR AVIGATION Your control head allows you to start navigation or edit your navigation data from the Chart View. You can also start navigation or edit navigation data from the Waypoint Management dialog box. The instructions in this section apply to the Waypoint Management dialog box. - Page 156 Selecting Files in the Waypoint Management Dialog Box (Waypoints, Routes, Tracks) selected file (highlighted in yellow) selected file preview waypoint route track Directory: Bass08 is the selected group information and instructions Scroll through the List Open a Menu Go Back Manage your Navigation Data...
- Page 157 Jump to the Top The Options menu, and other important actions, are located at the top of the Waypoint Management dialog box. Use these instructions to quickly select Options or jump to the top. 1. Press the EXIT key. Selecting Options (Jump to the Top) Options Directory: Bass08 is the selected group...
-
Page 158: Manage Waypoints
Manage Waypoints When you press the MARK key and create a new waypoint, an alphanumeric name (beginning with WP) is assigned to the waypoint. You can use the Waypoint Management dialog box to edit the saved waypoint or create a new waypoint. You can also select a waypoint icon and category for all new waypoints. - Page 159 Editing a Waypoint icon category changing the icon visibility latitude longitude save waypoint information Edit a Saved Waypoint 1. Select a waypoint. Press the RIGHT Cursor key. 2. Select Edit. Press the RIGHT Cursor key. 3. Use the Cursor Control key to edit the available fields. Select the file name, and press the RIGHT Cursor key.
- Page 160 Changing the Waypoint Name Move from Space to Space Select a Letter, Number, or Symbol Save Create a New Waypoint Use the following instructions to create a new waypoint and add your own settings. To mark a waypoint in Chart View, see Navigation Overview: Waypoints.
- Page 161 Set the Waypoint Icon Default Use the following instructions to set the waypoint icon category and the waypoint icon for all new waypoints. NOTE: If the Waypoint Management dialog box is open, press the EXIT key to close the dialog box, and proceed with the following instructions.
-
Page 162: Manage Routes
Manage Routes You can edit your saved routes, and you can also create new routes from scratch using your saved waypoints. Route names are alphanumeric and begin with RT. Open the Route Submenu 1. Select a route from the Waypoint Management dialog box. Press the RIGHT Cursor key. 2. - Page 163 Open a Saved Route 1. Select a route. Press the RIGHT Cursor key. 2. Select Open. Press the RIGHT Cursor key. Opening a Saved Route waypoint order (first to last) Directory: RT002 is the selected route Review Route Distance Information Use the instructions in this section to open a saved route and review the distance and bearing from each waypoint to the next.
- Page 164 Travel a Saved Route 1. Select a route. Press the RIGHT Cursor key. 2. Select Travel. Press the RIGHT Cursor key. 3. Select Forward or Reverse. Press the RIGHT Cursor key. Navigation begins immediately. The Waypoint Management dialog box will close so you can see the route on the Chart View. Edit a Saved Route You can customize a route name, add or remove waypoints, and change the travel order for navigation.
- Page 165 Create a New Route 1. Open a Group: Select a group (where you want to save the new route). Press the RIGHT Cursor key. Home is the highest level group, or the main directory, in the Waypoint Management dialog box. 2.
- Page 166 Adding Waypoints to a Route sort files next steps selected waypoint (highlighted in yellow) Directory: Bass08 is the selected group instructions Scroll through the List Select Add Waypoints to a Route When you add a waypoint to a route, it is a copy. If you make changes to the copy, the changes will be made to all copies. 1.
- Page 167 Delete a Waypoint from a Route 1. Select a route. Press the RIGHT Cursor key. 2. Select Open. Press the RIGHT Cursor key. 3. Select a waypoint in the route. Press the RIGHT Cursor key. 4. Select Delete. Press the RIGHT Cursor key. 5.
- Page 168 Changing the Route Order (Moving a Waypoint) move a waypoint up or down in the route order Directory: RT002 is the selected route instructions Select the Waypoint Move the Waypoint Up or Down Confirm the New Location Manage Routes...
-
Page 169: Manage Tracks
Manage Tracks Save and edit your tracks with the Waypoint Management dialog box. Track names are saved with a date and time stamp. The Tracks submenu allows you to edit the track name, appearance, and the track visibility. You can also move tracks from one group to another group. - Page 170 Edit a Saved Track Use the following instructions to edit a saved track. To edit the current track, see Navigation Overview: Tracks. 1. Select a track. Press the RIGHT Cursor key. 2. Select Edit. Press the RIGHT Cursor key. 3. Use the Cursor Control key to edit the available fields. Select the file name, and press the RIGHT Cursor key.
-
Page 171: Manage Groups
Manage Groups Use groups to organize your waypoints, routes, and tracks in one set. Some anglers prefer to group their navigation items by trip, fish-type, body of water, or time of day. New group names are alphanumeric and begin with GP, and you can edit the name. NOTE: Groups and sub-groups use storage. - Page 172 Set a Group as the Default Directory To save all your new waypoints, routes, and tracks to a designated group, use the following steps: 1. Select a group. Press the RIGHT Cursor key. 2. Select Open. Press the RIGHT Cursor key. 3.
- Page 173 Adding Items to a Group sort files next steps instructions Scroll Up or Down Add/Remove Navigation Items 1. Select a group. Press the RIGHT Cursor key. 2. Select Add/Remove. Press the RIGHT Cursor key. The menu will close. 3. Add: Press the UP or DOWN Cursor keys to choose a waypoint, route, or track. Press the RIGHT Cursor key to add it to the group.
- Page 174 Edit a Group 1. Select a group. Press the RIGHT Cursor key. 2. Select Edit. Press the RIGHT Cursor key. 3. Use the Cursor Control key to edit the available fields. Select the file name, and press the RIGHT Cursor key. See the illustration Changing the Group Name Name.
-
Page 175: Search And Organize
The Waypoint Management dialog box allows you to move your waypoints, routes, and tracks into a designated group, make copies, and search for information. You can also organize your navigation items in HumminbirdPC (see Import/Export Navigation Data), and visit our Web site at humminbird.com for details. Search By Search By allows you to search the items in the Waypoint Management dialog box by Name, Distance, Date, Icon, or Icon Category. - Page 176 Selecting Multiple Waypoints sort files next steps selected waypoints (highlighted in yellow) Directory: Bass08 is the selected group instructions Scroll Up or Down Select Create a Copy and Save as a New Item Use the instructions in this section to copy a waypoint, route, or track and save it as a separate item. The new item retains the properties from the original, but it will not be affected by changes to the original.
-
Page 177: Import/Export Navigation Data
Use the following instructions to import waypoints, routes, tracks, and groups into your Humminbird control head. The control head will import Humminbird navigation data from an installed microSD card. If the navigation data is from another source or format, it must be converted (using HumminbirdPC) before you can import it. -
Page 178: Autochart Live Overview
ZeroLine Map Card for unlimited mapping. ZeroLine Map Card: To purchase a ZeroLine Map Card and download the accessory guide, visit our Web site at humminbird.com. More Information: Visit our Web site for informational videos. -
Page 179: Prepare The Control Head For Mapping
Set the Map Source AutoChart Live can be used when a Humminbird LakeMaster or Navionics map card is installed and selected as the map source. When you install a map card, the map source is changed automatically to match the microSD card map source. You can also change the map source manually. - Page 180 Confirm Digital Depth and GPS Fix 1. Display a Chart View on-screen. 2. Confirm Digital Depth: Confirm the depth digital readout is displayed. It may take a moment for depth to be displayed. 3. Confirm GPS Fix: Confirm the speed digital readout is displayed. NOTE: Digital readouts can be displayed as an overlay, or they can be displayed in data boxes (see Views: Display Digital Readouts).
- Page 181 Use Different Views: To use different views on the control head and continue recording, press the EXIT key. Not Available: Taking screen snapshots and playback mode are not available during recording. NOTE: For more information, see Screen Snapshots and Recordings. Also, visit our Web site at humminbird.com to purchase AutoChart PC and download the manual.
-
Page 182: Record Your Custom Map
2. R ECORD YOUR USTOM 1. Preparation: Before you start mapping for the day, confirm that the control head is set up as shown in the section Prepare the Control Head for Mapping. 2. Chart X-Press Menu: With a Chart View displayed on-screen, press the MENU key once. 3. - Page 183 Collecting Data for your AutoChart Live Map depth map scale contour lines (black lines) depth depth map in progress boat icon current track (red line) AutoChart Live...
-
Page 184: Stop Recording
3. S ECORDING Use the instructions in this section to stop recording. Your map is automatically saved to the control head (internal) or to the ZeroLine Map Card if it is installed. 1. Chart X-Press Menu: With a Chart View displayed on-screen, press the MENU key once. 2. -
Page 185: Display/Hide Your Custom Map
ISPLAY IDE YOUR USTOM The custom map can be displayed or hidden while you are recording or after the map is saved. You can also adjust the transparency. Display the Map 1. Chart X-Press Menu: With a Chart View displayed on-screen, press the MENU key once. 2. -
Page 186: Adjust The Map Display Settings
DJUST THE ISPLAY ETTINGS Use the AutoChart Live menu to adjust the depth range, contour interval, and map position. Some of the menu options in this section may be displayed in other parts of the menu system so that you can access them quickly. No matter where you make the change, the control head will update the setting across the system. - Page 187 Display Contour Lines and Adjust the Contour Interval You can display or hide the contour lines on the map, and you can adjust the distance between each contour line. Contour Interval is also affected by the Water Level Offset setting. 1.
- Page 188 Change the Map Position The custom map will be displayed on-screen based on the Map Position setting. While you are recording a map, the Map Position should be set to Auto. 1. From the AutoChart Live menu, select Map Position. 2.
- Page 189 Add Settings with Chart Options You can also add adjustments to your custom map using the HB Chart menu. For example, if Humminbird is set as the map source, you can add Depth Colors, Shallow Water, etc. to your AutoChart Live map. See Display Humminbird LakeMaster Contour Lines and Depth Ranges.
-
Page 190: Manage Your Control Head
ANAGE YOUR ONTROL Select an Installed GPS Receiver The GPS Receiver Override menu is available when more than one GPS receiver is installed and detected by the control head. If GPS Receiver Override is set to Auto, the control head will select a GPS receiver automatically. To manually select a GPS receiver, follow the instructions in this section. - Page 191 NMEA-compatible device, such as an autopilot. See the accessory guide for details. Accessory guides can be downloaded from our Web site at humminbird.com. 1. Main Menu (Advanced User Mode): Press the MENU key twice. Select the Setup tab.
- Page 192 NOTE: The Timer can be displayed as a digital readout. See Views: Display Digital Readouts. Change the Display Language The available languages are determined by your Humminbird model. WARNING! Do NOT enable Asian Mode if you do not require Asian languages. Before you select Asian Mode, contact Customer Service for important information.
- Page 193 Apply an Offset to a Digital Readout Use the following instructions to adjust the digital readout by the offset amount entered. 1. Main Menu (Advanced User Mode): Press the MENU key twice. Select the Setup tab. 2. Select one of the following menus. Use the RIGHT or LEFT Cursor keys to adjust the offset. Adjusts the depth digital readout by the amount entered.
- Page 194 Adjust the Backlight 1. Press the POWER key. 2. Select Light. 3. Adjust the Backlight setting from Dim to 10 (brightest). Start Standby Mode To conserve power while the control head is not in-use, start Standby mode. 1. Press the POWER key. 2.
-
Page 195: Update Software
OFTWARE Set up an online account at humminbird.com so that you will receive the latest Humminbird news and software updates for your Humminbird model. You can also download HumminbirdPC from your account, which allows you to manage your waypoints, routes, and tracks on your personal computer. -
Page 196: Maintenance
Humminbird continues to deliver top performance. Control Head Maintenance It is important to consider the following precautions when using your Humminbird control head: • Chemicals, such as those found in bug spray and sunscreen, may cause permanent damage to the control head screen. Such damage is not covered by the warranty. -
Page 197: Troubleshooting
ROUBLESHOOTING Before contacting Humminbird Customer Service, please read the following section. Taking the time to review these troubleshooting guidelines may allow you to solve a performance problem yourself, and therefore avoid sending your unit back for repair. Control Head Doesn’t Power Up If your control head doesn’t power up, use the installation guide to confirm the following:... - Page 198 Display Problems There are several main conditions or sources of possible interference that may cause problems with the quality of the information displayed on the control head. Look in the following table for some symptoms of display problems and possible solutions: Display Problems Possible Solutions If the power output of your boat’s engine is unregulated, the control head may be...
-
Page 199: Specifications
Power Output (MAX) ............. . 500 Watts (RMS), 4000 Watts (Peak to Peak) NOTE: Humminbird verifies maximum stated depth in saltwater conditions, but actual depth performance may vary due to transducer installation, water type, thermal layers, bottom composition, and slope. - Page 200 Power Output (MAX) ............. . 500 Watts (RMS), 4000 Watts (Peak to Peak) NOTE: Humminbird verifies maximum stated depth in saltwater conditions, but actual depth performance may vary due to transducer installation, water type, thermal layers, bottom composition, and slope.
- Page 201 Power Output (MAX) ............. . 500 Watts (RMS), 4000 Watts (Peak to Peak) NOTE: Humminbird verifies maximum stated depth in saltwater conditions, but actual depth performance may vary due to transducer installation, water type, thermal layers, bottom composition, and slope.
- Page 202 Power Output (MAX) ............. . 500 Watts (RMS), 4000 Watts (Peak to Peak) NOTE: Humminbird verifies maximum stated depth in saltwater conditions, but actual depth performance may vary due to transducer installation, water type, thermal layers, bottom composition, and slope.
- Page 203 Power Output (MAX) ............. . 500 Watts (RMS), 4000 Watts (Peak to Peak) NOTE: Humminbird verifies maximum stated depth in saltwater conditions, but actual depth performance may vary due to transducer installation, water type, thermal layers, bottom composition, and slope.
- Page 204 HELIX 5 GPS G2 Control Head Display Size (diagonal) ..................5 inches (127 mm) Pixel Matrix .
- Page 205 HELIX 5 Control Head Measurements HELIX 5 Gimbal Mount 7.55 in (191.77 mm) VIEW 4.28 in 4.64 in MENU (108.71 mm) (117.86 mm) MARK EXIT GOTO 2.90 in (73.66 mm) 3.30 in (83.82 mm) Specifications...
- Page 206 HELIX 5 In-Dash Mount 7.55 in (191.77 mm) VIEW 4.28 in MENU (108.71 mm) MARK EXIT GOTO 2.90 in (73.66 mm) 2.17 in (55.12 mm) Specifications...
- Page 207 Power Output (MAX) ............. . 500 Watts (RMS), 4000 Watts (Peak to Peak) NOTE: Humminbird verifies maximum stated depth in saltwater conditions, but actual depth performance may vary due to transducer installation, water type, thermal layers, bottom composition, and slope.
- Page 208 Power Output (MAX) ............. . 500 Watts (RMS), 4000 Watts (Peak to Peak) NOTE: Humminbird verifies maximum stated depth in saltwater conditions, but actual depth performance may vary due to transducer installation, water type, thermal layers, bottom composition, and slope.
- Page 209 Power Output (MAX) ............. . 500 Watts (RMS), 4000 Watts (Peak to Peak) NOTE: Humminbird verifies maximum stated depth in saltwater conditions, but actual depth performance may vary due to transducer installation, water type, thermal layers, bottom composition, and slope.
- Page 210 Power Output (MAX) ............. . 500 Watts (RMS), 4000 Watts (Peak to Peak) NOTE: Humminbird verifies maximum stated depth in saltwater conditions, but actual depth performance may vary due to transducer installation, water type, thermal layers, bottom composition, and slope.
- Page 211 HELIX 7 GPS G2 Control Head Display Size (diagonal) ..................7 inches (178 mm) Pixel Matrix .
- Page 212 HELIX 7 Control Head Measurements HELIX 7 Gimbal Mount 10.54 in (267.72 mm) 5.44 in 5.80 in (138.18 mm) (147.32 mm) 2.97 in (75.44 mm) 3.60 in (91.44 mm) Specifications...
- Page 213 HELIX 7 In-Dash Mount 10.54 in (267.72 mm) 5.44 in (138.18 mm) 2.97 in (75.44 mm) 2.17 in (55.12 mm) Specifications...
- Page 214 Eufaula, AL 36027 *NOTE: A copy of the Linux operating system is not required to upgrade your fishing system. The Humminbird application software and control head include a separate service warranty. Please see humminbird.com and the separate warranty card included with your unit for details.
-
Page 215: Contact Humminbird
ONTACT UMMINBIRD Contact Humminbird Customer Service in any of the following ways: Web site: humminbird.com E-mail: service@humminbird.com Telephone: 1-800-633-1468 Direct Shipping: Humminbird Service Department 678 Humminbird Lane Eufaula, AL 36027 USA Hours of Operation: Monday - Friday 8:00 a.m. to 4:30 p.m. (Central Standard Time) Social Media Resources: Facebook.com/HumminbirdElectronics...