
Related Manuals for Pentax Optio 33LF


Summary of Contents for Pentax Optio 33LF
- Page 1 Digital Camera Operating Manual For optimum camera performance, please read this Operating Manual before using the camera.
- Page 2 Regarding copyrights Images taken using the Optio 33LF that are for anything other than personal enjoyment cannot be used without permission according to the rights as specified in the Copyright Act. Please take care, as there are even cases where limitations are placed on taking pictures even for personal enjoyment during demonstrations, industrial enterprise or as items for display.
-
Page 3: For Your Safety
• If the camera emits smoke or a strange smell, or in the event of any other irregularity, stop using the camera immediately, remove the battery or disconnect the AC adapter and contact your nearest Pentax service center. Continued use of the camera may result in fire or electric shock. -
Page 4: Handling The Camera
(such as at a wedding or during traveling). • Pentax is not responsible for consequential damages (costs incurred as a result of taking pictures, loss of benefits that were to be obtained through taking pictures) arising from failure of this product. - Page 5 • Do not use the camera where it may come in contact with rain, water or any other liquid, because the camera is not weather, water, or liquid resistant. Should the camera get wet from rain, splashing water, or any other liquid, wipe it off immediately with a dry soft cloth.
-
Page 6: Table Of Contents
Contents FOR YOUR SAFETY...1 Handling the Camera...2 Contents ...4 Contents of This Manual...7 Checking Package Contents ...8 Names of Parts...9 Names of Operating Parts ...10 Getting Started Attaching the Strap...11 Powering the Camera ...12 Installing the Batteries ...12 Using the AC Adapter...14 Inserting / Removing the SD Memory Card / MultiMediaCard ...15 Swiveling the LCD Monitor (Flexible LCD Monitor) ...18 Turning the Camera On and Off ...19... - Page 7 Selecting the Flash Mode ...42 Selecting the Recorded Pixels...43 Selecting the Quality Level ...44 Adjusting the White Balance...45 Setting the Focusing Area ...47 Setting the Light Metering Range ...48 Setting the Sensitivity ...49 Setting the Instant Review Time...50 Setting the Image Sharpness ...50 Setting the Color Saturation ...51 Setting the Image Contrast...51 EV Compensation...52...
- Page 8 Turning the Operation Sound On and Off...87 Changing the Date Style and Date / Time ...87 Setting the World Time ...88 Changing the Display Language ...89 Setting the Screen Effect...90 Setting the Background Color...90 Setting Auto Power Off ...91 Setting the LCD Monitor Brightness ...91 Selecting the Video Output Format ...92 Changing the Start-up / Shutdown Screen ...92 Setting Custom Functions to the Four-way Controller ...93...
-
Page 9: Contents Of This Manual
Contents of This Manual This operating manual contains the following chapters. 1 Getting Started ––––––––––––––––––––––––––––––––––––––––– Explains what you need to do after purchasing the camera and before you start taking pictures. Be sure to read it and follow the instructions. 2 Quick Start–––––––––––––––––––––––––––––––––––––––––––––... -
Page 10: Checking Package Contents
Checking Package Contents Camera Strap Software Optio 33LF O-ST5 (*) (CD-ROM) S-SW12 Video cable USB cable AA alkaline I-VC2 (*) I-USB2 (*) batteries (2) Operating Manual Operating Manual (this manual) (PC Connection Manual) * Items marked with (*) are also available as optional accessories. -
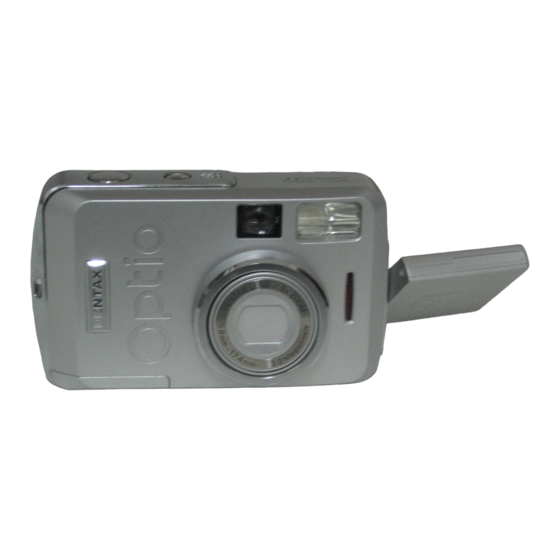
Page 11: Names Of Parts
Names of Parts Front Back Shutter release button Power switch Viewfinder Built-in flash Terminal cover PC / AV terminal DC input terminal Self-timer lamp Lens Viewfinder Focus status lamp (Green) Flash status lamp (Red) Strap lug LCD monitor Card cover Battery cover Tripod socket... -
Page 12: Names Of Operating Parts
Names of Operating Parts Guide display A button operation guide appears on the LCD monitor during operation. The buttons are indicated as shown below. Four-way controller(2) Four-way controller(3) Four-way controller(4) Four-way controller(5) OK button MENU button Zoom / f / y button (Digital zoom and magnified playback only) i button... -
Page 13: Getting Started
Getting Started Attaching the Strap Pass the narrow end of the strap through the strap lug, and attach as shown. -
Page 14: Powering The Camera
Powering the Camera (Using AA batteries) Installing the Batteries Install batteries in the camera. Use two AA alkaline, AA lithium or AA Ni- MH batteries or use one CR-V3 battery. Slide the battery cover in the direction and flip open. Insert the batteries according to the +- indicator in the battery chamber. -
Page 15: Battery Level Indicator
Approx. 250 AA Ni-MH AA alkaline batteries • These figures are based on PENTAX measuring conditions. Results may vary depending on the capture mode and shooting conditions. • Battery performance temporarily deteriorates as the temperature decreases. When using the camera in cold climates, have extra batteries on hand, keeping them warm in your pocket. -
Page 16: Using The Ac Adapter
Using the AC Adapter When using the LCD monitor for a long time or when connecting the camera to your PC, use of the AC adapter D-AC5 (sold separately) is recommended. Make sure the camera is turned off before opening the terminal cover. -
Page 17: Inserting / Removing The Sd Memory Card / Multimediacard
Inserting / Removing the SD Memory Card / MultiMediaCard Removing You can use an SD Memory Card and MultiMediaCard with this camera. Captured images are recorded on the SD Memory Card / MultiMediaCard if a card is inserted, or in the Bult-in memory if no card is inserted. - Page 18 Card. • Maximum movie picture length when using a MultiMediaCard is 30 seconds. • These figures are based on PENTAX standard shooting conditions, and may vary depending on factors such as the subject, shooting conditions, capture mode, and SD Memory Card / MultiMediaCard used.
- Page 19 • The PENTAX website provides a list of SD Memory Cards and MultiMediaCards that have been checked for compatibility with the camera. Inquiries on card compatibility can also be answered by your nearest PENTAX service center.
-
Page 20: Swiveling The Lcd Monitor (Flexible Lcd Monitor)
270 degrees vertically. • Protect your LCD monitor when your digital camera is not in use by swiveling it to the back (PENTAX Optio logo is on the front) for storage. Do not apply excessive force when rotating the LCD monitor. -
Page 21: Turning The Camera On And Off
Turning the Camera On and Off Press the power switch. The camera will turn on. The lens cover opens and the lens extends. Press the power switch again to turn the camera off. Playback Only Mode Press the power switch while pressing the Playback button activates the Playback Only mode. -
Page 22: Initial Settings
Initial Settings When the initial settings screen appears when you turn the camera on, follow the procedure below to set the display language, Home Town, DST, and current date and time. When the date and time that appear at the bottom right of the LCD monitor when you playback the image quickly after taking a picture is not the current time, follow the instructions for “Changing the Date Style and Date / Time”... -
Page 23: Setting The Home Town
Setting the Home Town You can choose the city (Home Town) in which you will use the camera. Press the four-way controller (45) to select the desired city (Home Town). Press the four-way controller (3). The screen for setting the DST will be displayed. -
Page 24: Setting The Video Output Format
Setting the Video Output Format You can choose the output format (NTSC or PAL) for taking or playing back pictures using a TV monitor. Use the four-way controller (45) to select the video output format. The default setting is NTSC. Press the OK button. - Page 25 Press the four-way controller (5). 23 are displayed above and below the month. Use the four-way controller (23) to change the month. Press the four-way controller (5). 23 are displayed above and below the date. Use the four-way controller (23) to set the date and press the four-way controller (5) again.
-
Page 26: Quick Start
Viewfinder This is the simplest way to take still pictures. The flash discharges automatically depending on the light conditions. Press the power switch. The camera will turn on. Screen is displayed for 1 second, and then the capture screen Confirm the subject and shooting information on the LCD monitor. -
Page 27: Pressing Halfway
Press the shutter release button halfway. The focus frame and the focus status lamp (green) light when the camera is in focus. Press the shutter release button completely. The captured image is displayed on the LCD monitor for 0.5 seconds (instant review). -
Page 28: Playing Back Still Pictures
Playing Back Still Pictures Playing Back Images To play back still pictures: Press the Playback button Q after taking a picture. The captured image is displayed on the LCD monitor. Rotating a Displayed Image Press the four-way controller (3). The image will rotate clockwise 90°, 180°... -
Page 29: Playing Back Previous Or Next Images
Playing Back Previous or Next Images Still images can be played back one at a time, proceeding either forward or backward. Press the Playback button Q after taking a picture. The image will be displayed on the LCD monitor. Press the four-way controller (45). Displays the previous image. -
Page 30: How To View The Recorded Images
Viewing Images on the Camera One of the advantages of a digital camera is that you can check the picture as soon as you take it. You can check the composition and brightness, and take the picture again if you are not satisfied. - Page 31 SD Memory Card / MultiMediaCard, please read the operating manual for your equipment.) 1 Booklet: “Viewing Your Digital Camera Images On Your PC” Printing Images at a Printing Service You can order conventional photograph prints by taking the SD Memory Card / MultiMediaCard with recorded images to a store that performs printing.
-
Page 32: Common Operations
Common Operations Using Button Functions Capture Mode bbutton Changes the flash mode. (1 p.42) gj button Selects self-timer mode or continuous shooting mode. (1 p.63, 66) ) button Changes the Capture mode as follows. (1 p.40) Macro mode, infinity-landscape mode, Manual focus mode Zoom button Changes the size of the subject. -
Page 33: Playback Mode
Playback Mode Z button Prevents image deletion and protected images display. (1 p.78) DPOF button Sets DPOF settings. (1 p.81) i button Deletes the image. (1 p.76) Zoom / f / y button Displays nine images at once when f is pressed in Standard Playback mode. -
Page 34: Using The Menus
Using the Menus When you press the MENU button, the menus are displayed on the LCD monitor. You can use these to set functions, save settings and change camera settings. How to Set the Menus A button operation guide is displayed on the LCD monitor during menu operation. - Page 35 Example of Menu Operation (Pressing the MENU Button in Capture Mode) MENU button [A Rec. Mode] Menu Rec. Mode Recorded Pixels 2048 1536 Quality Level White Balance Focusing Area Wide AE Metering Sensitivity Auto MENU Exit Rec. Mode Recorded Pixels 2048 1536 Quality Level...
-
Page 36: Enlarging A Menu Display
Enlarging a Menu Display Pressing the zoom button (x) while a menu is displayed will enlarge the menu. Press the zoom button (w) to return to the original display. Operation Example Rec. Mode Recorded Pixels 2048 1536 Quality Level White Balance Focusing Area Wide AE Metering... -
Page 37: Menu List
Menu List [A Rec. Mode] Menu … Setting changes are enabled (for * functions, settings changes in Picture modes are disabled). × … Setting changes are disabled. Item Description Recorded Selects the number of Pixels recorded pixels. Selects the image Quality Level compression rate. - Page 38 [Q Playback] Menu Item Slideshow Plays recorded images successively. Displays / hides files set as protected Protected Image images. Copies files between the internal Copy Image memory and the SD Memory card / MultiMediaCard. When set to ON, the playback image magnification switches to 1×, 2×, 4×, Quick Zoom 8×...
-
Page 39: Taking Pictures
Taking Pictures Setting the Shooting Functions Switching Between Modes Capture mode is for taking pictures and playback mode is for playing back or erasing images. Switching between Capture Mode and Playback Mode • Press the Playback button to switch from Capture mode to Playback mode. •... -
Page 40: Displaying Shooting Information In Capture Mode
Displaying Shooting Information in Capture Mode The LCD monitor can be changed by pressing the OK button. Normal display Shooting information is displayed when the power is turned on. 1 Flash 2 Shooting mode 3 Focus mode 4 Capture mode 5 AF frame 6 Card / internal memory 7 Capacity remaining 8 Battery indicator Histogram display... - Page 41 No information display Shooting information is not displayed. • The AF frame is displayed in autofocus, and q. • Settings are displayed for several seconds when changed. LCD monitor off Turns the LCD monitor off. (The LCD monitor is not turned off in Playback mode.) When the LCD monitor is off, the camera will automatically switch to normal display when you switch to q, z.
-
Page 42: Selecting The Focus Mode
Selecting the Focus Mode Focus Mode (No icon) Autofocus Macro Infinity-landscape Manual focus Press the ) button in Capture mode. The focus mode will change each time it is pressed and the current setting will be displayed on the LCD monitor. The camera is ready to take the picture in the set focus mode. - Page 43 Manual Focus When you press the four-way controller (45) in z mode, the central portion of the picture is enlarged to full-screen on the LCD monitor. Adjust the focus with the four-way controller (45) while checking the image on the monitor. For distant focus For closer focus After the focus is set, press any buttons except the four-way controller...
-
Page 44: Selecting The Flash Mode
Selecting the Flash Mode (No icon) Automatic flash Flash Off Flash On Auto flash + Red- eye reduction Flash On + Red-eye reduction • The flash is off when the Capture mode is set to C, Continuous shooting or Infinity-Landscape. •... -
Page 45: Selecting The Recorded Pixels
Selecting the Recorded Pixels Select the number of recorded pixels from [2048 × 1536], [1600 × 1200], [1024 × 768] and [640 × 480]. The more pixels there are, the larger the image size and file size. The image file size will also differ according to quality level settings. 2048 ×... -
Page 46: Selecting The Quality Level
Selecting the Quality Level Select the image compression rate. The more E there are, the better the quality and the larger the file. The image file size will also differ according to Recorded Pixels settings. Best Better Good Select [Quality Level] on the [A Rec. Mode] menu. Use the four-way controller (45) to change the image quality. -
Page 47: Adjusting The White Balance
Adjusting the White Balance You can take pictures in natural colors by adjusting the white balance according to the light conditions at the time of shooting. Auto Daylight Shade Tungsten Light Fluorescent Light Manual Select [White Balance] on the [A Rec. Mode] menu. Press the four-way controller (5). - Page 48 Setting Manually Select [K] (Manual) on the White Balance selection screen. Point your camera at a blank sheet of paper so that it fills the screen. Press the OK button. The white balance is automatically adjusted, [Complete] appears on the LCD monitor and the display returns to the menu screen. Press the OK button.
-
Page 49: Setting The Focusing Area
Setting the Focusing Area You can change the autofocus area. Wide Normal range Spot The autofocus range becomes smaller. Select [Focusing Area] on the [A Rec. Mode] menu. Use the four-way controller (45) to change the setting. Press the OK button. The camera is ready to take the picture. -
Page 50: Setting The Light Metering Range
Setting the Light Metering Range You can select which part of the screen to use to measure the brightness and determine the exposure. Multi-segment Center-weighted Spot Select [AE Metering] on the [A Rec. Mode] menu. Use the four-way controller (45) to change the setting. -
Page 51: Setting The Sensitivity
Setting the Sensitivity You can select the Sensitivity to suit the brightness of the surroundings. Auto The camera makes the adjustment automatically. • The lower the sensitivity (smaller number), the sharper and more noise-reduced the image. Shutter speed will be slower in low light conditions. -
Page 52: Setting The Instant Review Time
Setting the Instant Review Time You can select the Instant Review display time from 0.5 sec., 1 sec., 2 sec., 3 sec., 5 sec., or OFF (no display). Select [Instant Review] on the [A Rec. Mode] menu. Use the four-way controller (45) to change the display time. -
Page 53: Setting The Color Saturation
Setting the Color Saturation You can set the color saturation. Select [Saturation] on the [A Rec. Mode] menu. Use the four-way controller (45) to select x (Normal), z (High), or y (Low). Press the OK button. The camera is ready to take the picture. Setting the Image Contrast You can set the image contrast. -
Page 54: Ev Compensation
EV Compensation You can take pictures that are intentionally over-exposed or under- exposed. Select [EV Compensation] on the [A Rec. Mode] menu. Use the four-way controller (45) to select the EV Compensation. Adjust the + side to over-expose and the – side to under-expose. -
Page 55: Taking Pictures
Taking Pictures When an SD Memory Card / MultiMediaCard has been inserted, all images are saved to the card. Images are saved to the internal memory when no card has been inserted. Taking Pictures With Set Functions (Program Mode) In Program mode (A), the camera automatically sets the shutter speed and aperture for taking still pictures. -
Page 56: Optimizing Pictures For The Scene Type (Picture Modes)
Optimizing Pictures for the Scene Type (Picture Modes) You can select the Picture mode according to the shooting scene. Picture Mode There are seven modes available in Picture mode. Landscape (Default Setting) Flower Portrait Self-Portrait Surf > Snow Sunset Press the four-way controller (23) in Capture mode. The Virtual mode dial appears. -
Page 57: Taking Self-Portraits
Press the OK button. The Picture mode is selected. Press the shutter release button. The picture will be taken. • In Picture mode, you also can press the shutter button halfway or press any button other than the four-way controller to set the selection. -
Page 58: Taking Dark Scenes (Night Scene Mode)
Taking Dark Scenes (Night Scene Mode) The settings in this mode are appropriate for taking dark scenes. Press the four-way controller (23) in Capture mode. The virtual mode dial appears. Use the four-way controller (23) to select the [Night Scene Mode (B)] Press the OK button. -
Page 59: Taking Movie Pictures (Movie Mode)
Taking Movie Pictures (Movie Mode) This mode enables you to take movie pictures. When using an SD Memory Card or the internal memory, you can continue recording until the memory becomes full. When using a MultiMediaCard, the maximum length of one recording (1 set) is approximately 30 seconds. - Page 60 Playing Back Movie Pictures 1 p.72 Movie pictures are saved in AVI (Motion JPEG) format. The software provided (ACDSee for PENTAX) lets you easily play back movie pictures on a PC. • The flash will not discharge in Movie mode.
-
Page 61: Taking Panorama Pictures (Panorama Assist Mode)
Taking Panorama Pictures (Panorama Assist Mode) Using the provided software (ACDSee for PENTAX), you can join multiple images and easily create panoramic photos. Use Panorama Assist mode to combine images taken so that edges overlap to create a single panoramic photo. - Page 62 (23) • You cannot use the camera itself to create panoramic images. Use the provided software (ACDSee for PENTAX) to join the pictures. For details on creating panorama images, see the separate booklet “Viewing Digital Camera Images on Your PC”.
-
Page 63: Taking Pictures With Filters (Digital Filter Mode)
Taking Pictures with Filters (Digital Filter Mode) You can take pictures with digital filters in a variety of colors, such as red, blue, and green. Filters Eight color filters are provided: black-and-white, sepia, red, green, blue, black-and-white + red, black-and-white + green, and black-and-white + blue. -
Page 64: Taking Pictures Continuously (Continuous Shooting)
Taking Pictures Continuously (Continuous Shooting) Pictures are taken continuously while the shutter release button is pressed. Press the gj button in Capture mode to display j on the LCD monitor. Press the shutter release button. Pictures will be taken continuously while the shutter release button is pressed. -
Page 65: Using The Zoom
Using the Zoom You can use the Zoom to take pictures in Tele or Wide mode. Press the Zoom button in Capture mode. x Tele: Subject becomes bigger. w Wide: Subject becomes smaller. When the digital zoom function is disabled, you can take pictures at up to 3 times magnification using the optical zoom. - Page 66 Enabling the Digital Zoom Function Press the MENU button in Capture mode. The [A Rec. Mode] menu will appear. Use the four-way controller (23) to select [Digital Zoom]. Use the four-way controller (45) to select [O (on)]. Press the OK button. The camera is ready to take the picture.
-
Page 67: Using The Self-Timer
Using the Self-Timer The picture will be taken either 10 seconds or 2 seconds after the shutter release button is pressed. Press the gj button in Capture mode to display g or r on the LCD monitor. Press the shutter release button. g The self-timer is engaged, and the self-timer lamp lights for about 7 seconds. -
Page 68: Saving The Settings
Saving the Settings Saving the Menu Items (Memory) You can choose whether or not to save the set values when the camera is turned off. If you select [O (On)], the camera saves the settings in effect just before the camera is turned off. If you select [P (Off)], the settings returns to the default setting when the camera is turned off. - Page 69 Press the MENU button in Capture mode. Use the four-way controller (23) to select [Memory]. Press the four-way controller (5). The [Memory] menu appears. Use the four-way controller (23) to select the item. Use the four-way controller (45) to select [O (on)] or [P (off)]. Press the OK button twice.
-
Page 70: Playback / Deleting
Playback / Deleting Playing Back Images When an SD Memory Card / MultiMediaCard has been inserted, images saved on the card are played back. Images are played back from the internal memory when no card has been inserted. Playing Back Still Pictures Refer to “Playing Back Images”... - Page 71 Turning Quick Zoom On and Off When Quick Zoom is set to on, pressing the zoom button (x) during magnified display will increase display magnification to 1×, 2×, 4×, 8× and 12×. Press the MENU button in playback mode. The [Q Playback] menu appears. Use the four-way controller (23) to select [Quick Zoom].
-
Page 72: Playing Back Movie Pictures
Playing Back Movie Pictures You can play back Movie pictures. A guide to operation appears on the LCD monitor during playback. In Playback mode, use the four-way controller (45) to select the image to play back. Press the four-way controller (2). Playback will start. -
Page 73: Displaying Shooting Information In Playback Mode
Displaying Shooting Information in Playback mode You can display an overlay of playback information on the LCD monitor. Press the OK button to switch between displayed information. Normal display Displays shooting information. 1 Playback mode 3 File number 4 Four-way controller operation guide 5 Shutter speed 7 Battery indicator 8 Date and time The four-way controller operation guide will... -
Page 74: Nine Image Display
Nine Image Display You can display nine images at the same time. In Playback mode, use the four-way controller (45) to select an image. Press w / f on the Zoom / f / y button. Up to nine small images will be displayed at once. -
Page 75: Slideshow
Slideshow You can continuously play back all images saved on an SD Memory Card / MultiMediaCard. When no card has been inserted, all images saved in the internal memory are continuously played back. In Playback mode, use the four-way controller (45) to select the first image for the slideshow. -
Page 76: Deleting Images
Deleting Images Deleting a Single Image In Playback mode, use the four-way controller (45) to select the image to delete. Press the i button. The Delete screen appears. Select [Delete] with the four-way controller (2). Press the OK button. • You can also delete displayed images in Instant Review (p.25). •... - Page 77 Turning Quick Delete On and Off When Quick Delete is set to on and the camera is in Delete (One) mode, the delete screen is displayed with [Delete] already selected. Press the MENU button in playback mode. The [Q Playback] menu appears. Use the four-way controller (23) to select [Quick Delete].
-
Page 78: Protecting Images From Deletion (Protect)
Protecting Images from Deletion (Protect) You can protect images from being accidentally erased. You also can prevent protected images from being displayed. In Playback mode, select the image to protect with the four-way controller (45). Press the Z button. The Protect screen appears. Select [Protect] with the four-way controller (23). - Page 79 Preventing Protected Images from Being Displayed Set whether protected images are to be displayed. Press the MENU button in playback mode. Use the four-way controller (23) to select [Protected Image]. Use the four-way controller (45) to switch between [Show] and [Hide]. Show : Protected files are displayed.
-
Page 80: Viewing Images On A Tv
Viewing Images on a TV By using the video cable, you can capture and play back images on a TV or monitor with a Video IN jack. Make sure that both the TV and the camera are turned off before connecting the cable. Open the terminal cover and connect the video cable. -
Page 81: Printing Service Settings (Dpof)
Printing Service Settings (DPOF) You can print the images on the SD Memory Card / MultiMediaCard using a DPOF (Digital Print Order Format) compatible printer, or at a printing service. Single Image Settings Set the following items for each image. •... - Page 82 Press the OK button. Prints can be made according to the settings. • If DPOF settings already exist for an image, the number of prints and the on / off date setting will be displayed. • To cancel DPOF settings, set the number of prints to 00 and press the OK button.
-
Page 83: Settings For All Images
Settings for All Images In Playback mode, press the DPOF button twice. The DPOF screen will be displayed. Use the four-way controller (45) to set the number of prints. The maximum setting is 99. Press the four-way controller (3). The frame will move to [Date]. Use the four-way controller (45) to select [O] or [P] for the date. -
Page 84: Copying Images
Copying Images Copies files between the internal memory and the SD Memory Card / MultiMediaCard. This function is not available when no card is inserted. When you copy from the internal memory to a memory card, all files are copied at once. When copying from a memory card to the internal memory, you can confirm each file you want to copy. - Page 85 Copying from the Internal Memory to a Memory Card Select [@ 5 ?] with the four-way controller. Press the OK button. All images are copied to the card. Copying from a Card to the Internal Memory Select [? 5 @] with the four-way controller.
-
Page 86: Settings
Settings Camera Settings How to recall the [B Set-up] menu Formatting Cards / Internal Memory Formatting will delete all the data on the SD Memory Card / MultiMediaCard. The internal memory is formatted when no card is inserted. • Do not remove the card during SD Memory Card / MultiMediaCard formatting. -
Page 87: Turning The Operation Sound On And Off
Turning the Operation Sound On and Off You can turn the operation sounds on and off. Select [Beep] on the [B Set-up] menu. Use the four-way controller (45) to select [O (on)] or [P (off)]. Press the OK button. The camera is ready for capture or playback. Changing the Date Style and Date / Time You can change the initial date and time settings. -
Page 88: Setting The World Time
How to recall the [B Set-up] menu Setting the World Time The date and time set in “Initial Settings” (p.20) are the Home Time (your usual time zone) setting. Setting World Time enables you to display the local date and time on the monitor when traveling overseas. -
Page 89: Changing The Display Language
Use the four-way controller (45) to select the World Time city, and press the four-way controller (3). Use the four-way controller (45) to select DST [O (on)] or [P (off)], and press the four-way controller (3). This sets Home Time city. When New York is selected as the Home Time city, use the four-way controller (45) to select your Home Time city, or turn DST On/Off. -
Page 90: Setting The Screen Effect
How to recall the [B Set-up] menu LCD monitor Setting the Screen Effect You can display various animated effects when switching display screens on the LCD monitor. Select [Screen effect] on the [B Set-up] menu. Use the four-way controller (45) to select [O (on)] or [P (off)]. -
Page 91: Setting Auto Power Off
Setting Auto Power Off You can set the camera to turn off automatically after a certain period of inactivity. Select [Auto Power Off] on the [B Set-up] menu. Use the four-way controller (45) to select [3 min.], [5 min.], or [Off]. Press the OK button. -
Page 92: Selecting The Video Output Format
How to recall the [B Set-up] menu Selecting the Video Output Format You can select the output format (NTSC or PAL) for capturing or playing back images on a TV monitor. Select [Video Out] on the [B Set-up] menu. Use the four-way controller (45) to select [NTSC] or [PAL], to match your TV output format. -
Page 93: Setting Custom Functions To The Four-Way Controller
Setting Custom Functions to the Four-way Controller You can register a frequently used function to the four-way controller (45). When taking pictures, you can press the four-way controller key (45) to set functions directly, without having to display the Rec. Mode menu. -
Page 94: Resetting To Default Settings [Reset]
How to recall the [B Set-up] menu Resetting to Default Settings [Reset] This resets all settings other than Date / Time, Language, Video Out, and World Time. Select [Reset] on the [B Set-up] menu. Press the four-way controller (5). The Reset screen will appear. Use the four-way controller (2) to select [Reset]. -
Page 95: Appendix
Appendix List of City Names The following are the cities and code names available for setting the World Time. Region City EUROPE Madrid London Paris Milano Rome Berlin Moscow AFRICA Johannesburg Cairo MIDDLE Istanbul EAST Jerusalem Jeddah Tehran Dubai Kabul ASIA Karachi Male... -
Page 96: Messages
Messages The following messages may appear on the LCD monitor during camera operation. Memory card full. Built-in Memory Full. No image Camera cannot display this image Battery depleted Memory card error Card not formatted Setting being recorded Formatting.. Deleting Image folder could not be created Settings not stored Cannot save image... -
Page 97: Optional Accessories
Optional Accessories The following optional accessories are available for this camera. AC Adapter D-AC5 USB Cable I-USB2 (included) Video cable I-VC2 (included) Camera Case O-CC5 Strap O-ST5 (included) -
Page 98: Troubleshooting
Troubleshooting Problem The camera will No batteries are not turn on installed Batteries is installed incorrectly Batteries is exhausted No image on The LCD monitor is the LCD turned off monitor Connected to a TV Image is displayed but hard to see Shutter release Flash is charging button will not... - Page 99 Problem Cause Out of focus Subject is difficult for Autofocus to handle Subject is not in Focusing Area Subject is too close The focus mode is on q When the focus mode is on q, normal Picture taken Subject is too far away with flash is in a dark environment dark...
-
Page 100: Main Specifications
Main Specifications Type Effective Pixels Sensor Recorded Pixels Sensitivity File Format Quality Level Storage Medium Image Storage Capacity Recorded Pixels 2048 × 1536 1600 × 1200 1024 × 768 640 × 480 • These figures show the number of shots when using a 16MB SD Memory Card. White Balance Lens Digital Zoom... - Page 101 Auto, Flash Off, Flash On, Auto+Red-eye reduction, Flash On+Red-eye reduction Wide Approx. 0.2 m to 5 m (at 5.8 mm, Sensitivity AUTO) Tele Approx. 0.1 m to 2.7 m (at 17.4 mm, Sensitivity AUTO) battery CR-V3, at 25°C) * Based on PENTAX measuring conditions.
-
Page 102: Warranty Policy
If the equipment is not covered by warranty, regular charges of the manufacturer or of its representatives will apply. Shipping charges are to be borne by the owner. If your PENTAX product was purchased outside of the country where you wish to have it serviced during the warranty period, regular handling and servicing fees may be charged by the manufacturer's representatives in that country. - Page 103 Therefore, we recommend that you review the warranty card supplied with your product at the time of purchase, or contact the PENTAX distributor in your country for more information and to receive a copy of the warranty policy.
- Page 104 For customers in USA STATEMENT OF FCC COMPLIANCE This device complies with Part 15 of the FCC Rules. Operation is subject to the following two conditions: (1) This device may not cause harmful interference, and (2) this device must accept any interference received, including interference that may cause undesired operation.
-
Page 105: Declaration Of Conformity
The above named party is responsible for ensuring that the equipment complies with the standards of 47CFR §15.101 to §15.109. Product Name: PENTAX Digital Still Camera Model Number: Optio 33LF Contact person: Customer Service Manager... - Page 106 JAPAN (http://www.pentax.co.jp/) Julius-Vosseler-Strasse, 104, 22527 Hamburg, GERMANY (HQ - http://www.pentaxeurope.com) (Germany - http://www.pentax.de) PENTAX House, Heron Drive, Langley, Slough, Berks SL3 8PN, U.K. (http://www.pentax.co.uk) 12/14, rue Jean Poulmarch, 95106 Argenteuil Cedex, FRANCE (for Netherlands) Spinveld 25, 4815 HR Breda, NETHERLANDS (http://www.pentax.nl)