Yamaha RX-V365 Owner's Manual
Hide thumbs
Also See for RX-V365:
- Service manual (100 pages) ,
- Owner's manual (85 pages) ,
- Specifications (2 pages)
Table of Contents
Advertisement
Available languages
Available languages
Advertisement
Chapters
Table of Contents

Related Manuals for Yamaha RX-V365


Summary of Contents for Yamaha RX-V365
- Page 1 RX-V365 AV Receiver OWNER’S MANUAL MANUAL DE INSTRUCCIONES...
- Page 2 12 Only voltage specified on this unit must be used. Using this unit with a higher voltage than specified is dangerous and may cause fire, damage to this unit, and/or personal injury. Yamaha will not be held responsible for any damage resulting from use of this unit with a voltage other than specified.
-
Page 3: Table Of Contents
Contents INTRODUCTION ADVANCED OPERATION Features..............2 Set menu ..............30 Supplied accessories ..........2 Using set menu............31 Functional overview..........3 1 SOUND MENU............ 31 2 INPUT MENU............33 Front panel ..............3 3 OPTION MENU ........... 34 Front panel display............. 4 Remote control features ........ -
Page 4: Introduction
◆ SCENE template customizing capability Check that you received all of the following parts. ❏ Remote control Sound field programs ◆ Proprietary Yamaha technology for the creation of surround ❏ Batteries (2) (AAA, R03, UM-4) field ❏ AM loop antenna ◆... -
Page 5: Functional Overview
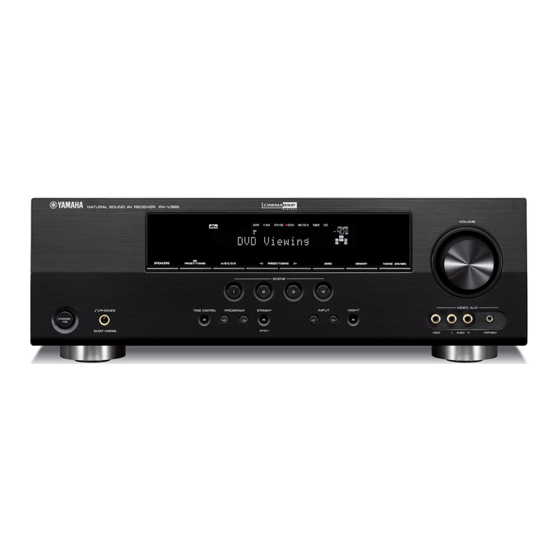
Functional overview Front panel VOLUME OPTIMIZER MIC EDIT SPEAKERS PRESET/TUNING A/B/C/D/E PRESET/TUNING BAND MEMORY TUNING AUTO/MAN'L SCENE VIDEO AUX PHONES TONE CONTROL PROGRAM STRAIGHT INPUT NIGHT STANDBY SILENT CINEMA EFFECT VIDEO AUDIO PORTABLE STANDBY/ON VOLUME control Turns on this unit, or sets it to standby mode (see page 15). Adjusts the volume level of this unit (see page 18). -
Page 6: Front Panel Display
Functional overview Front panel display V-AUX DTV/CBL MD/CD-R TUNER VOLUME AUTO TUNED STEREO MEMORY YPAO VIRTUAL SILENT CINEMA PRESET NIGHT SLEEP ENHANCER MUTE DIGITAL L C R Decoder indicator Input channel and speaker indicators Lights up when any of the decoders of this unit functions. LFE indicator ENHANCER indicator L C R... -
Page 7: Remote Control
Functional overview Remote control Press this button before you control this unit (see page 18). SCENE 1/2/3/4 Recalls an input source and a sound field program assigned to each SCENE button (see page 22). POWER POWER STANDBY POWER BAND LEVEL TITLE MUTE Selects the speaker that you want to adjust (see page 20). -
Page 8: Rear Panel
Functional overview Rear panel ANTENNA SPEAKERS SURROUND CENTER FRONT B DTV/CBL HDMI COMPONENT VIDEO DTV/CBL MONITOR DIGITAL INPUT VIDEO DTV/CBL MONITOR UNBAL. OPTICAL MULTI CH INPUT AUDIO OUTPUT DTV/CBL FRONT SURROUND CENTER (PLAY) CD-R (REC) DTV/ WOOFR COAXIAL FRONT A SUBWOOFER COMPONENT VIDEO jacks MULTI CH INPUT jacks... -
Page 9: Quick Start Guide
Quick start guide The following steps describe the easiest way to operate this unit. See the related pages for details on the operation and settings. Step 1: Check the items Step 3: Connect your components In these steps, you need the following items which are not Connect your TV, DVD player or other components. -
Page 10: Preparation
PREPARATION Preparation of remote control Installing batteries in the remote control Using the remote control The remote control transmits a directional infrared ray. Be sure to aim the remote control directly at the remote control sensor on this unit during operation. 30º... -
Page 11: Connections
Subwoofer (SW) FRONT A The use of a subwoofer with a built-in amplifier, such as the Yamaha Active Servo Processing Subwoofer System, is effective not only for reinforcing bass frequencies from any or all channels, but also for high fidelity sound reproduction of the LFE (low-frequency effect) channel included in Dolby Digital and DTS sources. - Page 12 Connections ■ Connecting to the FRONT A terminals Speakers Jacks on this unit a Front speaker (A) Right* FRONT A (R) b Front speaker (A) Left* FRONT A (L) c Surround speaker Right SURROUND (R) Red: positive (+) d Surround speaker Left SURROUND (L) Black: negative (–) e Center speaker...
-
Page 13: Connecting Video Components
Connections VIDEO jacks Connecting video components For conventional composite video signals transmitted via composite video cables. Information on jacks and cable plugs COMPONENT VIDEO jacks For component signals, separated into the luminance (Y) Audio jacks and cable plugs and chrominance (P ) video signals transmitted on separate wires of component video cables. -
Page 14: Connecting A Tv Monitor Or Projector
Connections Connecting a TV monitor or projector Make sure that this unit and other components are unplugged from the AC wall outlets. Note • If you turn off the video monitor connected to the HDMI OUT jack via a DVI connection, the connection may fail. In this case, the HDMI indicator flashes irregularly. -
Page 15: Connecting Other Components
Connections Connecting other components Connecting audio and video components This unit has three types of audio jacks, two types of video jacks and HDMI jacks. You can choose the connection method depending on the component to be connected. ■ Connecting example (connecting a DVD player) ANTENNA DTV/CBL HDMI... -
Page 16: Using The Video Aux Jacks On The Front Panel
Connections Component Signal type Jacks on component Jacks on this unit DVD recorder Video HDMI out* HDMI (DVR)* Video out (composite) VIDEO (DVR IN) Audio Audio out (analog)* AUDIO (IN (PLAY))* Audio recording Audio in (analog)* AUDIO (OUT (REC))* Video recording Video in (composite)* VIDEO (DVR OUT)* CD player... -
Page 17: Connecting The Fm And Am Antennas
AC wall outlet. indoor one. If you experience poor reception quality, install an outdoor antenna. Consult the nearest authorized Yamaha dealer or service center Improper setting of the VOLTAGE SELECTOR may about outdoor antennas. -
Page 18: Optimizing The Speaker Setting For Your Listening Room (Ypao)
Optimizing the speaker setting for your listening room (YPAO) This unit has the Yamaha Parametric Acoustic Optimizer (YPAO). With the YPAO, this unit automatically adjusts output characteristics of your speakers based on speaker positions, speaker performances, and acoustic characteristics of the room. - Page 19 Optimizing the speaker setting for your listening room (YPAO) ■ If an error screen appears Notes If this unit detects the potential problems, an error • During the automatic setup procedure, do not perform any message appears on the front panel display during the operation on this unit.
-
Page 20: Basic Operation
BASIC OPERATION Playback Rotate PVOLUME (or press mVOLUME +/–) Caution Extreme caution should be exercised when you play to adjust the volume to the desired output back CDs encoded in DTS. If you play back a CD level. encoded in DTS on a DTS-incompatible CD player, you will only hear some unwanted noise that may damage your speakers. -
Page 21: Additional Operations
Playback ■ Selecting the component connected to the Guide to contents MULTI CH INPUT jacks as the input source Use this feature to select the component connected to the When you want... See page MULTI CH INPUT jacks (see page 14) as the input source. -
Page 22: Using Audio Features
Playback Using audio features • Once you press jBAND LEVEL TITLE on the remote control, you can also select the speaker by pressing lk / n. Use the following features to adjust the audio output or • The available speaker channels differ depending on the speaker settings. - Page 23 Playback ■ Using the sleep timer Press ll / h to adjust the effect level while Use this feature to automatically set this unit to the “NIGHT:CINEMA” or “NIGHT:MUSIC” is standby mode after a certain amount of time. The sleep displayed on the front panel display.
-
Page 24: Selecting The Scene Templates
Selecting the SCENE templates Just by pressing one SCENE button, you can recall your Selecting the desired SCENE template favorite input source and sound field program according to the SCENE template that has been assigned to the SCENE If you want to use other SCENE templates, you can select button. - Page 25 Selecting the SCENE templates Which SCENE template would you like to select? The following tables indicate preset SCENE template descriptions. Select the corresponding SCENE templates for the desired source. The illustrations of the SCENE button in the following table indicate that the SCENE templates in those cells are assigned to the SCENE buttons, respectively.
-
Page 26: Creating Your Original Scene Templates
Selecting the SCENE templates Press lk / n to select the desired parameter Creating your original SCENE of the SCENE template and then ll / h to templates select the desired value of the selected You can create your original SCENE templates for each parameter. -
Page 27: Using Remote Control On The Scene Feature
Selecting the SCENE templates Using remote control on the SCENE feature Controlling the input source components in the SCENE mode You can operate both this unit and the input source component by using the remote control. You must set the appropriate remote control code for each input source in advance (see page 38). -
Page 28: Sound Field Programs
This unit is also equipped with a Yamaha digital sound • Sound field programs cannot be selected when the component connected to the MULTI CH INPUT jacks is selected as the input source (see field processing (DSP) chip containing several sound field page 19). - Page 29 Sound field programs ■ Selecting decoders for 2-channel sources CT WIDTH Center width (surround decode mode) Function: Adjusts the center image from all three front Signals input from 2-channel sources can also be played speakers to varying degrees. A larger value back on multi-channels.
-
Page 30: Fm/Am Tuning
FM/AM tuning To begin automatic tuning, press Note FPRESET/TUNING l / h once. To tune Be sure to set the tuner frequency step according to the frequency spacing in your area before you tune into a into the desired station manually, press radio station. - Page 31 FM/AM tuning Press EA/B/C/D/E (or ll / h) repeatedly to • You can select the preset station group and the preset station number where the first received station will be stored by pressing EA/B/C/D/E select the desired preset station group (A to and then FPRESET/TUNING l / h.
-
Page 32: Advanced Operation
ADVANCED OPERATION Set menu You can use the following parameters in the set menu to adjust a variety of system settings and customize the way this unit operates. Change the initial settings to reflect the needs of your listening environment. AUTO SETUP Auto setup Use this feature to automatically adjust speaker and system parameters (see page 16). -
Page 33: Using Set Menu
Set menu Using set menu 1 SOUND MENU Use the remote control to access and adjust each Use this menu to manually adjust any speaker settings or parameter. compensate for video signal processing delays when using LCD monitors or projectors. •... - Page 34 Set menu LFE signals output Notes Choice Subwoofer Front speakers Other speakers • The available speaker channels differ depending on the setting of the speakers. BOTH* Output No output No output • This does not affect recorded material. C)SP DISTANCE Speaker distance SWFR Output...
-
Page 35: Input Menu
Set menu ■ ■ TEST A.DELAY Test tone Audio delay Use this feature to make adjustments for “CENTER GEQ” Use this feature to delay the sound output and synchronize while listening to a test tone. it with the video image. This may be necessary for certain LCD monitors or projectors. -
Page 36: Option Menu
Set menu B)INPUT RENAME D)DECODER MODE Input rename Decoder mode ■ Use this feature to change the name of the input source Decoder select mode that appears on the front panel display. Use this feature to designate the default decoder mode for the input sources connected to the DIGITAL INPUT The following is an example where “DVD”... - Page 37 Set menu Note • When “MEM.GUARD” is set to “ON,” you cannot select and adjust any other set menu items. C)AUDIO SELECT Audio select Use this feature to designate the default audio input jack select setting for the input sources. Choice Function AUTO*...
-
Page 38: Remote Control Features
Remote control features In addition to controlling this unit, the remote control can also operate other audiovisual components made by Yamaha and other manufacturers. To control your TV or other components, you must set up the appropriate remote control code for each input source (see page 38). - Page 39 Remote control features ■ Controlling other components Press one of the input selector buttons (f) or A to E buttons to control other components. You must set the appropriate remote control code for each input source in BAND LEVEL VOLUME TITLE MENU advance (see page 38).
-
Page 40: Setting Remote Control Codes
Note display, and the remote control codes previously set • You may not be able to operate your Yamaha component even if a are cleared and reset to the initial factory settings. Yamaha remote control code is preset as listed above. In this case, try setting another Yamaha remote control code. -
Page 41: Advanced Setup
Advanced setup This unit has additional menus that are displayed on the front panel display. The advanced setup menu offers additional operations to adjust and customize the way this unit operates. Change the initial settings (indicated by (*) in this following parameter) to reflect the needs of your listening environment. -
Page 42: Additional Information
Refer to the table below when this unit does not function properly. If the problem you are experiencing is not listed below or if the instruction below does not help, turn off this unit, disconnect the power cable, and contact the nearest authorized Yamaha dealer or service center. ■... - Page 43 Troubleshooting Problem Cause Remedy page Only the center When playing a monaural source with a speaker outputs CINEMA DSP program, the source signal substantial sound. is directed to the center channel, and the front and surround speakers output effect sounds. No sound is heard “CENTER”...
- Page 44 Troubleshooting Problem Cause Remedy page This unit does not The internal microcomputer has been Disconnect the power cable from the AC wall outlet — operate properly. frozen by an external electric shock (such and then plug it in again after about 30 seconds. as lightning or excessive static electricity) or by a power supply with low voltage.
- Page 45 Troubleshooting Problem Cause Remedy page The desired station The signal is weak or the antenna Tighten the AM loop antenna connections and — cannot be tuned into connections are loose. orient it for the best reception. with the automatic Use the manual tuning method. tuning method.
-
Page 46: Resetting The System
Troubleshooting After AUTO SETUP Warning message Cause Remedy page PHASE REVERSED Speaker polarity is not correct. This Check the speaker connections for proper polarity (+ message may appear depending on the or –). speakers even when the speakers are connected correctly. DISTANCE ERROR The distance between the nearest speaker Bring the speaker closer to the listening position. -
Page 47: Glossary
5-channel playback with 2 front left and right heard. Based on a wealth of actually measured data, Yamaha channels, 1 center channel, and 2 surround left and right channels... -
Page 48: Specifications
Specifications AUDIO SECTION VIDEO SECTION • Minimum RMS Output Power for Front, Center, Surround • Signal Level Composite ..............1 Vp-p/75 Ω [U.S.A. and Canada models] 1 kHz, 0.9% THD, 8 Ω ..........100 W/ch Component ....1 Vp-p/75 Ω (Y), 0.7 Vp-p/75 Ω (P [Other models] •... -
Page 49: Index
Index ■ Numerics Control buttons, remote control ....... 5 Initial volume ..........33 Creating original SCENE templates ....24 Initializing ............. 39 1 SOUND MENU ........30, 31 Input assignment ........... 33 CROSSOVER ..........32 2 INPUT MENU ........30, 33 Crossover ............32 Input channel and speaker indicators .... - Page 50 Volume Trim ..........34 Setting input source of the customized SCENE ■ template on the remote control ....25 Setting remote control codes ......38 Yamaha Parametric Room Acoustic SIGNAL INFO ..........21 Optimizer ..........16 Signal information ..........30 YPAO ............16 SILENT CINEMA .........27 YPAO (Yamaha Parametric Room SILENT CINEMA indicator ......4...
- Page 52 El uso de este aparato con una tensión superior a la especificada resulta peligroso y puede provocar incendios, daños en el aparato y/o lesiones personales. Yamaha no se hará responsable de ningún daño debido al uso de este aparato con una tensión diferente a la especificada.
- Page 53 Contenido INTRODUCCIÓN FUNCIONAMIENTO AVANZADO Funciones ..............2 Menú de ajuste............30 Accesorios suministrados .......... 2 Uso del menú de ajuste ..........31 Descripción general de las funciones..... 3 1 SOUND MENU............ 31 2 INPUT MENU............33 Panel delantero............3 3 OPTION MENU ........... 34 Visor del panel delantero ...........
-
Page 54: Introducción
◆ Capacidad de personalización de plantillas SCENE siguientes. ❏ Mando a distancia Programas de campo sonoro ◆ Tecnología patentada por Yamaha para la creación de campos ❏ Pilas (2) (AAA, R03, UM-4) surround ❏ Antena de cuadro de AM ◆ Modo Compressed Music Enhancer ❏... -
Page 55: Descripción General De Las Funciones
Descripción general de las funciones Panel delantero VOLUME OPTIMIZER MIC EDIT SPEAKERS PRESET/TUNING A/B/C/D/E PRESET/TUNING BAND MEMORY TUNING AUTO/MAN'L SCENE VIDEO AUX PHONES TONE CONTROL PROGRAM STRAIGHT INPUT NIGHT STANDBY SILENT CINEMA EFFECT VIDEO AUDIO PORTABLE INPUT l / h STANDBY/ON Enciende esta unidad o la pone en el modo de espera (vea la Selecciona una fuente de entrada (vea la página 18). -
Page 56: Visor Del Panel Delantero
Descripción general de las funciones Visor del panel delantero V-AUX DTV/CBL MD/CD-R TUNER VOLUME AUTO TUNED STEREO MEMORY YPAO VIRTUAL SILENT CINEMA PRESET NIGHT SLEEP ENHANCER MUTE DIGITAL L C R Indicador de descodificador Indicador SLEEP Se enciende cuando funciona cualquier descodificador de esta Se enciende cuando el temporizador para dormir está... -
Page 57: Mando A Distancia
Descripción general de las funciones Mando a distancia Pulse este botón antes de controlar esta unidad (vea la página 18). SCENE 1/2/3/4 Recupera una fuente de entrada y un programa de campo sonoro POWER POWER STANDBY POWER asignado a cada botón SCENE (vea la página 22). MUTE BAND LEVEL TITLE Selecciona el altavoz que desea ajustar (vea la página 20). -
Page 58: Panel Trasero
Descripción general de las funciones Panel trasero ANTENNA SPEAKERS SURROUND CENTER FRONT B DTV/CBL HDMI COMPONENT VIDEO DTV/CBL MONITOR DIGITAL INPUT VIDEO DTV/CBL MONITOR OPTICAL UNBAL. MULTI CH INPUT AUDIO OUTPUT DTV/CBL FRONT SURROUND CENTER CD-R (PLAY) (REC) DTV/ WOOFR COAXIAL FRONT A SUBWOOFER... -
Page 59: Guía De Inicio Rápido
Guía de inicio rápido Los pasos siguientes describen la forma más sencilla de utilizar esta unidad. Vea las páginas relacionadas para obtener información detallada sobre el funcionamiento y los ajustes. Paso 1: Verificación de los elementos Paso 3: Conecte los componentes En estos pasos necesita los siguientes elementos, que no se Conecte su TV, reproductor DVD o cualquier otro incluyen en el paquete de esta unidad. -
Page 60: Preparación
PREPARACIÓN Preparación del mando a distancia Instalación de las pilas en el mando a Utilización del mando a distancia distancia El mando a distancia transmite un rayo infrarrojo direccional. Asegúrese de apuntar directamente el mando a distancia al sensor de mando a distancia de esta unidad durante el funcionamiento. -
Page 61: Conexiones
FRONT A Subwoofer (SW) La utilización de un subwoofer con amplificador incorporado, como, por ejemplo, el Yamaha Active Servo Processing Subwoofer System, no sólo es eficaz para reforzar las frecuencias de los graves de cualquier canal, sino que también los es para la reproducción de sonido de alta fidelidad del canal LFE (efecto de baja frecuencia) incluido en las fuentes Dolby Digital y DTS. - Page 62 Conexiones ■ Conexión a los terminales FRONT A Terminales de esta Altavoces unidad a Altavoz delantero (A) FRONT A (R) Derecho* Rojo: positivo (+) b Altavoz delantero (A) FRONT A (L) Izquierdo* Negro: negativo (–) c Altavoz surround SURROUND (R) Derecho d Altavoz surround SURROUND (L)
-
Page 63: Conexión De Componentes De Vídeo
Conexiones Terminales VIDEO Conexión de componentes de vídeo Para señales de vídeo compuesto convencional transmitidas por cables de vídeo compuesto. Información sobre terminales y clavijas de Terminales COMPONENT VIDEO cables Para señales de componente, separadas en señales de vídeo de luminancia (Y) y crominancia (P ) y transmitidas por Terminales de audio y clavijas de cables conductores separados de cables de vídeo componente. - Page 64 Conexiones Conexión de un proyector o de un monitor de TV Asegúrese de que esta unidad y otros componentes estén desenchufados de las tomas de CA. Nota • La conexión podría fallar si apaga el monitor de vídeo conectado al terminal HDMI OUT a través de una conexión DVI. En este caso, el indicador HDMI parpadea de forma irregular.
-
Page 65: Conexión De Otros Componentes
Conexiones Conexión de otros componentes Conexión de componentes de audio y vídeo Este equipo tiene tres tipos de terminales de audio, dos tipos de terminales de vídeo y terminales HDMI. Puede elegir el método de conexión en función del componente que se vaya a conectar. ■... -
Page 66: Uso De Los Terminales Video Aux Del Panel Delantero
Conexiones Componente Tipo de señal Terminales del componente Terminales de esta unidad Grabadora DVD Vídeo Salida HDMI* HDMI (DVR)* Salida de vídeo (compuesto) VIDEO (DVR IN) Audio Salida de audio (analógica)* AUDIO (IN (PLAY))* Grabación de audio Entrada de audio (analógica)* AUDIO (OUT (REC))* Grabación de vídeo Entrada de vídeo (compuesto)*... -
Page 67: Conexión De Antenas De Fm Y Am
ANTES de conectar el cable de alimentación a la que una interior. Si tiene problemas con la recepción, instale una antena exterior. Consulte al centro de servicio o concesionario Yamaha toma de corriente. autorizado acerca de las antena exteriores. -
Page 68: Optimización De Los Ajustes De Los Altavoces Para Su Sala De Escucha (Ypao)
Optimización de los ajustes de los altavoces para su sala de escucha (YPAO) Esta unidad dispone del Yamaha Parametric Acoustic Optimizer (YPAO). Con el YPAO, esta unidad ajusta automáticamente las características de salida de sus altavoces basándose en las posiciones y rendimientos de los altavoces, así... - Page 69 Optimización de los ajustes de los altavoces para su sala de escucha (YPAO) Notas • Si cambia los altavoces, las posiciones de los altavoces o la disposición de su entorno de escucha, ejecute de nuevo “AUTO • No haga ninguna operación en esta unidad durante el SETUP”...
-
Page 70: Funcionamiento Básico
FUNCIONAMIENTO BÁSICO Reproducción Gire PVOLUME (o pulse mVOLUME +/–) Nota Deberá tener mucho cuidado cuando reproduzca CDs para ajustar el volumen al nivel de salida codificados en DTS. Si reproduce un CD codificado en deseado. DTS en un reproductor CD incompatible con DTS, sólo oirá... -
Page 71: Operaciones Adicionales
Reproducción ■ Selección del componente conectado a los Guía de contenidos terminales MULTI CH INPUT como fuente de entrada Emplee esta función para seleccionar el componente Si desea... Vea la página conectado con los terminales MULTI CH INPUT (vea la página 14) como fuente de entrada. - Page 72 Reproducción Uso de las funciones de audio • Una vez pulsado jBAND LEVEL TITLE en el mando a distancia, también puede seleccionar el altavoz pulsando lk / n. Utilice las siguientes funciones para ajustar la salida de • Hay diferentes canales de altavoces disponibles en función de la configuración de los altavoces.
- Page 73 Reproducción ■ Utilización del temporizador para dormir • Los ajustes de “NIGHT:CINEMA” y “NIGHT:MUSIC” se Utilice esta función para poner automáticamente esta guardan de forma independiente. unidad en el modo de espera después de pasar cierto Notas tiempo. El temporizador para dormir es útil para cuando •...
-
Page 74: Selección De Las Plantillas Scene
Selección de las plantillas SCENE Simplemente pulsando un botón SCENE, puede recuperar su Seleccione la plantilla SCENE deseada fuente de entrada y programa de campo sonoro favorito de acuerdo con la plantilla SCENE que se ha asignado al botón Si desea utilizar otras plantillas SCENE, puede SCENE. - Page 75 Selección de las plantillas SCENE ¿Qué plantilla SCENE le gustaría seleccionar? Las tablas siguientes indican descripciones de plantillas SCENE preestablecidas. Seleccione las plantillas SCENE correspondientes para la fuente deseada. Las ilustraciones del botón SCENE de la tabla siguiente indican que las plantillas SCENE de esas celdas se asignan a los botones SCENE respectivamente.
-
Page 76: Creación De Sus Plantillas Scene Originales
Selección de las plantillas SCENE Pulse lk / n para seleccionar el parámetro Creación de sus plantillas SCENE deseado de la plantilla SCENE y después originales ll / h para seleccionar el valor deseado Puede crear sus plantillas SCENE originales para cada del parámetro seleccionado. -
Page 77: Uso Del Mando A Distancia En La Función Scene
Selección de las plantillas SCENE Uso del mando a distancia en la función SCENE Control de los componentes de fuente de entrada en el modo SCENE Puede controlar esta unidad y el componente de fuente de entrada mediante el uso del mando a distancia. Deberá establecer de antemano el código de mando a distancia apropiado para cada fuente de entrada (vea la página 38). -
Page 78: Programas De Campo Sonoro
• Los programas de campo sonoro no se pueden seleccionar cuando el chip de procesamiento de campo sonoro digital Yamaha componente conectado a los terminales MULTI CH INPUT está (DSP) que contiene varios programas de campo sonoro que seleccionado como fuente de entrada (vea la página 19). - Page 79 Programas de campo sonoro ■ Selección de descodificadores para fuentes de CT WIDTH Anchura central 2 canales (modo de descodificador surround) Función: Ajusta la imagen central de los tres altavoces Las señales introducidas desde fuentes de 2 canales delanteros en diversos grados. Un valor más también se pueden reproducir en múltiples canales.
-
Page 80: Sintonización De Fm/Am
Sintonización de FM/AM Para comenzar la sintonización automática, Nota pulse una vez FPRESET/TUNING l / h. Asegúrese de establecer el paso de frecuencias del sintonizador según la separación de frecuencias de su Para sintonizar manualmente la emisora deseada, pulse repetidamente FPRESET/ zona antes de sintonizar una emisora de radio. - Page 81 Sintonización de FM/AM Cuando realice esta operación con el mando a distancia, • Puede seleccionar el grupo de emisoras presintonizadas y el número de emisoras presintonizadas donde se almacenará la primera emisora recibida pulse fTUNER para seleccionar “TUNER” como la pulsando EA/B/C/D/E y después FPRESET/TUNING l / h.
-
Page 82: Funcionamiento Avanzado
FUNCIONAMIENTO AVANZADO Menú de ajuste Puede utilizar los parámetros siguientes del menú de ajuste para ajustar una amplia variedad de configuraciones del sistema y personalizar la forma en que funciona esta unidad. Cambie la configuración inicial para que refleje las necesidades de su entorno de escucha. -
Page 83: Uso Del Menú De Ajuste
Menú de ajuste Uso del menú de ajuste 1 SOUND MENU Utilice el mando a distancia para acceder y ajustar cada Utilice este menú para ajustar manualmente los ajustes de los parámetro. altavoces o compensar los retardos de procesamiento de la señal de vídeo cuando se utilicen proyectores o monitores LCD. - Page 84 Menú de ajuste Salida de señales LFE Notas Altavoces Otros • Los canales de altavoces disponibles son distintos según el ajuste de los Opción Subwoofer altavoces. delanteros altavoces • Esto no afecta al material grabado. BOTH* Salida Sin salida Sin salida Distancia a los altavoces C)SP DISTANCE SWFR Salida...
-
Page 85: Input Menu
Menú de ajuste ■ ■ Tono de prueba TEST Retardo de audio A.DELAY Utilice esta función para realizar ajustes para “CENTER Utilice esta función para retardar la salida del sonido y GEQ” mientras escucha un tono de prueba. sincronizarla con la imagen de vídeo. Esto puede ser necesario para ciertos proyectores o monitores LCD. -
Page 86: Option Menu
Menú de ajuste ■ Ajuste de priorización del descodificador de El siguiente es un ejemplo en el que a “DVD” se le renombra “My DVD”. Opción Función pDVD V-AUX DTV/CBL MD/CD-R TUNER AUTO* Detecta automáticamente el tipo de señales de entrada My DVD y selecciona el modo de entrada apropiado. - Page 87 Menú de ajuste C)AUDIO SELECT Selección de audio Use esta función para designar el ajuste de selección del terminal de entrada de audio para las fuentes de entrada. Opción Función AUTO* Detecta automáticamente el tipo de señales de entrada y selecciona el modo de entrada apropiado. LAST Selecciona automáticamente el último modo de entrada utilizado para la fuente de entrada conectada...
-
Page 88: Funciones Del Mando A Distancia
Además de controlar esta unidad, el mando a distancia también puede controlar otros componentes audiovisuales hechos por Yamaha y otros fabricantes. Para controlar su TV u otros componentes deberá preparar el código de mando a distancia apropiado para cada fuente de entrada (vea la página 38). -
Page 89: Control De Otros Componentes
Funciones del mando a distancia ■ Control de otros componentes Pulse uno de los botones de selección de entrada (f) o los botones A a E para controlar otros componentes. Deberá BAND LEVEL VOLUME establecer de antemano el código de mando a distancia TITLE MENU POWER... -
Page 90: Ajuste De Los Códigos De Mando A Distancia
Nota Aparece “RemoteSetup OK” en el visor del panel • Tal vez no pueda controlar su componente Yamaha aunque se preajuste delantero y se borran los códigos del mando a un código de fabricante Yamaha listado arriba. En este caso, intente distancia previamente establecidos y se restablecen poner otros códigos de mando a distancia Yamaha. -
Page 91: Configuración Avanzada
Configuración avanzada Esta unidad tiene menús adicionales que se visualizan en el visor del panel delantero. El menú de configuración avanzada ofrece operaciones adicionales para ajustar y personalizar la forma en que funciona esta unidad. Cambie los ajustes iniciales (indicados mediante (*) en este siguiente parámetro) para reflejar las necesidades de su ambiente de escucha. ■... -
Page 92: Información Adicional
Consulte la tabla inferior cuando el equipo no funcione correctamente. Si el problema que usted tiene no aparece en la lista inferior o las instrucciones no le sirven de ayuda, apague esta unidad, desenchufe el cable de alimentación y póngase en contacto con un centro de servicio o concesionario Yamaha autorizado. ■... - Page 93 Resolución de problemas Vea la Problema Causa Remedio página Sólo sale buen sonido Cuando reproduce una fuente mono con por el altavoz central. un programa CINEMA DSP, la señal de la fuente se dirige al canal central y los altavoces delanteros y surround dan salida a los efectos de sonido.
- Page 94 Resolución de problemas Vea la Problema Causa Remedio página Esta unidad no El microprocesador interno ha sido Desenchufe el cable de alimentación de la toma de — funciona dañado por una descarga eléctrica externa CA y enchúfelo de nuevo 30 segundos después. correctamente.
- Page 95 Resolución de problemas Vea la Problema Causa Remedio página La emisora deseada no se La señal es débil o las conexiones de la Apriete las conexiones de la antena de cuadro de — puede sintonizar con el antena están flojas. AM y oriéntela para obtener la mejor recepción.
- Page 96 Resolución de problemas Después de AUTO SETUP Mensaje de Vea la Causa Remedio advertencia página PHASE REVERSED La polaridad de los altavoces no es la Compruebe que es correcta la polaridad de las correcta. Este mensaje puede aparecer conexiones de los altavoces (+ o –). dependiendo de los altavoces aunque estos estén correctamente conectados.
-
Page 97: Glosario
Yamaha CINEMA DSP Dolby Surround utiliza un sistema de grabación analógica de 4 utiliza la tecnología DSP original de Yamaha para combinar los sistemas canales para reproducir efectos de sonido realistas y dinámicos: 2 Dolby Pro Logic, Dolby Digital y DTS con el fin de proporcionar la canales delanteros derecho e izquierdo (estéreo), un canal central para... -
Page 98: Especificaciones
Especificaciones SECCIÓN DE AUDIO SECCIÓN DE VÍDEO • Potencia de salida RMS mínima para los altavoces delanteros, • Nivel de señal Compuesto ..............1 Vp-p/75 Ω central, surround Componente ....1 Vp-p/75 Ω (Y), 0,7 Vp-p/75 Ω (P [Modelos de EE.UU. y Canadá] 1 kHz, 0,9% THD, 8 Ω... -
Page 99: Índice
Índice ■ ■ Numéricos Conexión a los terminales COMPONENT VIDEO ............11 1 SOUND MENU ........30, 31 Hall ..............26 Conexión a los terminales FRONT A .... 10 2 INPUT MENU ........30, 33 HDMI ............11 Conexión a los terminales FRONT B .... 10 2ch Stereo ............26 HP D.R ............ - Page 100 Sintonización automática .......28 Sintonización automática de emisoras ■ presintonizadas ..........28 Sintonización de AM ........28 Yamaha Parametric Room Acoustic Sintonización de FM ........28 Optimizer ..........16 Sintonización manual ........28 YPAO ............16 Sitúe esta unidad en el modo de espera ..15 YPAO (Yamaha Parametric Room SLEEP, mando a distancia .......5...
-
Page 101: Lista De Códigos De Mando A Distancia
Lista de códigos de mando a distancia Pacific 2074 Blu-ray Player DVD/VCR iPod Panasonic 2030, 2040, 2054, 2057, 2105, 2110 Samsung 2137 1017, 2045 Yamaha 5011 Philips 2019, 2026, 2046, 1071, 2087 CD Player 2073, 2081, 2090 Panasonic 1020, 1072, 2040, LD Player Pioneer 2036, 2082... - Page 102 Baur 0217 Elbe 0203, 0204, 0212, Hinari 0208, 0209, 0213, Life 0206, 0208 Beko 0228 0218 0217, 0218 Lifetec 0206, 0208, 0218 Belcor 0060 Elbe-Sharp 0204 Hisawa 0209, 0218 Loewe 0063, 0128, 0203, Bell & Howell 0058, 0064 Elcit 0204, 0205 Hitachi 0006, 0014, 0015, 0204, 0223, 0227...
- Page 103 White Westinghouse Otto Versand 0204, 0207, 0213, 0205 Supra 0208 0200, 0207, 0217 0215, 0216, 0217, Saba 0204, 0205, 0211, Supreme 0059 Yamaha 0000, 0001, 0002, 0255 0216 Susumu 0209 0003, 0004, 0005, Pael 0200, 0207 saccs 0212 Sutron 0208...
- Page 104 1046, 1050, 1062 Schneider 1042, 1044, 1045, 1002, 1014 Hanseatic 1045, 1046 1046, 1050 Multitech 1002, 1005, 1006, Harley Davidson1005 Scott 1012 1042, 1046, 1050 Harman/Kardon 1000 Murphy 1042 © 2009 Yamaha Corporation All rights reserved. Printed in China WQ95870...