Table of Contents
Advertisement
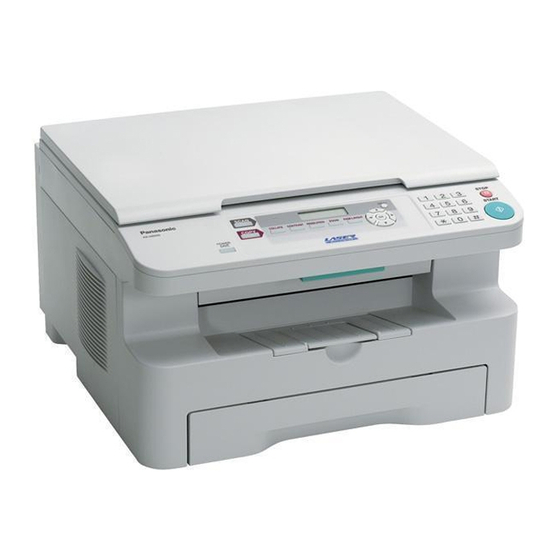
This pictured model is KX-MB262.
Do NOT connect the USB cable until prompted by the Multi-Function Station (CD-ROM).
1
KX-MB262CX or KX-MB772CX may not be available in some areas.
KX-MB772 only:
L This unit is compatible with Caller ID. To use this feature, you must subscribe to the
appropriate service of your service provider.
L Be sure to use the telephone line cord included in this unit.
L This model is designed to be used in Middle East, Hong Kong, Malaysia, Asia, New Zealand,
Africa and Latin America according to the location setting feature. The default setting is
Middle East. To change the location setting, see page 54 (feature #114).
Operating Instructions
KX-MB262CX
Model No.
KX-MB772CX
2
Multi-Function Printer
Advertisement
Table of Contents

Related Manuals for Panasonic KX-MB262CX


Summary of Contents for Panasonic KX-MB262CX
-
Page 1: Operating Instructions
This pictured model is KX-MB262. Do NOT connect the USB cable until prompted by the Multi-Function Station (CD-ROM). KX-MB262CX or KX-MB772CX may not be available in some areas. KX-MB772 only: L This unit is compatible with Caller ID. To use this feature, you must subscribe to the appropriate service of your service provider. - Page 2 L This material is copyrighted by Panasonic Communications Co., Ltd., and may be reproduced for internal use only. All other reproduction, in whole or in part, is prohibited without the written consent of Panasonic Communications Co., Ltd. © 2007 Panasonic Communications Co., Ltd. All Rights Reserved.
- Page 3 Location Location Available features by location setting (KX-MB772 only) The following features may vary slightly depending on the location setting (#114 on page 54). Change the location setting to match where you use the unit. Feature/Code Middle East, Africa, Latin America Dialling mode {#}{1}{2}{0}...
-
Page 4: Important Information
L For optimal performance, genuine Panasonic toner cartridges and drum units are recommended. We cannot be responsible for problems that may be caused by a non-Panasonic toner cartridge or drum unit: – Damage to the unit – Poor print quality –... -
Page 5: Table Of Contents
Date and time (KX-MB772 only)... 21 Your logo (KX-MB772 only) ... 22 Your fax number (KX-MB772 only) ... 22 2.10 Installing Multi-Function Station ... 23 2.11 Starting Multi-Function Station ... 25 3. Printer Printer Printing from Windows applications ... 26 4. Scanner Scanner Scanning from the unit (Push Scan)... - Page 6 Table of Contents Troubleshooting 11.3 When a function does not work ... 68 12.Paper Jams Jams 12.1 Recording paper jam ... 73 12.2 Document jams (Auto document feeder) (KX- MB772 only) ... 78 13.Cleaning Cleaning 13.1 Cleaning the white plates and glass... 79 13.2 Cleaning the document feeder rollers (KX- MB772 only) ...
-
Page 7: Introduction And Installation
1.2 Accessory information To ensure that the unit operates properly, we recommend the use of a Panasonic toner cartridge and drum unit. See page 85 for specifications. 1.2.1 Available accessories – Replacement toner cartridge L Model No. -
Page 8: Button Descriptions
1. Introduction and Installation Finding the Controls 1.3 Button descriptions A B CDEFG HIJK * The small hole on the left side of the LCD display is for beeps (KX-MB262 only). * The pictured model is KX-MB772. {COPY} L To switch to the copy mode (page 18, 31). {SCAN} L To switch to the scan mode (page 18, 28). -
Page 9: Overview
1.4 Overview 1.4.1 Front view KX-MB772 KX-MB262 1 Top cover 2 ADF (Auto Document Feeder) cover 3 Document guides 4 Document cover 5 Output tray 6 Top cover release lever 7 Document entrance 8 Paper input tray 9 Recording paper exit j Document exit 1.4.2 Rear view KX-MB772... -
Page 10: Toner Cartridge And Drum Unit
L We cannot be responsible for any damage to the unit or degradation of print quality which may occur from the use of a non-Panasonic toner cartridge and drum unit. L Do not leave the toner cartridge out of the protection bag for a long time. - Page 11 Place the toner cartridge (3) into the drum unit (4) vertically. Turn the green levers (5) on each side of the toner cartridge while pressing down firmly. Make sure that the triangles (6) match, to install the toner cartridge correctly. Lift the top cover release lever (7) and open the top cover (8).
- Page 12 “REPLACE DRUM” appears on the display, replace the toner cartridge and drum unit. L To ensure that the unit operates properly, we recommend the use of Panasonic toner cartridge (Model No. KX-FAT92A/KX-FAT92E) and drum unit (Model No. KX-FAD93A/KX-FAD93E). See page 7 for accessory information.
-
Page 13: Output Tray
L To maintain print quality and machine life, we recommend you to clean slots and openings (page 4) and the inside of the unit (page 79, 82) when replacing the toner cartridge and/or drum unit. Waste disposal method Waste material should be disposed of under conditions which meet all national and local environmental regulations. - Page 14 1. Introduction and Installation If the top part of the extender is detached 1. With the top part of the extender in the open position, insert the tab (1) into the left hole (2) of the extender. 2. Slide the other tab (3) into the right hole (4) of the extender from below until it clicks into place.
-
Page 15: Recording Paper
1.7 Recording paper The paper input tray unit can hold: – Up to 250 sheets of 60 g/m to 75 g/m – Up to 230 sheets of 80 g/m paper. – Up to 200 sheets of 90 g/m paper. L Please refer to page 84 for information on recording paper. - Page 16 1. Introduction and Installation Insert the paper input tray to the unit, lifting the front part of the tray. Then push it completely into the unit. Note: L If the paper is not loaded correctly, re-adjust the paper guides, or the paper may jam. L If the paper input tray does not close, the plate in the paper input tray may be lifted.
-
Page 17: Preparation
2 Preparation Connections and Setup 2.1 Connections Caution: L When you operate this product, the power outlet should be near the product and easily accessible. L Be sure to use the telephone line cord included in this unit (KX-MB772 only). L Do not extend the telephone line cord (KX-MB772 only). -
Page 18: Dialling Mode (Kx-Mb772 Only)
2. Preparation 2.2 Dialling mode (KX-MB772 only) Important: L Not available when “NEW ZEALAND” is selected in feature #114 on page 54. If you cannot dial (page 36), change this setting according to your telephone line service. {MENU} {SET} {MENU} i {#}{1}{2}{0} Press {1} or {2} to select the desired setting. -
Page 19: Setting The Original
Document Requirements 2.4 Setting the original 2.4.1 Using the scanner glass Open the document cover (1). Place the document FACE DOWN on the scanner glass (2), aligning the top left of the document with the corner to which the m mark points. Close the document cover. -
Page 20: Help Function (Kx-Mb772 Only)
2. Preparation Minimum document size 128 mm Maximum document size 216 mm Effective scanning area L Shaded area will be scanned. 4 mm 208 mm 216 mm Document weight L Single sheet: 60 g/m to 75 g/m L Multiple sheets: 60 g/m to 75 g/m Help... -
Page 21: Adjusting Volume (Kx-Mb772 Only)
Volume 2.6 Adjusting volume (KX-MB772 only) Important: L Before adjusting volume, set the operation mode to fax mode. If the {FAX} light is OFF, turn it ON by pressing {FAX}. {FAX} {SET} Ringer volume While the unit is idle, press {V} or {^}. L If there are any documents in the document entrance, you cannot adjust the volume. -
Page 22: Your Logo (Kx-Mb772 Only)
2. Preparation 2.8 Your logo (KX-MB772 only) You can program your logo (name, company name, etc.) so that it appears on the top of each page sent. {MENU} {STOP} {SET} {<}{>} {MENU} i {#}{1}{0}{2} i {SET} Enter your logo, up to 30 characters (see page 63 for character entry). -
Page 23: Installing Multi-Function Station
2.10 Installing Multi-Function Station 2.10.1 Required computer environment Panasonic Multi-Function Station software enables the unit to carry out the following functions: – Printing on plain paper and labels – Scanning documents and converting an image into text with Readiris OCR software –... - Page 24 You need to add the printer driver for each unit, as follows. [Start] i [All Programs] or [Programs] i [Panasonic] i the unit’s name i [Add Printer Driver]. Then follow the on-screen instructions. Note: L You cannot connect more than one unit to the same computer at the same time.
-
Page 25: Starting Multi-Function Station
2.11 Starting Multi-Function Station [Start] i [All Programs] or [Programs] i [Panasonic] i the unit’s name i [Multi-Function Station] L Multi-Function Station will appear. * The pictured screenshot is for KX-MB772. [Scan] (page 29) L To scan and display the scanned images. -
Page 26: Printer
Setting the printer properties You can change the printer setting in step 3. We recommend that you test paper (especially special sizes and types of paper) on the unit before purchasing large quantities. - Page 27 FOR PC PRINTING L To use the manual input tray, you must change the paper source in the [Basic] tab when setting the printer properties (page 26). You can also select the desired media type. To print on labels Use labels designed for laser printing. We recommend the following: ®...
-
Page 28: Scanner
4. Scanner Scanner 4 Scanner 4.1 Scanning from the unit (Push Scan) You can easily scan the document by operating the operation panel on the unit. Select following scanning modes depending on the way to use the scanned image. – Viewing using Multi-Function Viewer (Viewer) –... -
Page 29: Scanning From A Computer (Pull Scan)
{SCAN} Press {V} or {^} repeatedly to select “OCR”. i {SET} Press {V} or {^} repeatedly to select “USB HOST”. i {SET} If necessary, change the scanning settings (scan type / resolution / file format / brightness / contrast / scan size). - Page 30 Device], click the [Select...] to select the unit from the list, then click [OK]. The [Select...] button will not be displayed when the only one printer driver has been installed. L You can move, copy and delete a file or page. 4.2.3 Using other applications Multi-Function Station includes a TWAIN compliant scanner driver.
-
Page 31: Copier
5 Copier Copy 5.1 Making a copy Illegal copies L It is unlawful to make copies of certain documents. Copying certain documents may be illegal in your country. Penalties of fines and/or imprisonment may be imposed on those found guilty. The following are examples of items that may be illegal to copy in your country. -
Page 32: More Copying Features
5. Copier 5.1.2 Using the auto document feeder (KX- MB772 only) {COPY} {START} If the {COPY} light is OFF, turn it ON by pressing {COPY}. Set the original (page 19). If necessary, change the resolution and contrast according to the type of document. L To select the resolution, see page 31. - Page 33 Example: 150% enlarged copy Using the scanner glass (1): Original document Using the auto document feeder (KX-MB772 only): Original document Example: 70% reduced copy Using the scanner glass (1): Original document Using the auto document feeder (KX-MB772 only): Original document 5.2.2 To copy 2-sided documents onto 1 page (Quick ID copy feature) (Scanner Enlarged copy...
- Page 34 5. Copier Original document Page layout “8 in 1” “LANDSCAPE” “PORTRAIT” Note: L You can save the previous page layout setting (feature #467 on page 61). 5.2.3 To make a poster size copy (Poster feature) (Scanner glass only) You can make copies divided in to 4 (“2 × 2”) or 9 (“3 ×...
- Page 35 Original document Page layout “8 in 1” “PORTRAIT” “LANDSCAPE” Note: L You can save the previous page layout setting (feature #467 on page 61). 5.2.5 To collate multiple copies The unit can collate multiple copies in the same order as the original document pages.
-
Page 36: Fax (Kx-Mb772 Only)
6. Fax (KX-MB772 only) Sending Faxes 6 Fax (KX-MB772 only) 6.1 Sending a fax manually 6.1.1 Using the scanner glass By using the scanner glass, you can send a page from booklets or small size paper that cannot be sent with the auto document feeder. -
Page 37: Storing Items For The One-Touch Dial Feature And Navigator Directory
Printing a journal report A journal report provides you with a printed record of the 30 most recent faxes. To print it manually, see page 83. To print it automatically after every 30 new fax transmissions and receptions, make sure feature #402 is activated (page 57). -
Page 38: Sending A Fax Using One-Touch Dial Feature And Navigator Directory
6. Fax (KX-MB772 only) Enter the telephone number, up to 32 digits. i {SET} L To program other items, repeat steps 2 to 3. {MENU} Note: L A hyphen or a space entered in a telephone number counts as 2 digits. 6.2.3 Editing a stored item {DIRECTORY} Press {V} or {^} repeatedly to display the desired... -
Page 39: Broadcast Transmission
Enter the fax number using one-touch dial or navigator directory. {START} 6. Fax (KX-MB772 only) 6.4 Broadcast transmission By storing one-touch dial and navigator directory items (page 37) into the broadcast memory, you can send the same document to multiple parties (up to 20). Your programmed items will remain in the broadcast memory, allowing frequent re-use. - Page 40 6. Fax (KX-MB772 only) Press {V} or {^} repeatedly to display the desired broadcast memory (“<BROADCAST>” or “<MANUAL BROAD>”). i {MENU} i {*} Press {V} or {^} repeatedly to display the desired item you want to add. i {SET} L To add other items, repeat this step (up to 20 items).
-
Page 41: Sending A Computer Document As A Fax Message From Your Computer
Open the document you want to send. Select [Print...] from the [File] menu. L The [Print] dialogue box will appear. Select the PCFAX unit’s name as the active printer. Click [Print] or [OK]. L The [Send a Fax] dialogue box will appear. - Page 42 6. Fax (KX-MB772 only) Setup Set the fax machine to TEL mode (page 43) by pressing {FAX AUTO ANSWER} repeatedly. Note: L Make sure feature #404 is set to “TEL” beforehand (page 57). How to receive phone calls and faxes You have to answer all calls manually.
-
Page 43: Receiving A Fax Automatically - Auto Answer On
6.7 Receiving a fax automatically – Auto answer ON 6.7.1 Activating FAX ONLY mode Press {FAX AUTO ANSWER} repeatedly to display “FAX ONLY MODE”. L The {FAX AUTO ANSWER} light turns ON. How faxes are received When receiving calls, the unit will automatically answer all calls and only receive fax documents. - Page 44 6. Fax (KX-MB772 only) Note: L To stop receiving, see page 64. L To receive fax documents using the extension telephone, make sure remote fax activation is turned ON (feature #434 on page 59) beforehand. The default setting is ON. 6.8.2 Activating TEL/FAX mode Important: L Not available when “NEW ZEALAND”...
-
Page 45: Using The Unit With An Answering Machine
6.9 Using the unit with an answering machine 6.9.1 Setting up the unit and an answering machine Connect the answering machine (1). L Answering machine is not included. L Remove the stopper (2) if attached. Set the number of rings on the answering machine to 4 rings or less. -
Page 46: Junk Fax Prohibitor (Preventing Fax Reception From Undesired Callers)
6. Fax (KX-MB772 only) 6.11 Junk fax prohibitor (preventing fax reception from undesired callers) If you subscribe to Caller ID service (page 48), this feature prevents fax reception from calls that do not show caller information. Additionally, the unit will not accept faxes originating from numbers that match the ones on a programmable junk fax prohibitor list. -
Page 47: Receiving A Fax Into Your Computer
6.12 Receiving a fax into your computer You can receive a fax document on your computer. The received fax document is saved as an image file (TIFF- G4 format). To receive a fax document using your computer, make sure the following features are set beforehand. –... -
Page 48: Caller Id (Kx-Mb772 Only)
7. Caller ID (KX-MB772 only) 7 Caller ID (KX-MB772 only) Caller ID 7.1 Caller ID service This unit is compatible with the Caller ID service offered by your local telephone company. To use this unit’s Caller ID features, you must subscribe to a Caller ID service. -
Page 49: Viewing And Calling Back Using Caller Information
7.2 Viewing and calling back using caller information Important: L Calling back will not be possible if the caller information does not include a telephone number. L If the area code of the received telephone number is the same as yours, the area code may need to be deleted before calling back. -
Page 50: Erasing Caller Information
7. Caller ID (KX-MB772 only) 7.4 Erasing caller information 7.4.1 Erasing all caller information Press {MENU} repeatedly to display “CALLER SET UP”. i {SET} L “CALL LIST ERASE” will be displayed. {SET} L To cancel erasing, press {STOP}, then {MENU}. {SET} i {STOP} 7.4.2 Erasing specific caller information {CALLER ID}... -
Page 51: Distinctive Ring (Kx-Mb772 Only)
8 Distinctive Ring (KX-MB772 only) Distinctive Ring 8.1 Distinctive Ring (Fax Ability/Duplex ring) service Important: L Not available when “MALAYSIA” is selected in feature #114 on page 54. This feature is only for use if you subscribe to a Distinctive Ring pattern service from your telephone company. -
Page 52: Programming The Ring Pattern Assigned For Fax
8. Distinctive Ring (KX-MB772 only) 8.4 Programming the ring pattern assigned for fax Important: L Available when “MIDDLE EAST”, “ASIA”, “AFRICA” or “LAT.AMERICA” is selected in feature #114 on page 54. Set feature #430 to “ON” (page 51). {MENU} i {#} i {4}{3}{1} Press {1} to {5} to select the ring pattern assigned for fax. -
Page 53: Programmable Features
9 Programmable Features Features Summary 9.1 Programming {MENU} {SET} {MENU} Press {#} and the 3-digit code (page 54 to page 62). Press the desired selection to display the desired setting. L This step may be slightly different depending on the feature. {SET} Press {MENU} to exit. -
Page 54: Programmable Features
9. Programmable Features 9.2 Basic features Feature/Code Setting the date and time {#}{1}{0}{1} (KX-MB772 only) Setting your logo {#}{1}{0}{2} (KX-MB772 only) Setting your fax number {#}{1}{0}{3} (KX-MB772 only) Setting the location where you use {#}{1}{1}{4} (KX-MB772 only) Setting the dialling mode {#}{1}{2}{0} (KX-MB772 only) Setting recall/flash time... - Page 55 Feature/Code Changing the password for feature programming via remote operation {#}{1}{5}{5} Setting the ringer pattern {#}{1}{6}{1} (KX-MB772 only) Changing the ring count in FAX ONLY mode {#}{2}{1}{0} (KX-MB772 only) Setting the Caller ID list to print automatically {#}{2}{1}{6} (KX-MB772 only) Setting the recording paper size in the paper input tray {#}{3}{8}{0}...
- Page 56 9. Programmable Features Feature/Code Setting the default operation mode timer {#}{4}{6}{4} (KX-MB772 only) Setting toner save feature {#}{4}{8}{2} Selection To set the timer before returning to the default operation mode (feature #463). {0} “OFF”: Deactivates this feature. {1} “30s”: 30 seconds {2} “1min”...
-
Page 57: Fax Features (Kx-Mb772 Only)
9.3 Fax features (KX-MB772 only) Feature/Code Changing the TEL/FAX delayed ring count {#}{2}{1}{2} Printing a sending report {#}{4}{0}{1} Setting the journal report to print automatically {#}{4}{0}{2} Changing the receiving mode in the manual answer setting {#}{4}{0}{4} Sending documents overseas {#}{4}{1}{1} Selection If you use an extension telephone in TEL/FAX mode, select the desired number of times the extension telephone rings before the unit answers the call. - Page 58 9. Programmable Features Feature/Code Sending a fax at a specific time {#}{4}{1}{2} Setting the Error Correction Mode (ECM) {#}{4}{1}{3} Setting the connecting tone {#}{4}{1}{6} Activating the Distinctive Ring feature {#}{4}{3}{0} Selection This feature allows you to take advantage of low-cost calling hours offered by your telephone company.
- Page 59 Feature/Code Setting the ring pattern for fax (Distinctive Ring feature) {#}{4}{3}{1} Setting auto reduction feature {#}{4}{3}{2} Changing the fax activation code {#}{4}{3}{4} Changing the silent fax recognition ring setting {#}{4}{3}{6} Setting the memory reception alert {#}{4}{3}{7} Selection {1} “A” {2} “B” {3} “C”...
- Page 60 9. Programmable Features Feature/Code Setting friendly reception {#}{4}{3}{8} Receiving a fax into the computer {#}{4}{4}{2} Resetting fax features to their default settings {#}{4}{5}{9} Selection To receive a fax automatically when you answer a call and hear a fax calling tone (slow beep). {0} “OFF”: You have to press {START} for fax reception.
-
Page 61: Copy Features
9.4 Copy features Feature/Code Changing the default copy resolution {#}{4}{6}{1} Holding the previous page layout setting {#}{4}{6}{7} Holding the previous zoom (enlargement / reduction) setting {#}{4}{6}{8} Holding the previous collate setting {#}{4}{6}{9} 9.5 PC print features Feature/Code Changing the data timeout setting {#}{7}{7}{4} Selection... -
Page 62: Scan Features
9. Programmable Features 9.6 Scan features Feature/Code Setting the scan mode for Push Scan {#}{4}{9}{3} Holding the previous scanning parameter for Push Scan {#}{4}{9}{4} Selection {1} “VIEWER” (default): The scanned image will be displayed in the [Multi- Function Viewer] window. {2} “FILE”: The scanned image will be saved as a file. -
Page 63: Useful Information 10.1 Character Entry (Kx-Mb772 Only)
10 Useful Information Useful Information 10.1 Character entry (KX-MB772 only) The dial keypad is used to enter characters and numbers. – Press {<} or {>} to move the cursor. – Press dial keys to enter characters and numbers. – Press {STOP} to erase the character or number highlighted by the cursor. -
Page 64: Status Of The Unit
10. Useful Information 10.2 Status of the unit 10.2.1 Using Remote Control You can easily operate the following functions from your computer. – Programming the features (page 54) KX-MB772 only: – Storing, editing or erasing items in directories (page 37, 39) –... -
Page 65: Help
11 Help 11.1 Error messages – Reports (KX-MB772 only) If a problem occurs during fax transmission or reception, one of the following messages will be printed on the sending and journal reports (page 36). Message COMMUNICATION ERROR DOCUMENT JAMMED ERROR-NOT YOUR UNIT JUNK FAX PROH. -
Page 66: Error Messages - Display
11. Help 11.2 Error messages – Display If the unit detects a problem, one or more of the following messages will appear on the display. Display “CALL SERVICE” “CARRIAGE ERROR” “CHANGE DRUM” “CHECK DOCUMENT” “CHECK DRUM” “CHECK PAPER #1” “CHECK PICK UP INPUT TRAY #2”... - Page 67 Display “NO FAX REPLY” “OUT OF PAPER INPUT TRAY #2” “PAPER JAMMED” “OPEN TOP COVER” “PC FAIL OR BUSY” “PLEASE WAIT” “POLLING ERROR” “REDIAL TIME OUT” “REMOVE DOCUMENT” “REMOVE PAPER IN INPUT TRAY #2” “REPLACE DRUM CHANGE SUPPLIES” “RX MEMORY FULL” “TONER EMPTY”...
-
Page 68: When A Function Does Not Work
L The unit is set to the scan mode or copy mode. Press {FAX} to switch modes. If you still have this problem, contact our service personnel. L This is because the printer driver is used for PC FAX and Remote Control. The transmission error will be displayed as the printing error. -
Page 69: Printing Problems
L The recording paper is too damp. Use new paper. L The remaining toner is low. Replace the toner cartridge. L To check the drum life and quality, please print the printer test list (page 83). If printing quality is still poor, replace the toner cartridge and drum unit. - Page 70 11. Help 11.3.4 Copier Problem The unit will not make a copy. Letters on the copied documents are not clear. The copied documents are too dark and cannot be read. 11.3.5 Fax (KX-MB772 only) Problem I cannot send documents. I cannot send a fax overseas. The other party complains that letters on their received document are distorted.
- Page 71 Problem I cannot receive documents automatically. The display shows “CONNECTING...”, but faxes are not received. The printing quality of the received documents is poor. The other party complains that they cannot send a document. I cannot select the desired receiving mode. When an extension telephone is connected, I cannot receive documents by pressing...
- Page 72 11. Help Problem I cannot make calls. The unit does not ring. The other party complains they only hear a fax tone and cannot talk. The {REDIAL} or {PAUSE} button does not function properly. The receiving mode does not function properly. I cannot receive a fax document on the computer.
-
Page 73: Paper Jams
12 Paper Jams Jams 12.1 Recording paper jam 12.1.1 When the recording paper has jammed inside of the unit The display will show the following. Caution: L Do not pull out the jammed paper forcibly before opening the top cover. L To prevent injuries, be careful not to put your hands under the top cover. - Page 74 12. Paper Jams 3. Close the paper input tray. L Open and close the top cover (4) to clear the error message. Case 2: When the recording paper has jammed near the drum and toner unit: 1. Pull open the paper input tray (1). 2.
- Page 75 3. Remove the jammed paper (6) carefully by pulling it upwards. Remove the jammed paper (7) carefully by pulling it toward you. 4. Close the paper input tray. 5. Close the top cover until locked. 12. Paper Jams...
- Page 76 12. Paper Jams Case 3: When the recording paper has jammed near the fuser unit: 1. Lift the top cover release lever (1) and open the top cover (2). Caution: The fuser unit (3) gets hot. Do not touch Note: L Do not touch the transfer roller (4).
- Page 77 12.1.2 When the recording paper is not fed into the unit properly The display will show the following. Pull the paper input tray until it clicks into place, then pull it completely out, lifting the front part of the tray. Remove the recording paper and straighten.
-
Page 78: Document Jams (Auto Document Feeder) (Kx- Mb772 Only)
12. Paper Jams 12.2 Document jams (Auto document feeder) (KX-MB772 only) Caution: L Do not pull out the jammed document forcibly before lifting the ADF cover. Open the ADF cover (1) while holding the document cover (2). Remove the jammed document (3) carefully. When the document has jammed near the document entrance: When the document has jammed near the... -
Page 79: Cleaning
13 Cleaning Cleaning 13.1 Cleaning the white plates and glass Clean the white plates and glass when a black line, a white line or a dirty pattern appears on: – your recording paper, – the original document, – the scanned data, or –... - Page 80 13. Cleaning 13.1.2 Lower glass Disconnect the power cord. Lift the top cover release lever (1) and open the top cover (2). Caution: The fuser unit (3) gets hot. Do not touch Note: L Do not touch the transfer roller (4). Remove the drum and toner unit (5) by holding the tabs.
- Page 81 13. Cleaning L Make sure that the triangles (8) match, to install Caution: the drum and toner unit correctly. L To prevent injuries, be careful not to put your hands under the top cover. Re-connect the power cord. Close the top cover until locked.
-
Page 82: Cleaning The Document Feeder Rollers (Kx-Mb772 Only)
13. Cleaning 13.2 Cleaning the document feeder rollers (KX-MB772 only) Clean the rollers when the document frequently misfeeds. Disconnect the power cord. Open the ADF cover (1) while holding the document cover (2). Clean the document feeder rollers (3) with a cloth moistened with isopropyl rubbing alcohol, and let all parts dry thoroughly. -
Page 83: General Information
– “TEL NO. LIST” – “JOURNAL REPORT” – “BROADCAST LIST” – “PRINTER TEST” L If the test print has smudges, or blurred points or lines, clean the inside of the unit (page 79, 82). If printing quality is still poor, replace the toner cartridge and drum unit. -
Page 84: General Information
14. General Information ■ Power supply: 220–240 V AC, 50/60 Hz ■ Memory capacity (for operation and storing memory): 32 MB ■ Fax memory capacity 2 MB in total Approx. 170 pages of memory reception Approx. 150 pages of memory transmission (Based on the ITU-T No. - Page 85 4. PC Operations/ Setup 4.1 Connecting to a computer 4.2 Installing Multi-Function Station 4.3 Starting Multi-Function Station Printing 4.4 Using the unit as a printer Scanning 4.5 Using the unit as a scannerRemote Control 4.6 Operating the unit from your computer.
-
Page 86: Index
15. Index 15. Index 15.1 Index # #101 Date and time: 21 #102 Your logo: 22 #103 Your fax number: 22 #114 Location: 54 #120 Dialling mode: 18 #121 Recall/flash time: 54 #145 LCD display contrast: 54 #155 Change password: 55 #161 Ringer pattern: 55 #210 FAX ring count: 55 #212 TEL/FAX ring count: 57... - Page 87 PC fax setting (Feature #442): 60 PC print features: 61 Polling: 45 Power failure: 72 Power save (Feature #403): 55 Printer test list: 83 Programming: 53 Pull scan: 29 Push scan: 28 Q Quick scan: 37 R Recall time (Feature #121): 54...
- Page 88 PFQX2741ZA CM0807DN0 (CD)