Table of Contents
Advertisement
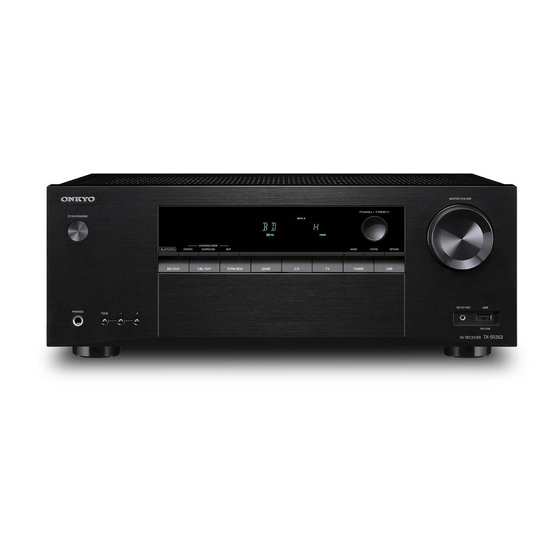
AV RECEIVER / AMPLI-TUNER AUDIO-VIDEO TX-SR353
Quick Start Guide
Guide rapide
Guía de inicio
For detailed descriptions of this unit, see the "Operating Instructions". (En)
http://www.onkyo.com/manual/txsr353/en.pdf
Pour avoir une description détaillée de cet appareil, lire le "Mode d'emploi". (Fr)
http://www.onkyo.com/manual/txsr353/fr.pdf
Para descripciones detalladas de esta unidad, consulte las "Manual de instrucciones". (Es)
http://www.onkyo.com/manual/txsr353/es.pdf
En
rápido
Fr
Es
En
Fr
Es
Advertisement
Table of Contents

Related Manuals for Onkyo TX-SR353


Summary of Contents for Onkyo TX-SR353
- Page 1 AV RECEIVER / AMPLI-TUNER AUDIO-VIDEO TX-SR353 Quick Start Guide Guide rapide Guía de inicio rápido For detailed descriptions of this unit, see the “Operating Instructions”. (En) http://www.onkyo.com/manual/txsr353/en.pdf Pour avoir une description détaillée de cet appareil, lire le “Mode d'emploi”. (Fr) http://www.onkyo.com/manual/txsr353/fr.pdf...
- Page 2 Layout / Disposition / Disposición Front Speakers, Center Speaker Front speakers output front stereo sound and a center speaker outputs center sound such as dialogs and vocals. The optimal positioning is for front speakers to be at ear height. Center speaker should be set up facing the listening position.
- Page 3 Hookup 120° 120° Raccordement Conexión En/Fr/Es : 4 – 11 Setup Surround Speakers Configuration Subwoofer Surround speakers create back sound field. Configuración Subwoofer reproduces bass sounds and creates rich The optimal positioning is just above ear height. sound field. En : 12, Fr : 16, Es : 20 Place it anywhere in the front of the listening position.
- Page 4 Speaker / Enceinte / Altavoz 1/2˝ 1/2˝ (12 mm) (12 mm) SUBWOOFER FRONT FRONT CENTER SURROUND SURROUND 1-2 Speaker cable/Câble d'enceinte/Cable de altavoz, 3-4 Subwoofer cable/Câble du caisson de basse/Cable de subwoofer...
- Page 5 The power cord must be connected only after all other Make sure the exposed wires of the speakers do not connections are completed. stick out of the speaker terminals when connecting. If Connect speakers with 6 h to 16 h impedance. the exposed wires of the speakers touch the rear Match the + and - terminals on this unit with the + and panel or the + and - wires touch each other, the...
- Page 6 TV–1 (ARC TV) / TV–1 (TV ARC) / TV–1 (TV ARC) This describes the connections for a TV that supports the ARC (Audio Return Channel) feature. With this connection, set ARC to ON in “HDMI Setup ( 12)”. To hear audio from the TV, press TV on the remote control.
- Page 7 TV–2 (Non-ARC TV) / TV–2 (TV Non-ARC) / TV–2 (TV no ARC) This describes the connections for a TV that does not support the ARC (Audio Return Channel) feature. Connect using an optical cable along with a HDMI cable. To hear audio from the TV, press TV on the remote control.
- Page 8 AV Component (HDMI) / Appareil AV (HDMI) / Componente AV (HDMI) To play the player, press INPUT SELECTOR on the remote control with the same name as the jack to which you connected the player so that the input on the unit is selected. 0 This unit does not support linked operations with other devices.
- Page 9 AV Component (Non-HDMI) / Appareil AV (Non-HDMI) / Componente AV (No HDMI) When making this connection, the setup screen for this unit is not displayed on the TV. Perform the settings while looking at the display on this unit. To play the player, press INPUT SELECTOR on the remote control with the same name as the jack to which you connected the player so that the input...
- Page 10 Audio Component / Appareil audio / Componente de audio Connect using a coaxial cable or analog audio cable. To play the player, press CD on the remote control. Raccordez à l'aide d'un câble coaxial ou d'un câble audio analogique. Pour lire le lecteur, appuyez sur la touche CD de la télécommande.
- Page 11 Antenna and Power / Antenne et alimentation / Antena y alimentación Antennas Hookup / Branchement des Turning the Unit On / Mise en marche de antennes / Conexión de antenas l'appareil / Encender la unidad Move the antenna around while playing the radio to Connect the power cord to the power outlet after find the position with the best reception.
-
Page 12: Automatic Speaker Setting (Accueq Room Calibration)
Setup Automatic Speaker Setting (AccuEQ Room HDMI Setup Calibration) Position the supplied setup microphone in the When connecting to a TV that supports ARC (Audio listening position to automatically make the optimum Return Channel), enable the ARC feature. SETUP MIC settings to suit the environment of the room, such as 1. -
Page 13: Basic Playback
Playback Basic Playback Listening To the Radio 1. Switch the input on the TV to that assigned to the 1. Press TUNER (a). unit. 2. Press BAND (b) several times to select either AM 2. Press INPUT SELECTOR (a) on the remote or FM. -
Page 14: Bluetooth ® Playback
3. On the screen, etc., of the BLUETOOTH-enabled MasterAudio, for example, to suit the input audio device, select “Onkyo AV Receiver”. After a short format. When the input signal is 2-channel, you can time “CONNECT” is displayed and pairing is select the DOLBY PLII MOVIE/MUSIC/GAME and completed. -
Page 15: Troubleshooting
Press (e) several times to check various settings in Important: The listening modes may not be available 3. When you see RESET? appear in the display, the following order: listening mode volume input depending on the current source, settings and status press SURROUND. -
Page 16: Configuration Hdmi
Configuration Réglage automatique d'enceinte (Calibrage Configuration HDMI de la pièce AccuEQ) Placez le microphone de configuration fourni sur la position Lorsque vous raccordez un téléviseur qui prend en charge la d'écoute pour effectuer automatiquement les réglages optimaux fonctionnalité ARC (Audio Return Channel), activez la SETUP MIC qui correspondent à... -
Page 17: Lecture De Base
Lecture Lecture de base Écoute de la radio 1. Réglez l'entrée du téléviseur sur celle assignée à 1. Appuyez sur TUNER (a). l'appareil. 2. Appuyez plusieurs fois sur BAND (b) pour 2. Appuyez sur le INPUT SELECTOR (a) de la sélectionner AM ou FM. - Page 18 Digital ou le DTS-HD MasterAudio pour, par 3. Sur l'écran, etc., du dispositif compatible exemple, correspondre au format audio entrant. BLUETOOTH, sélectionnez “Onkyo AV Receiver”. Lorsque le signal d'entrée est sur 2 canaux, vous Après une courte période “CONNECT” s'affiche et pouvez sélectionner les modes d'écoute DOLBY PLII...
-
Page 19: Dépannage
Réinitialisation de l'appareil principal Appuyez plusieurs fois sur (e) pour vérifier les 0 PCM (Fréquences d'échantillonnage 32 kHz à différents réglages dans l'ordre suivant : mode 192 kHz) Utilisez cette procédure pour remettre tous les d'écoute volume entrée du format audio 0 SACD (DSD 2 canaux uniquement) paramètres du récepteur sur leur réglage d'usine par source d'entrée. -
Page 20: Configuración Hdmi
Configuración Configuración Automática de los Altavoces Configuración HDMI (AccuEQ Room Calibration) Coloque el micrófono de configuración en la posición de Al conectar una TV compatible con ARC (Canal de retorno escucha para realizar automáticamente los ajustes óptimos de audio), habilite la función ARC. SETUP MIC adecuados para el entorno de la habitación, tales como las 1. -
Page 21: Reproducción Básica
Reproducción Reproducción básica Escuchar la radio 1. Cambie la entrada en la TV a aquella asignada a 1. Pulse TUNER (a). la unidad. 2. Pulse BAND (b) repetidamente para seleccionar 2. Pulse INPUT SELECTOR (a) en el mando a AM o FM. distancia con el mismo nombre que el conector al 3. - Page 22 3. En la pantalla, etc., del dispositivo con adecuarse al formato de entrada de audio. Cuando la BLUETOOTH elija “Onkyo AV Receiver”. Después señal de entrada es de 2 canales, puede seleccionar de un momento, se visualiza “CONNECT” y el los modos de audición DOLBY PLII MOVIE/MUSIC/...
-
Page 23: Resolución De Problemas
Restauración de la unidad principal Pulse (e) repetidamente para comprobar varios 0 PCM (frecuencias de muestreo desde 32 kHz ajustes en el siguiente orden: modo de audición hasta 192 kHz) Use este procedimiento para restaurar todos los volumen formato de entrada de audio fuente de 0 SACD (solo DSD 2 canales) ajustes del receptor a los ajustes de fábrica. - Page 24 Visit the Onkyo web site for the latest update. encima, 20 cm detrás, y 20 cm en cada lado). F1512-0 (C) Copyright 2015 Onkyo & Pioneer Corporation Japan. All rights reserved. Printed in China / Imprimé en Chine / Напечатано в Китае 5707-00001-079-0S...