Table of Contents
Advertisement
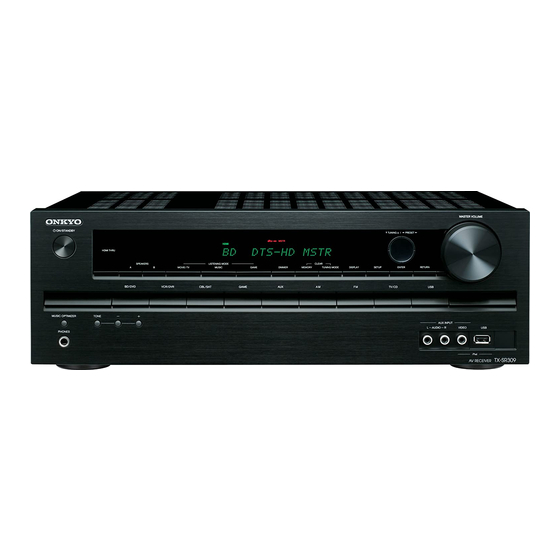
AV Receiver
TX-SR309
Instruction Manual
Thank you for purchasing an Onkyo AV Receiver.
Please read this manual thoroughly before making
connections and plugging in the unit.
Following the instructions in this manual will enable
you to obtain optimum performance and listening
enjoyment from your new AV Receiver.
Please retain this manual for future reference.
Contents
Introduction ...................................2
Connections.................................10
Turning On & Basic Operations ......17
Advanced Operations .................29
Controlling Other Components .... 38
Appendix ......................................43
E
n
Advertisement
Table of Contents

Related Manuals for Onkyo TX-SR309


Summary of Contents for Onkyo TX-SR309
- Page 1 AV Receiver TX-SR309 Instruction Manual Thank you for purchasing an Onkyo AV Receiver. Please read this manual thoroughly before making connections and plugging in the unit. Following the instructions in this manual will enable you to obtain optimum performance and listening enjoyment from your new AV Receiver.
-
Page 2: Introduction
Introduction WARNING: TO REDUCE THE RISK OF FIRE OR ELECTRIC SHOCK, DO NOT EXPOSE THIS APPARATUS TO RAIN OR MOISTURE. CAUTION: TO REDUCE THE RISK OF ELECTRIC SHOCK, DO NOT REMOVE COVER (OR BACK). NO USER-SERVICEABLE PARTS INSIDE. REFER SERVICING QUALIFIED PERSONNEL. -
Page 3: Precautions
If water or any other liquid gets inside this unit, have it checked by your Onkyo dealer. 8. Handling Notes • If you need to transport this unit, use the original packaging to pack it how it was when you originally bought it. -
Page 4: Supplied Accessories
We, ONKYO EUROPE ELECTRONICS GmbH LIEGNITZERSTRASSE 6, 82194 GROEBENZELL, GERMANY declare in own responsibility, that the ONKYO product described in this instruction manual is in compliance with the corresponding technical standards such as EN60065, EN55013, EN55020 and EN61000-3-2, -3-3. GROEBENZELL, GERMANY... -
Page 5: Table Of Contents
Hardware... 34 HDMI Setup... 35 Using the Audio Settings ... 36 Controlling Other Components iPod/iPhone Playback via Onkyo Dock ... 38 Using the Onkyo Dock... 38 Controlling Your iPod/iPhone ... 38 Controlling Other Onkyo Components ... 40 Preprogrammed Remote Control Codes ... 40 Entering Remote Control Codes... -
Page 6: Features
Pro Logic and the double-D symbol are trademarks of Dolby , Dolby Laboratories. Music Optimizer™ is a trademark of Onkyo Corporation. “HDMI, the HDMI Logo, and High-Definition Multimedia Interface are trademarks or registered trademarks of HDMI Licensing LLC in the United States and other countries.”... -
Page 7: Front & Rear Panels
Front & Rear Panels Front Panel (North American and Taiwan models) (European, Australian and Asian models) The page numbers in parentheses show where you can find the main explanation for each item. a 8 ON/STANDBY button (17) b HDMI THRU indicator (35) c SPEAKERS A and B buttons (26) d Remote control sensor (4) e LISTENING MODE buttons (23) -
Page 8: Display
Display For detailed information, see the pages in parentheses. a A and B speaker indicators (26) b Audio input indicators c Listening mode and format indicators (23, 27) d Tuning indicators (20) Rear Panel (North American, European, Australian and Asian models) (Taiwan models) a DIGITAL IN COAXIAL and OPTICAL jacks b COMPONENT VIDEO IN and OUT jacks... -
Page 9: Remote Controller
Controlling the AV Receiver To control the AV receiver, press RECEIVER to select Receiver mode. You can also use the remote controller to control Onkyo Blu-ray Disc/DVD player, CD player, and other components. See “Entering Remote Control Codes” for more page 40). -
Page 10: Connections
Connections Connecting the AV Receiver Connecting Your Speakers Connecting the Speaker Cables The following illustration shows which speaker should be connected to each pair of terminals. Front B right Front B left Speakers B ■ Push-type speaker terminals Strip 3/8" to 1/2" (10 to 12 mm) of insulation from the ends of the speaker cables, and twist the bare wires tightly, as shown. - Page 11 Speaker Configuration The following table indicates the channels you should use depending on the number of speakers that you have. No matter how many speakers you use, a powered subwoofer is recommended for a really powerful and solid bass. To get the best from your surround sound system, you need to set the speaker settings manually Number of channels ✔...
-
Page 12: About Av Connections
About AV Connections Connected image with AV components HDMI cable AV receiver Blu-ray Disc/ DVD player TV, projector, etc. • Before making any AV connections, read the manuals supplied with your AV components. • Don’t connect the power cord until you’ve completed and double-checked all AV connections. •... -
Page 13: Connecting Components With Hdmi
Connecting Components with HDMI Game console Satellite/cable set-top box, etc. Connect your components to the appropriate jacks. The default input assignments are shown below. Jack Components Input HDMI IN1 Blu-ray Disc/DVD player HDMI IN2 Satellite/cable set-top box, etc. HDMI IN3 Game console Output HDMI OUT... -
Page 14: Connecting Your Components
Connecting Your Components The on-screen setup menus appear only on a TV that is connected to the HDMI OUT. If your TV is connected to the MONITOR OUT V or the COMPONENT VIDEO OUT, use the AV receiver’s display when changing settings. Connect your components to the appropriate jacks. -
Page 15: Connecting Onkyo U Components
AV receiver. The other jack is for connecting additional u-capable components. • Connect only Onkyo components to u jacks. Connecting other manufacturer’s components may cause a malfunction. • Some components may not support all u functions. Refer to the manuals supplied with your other Onkyo components. -
Page 16: Connecting Antenna
Connecting Antenna This section explains how to connect the supplied indoor FM antenna and AM loop antenna. The AV receiver won’t pick up any radio signals without any antenna connected, so you must connect the antenna to use the tuner. Caution •... -
Page 17: Turning On & Basic Operations
Turning On & Basic Operations Turning On/Off the AV Receiver 8ON/STANDBY Turning On Press 8 ON/STANDBY on the front panel. Press RECEIVER followed by 8 on the remote controller. The AV receiver comes on, the display lights. Turning Off Press 8 ON/STANDBY on the front panel. Press RECEIVER followed by 8 on the remote controller. -
Page 18: Playback
Start playback on the source component. To adjust the volume, use the MASTER VOLUME control. Select a listening mode and enjoy! Controlling Contents of USB Devices See “Controlling Other Onkyo Components” about the operation of other components Press USB first. (➔... -
Page 19: Understanding Icons On The Display
CH +/– In Standard Mode (iPod/iPhone), this button selects albums. RETURN This button returns to the previous menu. This button selects the next song. This button fast-forwards the current song. This button stops playback. MODE You can switch between Standard Mode and Extended Mode during iPod/iPhone playback. -
Page 20: Using The Tuner
MP3 player’s instruction manual for details. • Protected WMA music files on an MP3 player cannot be played. • Onkyo accepts no responsibility whatsoever for the loss or damage to data stored on a USB mass storage device when that device is used with the AV receiver. - Page 21 ■ Manual tuning mode In manual tuning mode, FM stations will be in mono. Press TUNING MODE so that the AUTO indicator goes off on the display. Press and hold TUNING q/w. The frequency stops changing when you release the button.
- Page 22 ■ Displaying Radio Text (RT) Press RT/PTY/TP once. The RT information scrolls across the display. Note • The message “Waiting” may appear while the AV receiver waits for the RT information. • If the message “No Text Data” appears on the display, no RT information is available.
-
Page 23: Using Basic Functions
Using Basic Functions Using the Listening Modes Selecting Listening Modes See “Listening Modes” for detailed information about the listening modes ■ Listening Mode Buttons MOVIE/TV button This button selects the listening modes intended for use with movies and TV. MUSIC button This button selects the listening modes intended for use with music. - Page 24 The illustration shows which speakers are activated in each channel. See “Sp Config (Speaker Configuration)” for the page 31). speaker setup (➔ ■ Onkyo-Original DSP Listening Modes Listening Mode Description Orchestra Suitable for classical or operatic music, this mode emphasizes the surround channels...
- Page 25 Listening Mode Description Multichannel This mode is for use with PCM multichannel sources. M u l t Dolby Pro Logic II Dolby Pro Logic II expands any 2-channel source for 5.1-channel playback. It provides a very natural and seamless surround-sound experience that fully envelops M o v i e the listener.
-
Page 26: Using The Home Menu
Using the Home Menu The Home menu provides you quick access to frequently used menus without having to go through the long standard menu. This menu enables you to change settings and view the current information. The Home menus appear only on a TV that is connected to the HDMI OUT. -
Page 27: Setting The Display Brightness
Information is displayed for about three seconds, then the previously displayed information reappears. Changing the Input Display When you connect an u-capable Onkyo component, you must configure the input display so that u can work properly. This setting can be done only from the front panel. -
Page 28: Muting The Av Receiver
Muting the AV Receiver You can temporarily mute the output of the AV receiver. Press RECEIVER followed by MUTING. The output is muted and the MUTING indicator flashes on the display. • To unmute, press MUTING again or adjust the volume. •... -
Page 29: Advanced Operations
Advanced Operations Advanced Setup On-screen Setup Menus The on-screen setup menus appear only on a TV that is connected to the HDMI OUT. If your TV is connected to the MONITOR OUT V or the COMPONENT VIDEO OUT, use the AV receiver’s display when changing settings. -
Page 30: Hdmi Input
Explanatory Notes Menu ■ Subwoofer Yes: Select if a subwoofer is connected. Select if no subwoofer is connected. a Menu selection b Setting target c Setting options (default setting underlined) HDMI Input Menu HDMI Input If you connect a video component to an HDMI input, you must assign that input to an input selector. -
Page 31: Sp Config (Speaker Configuration)
• Available sampling rate for PCM signals from a digital input (optical and coaxial) is 32/44.1/48/88.2/96 kHz/16, 20, 24 bit. Sp Config (Speaker Configuration) Menu Sp Config This section explains how to specify which speakers are connected and their sizes. For speakers with a cone diameter larger than 6-1/2 inches (16 cm), specify Large (full band). -
Page 32: Level Cal (Level Calibration)
Level Cal (Level Calibration) Menu Level Cal Here you can adjust the level of each speaker with the built-in test tone so that the volume of each speaker is the same at the listening position. ■ Left, Center , Right, Surround Right, Surround Left –12 dB to 0 dB to +12 dB in 1 dB step. -
Page 33: Source Setup
Theater-Dimensional Setting ■ Listening Angle Wide: Select if the listening angle is 40 degrees. Narrow: Select if the listening angle is 20 degrees. With this setting, you can optimize the Theater- Dimensional listening mode by specifying the angle of the front left and right speakers relative to the listening position. -
Page 34: Hardware
■ Remote ID 1, 2, or 3 When several Onkyo components are used in the same room, their remote ID codes may overlap. To differentiate the AV receiver from the other components, you can change its remote ID from “1”, to “2” or “3”. -
Page 35: Hdmi Setup
HDMI Setup Menu HDMI Setup ■ HDMI Ctrl (RIHD) Turn this setting on to allow components connected via HDMI to be controlled by the AV receiver (➔ page 50). Note • When set to “On” and close the menu, the name of connected p-compatible components and “RIHD On”... -
Page 36: Using The Audio Settings
■ LipSync This function allows the AV receiver to automatically correct any delay between the video and the audio, based on the data from the connected monitor. Note • This function works only if your HDMI-compatible TV supports HDMI Lip Sync. After changing the settings of the “HDMI Ctrl (RIHD)”, “HDMI Through”... - Page 37 Music Optimizer ■ Music Optimizer Turn this setting on to enhance the sound quality of compressed music files. Use it with music files that use “lossy” compression, such as MP3. • Alternatively, you can use the AV receiver’s MUSIC OPTIMIZER. Note •...
-
Page 38: Controlling Other Components
Playback via Onkyo Dock Using the Onkyo Dock Dock is sold separately. Models sold are different depending on the region. For the latest information on the Onkyo Dock components, see the Onkyo web site at: http://www.onkyo.com Before using the Onkyo Dock components, update your iPod/iPhone with the latest software, available from the Apple web site. - Page 39 • For detailed operation of the iPod/iPhone, please refer to the instruction manual. This button does not turn the Onkyo DS-A2 or DS-A2X RI Dock on or off. Your iPod/iPhone may not respond the first time you press this button, in which case you should press it again.
-
Page 40: Controlling Other Onkyo Components
AV receiver, and operate the component. Controlling Onkyo components without u If you want to control an Onkyo component by pointing the remote controller directly at it, or you want to control an Onkyo component that’s not connected via u, use the... -
Page 41: Resetting Remote Mode Buttons
Controlling Other Components By pressing REMOTE MODE that’s been programmed with the remote control code for your component, you can control Onkyo component as below. For details on entering a remote control code for a different component (➔... - Page 42 Press the appropriate REMOTE MODE first. Note • With some components, certain buttons may not work as expected, and some may not work at all. Components Buttons b TOP MENU c q/w/e/r, ENTER d SETUP e 1, 3, 2, 5, 4, 7, 6 f SEARCH REPEAT...
-
Page 43: Appendix
Onkyo dealer. If you can’t resolve the issue yourself, try resetting the AV receiver before contacting your Onkyo dealer. To reset the AV receiver to its factory defaults, turn it on and, while holding down VCR/DVR, press 8 ON/STANDBY. - Page 44 ■ Only the front speakers produce sound When the Stereo or Mono listening mode is selected, only the front speakers and subwoofer produce sound. Check the Speaker Configuration. ■ Only the center speaker produces sound If you use the Dolby Pro Logic II Movie, Dolby Pro Logic II Music, or Dolby Pro Logic II Game listening mode with a mono source, such as an AM radio station or mono TV program, the sound is...
-
Page 45: Usb Device Playback
■ Can’t control other components If it’s an Onkyo component, make sure that the u cable and analog audio cable are connected properly. Connecting only an u cable won’t work. Make sure you’ve selected the correct remote controller mode. - Page 46 Onkyo is not responsible for damages (such as CD rental fees) due to unsuccessful recordings caused by the unit’s malfunction. Before you record important data, make sure that the material will be recorded correctly.
-
Page 47: Connection Tips And Video Signal Path
Connection Tips and Video Signal Path The AV receiver supports several connection formats for compatibility with a wide range of AV equipment. The format you choose will depend on the formats supported by your components. Use the following sections as a guide. The on-screen setup menus appear only on a TV that is connected to the HDMI OUT. -
Page 48: Usb Device Requirements
USB Features USB Device Requirements • USB mass storage device class (but not always guaranteed). • FAT16 or FAT32 file system format. • Up to 255 folders can be displayed, and folders may be nested up to 8 levels deep. •... -
Page 49: About Hdmi
About HDMI Designed to meet the increased demands of digital TV, HDMI (High Definition Multimedia Interface) is a new digital interface standard for connecting TVs, projectors, Blu-ray Disc/DVD players, set-top boxes, and other video components. Until now, several separate video and audio cables have been required to connect AV components. With HDMI, a single cable can carry control signals, digital video, and up to eight channels of digital audio (2-channel PCM, multichannel digital audio, and multichannel PCM). -
Page 50: Using An Rihd-Compatible Tv, Player, Or Recorder
Using an RIHD-compatible TV, Player, or Recorder p, which stands for Remote Interactive over HDMI, is the name of the system control function found on Onkyo components. The AV receiver can be used with CEC (Consumer Electronics Control), which allows system control over HDMI and is part of the HDMI standard. - Page 51 ■ How to connect and setup Confirm the connecting and setting. 1. Connect the HDMI OUT jack to the HDMI input jack of the TV. Blu-ray Disc/DVD player, etc. HDMI connection AV receiver DIGITAL AUDIO connection (OPTICAL) TV, projector, etc. 2.
-
Page 52: Specifications
Specifications Amplifier Section Rated Output Power All channels: (North American) 65 watts minimum continuous power per channel, 8 ohm loads, 2 channels driven from 20 Hz to 20 kHz, with a maximum total harmonic distortion of 0.7% (FTC) 90 watts minimum continuous power per channel, 6 ohm loads, 2 channels driven at 1 kHz, with a maximum total harmonic distortion of 0.9% (FTC) - Page 53 Memo...
- Page 54 Memo...
- Page 55 Memo...
- Page 56 1301, 555 Tower, No.555 West NanJin Road, Jin an, Shanghai, China 200041, Tel: 86-21-52131366 Fax: 86-21-52130396 Y1106-2 SN 29400557A (C) Copyright 2011 ONKYO SOUND & VISION CORPORATION Japan. All rights reserved. * 2 9 4 0 0 5 5 7 A *...