
Related Manuals for Yamaha HTR-5065


Summary of Contents for Yamaha HTR-5065
- Page 1 AV Receiver Owner’s Manual Read the supplied booklet “Safety Brochure” before using the unit. English...
-
Page 2: Table Of Contents
CONTENTS Accessories ............4 7 Connecting recording devices . - Page 3 Playback of iTunes/iPod music contents ............58 Playing back music in multiple rooms (HTR-5065 only) ... . 60 Frequently asked questions .
-
Page 4: Accessories
YPAO microphone CD-ROM (Owner’s Manual) • The illustrations of the main unit and remote control used in this manual are of the HTR-5065 (U.S.A. model), unless otherwise specified. • Some features are not available in certain regions. • Due to product improvements, specifications and appearance are subject to change without notice. -
Page 5: Features
. p.41 • Enjoying compressed music with enhanced sound (Compressed Music Enhancer) . p.60 • Playing back music in multiple rooms (Zone B)* Network contents * HTR-5065 only Speakers Audio Audio iPod/iPhone/iPad HDMI Control USB device 3D and 4K signals supported... -
Page 6: Full Of Useful Functions
Full of useful functions! Useful tips The combination of video/audio input jacks does not ❑ Connecting various devices (p.23) ❑ Creating 3-dimensional sound fields (p.37) match an external device... A number of HDMI jacks and various input/output jacks The Virtual Presence Speaker (VPS) function allows you Use “Audio In”... -
Page 7: Part Names And Functions
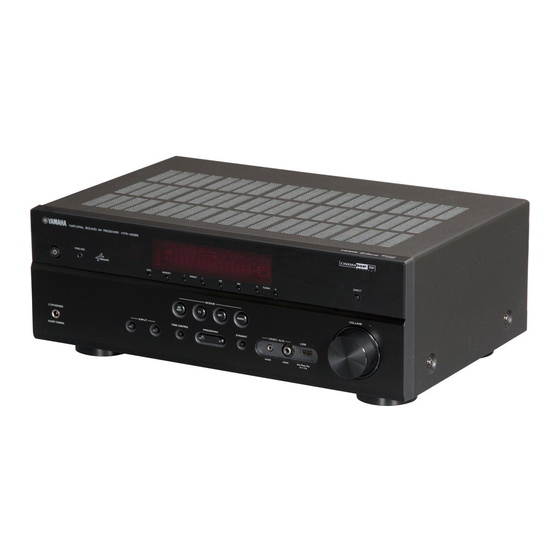
Part names and functions Front panel YPAO MIC DIRECT INFO MEMORY PRESET TUNING VOLUME SCENE RADIO VIDEO INPUT TONE CONTROL PROGRAM STRAIGHT PHONES SILENT CINEMA AUDIO VIDEO iPod/iPhone/iPad 2.1A z (power) key PRESET keys SCENE keys Turns on/off (standby) the unit. Select a preset FM/AM radio station (p.44). -
Page 8: Front Display (Indicators)
MUTE SBL SB SBR > HDMI ZONE indicators (HTR-5065 only) Speaker indicators Lights up when HDMI signals are being input or output. “SP A” lights up when the Zone A speaker output is enabled Indicate speaker terminals from which signals are output. -
Page 9: Rear Panel
Rear panel (HTR-5065 U.S.A. model) HDMI 1 HDMI 2 HDMI 3 HDMI 4 NETWORK HDMI OUT (BD/DVD) ANTENNA COMPONENT VIDEO SPEAKERS SURROUND BACK/BI AMP /ZONE B FRONT CENTER SURROUND SINGLE COMPONENT VIDEO MONITOR OUT VIDEO OPTICAL COAXIAL COAXIAL OPTICAL ( TV ) -
Page 10: Remote Control
Registers remote control codes of external devices on the SETUP OPTION remote control (p.82). Radio keys Operate the FM/AM radio when “TUNER” is selected as the ZONE keys (HTR-5065 only) ENTER VOLUME input source (p.42). Enable/disable the audio output to Zone A or Zone B (p.61). RETURN DISPLAY Switches to FM radio. -
Page 11: Preparations
PREPARATIONS General setup procedure Placing speakers (p.12) Select the speaker layout for the number of speakers that you are using and place them in your room. Connecting speakers (p.15) Connect the speakers to the unit. Connecting a TV (p.18) Connect a TV to the unit. Connecting playback devices (p.23) Connect video devices (such as BD/DVD players) and audio devices (such as CD players) to the unit. -
Page 12: Placing Speakers
Produces LFE (low-frequency effect) channel sounds and reinforces the bass parts of other channels. ● ● ● ● ● ● Subwoofer This channel is counted as “0.1”. * HTR-5065 only • HTR-5065 supports 2- to 7.1-channel system, and HTR-4065 supports 2- to 5.1-channel speaker system. PREPARATIONS ➤ Placing speakers... - Page 13 2 3 4 5 6 7 8 9 10 Speaker placement 7.1-channel system (HTR-5065 only) 5.1-channel system 10° to 30° 10° to 30° 10° to 30° 10° to 30° 30 cm (1 ft) or more 6.1-channel system (HTR-5065 only) 4.1-channel system 10°...
- Page 14 2 3 4 5 6 7 8 9 10 Speaker placement ■ 3.1-channel system Setting the speaker impedance (U.S.A. model only) Under its default settings, the unit is configured for 8-ohm speakers. When connecting 6-ohm speakers, set the speaker impedance to “6 Ω MIN”. In this case, you can also use 4-ohm speakers as the front speakers.
-
Page 15: Connecting Speakers
Connect the speakers placed in your room to the unit. 5.1-channel system 7.1-channel system The following diagrams provide connections for 5.1- and 7.1-channel systems as examples. For other (HTR-5065 only) systems, connect speakers while referring to the connection diagram for the 5.1-channel system. The unit (rear) The unit (rear) -
Page 16: Connecting Front Speakers That Support Bi-Amp Connections
(Zone A) and in another room (Zone B). To connect the Zone B speakers, see “Playing back music in multiple rooms + (red) (HTR-5065 only)” (p.60). - (black) Using a banana plug (U.S.A. and China models only) a Tighten the speaker terminal. -
Page 17: Input/Output Jacks And Cables
Input/output jacks and cables ■ ❑ VIDEO jacks ❑ AUDIO jacks Video/audio jacks Transmit analog video signals. Use a video pin cable. (Stereo L/R jacks) ❑ HDMI jacks Transmit analog stereo audio signals. Use a stereo pin Transmit digital video and digital sound through a single Video pin cable cable. -
Page 18: Connecting A Tv
1 2 3 4 5 6 7 8 9 10 TV connection Connecting a TV Connect a TV to the unit so that video input to the unit can be output to the TV. About HDMI Control You can also enjoy playback of TV audio on the unit. HDMI Control allows you to operate external devices via HDMI. - Page 19 1 2 3 4 5 6 7 8 9 10 TV connection ❑ Necessary settings Configure the settings for HDMI Control. To use HDMI Control and ARC, you need to configure the following settings. a Enable HDMI Control on the TV and playback devices (such as HDMI For details on settings and operating your TV, refer to the instruction manual for the TV.
-
Page 20: Hdmi Control-Compatible Tv
1 2 3 4 5 6 7 8 9 10 TV connection ■ ❑ Necessary settings Connection Method 2 (HDMI Control-compatible TV) To use HDMI Control, you need to configure the following settings. Connect the TV to the unit with an HDMI cable and a digital optical cable. For details on settings and operating your TV, refer to the instruction manual for the TV. - Page 21 1 2 3 4 5 6 7 8 9 10 TV connection ■ Connection Method 3 (TV with HDMI input jacks) Configure the settings for HDMI Control. Connect the TV to the unit with an HDMI cable and a digital optical cable. a Enable HDMI Control on the TV and playback devices (such as a HDMI Control-compatible BD/DVD player).
- Page 22 1 2 3 4 5 6 7 8 9 10 TV connection ■ ❑ VIDEO (composite video) connection (with a video pin cable) Connection Method 4 (TV without HDMI input jacks) When connecting any video device to the AV 1–2 (COMPONENT VIDEO) jacks of the MONITOR OUT unit, connect the TV to the MONITOR OUT (COMPONENT VIDEO) jacks.
-
Page 23: Connecting Playback Devices
1 2 3 4 5 6 7 8 9 10 Playback device connections Connecting playback devices ■ The unit is equipped with a variety of input jacks including HDMI input jacks to allow Component video connection you to connect different types of playback devices. For information on how to connect Connect a video device to the unit with a component video cable and an audio cable an iPod or a USB storage device, see the following pages. - Page 24 1 2 3 4 5 6 7 8 9 10 Playback device connections ■ ■ Composite video connection Changing the combination of video/audio input jacks Connect a video device to the unit with a video pin cable and an audio cable (digital If the combination of video/audio input jacks available on the unit does not match your coaxial, digital optical, or stereo pin cable).
-
Page 25: Connecting Audio Devices (Such As Cd Players)
1 2 3 4 5 6 7 8 9 10 Playback device connections Connecting audio devices (such as CD players) After connecting external devices (such as a TV and playback devices) and power cable of the unit, turn on the unit. Connect audio devices such as CD players and MD players to the unit. -
Page 26: Connecting To The Jacks On The Front Panel
1 2 3 4 6 7 8 9 10 Playback device connections FM/AM antenna connections Connecting to the jacks on the front panel Connecting the FM/AM antennas Use the VIDEO AUX jacks on the front panel to temporarily connect devices such as Connect the supplied FM/AM antennas to the unit. -
Page 27: Connecting To A Network
1 2 3 4 5 6 7 8 9 10 Network connections Connecting to a network Connect the unit to your router with a commercially-available STP network cable (CAT-5 or higher straight cable). • Some security software installed on your PC or the firewall settings of network devices (such as a router) You can enjoy Internet radio or music files stored on media servers, such as PCs and may block the access of the unit to the network devices or the Internet. -
Page 28: Connecting Recording Devices
1 2 3 4 5 6 7 9 10 Recording device connections Power cable connection Connecting recording devices Connecting the power cable You can connect video/audio recording devices to the AV OUT jacks. These jacks After all the connections are complete, plug in the power cable. output analog video/audio signals selected as the input. -
Page 29: Selecting An On-Screen Menu Language
1 2 3 4 5 6 7 8 9 Language setting Selecting an on-screen menu language CODE SET CODE SET SOURCE SOURCE RECEIVER RECEIVER RECEIVER z RECEIVER z Select the desired on-screen menu language from English HDMI HDMI To exit from the menu, press SETUP. (default), French, German, Spanish, Russian and Chinese. -
Page 30: Optimizing The Speaker Settings Automatically (Ypao)
SOURCE RECEIVER RECEIVER RECEIVER z RECEIVER z The Yamaha Parametric room Acoustic Optimizer (YPAO) function HDMI HDMI Place the YPAO microphone at your listening detects speaker connections, measures the distances from them to your listening position(s), and then automatically optimizes the... - Page 31 1 2 3 4 5 6 7 8 9 10 Automatic speaker setup CODE SET CODE SET • To cancel the operation, disconnect the YPAO microphone, or use the • A speaker with a problem is indicated by blinking of the speaker indicators in SOURCE SOURCE RECEIVER...
-
Page 32: Error Messages
Use the cursor keys (e/r) to select the Exit YPAO, and turn off and on the unit. If this error occurs E-10:Internal Err. An internal error has occurred. repeatedly, contact the nearest authorized Yamaha dealer or desired operation. (E-10:INTERNAL) service center. -
Page 33: Warning Messages
1 2 3 4 5 6 7 8 9 10 Automatic speaker setup Warning messages If a warning message is displayed after the measurement, you can still save the measurement results by following on-screen instructions. However, we recommend you perform YPAO again in order to use the unit with the optimal speaker settings. Warning message Cause Remedy... -
Page 34: Playback
PLAYBACK CODE SET CODE SET SOURCE SOURCE RECEIVER RECEIVER HDMI Basic playback procedure Input selection keys Switching information on the front display AUDIO Turn on the external devices (such as a TV or V-AUX ZONE ZONE BD/DVD player) connected to the unit. TUNER Press INFO. -
Page 35: Selecting The Input Source And Favorite Settings With One Touch
Configuring scene assignments HDMI sound program, Compressed Music Enhancer on/off, and target Input selection keys zones (HTR-5065 only) with just one touch. Perform the following operations to prepare the AUDIO Press SCENE. settings you want to assign to a scene. -
Page 36: Selecting The Sound Mode
Selecting the sound mode CODE SET CODE SET SOURCE SOURCE RECEIVER RECEIVER The unit is equipped with a variety of sound programs and HDMI HDMI surround decoders that allow you to enjoy playback sources with your favorite sound mode (such as sound field effect or stereo playback). -
Page 37: Enjoying Sound Field Effects (Cinema Dsp)
You’ll never get tired listening for long periods. The unit is equipped with a variety of sound programs that utilize Yamaha’s original DSP technology (CINEMA DSP). It allows you to easily create sound fields like actual movie This program reproduces monaural video sources, such as classic movies, in an atmosphere of a good old movie theater. - Page 38 2 channels and output from the front speakers (this program does not utilize CINEMA DSP). (HTR-5065: 7ch Stereo, HTR-4065: 5ch Stereo) Use this program to output sound from all speakers. When you play back...
-
Page 39: Enjoying Unprocessed Playback
MODE Enjoying sound field effects without surround speakers (Virtual CINEMA DSP) • (HTR-5065 only) To enable 6.1/7.1-channel playback from 5.1-channel sources when surround If you select one of the sound programs (except 2ch Stereo and back speakers are used, set “Extended Surround” (p.63) in the “Option” menu to a 7ch/5ch Stereo) when no surround speakers are connected, the setting other than “Off”. -
Page 40: Enjoying Pure High Fidelity Sound (Direct Playback)
MUTE Neo: 6 Music Uses the DTS Neo: 6 decoder suitable for music. * HTR-5065 only (HTR-5065 only) • You cannot select the Dolby Pro Logic IIx decoders when headphones are connected or when “Surround Back” in the “Setup” menu is set to “None”. -
Page 41: Enjoying Compressed Music With Enhanced Sound (Compressed Music Enhancer)
Enjoying compressed music with enhanced CODE SET CODE SET sound (Compressed Music Enhancer) SOURCE SOURCE RECEIVER RECEIVER HDMI HDMI AUDIO AUDIO Compressed Music Enhancer adds depth and breadth to the V-AUX V-AUX sound, allowing you to enjoy a dynamic sound close to the original ZONE ZONE TUNER... -
Page 42: Listening To Fm/Am Radio
Listening to FM/AM radio CODE SET CODE SET SOURCE SOURCE RECEIVER RECEIVER You can tune into a radio station by specifying its frequency or Selecting a frequency for reception HDMI HDMI selecting from registered radio stations. Press TUNER to select “TUNER” as the input AUDIO AUDIO TUNER... -
Page 43: Registering Favorite Radio Stations (Presets)
Registering favorite radio stations (presets) CODE SET CODE SET • To specify the preset number from which to start the registration, press SOURCE SOURCE RECEIVER RECEIVER You can register up to 40 radio stations as presets. Once you have PRESET or cursor keys (q/w) to select a preset number within 5 seconds HDMI HDMI after step 4 (while “READY”... - Page 44 ■ ■ Selecting a preset station Clearing preset stations CODE SET CODE SET Tune into a registered radio station by selecting its preset number. Clear radio stations registered to the preset numbers. SOURCE SOURCE RECEIVER RECEIVER HDMI HDMI Press TUNER to select “TUNER” as the input Press TUNER to select “TUNER”...
-
Page 45: Radio Data System Tuning
Radio Data System tuning CODE SET CODE SET • “Program Service”, “Program Type”, “Radio Text”, and “Clock Time” are not SOURCE SOURCE RECEIVER RECEIVER (Europe model only) displayed if the radio station does not provide the Radio Data System HDMI HDMI service. -
Page 46: Playing Back Ipod Music
Playing back iPod music You can play back iPod music on the unit using a USB cable Connecting an iPod supplied with the iPod. Connect your iPod to the unit with the USB cable supplied with the iPod. • Some features may not be compatible, depending on the model or software version of the iPod. -
Page 47: Playback Of Ipod Content
Playback of iPod content CODE SET CODE SET • To return to the previous screen, press RETURN. SOURCE SOURCE RECEIVER RECEIVER Follow the procedure below to operate the iPod contents and start • To switch between the browse and playback screens during playback, press HDMI HDMI playback. - Page 48 ■ ■ Playback screen Operating the iPod itself or remote control CODE SET CODE SET (simple play) SOURCE SOURCE RECEIVER RECEIVER HDMI HDMI i P o d Press MODE to switch to the simple play mode. N o w P l a y i n g The TV menu screen turns off and iPod operations are A r t i s t N a m e AUDIO...
- Page 49 ■ Repeat/shuffle settings CODE SET CODE SET You can configure the shuffle/repeat settings of your iPod. SOURCE SOURCE RECEIVER RECEIVER HDMI HDMI • During simple play, configure the shuffle/repeat settings directly on your iPod or press MODE to display the TV menu screen and then follow the procedure below. AUDIO AUDIO V-AUX...
-
Page 50: Playing Back Music Stored On A Usb Storage Device
Playing back music stored on a USB storage device CODE SET CODE SET SOURCE SOURCE RECEIVER RECEIVER You can play back music files stored on a USB storage device on HDMI HDMI the unit. Refer to the instruction manuals for the USB storage •... - Page 51 ■ Browse screen CODE SET CODE SET Use the cursor keys to select an item and press SOURCE SOURCE RECEIVER RECEIVER ENTER. HDMI HDMI U S B If a song is selected, playback starts and the playback T o p screen is displayed.
- Page 52 ■ ■ Playback screen Repeat/shuffle settings CODE SET CODE SET You can configure the repeat/shuffle settings for playback of USB SOURCE SOURCE RECEIVER RECEIVER storage device contents. HDMI HDMI U S B N o w P l a y i n g When “USB”...
-
Page 53: Playing Back Music Stored On Media Servers (Pcs/Nas)
Playing back music stored on media servers (PCs/NAS) CODE SET CODE SET SOURCE SOURCE RECEIVER RECEIVER You can play back music files stored on your PC or Playback of PC music contents HDMI HDMI DLNA-compatible NAS on the unit. Follow the procedure below to operate the PC music contents and AUDIO AUDIO start playback. - Page 54 ■ Browse screen CODE SET CODE SET Use the cursor keys to select an item and press SOURCE SOURCE RECEIVER RECEIVER ENTER. HDMI HDMI S E R V E R If a song is selected, playback starts and the playback N A S A screen is displayed.
- Page 55 ■ ■ Playback screen Repeat/shuffle settings CODE SET CODE SET You can configure the repeat/shuffle settings for the playback of PC SOURCE SOURCE RECEIVER RECEIVER music content. HDMI HDMI S E R V E R N o w P l a y i n g When “SERVER”...
-
Page 56: Listening To Internet Radio
Listening to Internet radio CODE SET CODE SET SOURCE SOURCE RECEIVER RECEIVER You can listen to Internet radio stations from all over the world. HDMI HDMI Press NET repeatedly to select “NET RADIO” as the You can control the Internet radio with the menu displayed on the input source. - Page 57 ■ ■ Browse screen Playback screen CODE SET CODE SET SOURCE SOURCE RECEIVER RECEIVER HDMI HDMI N E T R A D I O N E T R A D I O T o p N o w P l a y i n g B o o k m a r k s L o c a t i o n s S t a t i o n N a m e...
-
Page 58: Playing Back Itunes/Ipod Music Via A Network (Airplay)
Playing back iTunes/iPod music via a network (AirPlay) The AirPlay function allows you to play back iTunes/iPod music on Playback of iTunes/iPod music contents the unit via network. Follow the procedure below to play back iTunes/iPod music iTunes contents on the unit. Turn on the unit, and start iTunes on the PC or display the playback screen on the iPod. - Page 59 CODE SET CODE SET • You can turn on the unit automatically when starting playback on iTunes or iPod by • To control iTunes playback with the remote control of the unit, you need to SOURCE SOURCE RECEIVER RECEIVER setting “Network Standby” (p.78) in the “Setup” menu to “On”. configure the iTunes preferences to enable iTunes control from remote speakers in HDMI HDMI...
-
Page 60: Playing Back Music In Multiple Rooms (Htr-5065 Only)
• The same input source and volume setting are applied to both zones. • You can automatically enable/disable the audio output to Zone A/B in conjunction with a scene selection (p.35) Zone B Zone A PLAYBACK ➤ Playing back music in multiple rooms (HTR-5065 only) - Page 61 MODE Press VOLUME to adjust the volume. 0.0 dB ENTER RETURN To exit from the menu, press OPTION. INPUT INPUT TV VOL TV VOL TV CH TV CH MUTE MUTE PLAYBACK ➤ Playing back music in multiple rooms (HTR-5065 only)
-
Page 62: Configuring Playback Settings For Different Playback Sources
D S P / S u r r o u n d (DSP/Surround) V o l u m e T r i m Extended (HTR-5065 only) L i p s y n c Surround Selects how to play back 5.1- to 7.1-channel sources... - Page 63 ❑ Extended Surround (EXTD) • If you set an extreme value, sounds may not match those from other channels. (HTR-5065 only) Selects how to play back 5.1- to 7.1-channel sources when surround back speakers Adjusting with the front panel controls are used.
- Page 64 ■ Lipsync (Lipsync) Enables/disables the adjustment configured in “Lipsync” (p.74) in the “Setup” menu. • Some Dolby Digital EX or DTS-ES sources do not contain a flag for reproducing surround back channel. In this case, the unit reproduces the signals in 5.1-channel if “Extended Surround” is set to “Auto”. To reproduce the signals in 6.1 or 7.1-channel, set it to “bPLIIx Movie”, “bPLIIx Music”, or “EX/ES”.
- Page 65 ■ ■ Audio In (Audio In) Volume Interlock (Interlock) Combines the video jack of the selected input source (HDMI 1–4 or AV 1–2) with an Enables/disables volume controls from iTunes/iPod via AirPlay. audio jack of others. For example, use this function in the following cases. Settings •...
-
Page 66: Configurations
CONFIGURATIONS Configuring various functions (Setup menu) You can configure the unit’s various function with the menu displayed on the TV screen. • Operations with TV screen are available only when your TV is connected to the unit via HDMI. If not, carry out operations while viewing the front display. -
Page 67: Setup Menu Items
Setup menu items Menu Item Function Page (HTR-5065 only) Power Amp Assign Selects a speaker system. Subwoofer Selects whether or not a subwoofer is connected. Front Selects the size of the front speakers. Selects whether or not a center speaker is connected and its size. - Page 68 Menu Item Function Page CINEMA DSP 3D Mode Enables/disables CINEMA DSP 3D. Panorama Enables/disables the broadening effect of the front sound field. DSP Parameter Center Width Adjusts the broadening effect of the center sound field. Dimension Adjusts the difference in level between the front and surround sound fields. Center Image Adjusts the center orientation level (broadening effect) of the front sound field.
-
Page 69: Speaker
The front speakers will produce all of the front channel frequency components. ❑ Power Amp Assign (HTR-5065 only) Selects a speaker system. • “Front” is automatically set to “Large” when “Subwoofer” is set to “None”. In addition to the 5.1- or 7.1-channel speaker system, various speaker configurations ❑... - Page 70 Sets the phase of the subwoofer. When the bass sound is lacking or unclear, switch the subwoofer phase. ❑ Surround Back Settings (HTR-5065 only) Normal (default) Does not reverse the subwoofer phase. Selects whether or not surround back speakers are connected and their sizes.
- Page 71 Choices Set “EQ Select” to “GEQ”. Front L, Front R, Center, Surround L, Surround R, Surround Back L (HTR-5065 only), Use the cursor keys (q/w) to select “Channel” and the cursor keys (e/r) to select Surround Back R (HTR-5065 only), Subwoofer the desired speaker channel.
-
Page 72: Hdmi
HDMI HDMI OUT (TV) Enables/disables the audio output from a TV connected to the HDMI OUT jack. Configures the HDMI settings. Settings Off (default) Disables the audio output from the TV. S e t u p Enables the audio output from the TV. S p e a k e r C o n f i g u r a t i o n H D M I... -
Page 73: Sound
Choices (SCENE keys) spacious sound field in combination with the surround sound field. This setting is BD/DVD, TV, NET, RADIO effective when “bPLII Music” or “bPLIIx Music” (HTR-5065 only) is selected. Settings Settings Disables SCENE link playback for the selected SCENE key. - Page 74 This Adjust the audio output timing in “Adjustment”. setting is effective when “bPLII Music” or “bPLIIx Music” (HTR-5065 only) is Adjusts the delay between video and audio output automatically when selected.
-
Page 75: Eco
■ Volume Configures the volume settings. Configures the power supply settings. ❑ Dynamic Range Selects the dynamic range adjustment method for bitstream audio (Dolby Digital and S e t u p DTS signals) playback. S p e a k e r A u t o P o w e r D o w n H D M I E C O M o d e... -
Page 76: Function
■ ECO Mode Function Enables/disables the eco (power saving) mode. Configures the functions that make the unit easier to use. When the eco mode is enabled, you can reduce the unit’s power consumption. Settings S e t u p Off (default) Disables the eco mode. -
Page 77: Network
Network To change another input source name, repeat steps 1 to 3. To exit from the menu, press SETUP. Configures the network settings. ■ Dimmer S e t u p Adjusts the brightness of the front display. S p e a k e r I P A d d r e s s H D M I M A C A d d r e s s F i l t e r... -
Page 78: Mac Address Filter
■ ■ MAC Address Filter Network Standby Sets the MAC address filter to limit access to the unit from other network devices. Selects whether the unit can be turned on from other network devices (network standby). ❑ Filter Settings Enables/disables the MAC address filter. Off (default) Disables the network standby function. -
Page 79: Language
■ Information Language Displays the network information on the unit. Select an on-screen menu language. MAC Address MAC address IP Address IP address S e t u p Subnet Mask Subnet mask S p e a k e r E n g l i s h H D M I F r a n ç... -
Page 80: Configuring The System Settings (Advanced Setup Menu)
Press z (power) to set the unit to standby mode and turn it on again. Change the unit’s remote control ID so that it matches the remote control’s ID (default: ID1). When using multiple Yamaha AV receivers, you can set each remote control with a The new settings take effect. -
Page 81: Switching The Video Signal Type (Tv Format)
Switching the video signal type (TV FORMAT) Updating the firmware (UPDATE) TV FORMAT NTSC UPDATE Switch the video signal type of HDMI output so that it matches to the format of your TV. New firmware that provides additional features or product improvements will be Since the unit automatically selects the video signal type so that it matches to the TV, it released as needed. -
Page 82: Controlling External Devices With The Remote Control
OPTION OPTION • Under the unit’s default settings, the amplifier code (Yamaha: 5098) is set for all the input selection keys. With this setting, you can control HDMI can control it using the TV operation keys, regardless of the input Control-compatible devices connected to the unit with the remote control. -
Page 83: Registering The Remote Control Codes For Playback Devices
■ Registering the remote control codes for Playback device operations SOURCE z CODE SET CODE SET playback devices Once you have registered the remote control code for your SOURCE RECEIVER SOURCE/RECEIVER playback device, you can control it using the following keys after HDMI selecting the input source or scene. -
Page 84: Resetting Remote Control Codes
Resetting remote control codes CODE SET CODE SET SOURCE RECEIVER SOURCE/RECEIVER You can reset a remote control code registered to each input HDMI selection key. Input selection keys Press CODE SET using a pointed object such as the AUDIO tip of a ballpoint pen. V-AUX ZONE ZONE... -
Page 85: Updating The Unit's Firmware
Updating the unit’s firmware CODE SET CODE SET SOURCE SOURCE RECEIVER RECEIVER New firmware that provides additional features or product HDMI HDMI Use the cursor keys to select “Perform Update” and improvements will be released as needed. If the unit is connected to the Internet, you can download the firmware via the network and press ENTER. -
Page 86: Appendix
When using multiple Yamaha products, the remote control may work on another on the unit... Yamaha product or another remote control may work on the unit. If this happens, register different remote control IDs for the devices that you want to control with each By default, the volume level when the unit last entered standby mode is automatically remote control (p.80). -
Page 87: Troubleshooting
The power does not turn on. consecutively. If the unit is in this condition, the standby indicator nearest Yamaha dealer or service center to request repair. on the unit blinks when you try to turn on the power. The internal microcomputer has frozen, due to an external electric Hold down z (power) on the front panel for more than 10 seconds to initialize The power does not turn off. -
Page 88: Audio
“Signal Info” in the “Option” menu (p.64). No sound. (HTR-5065 only) Press ZONE A (ZONE B) to enable audio output to Zone A (or Zone B). Audio output to Zone A (or Zone B) is disabled. -
Page 89: Video
Problem Cause Remedy The TV does not support HDCP (High-bandwidth Digital Content Refer to the instruction manuals for the TV and check the TV’s specifications. Protection). No sound from the playback device (connected to The unit is set not to output audio input through HDMI jacks from In “Audio Output”... -
Page 90: Fm/Am Radio
Problem Cause Remedy You can display the menu of the unit on the TV only when they are connected with The TV is not connected to the unit via HDMI. an HDMI cable. If necessary, use an HDMI cable to connect them (p.18 to 21). The menu of the unit is not displayed on the TV. -
Page 91: Remote Control
Problem Cause Remedy Configure the sharing setting and select the unit as a device to which music The media sharing setting is not correct. contents are shared (p.53). Some security software installed on your PC is blocking the access The unit does not detect the PC. Check the settings of security software installed on your PC. -
Page 92: Error Indications On The Front Display
Turn off the iPod and then turn it on again. Internal Error An internal error has occurred. Contact the nearest authorized Yamaha dealer or service center. No content There are no playable files in the selected folder. Select a folder that contains files supported by the unit. -
Page 93: Glossary
Glossary Audio information DTS Express DTS Express is a compressed digital audio format that supports 5.1-channel audio and allows a higher compression rate than the DTS Digital Surround format developed by DTS, Inc. This technology is developed for audio streaming services on the Internet and secondary audio on BD (Blu-ray discs). ■... -
Page 94: Hdmi And Video Information
Sampling frequency/Quantization bit HDMI and video information Sampling frequency and quantization bits indicate the quantity of information when an analog audio signal is digitized. These values are noted as in the following example: “48 kHz/24-bit”. Component video signal • Sampling frequency With the component video signal system, the video signal is separated into the Y signal for luminance and Sampling frequency (the number of times the signal is sampled per second) is called the sampling rate. -
Page 95: Yamaha Technologies
(such as room size, wall material, and number of speakers) can differ so widely, it is inevitable that there are differences in the sound that you hear. Based on a wealth of actually measured data, CINEMA DSP, Yamaha’s original DSP technology provides the audiovisual experience of a movie theater in your own home. -
Page 96: Video Signal Flow
Video signal flow Information on HDMI Video signals input from a video device to the unit are output to a TV as shown below. HDMI Control Video device The unit HDMI Control allows you to operate external devices via HDMI. If you connect a TV that supports HDMI Control to the unit with an HDMI cable, you can control the unit (such as power and volume) with TV remote control operations. - Page 97 (Example) Check that the unit is properly synchronized with the TV by turning off the TV or adjusting the TV volume with the TV remote control. HDMI Control HDMI Control • If HDMI Control does not work properly, try unplugging the TV in Step 2 and plugging in the TV again in Playback starts Turns on and displays Step 3.
-
Page 98: Hdmi Signal Compatibility
HDMI signal compatibility Audio signals Audio signal type Audio signal format Compatible media (example) 2ch Linear PCM 2ch, 32 to 192 kHz, 16/20/24 bit CD, DVD-Video, DVD-Audio DVD-Audio, BD (Blu-ray disc), Multichannel Linear PCM 8ch, 32 to 192 kHz, 16/20/24 bit HD DVD 2/5.1ch, 2.8224 MHz, 1 bit SACD... -
Page 99: Reference Diagram (Rear Panel)
MONITOR OUT VIDEO OPTICAL COAXIAL COAXIAL OPTICAL ( TV ) SUBWOOFER AUDIO (HTR-5065 U.S.A. model) • The area around the video/audio output jacks is marked in white on the actual product to prevent improper connections. APPENDIX ➤ Reference diagram (rear panel) -
Page 100: Trademarks
“x.v.Color” is a trademark of Sony Corporation. Product includes software. © DTS, Inc. All Rights Reserved. “SILENT CINEMA” is a trademark of Yamaha Corporation. “Made for iPod,” “Made for iPhone,” and “Made for iPad” mean that an electronic accessory has been designed to connect specifically to iPod, iPhone, or iPad, respectively, and has been certified by the developer to meet Apple performance standards. -
Page 101: Specifications
DTS Express • Analog Audio • Audio Format - DTS, DTS 96/24, DTS-ES Matrix 6.1, DTS-ES Discrete 6.1 [HTR-5065] - Dolby TrueHD - DTS Digital Surround - Speaker Out x 7 (FRONT L/R, CENTER, SURROUND L/R, - Dolby Digital Plus SURROUND BACK L/R*) •... - Page 102 Pb/Pr ..............0.7 Vp-p/75 Ω Surround L/R............95 W+95 W AV 5 etc. (Input Shorted 250 mV, Speaker Out) Surround Back L/R [HTR-5065]......95 W+95 W • Video Maximum Input Level......1.5 Vp-p or more ................. 100 dB or more • Rated Output Power (1-channel driven) •...
- Page 103 • Dimensions (W x H x D) ...... 435 x 161 x 315 mm (17-1/8” x 6-3/8” x 12-3/8”) • Weight [HTR-5065] ............. 8.2 kg (18.1 lbs) [HTR-4065] ............. 8.1 kg (17.9 lbs) * Specifications are subject to change without notice.
-
Page 104: Index
Index Symbols ARC ............18 Charge (iPod) ........... 46 ★/★★ keys ..........10 ARC (Setup menu, HDMI) ......73 CINEMA DSP ..........37 ARC-compatible TV (Connection) .... 18 CINEMA DSP 3D ........39 Envelope icon (p) ........85 Audio Decoder (Front display) ....34 CINEMA DSP 3D Mode Lock icon (o) ...........77 Audio device connection ...... - Page 105 Error indications on the front display ..92 High speed HDMI cable ......17 Error message (YPAO) ......32 Default Gateway EX/ES (Extended Surround) ..... 63 (Setup menu, IP Address) .....77 Impedance (Speaker) ......12 EXTD (Option menu) ........ 63 DHCP (Setup menu, IP Address) ....77 In.Trim (Option menu) ......
- Page 106 Manual speaker configuration Option menu ..........62 (Setup menu) ........69 Option menu item list ....... 62 Radio Data System ........45 Max Volume (Setup menu, Volume) ..75 Output (Signal information) ...... 64 Rear panel (Part name and functions) ..9 Media Sharing ...........53 Recording device connection ....
- Page 107 TV FORMAT (ADVANCED SETUP) ..81 Standby indicator ........7 TV operation keys ........10 Standby Sync (Setup menu, HDMI) ..73 Yamaha Parametric room Acoustic TV operations (Remote control) ....82 Standby Through (Setup menu, HDMI) ..72 Optimizer ..........30 TV with HDMI input jacks (Connection) ... 21 Stereo mini jack .........17...
- Page 108 © 2012 Yamaha Corporation YE162B0/EN...
- Page 109 English Information about software This product uses the following free software. For information (copyright, etc) about each software, read the original sentences stated below. ■ ■ About ASN.1 object dumping code About libexpat Redistributions of source code must retain the above copyright notice, this list of conditions and the following ASN.1 object dumping code, copyright Peter Gutmann Copyright ©...
- Page 110 ■ ■ About The Independent JPEG Permission is NOT granted for the use of any IJG About Ogg/Vorbis author's name or company name in advertising or Group’s JPEG software Copyright © 2002-2008 Xiph.org Foundation publicity relating to this software or products derived from it.
- Page 111 3. This notice may not be removed or altered from any source distribution. Do not disassemble, decompile, or reverse engineer the software included in Yamaha AV products. © 2012 Yamaha Corporation YE161A0/SLEN...
- Page 112 List of remote control codes Lijst met afstandsbedieningscodes Liste des codes de commande Liste over fjernbetjeningskoder Liste der Fernbedienungscodes Liste over fjernkontrollkoder Lista över fjärrstyrningskoder Elenco dei codici di telecomando Lista de códigos de mando a distancia Anam 0179, 0343 Bazin 0282 Cathay...
- Page 113 Crown 0058, 0161, 0171, 0179, Elcit 0339 Frontech 0282, 0323, 0337, 0343, Grunpy 0058, 0059, 0179 0320, 0323, 0343, 0349, Electa 0348 0346, 0347 Haier 0157, 0233 0350, 0351 ELECTRO TECH 0343 Fujitsu 0059, 0069, 0074, 0075, Halifax 0277, 0282, 0337, 0342 CS Electronics 0277, 0340, 0342 Electroband 0055, 0107...
- Page 114 Indiana 0320, 0349, 0350 Kingsley 0277, 0342 Magnavox 0008, 0009, 0010, 0013, Motion 0171 Infinity 0010 0039 0026, 0032, 0033, 0048, Motorola 0052, 0178 InFocus 0250, 0327, 0363, 0479, Kloss Novabeam 0057, 0058 0050, 0128, 0211, 0212, 0008, 0026, 0050, 0053, 0508 Kneissel 0161, 0168, 0320...
- Page 115 Orion 0043, 0146, 0283, 0320, Phonola 0277, 0320, 0339, 0349, 0008, 0021, 0024, 0025, Schneider 0282, 0316, 0318, 0320, 0323, 0328, 0343, 0349, 0350 0026, 0027, 0042, 0049, 0333, 0340, 0342, 0349, 0350 Pilot 0007, 0008, 0050 0052, 0053, 0063, 0136, 0350, 0382 Orline 0320...
- Page 116 Trans Continens 0282, 0320 Wincom 0101, 0106 Bondstec 1008, 1030 0346 Transtec 0277 Xrypton 0320 Broksonic 1100 Tatung 0052, 0177, 0282, 0320, Trident 0282 Yamaha 0008, 0026, 0050, 0053, 0342, 0349, 0350 Triumph 0320 0080, 0081, 0082, 0083, 0337, 0343 0086, 0087...
- Page 117 Bush 1008, 1009, 1024, 1025, 1009, 1025 1018 Magnavox 1020, 1068, 1114, 1126 1029, 1049, 1051, 1063, Etzuko 1008, 1029 Hughes 1111, 1113, 1122 Magnin 1071 1217 Expressvu 1018 Hughes Network Systems Manesth 1008, 1029 Calix 1071 Ferguson 1027 1110, 1116 Marantz 1028, 1064, 1065, 1068 Candle...
- Page 118 1068, 1072, 1085, 1090, Samsung 1002, 1034, 1041, 1043, 1126 XR-1000 1068, 1069 1091, 1120, 1121, 1214 1057, 1060, 1070, 1084, Symphonic 1008, 1069, 1126 Yamaha 1064, 1065 Pathe Marconi 1027 1110, 1116, 1122, 1124, Systemax 1016 Yamishi 1008, 1029 Perdio...
- Page 119 Brandt 2148, 2188 2355 Irradio 2053 Memorex 2028, 2145, 2234 Broksonic 2145, 2146 Easy Home 2359 iSymphony 2246 MiCO 2354, 2382 Bush 2064, 2110, 2170, 2268, Eclipse 2354 2135 Micromaxx 2182 2290, 2346, 2358, 2367, E-Dem 2364 2020, 2096, 2097, 2099, Microsoft 2156 2383...
- Page 120 TRANScontinents 2363, 2367 2507 Proscan 2156 Skyworth 2356 Transonic 2367 Toshiba 2462 Prosonic 2360, 2377 Slim Art 2362 Trio 2362 Yamaha 2064, 2448, 2449, 2474, Protron 2202 SM Electronic 2355 Trutech 2242 2505 Provision 2358 Sonic Blue 2133 TruVision 2359 2144...
- Page 121 3097, 3099 Toshiba 2032, 2036, 2037, 2039, GC Electronics 3070 3114, 3116, 3120 3127 2049, 2054, 2055, 2076 3066, 3093 Popular Mechanics Videoway 3019 Yamaha 2056 3105 3126 View Star 3074, 3077, 3079 Gemini 3072, 3123 Proscan 3066, 3093 Viewmaster...
- Page 122 Allsonic 4005, 4008, 4024 Comag 4080, 4081, 4082, 4083, Emanon 4001 Hirschmann 4015, 4024, 4210, 4216, Alltech 4217 4086 Emme Esse 4008, 4024 4218, 4219 Alpha 4053 Commlink 4005 Engel 4217 Hisawa 4013 Alpha Digital 4104 Comtech 4050 Ep Sat 4006 Hisense 4016...
- Page 123 4049, 4103, 4107 Nokia 4006, 4040 Quelle 4015, 4215, 4219 SkySat 4212, 4217, 4218, 4219 Lifesat 4008, 4024, 4212, 4217 Nordmende 4001, 4006, 4007, 4010, Quiero 4052 Skyvision 4048 Lifetec 4008 4052 RadioShack 4019 SM Electronic 4212, 4217 Lorenzen 4219 Nova 4222 Radiola...
- Page 124 Xrypton 4024 Unitor 4013 XSat 4217 Yamaha 5084, 5087 Universum 4015, 4215, 4219 Zehnder 4008, 4209, 4010, 4215, US Digital 4016 4024 Zenith 4102, 4107, 4195 Tuner Zodiac 4004 Yamaha 5066, 5085, 5088, 5090, 5092 © 2012 Yamaha Corporation YE161A0/RC...
- Page 125 Blu-ray Disc Player Lecteur Blu-ray Disc BD-S473 Owner’s Manual Mode d’emploi Bedienungsanleitung Bruksanvisning Manuale di istruzioni Manual de Instrucciones Gebruiksaanwijzing...
- Page 126 VAROITUS Muiden kuin tässä esitettyjen toimintojen säädön tai Important notes for users in the asetusten muutto saattaa altistaa vaaralliselle säteilylle tai U.K. muille vaarallisille toiminnoille. Mains plug Advarsel: Usynlig laserstråling ved åbning når This apparatus is fitted with an approved 13 Amp sikkerhedsafbrydere er ude af funktion.
- Page 127 OBSERVERA Användning av reglage eller justeringar eller utförande av åtgärder på annat sätt än så som beskrivs häri kan resultera i farlig strålning. Yamaha Music Europe GmbH ATTENZIONE Siemensstr. 22-34 25462 Rellingen, Germany L’uso di controlli, regolazioni, operazioni o procedure...
- Page 128 Yamaha will not be held responsible for any damage resulting inside. from use of this unit with a voltage other than specified.
-
Page 129: About This Manual
Contents 1. Introduction 4. Settings What you can do with this Player ..... 2 SETUP menu ............. 21 Supplied parts ............ 2 Example of SETUP menu operation......23 General Setting.............. 24 About discs and files ......... 3 Display Setting.............. 26 Types of discs/files that can be used with this Player .. -
Page 130: Introduction
INTRODUCTION What you can do with this Player Easy setting for language, resolution, screen aspect ratio p. 12 You can perform language and TV settings. Play back commercially-released Blu-ray Disc™/Blu-ray 3D™/ p. 17 DVD/CD discs In addition to Blu-ray Discs, this Player also supports playback of a variety of other discs. p. -
Page 131: About Discs And Files
About discs and files ■ Types of discs/files that can be Region management information for used with this Player Blu-ray Disc/DVD videos – 12 cm (5”) and 8 cm (3”) discs can be played back in – Blu-ray Disc/DVD video players and discs have this Player. -
Page 132: Loading A Disc
Cinavia Consumer Information – Never use commercially available cleaning discs. Center, P.O. Box 86851, San Diego, CA, 92138, USA. The use of these discs can damage the lens. – Request the nearest service center approved by Yamaha to clean the lens. -
Page 133: Controls And Functions
Controls and functions ■ Front panel 1 p (On/Standby) 5 Front panel display Turns this Player on/Sets to standby mode. Displays various information for operational status. Pressing and holding this button for approximately 5 (Play) seconds forcibly resets this Player (system reset). Starts a playback. -
Page 134: Remote Control
Controls and functions ■ Remote control 1 Infrared signal transmitter: Outputs infrared signal. Aim this window to the remote control sensor (p. 9). Note 2 MARKER VIDEO : Sets Bookmark (p. 19) at – will appear on the top left corner of the screen when the pressed button is not available. - Page 135 Controls and functions C HOME: Displays the HOME menu screen (p. 13). D DIGEST : Shows 12 photo thumbnails. PHOTO When thumbnails are displayed, you can proceed to the next/previous page with : Displays Bookmark select bar VIDEO (p. 19). E p: Turns this Player on or sets it to standby mode.
- Page 136 Controls and functions N Cursor buttons (5/a/2/3): Moves the focus in the menu screen. ENTER: Selects the focused menu/item. O TOP MENU : Displays the top menu screen if the disc contains a menu. Select the desired item using 5/a/2/3 and ENTER. PROGRAM MARKER DIGEST...
- Page 137 Controls and functions Loading the batteries in the remote control Notes – Change both batteries when the operation range of the remote control decreases. – Use AAA, R03, UM-4 batteries. – Make sure that the polarities are correct. Refer to the illustration inside the battery compartment.
-
Page 138: Connection
CONNECTION HDMI connection ■ Connecting to the HDMI terminal – You can enjoy high quality digital picture and sound through the HDMI terminal. – Firmly connect an HDMI cable (commercially available) to the HDMI terminals. – See page 28 for information on the audio/video output formats. –... -
Page 139: Network And Usb Connection
Player. Using a USB extension cable may prevent the Player from performing correctly. Note To USB To NETWORK – Yamaha cannot guarantee that all brands’ USB connector terminal memory devices will operate with this Player. USB memory device (commercially available) -
Page 140: Playback
PLAYBACK Initial Wizard/Easy Setup ■ Setting with the Initial Wizard/Easy Setup Initial Wizard/Easy Setup allows you to set language, resolution, and screen aspect ratio easily. Initial Wizard screen is displayed when you turn this Player on for the first time after purchase. Same setting can be performed from SETUP menu = System = Easy Setup. -
Page 141: Home/Media Menu
HOME/MEDIA menu HOME and MEDIA menus allow you to browse and play multi-media files on data discs, USB memory devices and Common operations for playing back your network. files in a selected folder Example: Selecting a movie file on a USB memory Note device –... - Page 142 HOME/MEDIA menu 4 Select the Photo, Music, Video or AVCHD folder you Hint want to play back, then press ENTER. To return to the parent folder, press 2 or select – To enjoy slide show with music, press HOME to return to the HOME menu screen while music is played back, and select photo file.
-
Page 143: Using Network Content
HOME/MEDIA menu ■ Using network content This Player is DLNA certified (p. 34). You can manage photo, music and video contents stored on DLNA servers on your home network. Playing back shared contents 1 To play back files on your PC, install a DLNA server software, such as Windows Media Player 12, and share files you want to play back. -
Page 144: Using Network Services
– Some content may only be available for specific countries and may be presented in specific languages. – Yamaha does not represent or warrant that content services will continue to be provided or available for a particular period of time, and any such warranty, express or implied, is disclaimed. -
Page 145: Advanced Playback Operation
Advanced playback operation This chapter explains playback of commercially available Blu-ray Discs, DVDs, CDs, and recorded DVD-RW/R – Normal discs. – Shuffle CH (chapter) – Shuffle TT (title) Note – Shuffle All – Random CH (chapter) – For the basic playback operation, see page 6. –... -
Page 146: Status Menu
Advanced playback operation ■ Status menu MUSIC This shows various settings, such as subtitles, angle Example: Icons when playing a music file settings and the title/chapter/track number currently played back. To display status menu, press STATUS. Status menu contains following menus. VIDEO Example: Icons when playing a Blu-ray Disc (Playback status) -
Page 147: Using Bookmark
Advanced playback operation ■ Using Bookmark 2 Press ENTER to program playback order. VIDEO For audio disc, press 5/a to select a desired track then This allows you to set Bookmark at the specified point of press ENTER. the video. After Bookmark is set, you can move to the For DVD-Video disc, select a desired title (shown as point you set using this function. -
Page 148: Enjoying Bonusview™ And Bd-Live
– Some time may be required for the data to load (read/write). Notes – Yamaha cannot guarantee that all brands’ USB memory devices will operate with this Player. – Do not use a USB extension cable when connecting a USB memory device to the USB connector of the Player. -
Page 149: Settings
SETTINGS SETUP menu The SETUP menu enables various audio/visual settings and adjustments for functions using the remote control unit. Menu/Submenu Item Function Page System Screen Saver Sets screen saver on/off. Disc Auto Playback Sets this Player to start disc playback automatically. HDMI Control Sets this Player to receive control signal from the remote control of your TV/AV receiver. - Page 150 SETUP menu Menu/Submenu Item Function Page 3D Output Selects 3D or 2D videos. TV Screen Sets the screen aspect ratio of the connected TV, and adjust the video output. Video Out Select Selects the resolution of video output. Display Setting TV System Selects the TV System from NTSC/PAL/Multi.
-
Page 151: Example Of Setup Menu Operation
SETUP menu ■ Example of SETUP menu 4. Enter password. operation Enter your password with number buttons. You need to call up the SETUP menu screen to perform – The default password is 0000. settings for this Player. The following is the explanation –... -
Page 152: General Setting
SETUP menu ■ General Setting Load Default You can reset all settings of this Player to default setting The default settings are marked with “ ”. except Security setting (p. 25). For details on default settings, see pages 21–27. System Upgrade Screen Saver You can upgrade the software manually from USB... - Page 153 SETUP menu Playback Network Angle Mark Internet Connection You can set to display the Angle Mark ( ) when Set this item to Enable when you use BD-Live (p. 20), DLNA Blu-ray Disc/DVD with multiple angles is played back. (p. 15), software upgrade from the network (p. 30), and the other network functions.
-
Page 154: Display Setting
SETUP menu ■ Display Setting Video Out Select You can select the video output resolution from Auto, The default settings are marked with “ ”. 480i/576i, 480p/576p, 720p, 1080i, and 1080p. When set to Auto, resolution is set to the maximum resolution according to the connected TV. -
Page 155: Audio Setting
SETUP menu HDMI 1080p 24Hz Noise Reduction You can set the Noise Reduction to a level of 0 to 3. 0 is This outputs the BD-Video encoded in 24Hz frame rate in off, and 3 is the maximum level. HDMI 1080p 24Hz. Smoother video playback may be available with this function. -
Page 156: About The Audio Output Formats
SETUP menu ■ About the audio output formats HDMI Source format Bitstream Reencode with SA* or BCS** PCM 2ch Dolby Digital PCM 2ch without SA* or BCS** PCM 2ch with SA* or BCS** PCM 5.1ch Dolby Digital PCM 5.1ch without SA* or BCS** PCM 5.1ch with SA* or BCS** PCM 7.1ch... -
Page 157: About The Video Output Formats
SETUP menu ■ About the video output formats When TV System is set to NTSC Resolution Auto 480i/576i 480p/576p 720p 1080i 1080p BD-Video with 1080p 24/ 1080p/24 Hz 60 Hz * HDMI 480i 480p 720p 60 Hz 1080i 60 Hz content Others 1080p 60 Hz... -
Page 158: Software Upgrade
We recommend upgrading the software of this Player with software upgrade so that this Player is operated based on the latest software. To check for the availability of a software upgrade, visit http://download.yamaha.com/ Note – Do not remove the USB memory device, set this Player to standby mode or unplug the power cable/LAN cable while the software upgrade is being performed. -
Page 159: Additional Information
Refer to the table below when this Player does not function properly. If the problem you are experiencing is not listed below or if the instruction below does not help, turn off this Player, disconnect the power cable, and contact the nearest authorized Yamaha dealer or service center. ■ Power... -
Page 160: Picture
Troubleshooting ■ Picture Problem Possible causes and solutions No picture. – Make sure that the HDMI cable is connected correctly. (p. 10) – Make sure that the connected TV or the AV receiver is set to the correct input. (p. 10) –... -
Page 161: Network
Troubleshooting ■ Network Problem Possible causes and solutions Cannot connect to the Internet. – Connect the Network cable properly. – Turn on the connected equipment, such as broadband router or modem. – Connect the broadband router and/or modem properly. – Set the proper value(s) in the network setting. Check “Network”. (p. 25) Cannot download BD-Live contents. -
Page 162: Glossary
Glossary AVCHD Dolby Digital Plus AVCHD is a new format (standard) for high definition A sound system developed as an extension to Dolby video cameras that can be used to record and play high- Digital. This audio coding technology supports 7.1 resolution HD images. -
Page 163: Specifications
Glossary Lip Sync Subtitles Lip Sync, an abbreviation for lip synchronization, is a These are the lines of text appearing at the bottom of the technical term that involves both a problem and a screen which translate or transcribe the dialog. They are capability of maintaining audio and video signals recorded on many DVDs and Blu-ray Discs. -
Page 164: Copyright
Specifications ■ Copyright – Audio-visual material may consist of copyrighted works which must not be recorded without the authority of the owner of the copyright. Refer to relevant laws in your country. – Manufactured under license from Dolby Laboratories. Dolby and the double-D symbol are trademarks of Dolby Laboratories. -
Page 165: Index
ADDITIONAL INFORMATION Index ■ Numerics HDMI, SETUP menu ......27 SETUP menu operation ....... 23 HOME menu ........13 SETUP, remote control ......7 2ND AUDIO, remote control ....6 HOME, remote control ......7 SHUFFLE, remote control ....6 3D Output, SETUP menu ....26 Slide Show, On Screen menu .... - Page 166 Pour utiliser l’appareil au mieux de ses possibilités, lisez 14 Ne tentez pas de modifier ni de réparer l’appareil. Consultez attentivement ce mode d’emploi. Conservez-le le service Yamaha compétent pour toute réparation qui serait soigneusement pour référence. requise. Le coffret de l’appareil ne doit jamais être ouvert, Installez cet appareil dans un endroit frais, bien aéré, sec et...
-
Page 167: Propos De Ce Manuel
Table des matières 1. Introduction 4. Paramètres Possibilités offertes par ce lecteur....2 Menu SETUP ............. 21 Accessoires fournis ........... 2 Exemple d’utilisation du menu SETUP ......23 Réglages Généraux ............24 À propos des disques et des fichiers....3 Paramètres vidéo ............ -
Page 168: Introduction
INTRODUCTION Possibilités offertes par ce lecteur Réglage facile de la langue, de la résolution et du format d’image p. 12 Ce lecteur permet de définir la langue qui convient et les paramètres relatifs au téléviseur. Lecture des disques Blu-ray Disc™/Blu-ray 3D™/DVD/CD en vente p. -
Page 169: À Propos Des Disques Et Des Fichiers
À propos des disques et des fichiers ■ Types de disques/fichiers Information sur la gestion des régions utilisables avec ce lecteur pour les Blu-ray Disc/DVD vidéo – Ce lecteur accepte les disques de 12 cm et de 8 cm. – Les lecteurs et disques Blu-ray Disc/DVD vidéo Aucun adaptateur 8 cm–12 cm n’est nécessaire. -
Page 170: Chargement D'un Disque
L’utilisation de ces disques peut tournez la face à lire vers le bas. endommager la lentille. – Confiez le nettoyage de la lentille au SAV agréé par Yamaha le plus proche. ■ Précautions concernant le visionnage d’images vidéo 3D Remarques –... -
Page 171: Commandes Et Fonctions
Commandes et fonctions ■ Panneau avant 1 p (Mise sous tension/Mise en veille) 5 Afficheur du panneau avant Permet d’allumer ce lecteur ou de le mettre en veille. Affiche différentes informations relatives au Le maintien de cette touche enfoncée pendant environ fonctionnement de l’appareil. -
Page 172: Télécommande
Commandes et fonctions ■ Télécommande 1 Émetteur de signaux infrarouges : Émet des signaux infrarouges. Dirigez l’émetteur de la télécommande vers le capteur de l’appareil de Remarque destination (p. 9). – apparaît dans le coin supérieur gauche de l’écran 2 MARKER VIDEO : Permet de définir un si la fonction correspondant à... - Page 173 Commandes et fonctions 9 Touches numériques : Permettent de saisir des J SETUP : Affiche l’écran de menu SETUP (p. 21). nombres ou de passer directement, en cours de lecture, K AUDIO : Permet de changer la langue de à la plage ou au chapitre correspondant au numéro diffusion ou le format audio.
- Page 174 Commandes et fonctions N Touches de curseur (5/a/2/3) : Déplacent la sélection (entrée en surbrillance) sur l’écran de menu. ENTER : Sélectionne le menu ou la fonction en surbrillance. O TOP MENU : Affiche l’écran du menu principal si le disque contient un menu. Sélectionnez PROGRAM MARKER DIGEST...
- Page 175 Commandes et fonctions Insertion des piles dans la Portée approximative de la télécommande télécommande Capteur de télécommande 30° 30° 6 mètres Remarques – Changer les deux piles lorsque la portée de la télécommande diminue. – Utilisez des piles AAA, R03, UM-4. –...
-
Page 176: Raccordements
RACCORDEMENTS Raccordements HDMI ■ Raccordement à la borne HDMI – La borne HDMI offre une image et un son numériques de qualité supérieure. – Reliez fermement chaque extrémité du câble HDMI (disponible dans le commerce) aux bornes HDMI appropriées. – Reportez-vous à la page 28 pour en savoir plus sur les formats de sortie audio/vidéo disponibles. –... -
Page 177: Raccordements Réseau Et Usb
USB au connecteur USB du lecteur. HDMI 0.5A L’utilisation d’une rallonge USB peut entraîner un dysfonctionnement du lecteur. Remarque Vers le – Yamaha ne saurait garantir que ce lecteur connecteur Vers le port fonctionne avec toutes les marques de clés NETWORK USB. Clé USB (en vente dans le commerce) Câble réseau... -
Page 178: Lecture
LECTURE Wizard Initial/Installation Facile ■ Préconfiguration à l’aide de Wizard Initial/Installation Facile La fonction Wizard Initial/Installation Facile permet de définir facilement la langue, la résolution et le format d’image. L’écran Wizard Initial s’affiche lors de la première mise sous tension de ce lecteur effectuée juste après l’achat de votre appareil. -
Page 179: Menu Home/Media
Menu HOME/MEDIA Les menus HOME et MEDIA permettent de passer en revue et lire des fichiers multimédia sur des disques de Procédure de lecture des fichiers données, sur des clés USB et sur votre réseau. dans un dossier donné Exemple : Sélection d’un fichier vidéo sur une clé USB Remarque –... - Page 180 Menu HOME/MEDIA 3 Sélectionnez la source du fichier que vous avez 6 Sélectionnez le fichier à lire, puis appuyez sur l’intention de lire, puis appuyez sur ENTER. ENTER. Si le fichier sélectionné est un fichier vidéo, la lecture commence immédiatement. S’il s’agit d’un fichier de musique, la lecture commence après l’affichage d’un écran d’état.
-
Page 181: Utilisation D'un Contenu Du Réseau
Menu HOME/MEDIA ■ Utilisation d’un contenu du réseau Ce lecteur est certifié DLNA (p. 34). Cela signifie que vous pouvez gérer tout contenu à base de photos, musiques et vidéos stocké sur des serveurs DLNA de votre réseau domestique. Lecture d’un contenu partagé 1 Pour lire des fichiers sur votre ordinateur, installez un logiciel serveur DLNA, tel que Windows Media Player 12, et partagez les fichiers en question. -
Page 182: Utilisation Des Services Réseau
– Certains contenus pourraient être disponibles uniquement dans certains pays et dans certaines langues. – Yamaha ne garantit pas que ces services de contenus resteront offerts ou disponibles pour une durée définie, et toute garantie de ce type, explicite ou implicite, est exclue. -
Page 183: Mode De Lecture Avancé
Mode de lecture avancé Ce chapitre traite de la lecture des disques Blu-ray, DVD, CD vendus dans le commerce et des disques DVD-RW/R – Normal enregistrés. – Lecture Aléatoire CH (chapitre) – Lecture Aléatoire TT (titre) Remarque – Lecture aléatoire –... -
Page 184: Menu D'état
Mode de lecture avancé ■ Menu d’état MUSIC Ce menu propose différents réglages, tels que les sous- Exemple : Icônes affichées lors de la lecture d’un fichier titres, l’angle de vue ou le numéro du titre, du chapitre, ou de musique de la piste en cours de lecture. -
Page 185: Utilisation De La Fonction Signet
Mode de lecture avancé ■ Utilisation de la fonction 2 Appuyez sur ENTER pour programmer l’ordre de lecture. Dans le cas d’un disque audio, appuyez sur 5/a pour Signet VIDEO sélectionner chacune des pistes dans l’ordre où vous Vous pouvez repérer un point précis de la vidéo à l’aide souhaitez les lire, puis appuyez sur ENTER. -
Page 186: Utilisation Des Fonctions Bonusview™ Et Bd-Live
(image dans limage), vous avez la – Yamaha ne saurait garantir que ce lecteur fonctionne possibilité de lire ces données dans un coin de l’écran en avec toutes les marques de clés USB. -
Page 187: Paramètres
PARAMÈTRES Menu SETUP Le menu SETUP offre différents réglages audio/vidéo des fonctions au moyen de la télécommande. Menu/sous-menu Paramètre Description Page Système Economiseur Permet d’activer/désactiver l’économiseur d’écran. d'écran Lecture automatique Configure le lecteur afin de démarrer automatiquement la du disque lecture du disque. - Page 188 Menu SETUP Menu/sous-menu Paramètre Description Page Sortie 3D Permet de choisir le mode vidéo 3D ou 2D. Ecran TV Permet de régler le format d’écran du téléviseur raccordé ainsi que la sortie vidéo. Sélectionnez la Permet de sélectionner la résolution de la sortie vidéo. Paramètres sortie vidéo vidéo...
-
Page 189: Exemple D'utilisation Du Menu Setup
Menu SETUP ■ Exemple d’utilisation du menu 4. Entrez un mot de passe. SETUP Saisissez votre mot de passe à l’aide des touches Les réglages du lecteur se font à partir de l’écran du menu numériques. SETUP. Vous trouverez ci-dessous des explications sur –... -
Page 190: Réglages Généraux
Menu SETUP ■ Réglages Généraux Insérer les paramètres par défaut Vous avez la possibilité de rétablir tous les paramètres par Les réglages par défaut sont signalés par « ». défaut du lecteur à l’exception du paramètre Securité (p. 25). Pour en savoir plus au sujet des paramètres par Système défaut, reportez-vous aux pages 21–27. - Page 191 Menu SETUP Playback Réseau Connection Internet Marque Angle N’oubliez pas d’activer la connexion Internet (en réglant Ce paramètre permet d’afficher le symbole d’angle de vue ce paramètre sur Permettre) si vous comptez utiliser les (Marque Angle) ( ) lors de la lecture d’un disque Blu-ray fonctions BD-Live (p.
-
Page 192: Paramètres Vidéo
Menu SETUP ■ Paramètres vidéo Sélectionnez la sortie vidéo Ce paramètre vous donne le choix entre plusieurs Les réglages par défaut sont signalés par « ». résolutions de sortie vidéo : Auto, 480i/576i, 480p/576p, 720p, 1080i et 1080p. Si vous réglez ce paramètre sur Auto, le lecteur sélectionne automatiquement la résolution maximale en Sortie 3D fonction du téléviseur raccordé. -
Page 193: Paramètres Audio
Menu SETUP HDMI 1080p 24Hz Ajustement de la couleur Vous pouvez régler les paramètres Luminosité/Saturation/ Ce paramètre a pour effet de reproduire le signal BD Nuance pour chaque couleur (Rouge/Vert/Bleu/Jaune/ Vidéo codé à une vitesse de 24 Hz sous forme de signal Cyan/Magenta). -
Page 194: À Propos Des Formats De Sortie Audio
Menu SETUP ■ À propos des formats de sortie audio HDMI Format de la source Bitstream Reencode avec SA* ou BCS** PCM 2 canaux Dolby Digital PCM 2 canaux sans SA* ou BCS** PCM 2 canaux avec SA* ou BCS** PCM 5.1 canaux Dolby Digital PCM 5.1 canaux... -
Page 195: À Propos Des Formats De Sortie Vidéo
Menu SETUP ■ À propos des formats de sortie vidéo Si Système TV est réglé sur NTSC Résolution Auto 480i/576i 480p/576p 720p 1080i 1080p BD-Video avec 1080p 24/ un contenu 60 Hz * HDMI 480i 480p 720p 60 Hz 1080i 60 Hz 1080p/24 Hz Autres 1080p 60 Hz... -
Page 196: Mise À Niveau Logicielle
Pour savoir si une nouvelle mise à niveau logicielle est disponible, rendez-vous sur le site Web suivant : http://download.yamaha.com/ Remarque – Ne retirez pas le disque/la clé USB, ne mettez pas le lecteur en mode veille ou ne débranchez pas le cordon d’alimentation/câble de connexion au réseau local tant que la mise à... -
Page 197: Informations Complémentaires
Reportez-vous au tableau suivant si ce lecteur ne fonctionne pas convenablement. Si l’anomalie constatée n’est pas mentionnée ou si les actions correctives suggérées sont sans effet, mettez le lecteur hors tension, débranchez le cordon d’alimentation et prenez contact avec un revendeur agréé ou le service après-vente de Yamaha. ■ Alimentation... -
Page 198: Image
Guide de dépannage ■ Image Anomalies Causes possibles et solutions Absence d’image. – Assurez-vous que le câble HDMI est branché correctement. (p. 10) – Assurez-vous que l’entrée sélectionnée sur le téléviseur ou l’ampli-tuner AV raccordé au lecteur est correcte. (p. 10) –... -
Page 199: Réseau
Guide de dépannage ■ Réseau Anomalies Causes possibles et solutions Impossible de se connecter à Internet. – Vérifiez si le câble réseau est raccordé correctement. – Vérifiez si l’équipement raccordé (routeur haut débit ou modem) est sous tension. – Assurez-vous que le routeur haut débit et/ou le modem est connecté correctement. –... -
Page 200: Glossaire
Glossaire Adresse Mac DLNA L’adresse Mac est une valeur unique attribuée à un DLNA (Digital Living Network Alliance) permet de périphérique réseau à des fins d’identification. partager facilement des données multimédia numériques par l’intermédiaire d’un réseau AVCHD AVCHD désigne un nouveau format (norme) pour les domestique. -
Page 201: Caractéristiques Techniques
Glossaire FLAC Sous-titres FLAC (Free Lossless Audio Codec) est un format de Il s’agit des lignes de texte apparaissant au bas de fichier libre permettant la compression de données l’écran traduisant ou transcrivant les dialogues. Ils sont audio sans perte. Bien que son taux de compression enregistrés sur de nombreux disques DVD et Blu-ray. -
Page 202: Droits D'auteur
Caractéristiques techniques ■ Droits d’auteur – Copyright 2004-2010 Verance Corporation. Cinavia™ est une marque commerciale de Verance – Le support audio-visuel peut être composé d’œuvres Corporation protégée par le brevet américain soumises à des droits d’auteur qui ne peuvent être numéro 7,369,677 et par d’autres brevets mondiaux enregistrées sans l’autorisation du détenteur du droit délivrés et en attente sous licence de Verance... -
Page 203: Index
INFORMATIONS COMPLÉMENTAIRES Index ■ ■ ■ Numéros 2ND AUDIO, télécommande ....6 Guide de dépannage ......31 Raccordement réseau ......11 3D Message de la Réécoute, menu Raccordement USB ......11 ■ SETUP ..........24 Raccordements HDMI ......10 HDMI 1080p 24Hz, menu SETUP ..27 Recherche instantanée, menu à... - Page 204 Gerätes und/oder zu persönlichen Verletzungen kommen. darauf, nicht direkt in den Laserstrahl zu blicken. Wenn dieses Yamaha kann nicht verantwortlich gemacht werden für Schäden, Gerät an eine Netzdose angeschlossen ist, blicken Sie niemals in die auf die Verwendung dieses Gerätes mit einer anderen als der die Öffnung der Disc-Schublade oder in andere Öffnungen.
-
Page 205: Information About Software
Inhalt 1. Einleitung 4. Einstellungen Verwendungszweck des Players ...... 2 SETUP-Menü ............. 21 Lieferumfang ............2 Beispiel für die Bedienung des SETUP-Menüs.... 23 Allgemeine Einstellungen ..........24 Info zu Discs und Dateien ......... 3 Anzeige Einstellung ............26 Mit diesem Player kompatible Discs/Dateien ....3 Audio-Einstellungen ............. -
Page 206: Einleitung
EINLEITUNG Verwendungszweck des Players Leichte Einstellung von Sprache, Auflösung, Bildseitenverhältnis S. 12 Sie können die Sprach- und Fernsehereinstellungen vornehmen. Wiedergabe im Handel erhältlicher Blu-ray Disc™/Blu-ray 3D™/ S. 17 DVD/CD-Discs Zusätzlich zu Blu-ray Discs unterstützt dieser Player die Wiedergabe vieler weiterer Discs. S. -
Page 207: Info Zu Discs Und Dateien
Info zu Discs und Dateien ■ Mit diesem Player kompatible Regionverwaltungsinformationen für Discs/Dateien Blu-ray Disc/DVD-Videos – Mit diesem Player können 12-cm- und 8-cm-Discs – Blu-ray Disc/DVD-Video-Player und -Discs weisen wiedergegeben werden. Verwenden Sie keinen 8- Regionalcodes auf, welche die Regionen vorgeben, cm-auf-12-cm-Adapter. -
Page 208: Disc Einlegen
über Cinavia per Post zu erhalten, senden Sie eine Postkarte Der Gebrauch solcher Discs kann die Linse beschädigen. mit Ihrer Postanschrift an Cinavia Consumer Information – Lassen Sie die Linse von der nächsten von Yamaha Center, P.O. Box 86851, San Diego, CA, 92138, USA. zugelassenen Kundendienststelle reinigen. -
Page 209: Bedienungselemente Und Deren Funktionen
Bedienungselemente und deren Funktionen ■ Vorderseite 1 p (Ein/Bereitschaft) 5 Display der Vorderseite Schaltet den Player ein/versetzt ihn in den Zeigt verschiedene Informationen über den Bereitschaftsmodus. Betriebsstatus an. Wenn Sie diese Taste ungefähr 5 Sekunden gedrückt (Wiedergabe) halten, wird der Player zurückgesetzt (Zurücksetzung Startet die Wiedergabe. -
Page 210: Fernbedienung
Bedienungselemente und deren Funktionen ■ Fernbedienung 1 Infrarotsender: Gibt ein Infrarotsignal aus. Zielen Sie damit auf den Fernbedienungssensor (S. 9). Hinweis 2 MARKER VIDEO : Setzt ein Lesezeichen – wird in der linken oberen Ecke des Bildschirms (S. 19) an einem festgelegten Punkt in einem Film. angezeigt, wenn die gedrückte Taste nicht verfügbar Nachdem das Lesezeichen gesetzt wurde, können Sie ist. - Page 211 Bedienungselemente und deren Funktionen 9 Zifferntasten: Geben Sie hierüber Zahlen ein oder K AUDIO : Ändert die Audiosprache oder springen Sie während der Wiedergabe zum das Audioformat. Sie können diese Funktion auch entsprechend nummerierten Track/Kapitel. Diese über das Bildschirmmenü auswählen (S. 17). Tasten sind je nach Disctyp und Wiedergabebedingung L CLEAR: Löscht eingegebene Zahlen/eingerichtete eventuell nicht vorhanden.
- Page 212 Bedienungselemente und deren Funktionen N Cursortasten (5/a/2/3): Versetzt die Markierung im Menü. ENTER: Wählt das hervorgehobene Menü/Element aus. O TOP MENU : Zeigt das Top-Menü an, wenn die Disc ein Menü enthält. Wählen Sie den PROGRAM MARKER DIGEST ZOOM gewünschten Punkt über 5/a/2/3 und ENTER. Hinweis SHUFFLE REPEAT...
- Page 213 Bedienungselemente und deren Funktionen Batterien in die Fernbedienung Wirkungsbereich der Fernbedienung einlegen Fernbedienungssensor 30° 30° Hinweise – Tauschen Sie beide Batterien aus, wenn sich die Funktionsreichweite der Fernbedienung verringert. – Verwenden Sie Batterien vom Typ AAA, R03, UM- – Vergewissern Sie sich, dass Sie die Batterien mit der richtigen Polarität einlegen.
-
Page 214: Anschlüsse
ANSCHLÜSSE HDMI-Anschluss ■ Anschluss an den HDMI-Anschluss – Über denn HDMI-Anschluss können Sie eine hohe digitale Bild- und Tonqualität genießen. – Verbinden Sie ein HDMI-Kabel (im Fachhandel erhältlich) fest mit dem HDMI-Anschluss. – Näheres über die Audio-/Video-Ausgangsformate finden Sie auf Seite 28. –... -
Page 215: Netzwerk- Und Usb-Anschluss
USB-Anschluss des Players. Eine einwandfreie Funktion des Players ist bei Verwendung eines USB-Verlängerungskabels nicht gewährleistet. Hinweis An USB- An NETWORK- – Yamaha kann nicht garantieren, dass die USB- Anschluss Anschluss Speichergeräte aller Marken mit diesem Player verwendbar sind. USB-Speichergerät (im Fachhandel erhältlich) Netzwerkkabel (im Fachhandel erhältlich) -
Page 216: Wiedergabe
WIEDERGABE Konfigurationshilfe/Einfaches Konfigurationsmenü ■ Einstellungen über Konfigurationshilfe/Einfaches Konfigurationsmenü Mit Konfigurationshilfe/Einfaches Konfigurationsmenü können Sie problemlos die Sprache, Auflösung und das Bildseitenverhältnis festlegen. Der Konfigurationshilfe-Bildschirm wird angezeigt, wenn Sie diesen Player zum ersten Mal nach dem Kauf einschalten. Die gleiche Einstellung kann über das Menü SETUP = System = Einfaches Konfigurationsmenü... -
Page 217: Home/Media-Menü
HOME/MEDIA-Menü Über die Menüs HOME und MEDIA können Sie Multimediadateien auf Datendiscs, USB-Speichergeräten Allgemeine Bedienungsschritte für die und im Netzwerk durchsuchen und wiedergeben. Wiedergabe von Dateien in einem ausgewählten Ordner Hinweis Beispiel: Auswahl einer Filmdatei auf einem USB- – Einzelheiten zu den abspielbaren Discs und Speichergerät Formaten finden Sie auf Seite 3. - Page 218 HOME/MEDIA-Menü 3 Wählen Sie das Element aus, in dem die Datei 6 Wählen Sie die Datei aus, die wiedergegeben werden soll, und drücken Sie ENTER. enthalten ist, die wiedergegeben werden soll, und drücken Sie ENTER. Wird eine Videodatei ausgewählt, startet die Wiedergabe.
-
Page 219: Verwenden Von Netzwerkinhalten
HOME/MEDIA-Menü ■ Verwenden von Netzwerkinhalten Dieser Player ist DLNA-zertifiziert (S. 34). Sie können Fotos, Musiktitel und Videos verwalten, die auf DLNA- Servern in Ihrem Heimnetzwerk gespeichert sind. Wiedergabe freigegebener Inhalte 1 Um Dateien auf Ihrem Computer wiederzugeben, installieren Sie eine DLNA-Server-Software, wie beispielsweise Windows Media Player 12, und geben Sie die Dateien frei, die Sie wiedergeben möchten. -
Page 220: Verwenden Von Netzwerkdiensten
– Manche Inhalte stehen nur in bestimmten Ländern und/oder in bestimmten Sprachen zur Verfügung. – Yamaha ist nicht für Inhaltsdienste von Drittanbietern verantwortlich und gewährt keinerlei Garantie, dass deren Inhalte dauerhaft oder auch nur über eine bestimmte Zeitspanne hinweg zur Verfügung gestellt werden. -
Page 221: Erweiterte Wiedergabebedienung
Erweiterte Wiedergabebedienung In diesem Kapitel wird die Wiedergabe von im – Random: Zufällige Wiedergabe. Es kann zu Fachhandel erhältlichen BluZDisc-Discs, DVDs, CDs und Wiederholungen kommen. selbst aufgenommenen DVD-RW/R-Discs beschrieben. – Normal Hinweis – Zufall CH (Kapitel) – Zufall TT (Titel) –... -
Page 222: Status-Menü
Erweiterte Wiedergabebedienung ■ Status-Menü MUSIC Hierüber werden unterschiedliche Einstellungen Beispiel: Symbole bei der Wiedergabe einer Musikdatei angezeigt, wie beispielsweise Untertitel, Blickwinkel und aktuell wiedergegebene Titel-/Kapitel-/Tracknummer. Um das Status-Menü aufzurufen, drücken Sie STATUS. Das Status-Menü enthält die folgenden Untermenüs. VIDEO Beispiel: Symbole bei Wiedergabe einer Blu-ray Disc (Wiedergabestatus) (Wiederholungsmodus): Zeigt den aktuellen Wiederholungsmodus an (S. -
Page 223: Verwenden Von Lesezeichen
Erweiterte Wiedergabebedienung ■ Verwenden von 2 Drücken Sie ENTER, um die Wiedergabereihenfolge zu programmieren. Lesezeichen VIDEO Bei einer Audio-Disc drücken Sie 5/a zur Wahl des Hierüber können Sie ein Lesezeichen am festgelegten gewünschten Tracks und drücken Sie dann ENTER. Punkt im Video setzen. Nachdem ein Lesezeichen gesetzt Bei einer DVD-Video-Disc wählen Sie den wurde, können Sie zu dem Punkt springen, an dem diese gewünschten Titel (angezeigt als TT) und das... -
Page 224: Spaß Mit Bonusview™ Und Bd-Live
Disc oder im mitgelieferten Benutzerhandbuch. Weile dauern. ■ Verwenden der Bild-in-Bild-Funktion Hinweise (Zweitbild/Zweitton-Wiedergabe) – Yamaha kann nicht garantieren, dass USB- Speichergeräte aller Marken mit diesem Player Bei BD-Videos, die Zweitbild und -ton für die Bild-in- verwendbar sind. Bild-Funktion unterstützen, lässt sich in einem kleinen –... -
Page 225: Einstellungen
EINSTELLUNGEN SETUP-Menü Im SETUP-Menü können Sie mit der Fernbedienung verschiedene Bild-, Ton- und Funktionseinstellungen vornehmen. Menü/Untermenü Element Funktion Seite System Bilds.Schoner Aktiviert/deaktiviert den Bildschirmschoner. Disc Auto- Richtet diesen Player darauf ein, die Disc-Wiedergabe Wiedergabe automatisch zu starten. HDMI Steuerung Stellt diesen Player auf den Empfang von Steuersignalen von Allgemeine der Fernbedienung des TV/AV-Receivers ein. -
Page 226: Setup-Menü
SETUP-Menü Menü/Untermenü Element Funktion Seite 3D Ausgang Wählt zwischen 3D- und 2D-Videos aus. TV Bildschirm Stellt das Bildseitenverhältnis für den angeschlossenen Fernseher und den Videoausgang ein. Video Ausgabe Wählt die Auflösung des Videoausgangs aus. Anzeige Einstellung TV-System Wählt das TV-System aus NTSC/PAL/Multi. Farbraum Wählt Farbraum unter YCbCr 4:4:4/YCbCr 4:2:2/Voll RGB/ RGB aus. -
Page 227: Beispiel Für Die Bedienung Des Setup-Menüs
SETUP-Menü ■ Beispiel für die Bedienung des 4. Geben Sie das Passwort ein. SETUP-Menüs Geben Sie Ihr Passwort über die Zifferntasten ein. Um Einstellungen für diesen Player vornehmen zu – Das Standardpasswort lautet 0000. können, müssen Sie das SETUP-Menü aufrufen. –... -
Page 228: Allgemeine Einstellungen
SETUP-Menü ■ Allgemeine Einstellungen Werkseinstellung laden Sie können alle Einstellungen dieses Players, Die Werkseinstellungen sind mit einem Sternchen „ “ gekennzeichnet. ausgenommen der für Sicherheit, auf die Werksvorgaben zurücksetzen (S. 25). Weitere Informationen über die System Werksvorgaben finden Sie auf den Seiten 21–27. Bilds.Schoner Upgrade Sie können den Bildschirmschoner aktivieren oder deaktivieren. - Page 229 SETUP-Menü Untertitel Nachdem Sie die Alterskontrolle eingerichtet haben, erscheint ein Dialogfeld, wenn Sie eine Disc mit einer Sie können die Priorität der Sprache der Untertitel festlegen. höheren Stufe als der aktuellen Stufe für die Alterskontrolle wiedergeben oder wenn Sie die English, Français Español Deutsch Italiano...
-
Page 230: Anzeige Einstellung
SETUP-Menü DLNA 4:3 Letterbox Wählen Sie diese Option aus, wenn der Player an einen Fernseher mit einem Bildseitenverhältnis von Sie können DLNA (S. 34) auf Aktivieren oder 4:3 angeschlossen ist. Wenn ein Video mit einem Deaktivieren einstellen. Wenn Sie die DLNA-Funktion Bildseitenverhältnis von 16:9 wiedergegeben wird, nicht nutzen, wählen Sie die Option Deaktivieren. -
Page 231: Audio-Einstellungen
SETUP-Menü HDMI Deep Color Farbanpassung Sie können Helligkeit/Farbsätt/Farbton für jede Farbe Wenn Ihr TV und/oder AV-Receiver mit Deep Color (S. (Rot/Grün/Blau/Gelb/Cyan/Magenta) anpassen. Um diese 34) kompatibel ist, stellen Sie diese Funktion gemäß Ihrem Funktion zu nutzen, setzen Sie Video-Modus auf Nutzer. TV/AV-Receiver ein. -
Page 232: Übersicht Der Audioausgangsformate
SETUP-Menü ■ Übersicht der Audioausgangsformate HDMI Quellformat Bitstream Neuberechnen mit ZT* oder MTT** PCM-2ch Dolby Digital PCM-2ch ohne ZT* oder MTT** PCM-2ch mit ZT* oder MTT** PCM-5.1ch Dolby Digital PCM-5.1ch ohne ZT* oder MTT** PCM-5.1ch mit ZT* oder MTT** PCM-7.1ch Dolby Digital PCM-7.1ch ohne ZT* oder MTT**... -
Page 233: Übersicht Der Videoausgangsformate
SETUP-Menü ■ Übersicht der Videoausgangsformate Wenn das TV-System auf NTSC eingerichtet ist Auflösung Auto 480i/576i 480p/576p 720p 1080i 1080p BD-Video mit 1080p 24/ 1080p/24 Hz- 60 Hz * HDMI 480i 480p 720p 60 Hz 1080i 60 Hz Inhalt Andere 1080p 60 Hz Wenn das TV-System auf PAL eingerichtet ist Auflösung Auto... -
Page 234: Software-Upgrade
Sie die Software dieses Players über das Software-Upgrade aktualisieren, damit der Player mit der neuesten Software betrieben werden kann. Ob ein Software-Upgrade verfügbar ist, erfahren Sie auf der Seite: http://download.yamaha.com/ Hinweis – Entnehmen Sie nicht das USB-Speichergerät, versetzen Sie den Player nicht in den Bereitschaftsmodus und ziehen Sie weder Netzkabel noch LAN-Kabel, während das Software-Upgrade durchgeführt wird. -
Page 235: Zusätzliche Informationen
Suchen Sie eine Lösung aus der unten angegebenen Tabelle, wenn dieser Player nicht richtig funktionieren sollte. Falls Ihr Problem hier nicht aufgeführt wird oder die vorgeschlagene Lösung keine Abhilfe schafft, schalten Sie diesen Player aus, ziehen Sie das Netzkabel ab und wenden Sie sich an den nächsten Yamaha-Händler oder -Kundendienst. ■ Strom Problem Mögliche Ursache und Lösung... -
Page 236: Bild
Fehlersuche ■ Bild Problem Mögliche Ursache und Lösung Kein Bild. – Vergewissern Sie sich, dass das HDMI-Kabel korrekt angeschlossen sind. (S. 10) – Vergewissern Sie sich, dass der angeschlossene Fernseher oder AV-Receiver auf den korrekten Eingang eingestellt ist. (S. 10) –... -
Page 237: Netzwerk
Fehlersuche ■ Netzwerk Problem Mögliche Ursache und Lösung Internet-Verbindung nicht herstellbar. – Schließen Sie das Netzwerkkabel richtig an. – Schalten Sie das angeschlossene Gerät, wie beispielsweise einen Breitband-Router oder ein Modem, ein. – Schließen Sie den Breitband-Router und/oder das Modem richtig an. –... -
Page 238: Glossar
Glossar AVCHD Dolby Digital Plus AVCHD ist ein neues Format (Standard) für HD- Ein zur Erweiterung von Dolby Digital entwickeltes Camcorder zur Aufzeichnung und Wiedergabe von Soundsystem. Diese Toncodiertechnologie unterstützt hochauflösenden Videobildern. 7.1-Mehrkanal-Surround-Sound. BD-Live™ Dolby TrueHD BD-Live ist ein Blu-ray Disc-Standard, der eine Dolby TrueHD ist eine verlustfreie Netzwerkverbindung nutzt und dem Player ermöglicht, Codierungstechnologie, die bis zu 8-Kanal-Surround-... -
Page 239: Technische Daten
Glossar Letterbox (LB 4:3) Mac-Adresse Bildschirmformat mit schwarzen Balken am oberen und Die Mac-Adresse ist ein eindeutiger Wert, der einem unteren Bildrand, um die Wiedergabe von Breitbild- Netzwerkgerät zu Identifikationszwecken zugeordnet Software (16:9) auf einem angeschlossenen wird. Fernsehgerät mit Format 4:3 zu ermöglichen. Pan Scan (PS 4:3) Ein Bildschirmformat, das die Seiten des Bilds Linearer PCM-Ton... -
Page 240: Urheberrecht
Technische Daten ■ Urheberrecht – Copyright 2004-2010 Verance Corporation. Cinavia™ ist ein Verance Corporation- – Audiovisuelles Material kann urheberrechtlich Markenzeichen. Geschützt durch US-Patent geschützt sein und darf eventuell ohne Genehmigung 7,369,677 sowie anderer in den USA oder weltweit des Eigentümers der Urheberrechte nicht erteilter oder beantragter Patente unter Lizenz von aufgenommen werden. -
Page 241: Index
ZUSÄTZLICHE INFORMATIONEN Index ■ Numerics HDMI Steuerung, Funktion ....24 Speichermedium, SETUP-Menü ..24 HDMI Steuerung, SETUP-Menü ..24 Sprache, SETUP-Menü ....... 24 2ND AUDIO, Fernbedienung ....6 HDMI, SETUP-Menü ......27 STATUS, Fernbedienung ...... 7 3D Ausgang, SETUP-Menü ....26 HDMI-Anschluss .........10 Status-Menü ......... 18 3D Wiedergabe Information, HOME, Fernbedienung ......7 Steuertasten, Fernbedienung .... - Page 242 Anslutning till en strömkälla med högre spänning än den öppna höljet eller försöka reparera apparaten. angivna kan orsaka brand, skador på enheten och/eller personskador. Yamaha åtar sig inget ansvar för skador FARA! beroende på att enheten används med en spänning utöver den Apparaten avger synlig laserstrålning i öppet läge.
- Page 243 Innehåll 1. Introduktion 4. Inställningar Vad du kan göra med den här spelaren ... 2 SETUP-menyn........... 21 Medföljande delar..........2 Exempel på användning av SETUP-menyn....23 Allmäna Inställningar............ 24 Om skivor och filer..........3 Display inställningar ............. 26 Typer av skivor/filer som kan användas med denna Ljudinställning ..............
-
Page 244: Introduktion
INTRODUKTION Vad du kan göra med den här spelaren Enkel inställning för språk, upplösning, skärmformat s. 12 Du kan göra språk- och TV-inställningar. Spela upp kommersiellt utgivna Blu-ray Disc™/Blu-ray 3D™/DVD/ s. 17 CD-skivor Utöver Blu-ray-skivor kan spelaren även spela upp ett antal andra typer av skivor. s. -
Page 245: Om Skivor Och Filer
Om skivor och filer ■ Typer av skivor/filer som kan Regionshanteringsinformation för användas med denna spelare Blu-ray Disc/DVD-video – 12 cm och 8 cm skivor kan spelas upp med denna – Blu-ray Disc/DVD-videospelare och -skivor är spelare. Använd inte en 8 cm till 12 cm-adapter. märkta med regionskoder som anger i vilka regioner –... -
Page 246: Ladda En Skiva
Om skivor och filer ■ Ladda en skiva – Uppsök närmaste av Yamaha godkänd serviceverkstad för rengöring av linsen. – Sätt i skivan med etikettsidan vänd uppåt. ■ Att observera när du tittar på – På en skiva som är inspelad på båda sidor ska sidan du vill spela upp vara vänd nedåt. -
Page 247: Kontroller Och Funktioner
Kontroller och funktioner ■ Frontpanel 1 p (På/standby) 5 Frontpanelens display Slår på spelaren/ställer den i standby-läge. Visar information om användningsstatus. Om du håller ned den här knappen i ca. 5 sekunder (Spela upp) återställs spelaren om (systemåterställning). Påbörjar uppspelning. 2 Skivfackets lucka (Paus) (Mata ut) -
Page 248: Fjärrkontroll
Kontroller och funktioner ■ Fjärrkontroll 1 Sändare infraröda signaler: Skickar en infraröd signal. Sikta mot detta fönster med fjärrkontrollsensorn (s. 9). Kommentar 2 MARKER VIDEO : Ställer in Bokmärke – visas längst upp till vänster på skärmen när den nedtryckta knappen inte är tillgänglig. (s. - Page 249 Kontroller och funktioner B SUBTITLE M ANGLE : Ändrar VIDEO : Ändrar kameravinkel om undertextspråk (s. 35) om tillgängligt. Du kan även videon spelades in med flera vinklar. Kameravinkel välja detta objekt från menyn på skärmen (s. 17). ) visas på skärmen när denna funktion är C HOME: Visar HOME-menyskärmen (s.
- Page 250 Kontroller och funktioner N Markörknappar (5/a/2/3): Flyttar fokus på menyskärmen. ENTER: Väljer markerad meny/objekt. O TOP MENU : Visar översta menyskärmen om skivan innehåller en skivmeny. Välj önskat objekt med 5/a/2/3 och ENTER. PROGRAM MARKER DIGEST ZOOM Kommentar – Specifika handlingar kan skilja sig från de som anges SHUFFLE REPEAT här beroende på...
- Page 251 Kontroller och funktioner Isättning av batterier i fjärrkontrollen Kommentarer – Byt ut båda batterierna när fjärrkontrollens räckvidd försämras. – Använd AAA, R03, UM-4-batterier. – Kontrollera att batterierna är vända åt rätt håll. Se illustrationen på insidan av batterifacket. – Ta ur batterierna om fjärrkontrollen inte ska användas under en längre tid.
-
Page 252: Anslutning
ANSLUTNING HDMI-anslutning ■ Anslutning till HDMI-uttaget – HDMI-uttaget sörjer för en hög bild- och ljudkvalitet för digitala signaler. – Anslut en HDMI-kabel (säljs separat) till HDMI-uttagen. – Se sida 28 för information angående format för ljud-/videoutmatning. – Använd HIGH SPEED HDMI-kablar med HDMI-logotypen (visas på bakre omslaget). Observera! Anslut inte spelarens strömkabel innan alla andra anslutningar har gjorts. -
Page 253: Nätverks- Och Usb-Anslutning
USB-minnesenhet till spelarens USB-anslutning. Om en USB- HDMI 0.5A förlängningskabel används kan spelaren hindras från att fungera korrekt. Kommentar – Yamaha kan inte garantera att USB- Till USB- Till NETWORK- minnesenheter av alla märken fungerar med anslutning uttag denna spelare. -
Page 254: Spela Upp
SPELA UPP Installationsguide/Snabbinstallation ■ Inställning med Installationsguide/Snabbinstallation Med Installationsguide/Snabbinstallation kan du enkelt ställa in språk, upplösning och skärmförhållande. Installationsguide-skärmen visas när du slår på denna spelare för första gången efter köpet. Samma inställning kan utföras från SETUP-menyn = System = Snabbinstallation. 1 När skärmen Snabbinstallation visas, trycker du på... -
Page 255: Home/Media-Menyn
HOME/MEDIA-menyn Med HOME- och MEDIA-menyerna kan du bläddra i och spela upp multimediafiler på dataskivor, USB- Vanliga åtgärder för uppspelning av minnesenheter och ditt nätverk. filer i en vald mapp Exempel: Välja en filmfil från en USB-minnesenhet Kommentar – Information om uppspelningsbara skivor och format Kommentar finns på... - Page 256 HOME/MEDIA-menyn 3 Välj objektet som innehåller filen som du vill spela upp 6 Välj filen som du vill spela upp och tryck på ENTER. och tryck på ENTER. När en videofil väljs, startar uppspelningen. När en musikfil väljs, visas statusskärmen och uppspelningen påbörjas.
-
Page 257: Använda Nätverksinnehåll
HOME/MEDIA-menyn ■ Använda nätverksinnehåll Den här spelaren är DLNA-certifierad (s. 34). Du kan hantera foton, musik- och videoinnehåll som sparats på DLNA-servrar i ditt hemmanätverk. Spela upp delat innehåll 1 Spela upp filer på din PC genom att installera DLNA- serverprogramvara, t.ex. -
Page 258: Använda Nätverkstjänster
– En del innehåll kan enbart vara tillgängligt för vissa länder och kan presenteras på vissa bestämda språk. – Yamaha kan inte garantera att tjänster kommer fortsätta att tillhandahållas eller vara tillgängliga för en given tidsperiod, och Yamaha frånsäger sig varje sådant garantianspråk, uttalat eller underförstått, Spela upp video från YouTube™... -
Page 259: Avancerade Uppspelningsfunktioner
Avancerade uppspelningsfunktioner Detta kapitel förklarar uppspelning av kommersiellt tillgängliga Blu-ray-skivor, DVD-skivor, CD-skivor och – Normal inspelade DVD-RW/R-skivor. – Shuffle CH (kapitel) – Shuffle TT (titel) Kommentar – Shuffle Alla – Random CH (kapitel) – Grundläggande uppspelningsfunktioner förklaras på – Random TT (titel) sida 6. -
Page 260: Statusmeny
Avancerade uppspelningsfunktioner ■ Statusmeny MUSIC Detta visar olika inställningar, t.ex. undertexter, Exempel: Ikoner vid uppspelning av musikfiler vinkelinställningar och den titel/kapitel/spårnummer som spelas upp. Visa statusmenyn genom att trycka på STATUS. Statusmenyn innehåller följande menyer. VIDEO Exempel: Ikoner vid uppspelning av Blu-ray Disc (Uppspelningsstatus) (Upprepningsläge): Visar aktuellt upprepningsläge (s. -
Page 261: Använda Bokmärke
Avancerade uppspelningsfunktioner ■ Använda Bokmärke 2 Tryck på ENTER för att programmera VIDEO uppspelningsordningen. Med denna funktion kan du ställa in Bokmärke vid en För ljudskivor trycker du på 5/a för att välja ett angiven plats i videon. Efter Bokmärke har ställts in kan önskat spår och trycker sedan på... -
Page 262: Njuta Av Bonusview™ Och Bd-Live
USB-minnesenhet. – Laddning (läsning/skrivning) av data kan ta en tid. Kommentarer – Yamaha kan inte garantera att USB-minnesenheter av alla märken går att använda med denna spelare. – Använd inte en USB-förlängningskabel vid anslutning av en USB-minnesenhet till spelarens USB-anslutning. - Page 263 INSTÄLLNINGAR SETUP-menyn SETUP-menyn tillåter att olika ljud-/bildinställningar och justeringar av funktioner utförs med hjälp av fjärrkontrollen. Meny/undermeny Objekt Funktion Sida System Skärmsläckare Aktiverar/avaktiverar skärmsläckaren. Automatisk Ställer in spelaren på att starta skivuppspelning automatiskt. skivuppspelning HDMI Control Ställer in spelaren för att ta emot kontrollsignalen från Allmäna fjärrkontrollen på...
-
Page 264: Inställningar
SETUP-menyn Meny/undermeny Objekt Funktion Sida 3D uppspelning Väljer 3D- eller 2D-video. TV Screen Ställer in skärmformatet för den anslutna TV:n och justerar videoutmatningen. Inställning för Väljer upplösning för videoutsignalen. Display videoutgång inställningar TVsystem Ställer in TVsystem på NTSC/PAL/Multi. Färgrymd Ställer in Färgrymd från YCbCr 4:4:4/YCbCr 4:2:2/Full RGB/RGB. -
Page 265: Exempel På Användning Av Setup-Menyn
SETUP-menyn ■ Exempel på användning av 4. Ange lösenord. SETUP-menyn Ange ditt lösenord med sifferknapparna. Du måste öppna SETUP-menyskärmen för att utföra – Standardlösenordet är 0000. inställningarna på spelaren. Nedan förklaras de – Du kan inte gå vidare till nästa inställningsskärm grundläggande manövreringarna för SETUP-menyn. -
Page 266: Allmäna Inställningar
SETUP-menyn ■ Allmäna Inställningar Ladda Default Du kan återställa alla inställningar för spelaren till Standardinställningarna är markerade med ” ” . standardvärdena, med undantag av inställningen Säkerhet (s. 25). Information om standard inställningar finns på System sidorna 21–27. Skärmsläckare Uppgradera Du kan ställa in skärmsläckaren på... - Page 267 SETUP-menyn Spela upp Nätverk Kameravinkel Internetuppkoppling Du kan ställa in visning av Kameravinkel ( ) när Ställ in detta objekt på Möjliggöra när du använder BD-Live Blu-ray Disc/DVD med flera vinklar spelas upp. (s. 20), DLNA (s. 15), programvaruuppgradering från nätverket (s.
-
Page 268: Display Inställningar
SETUP-menyn ■ Display inställningar Inställning för videoutgång Du kan välja videoutmatningsupplösningen från Auto, Standardinställningarna är markerade med ” ”. 480i/576i, 480p/576p, 720p, 1080i och 1080p. När du ställer in Auto ställs upplösningen in på det högsta värdet för den anslutna TV:n. Mer information om utmatningsformat finns i ”Angående 3D uppspelning format för videoutmatning”... -
Page 269: Ljudinställning
SETUP-menyn HDMI 1080p 24Hz Brusreducering Du kan ställa in Brusreducering på en nivå mellan 0 och 3. Detta matar ut BD-video som kodats med 24Hz 0 är av och 3 är den maximala nivån. ramhastighet i HDMI 1080p 24Hz. Denna funktion kan ge jämnare videouppspelning. -
Page 270: Angående Format För Ljudutmatning
SETUP-menyn ■ Angående format för ljudutmatning HDMI Källformat Bitstream Reencode med SA* eller BCS** PCM 2ch Dolby Digital PCM 2ch utan SA* eller BCS** PCM 2ch med SA* eller BCS** PCM 5.1ch Dolby Digital PCM 5.1ch utan SA* eller BCS** PCM 5.1ch med SA* eller BCS** PCM 7.1ch... -
Page 271: Angående Format För Videoutmatning
SETUP-menyn ■ Angående format för videoutmatning När TVsystem ställs in på NTSC Upplösning Auto 480i/576i 480p/576p 720p 1080i 1080p BD-video med 1080p 24/ 1080p/24 Hz- 60 Hz * HDMI 480i 480p 720p 60 Hz 1080i 60 Hz innehåll Övrigt 1080p 60 Hz När TVsystem ställs in på... -
Page 272: Programvaruuppgradering
Vi rekommenderar att du uppgraderar spelarens programvara med programvaru-uppgradering så att spelaren fungerar med den senaste programvaran. Kontrollera om det finns tillgängliga uppgraderingar genom att besöka http://download.yamaha.com/ Kommentar – Ta inte ut USB-minnesenheten, försätt inte spelaren i standby-läge och koppla inte ur strömkabeln/LAN-kabeln när uppgraderingen utförs. -
Page 273: Ytterligare Information
Vi hänvisar till tabellen nedan när spelaren inte fungerar korrekt. Om du upplever ett problem som inte finns beskrivet nedan eller om föreskrifterna nedan inte hjälper, stäng av spelaren, koppla ur strömkabeln och kontakta närmaste Yamaha-återförsäljare eller serviceverkstad. ■ Ström Problem Tänkbara orsaker och lösningar... -
Page 274: Bild
Felsökning ■ Bild Problem Tänkbara orsaker och lösningar Ingen bild. – Kontrollera att alla HDMI-kablar anslutits på rätt sätt. (s. 10) – Kontrollera att den anslutna TV:n eller AV-mottagaren är inställd på rätt ingångskälla. (s. 10) – Om ingen skiva är isatt eller uppspelningen är stoppad, håller du ned på... -
Page 275: Nätverk
Felsökning ■ Nätverk Problem Tänkbara orsaker och lösningar Spelaren ansluter inte till Internet. – Anslut nätverkskabeln ordentligt. – Aktivera ansluten utrustning, som bredbandsrouter eller modem. – Anslut bredbandsroutern och/eller modemet ordentligt. – Ställ in korrekta värden i nätverksinställningen. Kontrollera ”Nätverk”. (s. 25) Det går inte att ladda ned BD-Live- –... -
Page 276: Ordlista
Ordlista AVCHD Dolby TrueHD AVCHD är ett nytt format (standard) för videokameror Dolby TrueHD är en förlustfri kodningsteknik som med hög upplösning som kan användas för att spela in stöder upp till 8 kanaler av flerkanals surroundljud för och spela upp HD-bilder i hög upplösning. nästa generation av optiska skivor. -
Page 277: Specifikationer
Ordlista Letter Box (LB 4:3) Pan Scan (PS 4:3) Ett skärmformat med svarta band överst och underst på Ett skärmformat som skär av sidorna på bilden för att bilden som medger visning av bredskärmsbilder (16:9) tillåta visning av bredskärmsbilder (16:9) på en TV av på... -
Page 278: Upphovsrätt
Specifikationer ■ Upphovsrätt – Audiovisuellt material kan bestå av upphovsrättsskyddade verk som ej får spelas in utan upphovsrättsinnehavarens tillstånd. Upplys dig om gällande lagar i detta avseende. – Tillverkat under licens från Dolby Laboratories. Dolby och den dubbla D-logotypen är varumärken som tillhör Dolby Laboratories. - Page 279 YTTERLIGARE INFORMATION Index ■ ■ Siffror Installationsguide .........12 Inställning för videoutgång, 2ND AUDIO, fjärrkontroll ....6 Säkerhet, SETUP-menyn ..... 25 SETUP-menyn .........26 3D uppspelning, SETUP-menyn ..26 SEARCH, fjärrkontroll ......7 Internetuppkoppling, SETUP-menyn ...25 Second Audio, Skärmmeny ....17 ■ IP inställningar, SETUP-menyn ...25 Second Video, Skärmmeny ....
- Page 280 è pericoloso e può causare incendi, guasti tecnica deve aprire la copertura o cercare di riparare questo e/o ferite. Yamaha non può venire considerata responsabile di dispositivo. danni risultanti dall’uso di quest’unità con un voltaggio superiore a quello prescritto.
- Page 281 Indice 1. Introduzione 4. Impostazioni Cosa è possibile fare con questo lettore ..2 Menu SETUP ............. 21 Dotazione ............2 Esempio di funzionamento del menu SETUP....23 Impostazione Generale..........24 Informazioni su dischi e file ......3 Impostazione Display............ 26 Tipi di dischi/file utilizzabili con questo lettore.....
-
Page 282: Introduzione
INTRODUZIONE Cosa è possibile fare con questo lettore Facile impostazione di lingua, risoluzione, rapporto di aspetto p. 12 dello schermo Lingua e impostazioni TV personalizzabili dall’utente. Riproduzione di dischi Blu-ray Disc™/Blu-ray 3D™/DVD/CD p. 17 disponibili in commercio Oltre ai dischi Blu-ray il presente lettore supporta la riproduzione di una varietà di altri dischi. p. -
Page 283: Informazioni Su Dischi E File
Informazioni su dischi e file ■ Tipi di dischi/file utilizzabili con Informazioni sulla gestione della questo lettore regione per Blu-ray Disc/DVD video – In questo lettore è possibile riprodurre dischi da 12 – I lettori video e i dischi Blu-ray Disc/DVD sono cm e da 8 cm. -
Page 284: Caricamento Di Un Disco
Consumer Information Center, P.O. Box 86851, San Diego, CA, 92138, USA. – Non utilizzare mai i dischi di pulizia disponibili in commercio. L’uso di questi dischi può danneggiare la lente. – Rivolgersi al più vicino centro di assistenza Yamaha autorizzato per la pulizia della lente. -
Page 285: Comandi E Funzioni
Comandi e funzioni ■ Pannello anteriore 1 p (On/Standby) 5 Display del pannello anteriore Attiva il lettore/lo imposta in modalità Standby. Visualizza diverse informazioni sullo stato di Tenere premuto questo tasto per circa 5 secondi per funzionamento del lettore. ripristinare forzatamente il lettore (ripristino sistema). (Riproduzione) 2 Coperchio del vassoio del disco Avvia la riproduzione. -
Page 286: Telecomando
Comandi e funzioni ■ Telecomando 1 Trasmettitore a infrarossi: emette il segnale a infrarossi. Puntare questa finestra verso il sensore del telecomando (p. 9). Nota 2 MARKER VIDEO : imposta il Bookmark – viene visualizzato nell’angolo in alto a sinistra (p. - Page 287 Comandi e funzioni C HOME: visualizza la schermata del menu HOME (p. 13). D DIGEST PHOTO : mostra 12 miniature di foto. Quando le miniature vengono visualizzate, è possibile passare alla pagina successiva/precedente con VIDEO : visualizza la barra di selezione dei Bookmark (p.
- Page 288 Comandi e funzioni N Tasti cursore (5/a/2/3): spostano la selezione nella schermata del menu. ENTER: seleziona il menu/la voce selezionata. O TOP MENU : visualizza la schermata del menu principale, se il disco contiene un menu. Selezionare la voce desiderata con 5/a/2/3 e PROGRAM MARKER DIGEST...
- Page 289 Comandi e funzioni Caricamento delle batterie nel telecomando Note – Sostituire entrambe le batterie quando il campo operativo del telecomando diminuisce. – Utilizzare batterie AAA, R03, UM-4. – Assicurarsi che la polarità sia corretta. Vedere l’illustrazione all’interno del vano batterie. –...
-
Page 290: Collegamenti
COLLEGAMENTI Collegamento HDMI ■ Collegamento al terminale HDMI – È possibile apprezzare immagini e suoni digitali di elevata qualità tramite il terminale HDMI. – Collegare saldamente un cavo HDMI (disponibile in commercio) ai terminali HDMI. – Vedere pagina 28 per informazioni sui formati di uscita audio/video. –... -
Page 291: Collegamento Di Rete E Collegamento Usb
Nota Al terminale connettore NETWORK – Yamaha non può garantire che tutte le marche di dispositivi di archiviazione USB funzionino correttamente con il lettore. Dispositivo di archiviazione USB (disponibile in commercio) Cavo di rete... -
Page 292: Riproduzione
RIPRODUZIONE Initial Wizard/Installazione rapida ■ Impostazione con Initial Wizard/Installazione rapida Initial Wizard/Installazione rapida consente l’agevole impostazione di lingua, risoluzione e rapporto di aspetto dello schermo. La schermata di Initial Wizard viene visualizzata quando il lettore viene attivato per la prima volta dopo l’acquisto. -
Page 293: Menu Home/Media
Menu HOME/MEDIA I menu HOME e MEDIA consentono di sfogliare e quindi riprodurre file multimediali presenti su data disc, Operazioni comuni per la riproduzione dispositivi di archiviazione USB e sulla propria rete. dei file in una cartella selezionata Esempio: selezione del file di un filmato su un Nota dispositivo di archiviazione USB –... - Page 294 Menu HOME/MEDIA 4 Selezionare la cartella Foto, Musica, Video o AVCHD Suggerimento che si desidera riprodurre, quindi premere ENTER. Per tornare alla cartella precedente, premere 2 o – Per godersi lo slide show con una base musicale, selezionare premere HOME per tornare alla schermata del menu HOME mentre viene riprodotta la musica e selezionare il file di foto.
-
Page 295: Uso Dei Contenuti Della Rete
Menu HOME/MEDIA ■ Uso dei contenuti della rete Questo lettore è certificato DLNA (p. 34). È possibile gestire contenuti di foto, musica e video archiviati su server DLNA nella propria rete domestica. Riproduzione di contenuti condivisi 1 Per riprodurre file sul PC, installare il software di un server DLNA, come ad es. -
Page 296: Uso Dei Servizi Di Rete
– Alcuni contenuti potrebbero essere disponibili solamente per determinati paesi e presentati in determinate lingue. – Yamaha non dichiara né garantisce che i servizi di contenuti continueranno a essere forniti o disponibili per un determinato periodo di tempo e nega qualunque garanzia, esplicita o implicita, in tal senso. -
Page 297: Funzionamento Di Riproduzione Avanzata
Funzionamento di riproduzione avanzata Questo capitolo spiega la modalità di riproduzione dei dischi Blu-ray disponibili in commercio, dei DVD e dei – Normale CD, nonché dei dischi DVD-RW/R registrati. – Shuffle CH (capitolo) – Shuffle TT (titolo) Nota – Shuffle All –... -
Page 298: Menu Di Stato
Funzionamento di riproduzione avanzata ■ Menu di stato MUSIC Mostra varie impostazioni, quali l’impostazione dei Esempio: icone durante la riproduzione di un file sottotitoli, dell’angolazione e il numero di titolo/capitolo/ musicale traccia in corso di riproduzione. Per visualizzare il menu di stato, premere STATUS. -
Page 299: Uso Dei Bookmark
Funzionamento di riproduzione avanzata ■ Uso dei Bookmark 2 Premere ENTER per programmare l’ordine di VIDEO riproduzione. Questa funzione consente l’impostazione di un Bookmark Per i dischi audio, premere 5/a per selezionare la in uno specifico punto del video. Una volta impostato il traccia desiderata, quindi premere ENTER. -
Page 300: Riproduzione Di Bonusview™ E Bd-Live
– Per il caricamento dei dati (lettura/scrittura) potrebbe essere necessario del tempo. Note – Yamaha non può garantire che tutte le marche di dispositivi di archiviazione USB funzionino correttamente con il lettore. – Non utilizzare un cavo di prolunga USB quando si collega un dispositivo di archiviazione USB al connettore USB del lettore. -
Page 301: Impostazioni
IMPOSTAZIONI Menu SETUP Il Menu SETUP abilita varie impostazioni e regolazioni audio/visive per le funzioni utilizzando il telecomando. Menu/Menu secondario Voce Funzione Pagina Sistema Screen Saver Imposta l’attivazione/disattivazione dello screen saver. Auto Riproduzione Imposta la riproduzione automatica del disco al momento del disco suo inserimento nel lettore. - Page 302 Menu SETUP Menu/Menu secondario Voce Funzione Pagina Uscita 3D Seleziona i video 3D o 2D. Teleschermo Imposta il rapporto di aspetto dello schermo del TV collegato e regola l’uscita video. Selezione Uscita Seleziona la risoluzione dell’uscita video. Impostazione Video Display Sistema TV Seleziona Sistema TV tra NTSC/PAL/Multi.
-
Page 303: Menu Setup
Menu SETUP ■ Esempio di funzionamento del 4. Immettere la password. menu SETUP Immettere la propria password con i tasti numerici. È necessario richiamare la schermata del menu SETUP – La password predefinita è 0000. per eseguire le regolazioni sul lettore. Quella che segue è –... -
Page 304: Impostazione Generale
Menu SETUP ■ Impostazione Generale Caricare le impostazioni predefinite È possibile azzerare tutte le impostazioni del lettore ai Le impostazioni predefinite sono contrassegnate con “ ”. valori di fabbrica ad eccezione dell’impostazione Sicurezza (p. 25). Per dettagli sulle impostazioni Sistema predefinite, vedere le pagine 21–27. - Page 305 Menu SETUP Riproduzione Rete Segno Angolo Connessione Internet È possibile impostare la visualizzazione del Segno Angolo Impostare questa voce su Attivare quando si utilizza BD-Live ) quando viene riprodotto un Blu-ray Disc/DVD con (p. 20), DLNA (p. 15), l’aggiornamento del software dalla rete angolazioni multiple.
-
Page 306: Impostazione Display
Menu SETUP ■ Impostazione Display Selezione Uscita Video È possibile selezionare la risoluzione di uscita video tra Le impostazioni predefinite sono contrassegnate con “ ”. Auto, 480i/576i, 480p/576p, 720p, 1080i e 1080p. Se impostata su Auto, la risoluzione viene impostata automaticamente alla risoluzione massima del TV collegato. -
Page 307: Impostazione Audio
Menu SETUP HDMI 1080p 24Hz Riduzione del rumore È possibile impostare Riduzione del rumore su un livello Questa impostazione trasmette il BD video codificato in da 0 a 3. 0 disattiva l’impostazione, mentre 3 è il livello frame rate 24Hz in HDMI 1080p 24Hz. Con questa funzione potrebbe essere disponibile una riproduzione massimo. -
Page 308: Informazioni Sui Formati Di Uscita Audio
Menu SETUP ■ Informazioni sui formati di uscita audio HDMI Formato sorgente Bitstream Ricodifica con SA* o BCS** PCM 2ch Dolby Digital PCM 2ch senza SA* o BCS** PCM 2ch con SA* o BCS** PCM 5.1ch Dolby Digital PCM 5.1ch senza SA* o BCS** PCM 5.1ch con SA* o BCS**... - Page 309 Menu SETUP ■ Informazioni sui formati di uscita video Se Sistema TV è impostato su NTSC Risoluzione Auto 480i/576i 480p/576p 720p 1080i 1080p BD-Video con 1080p 24/ contenuto 60 Hz * HDMI 480i 480p 720p 60 Hz 1080i 60 Hz 1080p/24 Hz Altri 1080p 60 Hz...
-
Page 310: Aggiornamento Del Software
Si raccomanda di aggiornare il software del lettore in modo che lo stesso possa funzionare con il software più recente. Per verificare la disponibilità di aggiornamenti per il software, visitare http://download.yamaha.com/ Nota – Durante l’esecuzione dell’aggiornamento del software, non rimuovere il dispositivo di archiviazione USB, non impostare il lettore in modalità... -
Page 311: Informazioni Aggiuntive
Consultare la tabella qui di seguito nel caso il lettore non funzioni correttamente. Se il problema riscontrato non risultasse elencato qui di seguito o se le istruzioni fornite non fossero d’aiuto, spegnere il lettore, scollegare il cavo di alimentazione e contattare il più vicino rivenditore o centro di assistenza Yamaha autorizzato. ■ Alimentazione... -
Page 312: Immagine
Risoluzione dei problemi ■ Immagine Problema Possibili cause e soluzioni Nessuna immagine. – Accertarsi che il cavo HDMI sia stato collegato correttamente. (p. 10) – Accertarsi che il TV o il ricevitore AV collegato sia impostato sull’ingresso corretto. (p. 10) –... -
Page 313: Rete
Risoluzione dei problemi ■ Rete Problema Possibili cause e soluzioni Impossibile collegarsi a Internet. – Collegare correttamente il cavo di rete. – Accendere il dispositivo collegato, quale un router o un modem a banda larga. – Collegare correttamente il router e/o il modem a banda larga. –... -
Page 314: Glossario
Glossario AVCHD Dolby Digital Plus AVCHD è un nuovo formato (standard) per le Un sistema sonoro sviluppato come estensione di Dolby videocamere ad alta definizione utilizzabile per Digital. Questa tecnologia di codificazione audio registrare e riprodurre immagini HD ad alta risoluzione. supporta audio surround 7.1 multicanale. -
Page 315: Dati Tecnici
Glossario Lyp Sync Spazio colorato Lyp Sync, abbreviazione di Lip Synchronization Spazio colorato è una gamma di colori che possono (sincronizzazione labiale), è un termine tecnico che essere rappresentati. RGB è uno spazio colorato basato indica sia un problema che la funzione utilizzata per sul modello di colore RGB (Red, Green and Blue, vale a mantenere sincronizzati i segnali audio e video in fase di dire rosso, verde e blu) e viene tipicamente utilizzato per... -
Page 316: Copyright
Dati tecnici ■ Copyright – Copyright 2004-2010 Verance Corporation. Cinavia™ è un marchio di fabbrica di Verance – Il materiale audiovisivo potrebbe consistere di lavori Corporation. Protetto dal brevetto statunitense n. soggetti a copyright che non devono essere registrati 7,369,677 e da brevetti mondiali registrati o in corso senza l’autorizzazione del proprietario del copyright. -
Page 317: Indice Analitico
INFORMAZIONI AGGIUNTIVE Indice analitico ■ ■ Numerics Secondo Audio, menu a schermo (On Screen) ........17 2ND AUDIO, telecomando ....6 Impostazione Audio, menu SETUP ..27 Secondo Video, menu a schermo Impostazione Display, menu SETUP ...26 ■ (On Screen) ........17 Impostazione Generale, menu SETUP Segno Angolo, menu SETUP .... - Page 318 Yamaha no se hará responsable de ningún daño debido al uso de este aparato con PELIGRO una tensión diferente de la especificada.
-
Page 319: Acerca De Este Manual
Índice general 1. Introducción 4. Ajustes Qué puede hacer con este reproductor ... 2 Menú SETUP ............. 21 Piezas incluidas ..........2 Ejemplo de funcionamiento del menú SETUP ..... 23 Configuración General ..........24 Información sobre discos y archivos....3 Configuración de pantalla .......... - Page 320 INTRODUCCIÓN Qué puede hacer con este reproductor Configuración sencilla de idioma, resolución y relación de aspecto pág. 12 de la pantalla Puede ajustar la configuración de idioma y TV. Reproducción de discos Blu-ray Disc™/Blu-ray 3D™/DVD/CD pág. 17 comercializados en el mercado Además de los discos Blu-ray, este reproductor también admite la reproducción de otros tipos de discos.
- Page 321 Información sobre discos y archivos ■ Tipos de discos/archivos que Información sobre la gestión de la pueden utilizarse con este región en los vídeos Blu-ray Disc/DVD reproductor – Los discos y los reproductores de vídeo Blu-ray – En este reproductor se pueden reproducir discos de Disc/DVD tienen códigos de región, que dictan las 12 cm y 8 cm.
- Page 322 – Solicite la limpieza de la lente en el centro de atención al cliente aprobado por Yamaha más cercano. ■ Aviso para ver imágenes de vídeo en 3D – Algunas personas pueden sufrir molestias (como vista cansada, fatiga o náuseas) al ver imágenes de...
-
Page 323: Panel Delantero
Controles y funciones ■ Panel delantero 1 p (Encendido/en espera) 5 Visor del panel delantero Pone en marcha el reproductor/activa el modo en espera. Muestra distintos tipos de información sobre el estado Si mantiene pulsado este botón durante del dispositivo. aproximadamente 5 segundos, forzará... - Page 324 Controles y funciones ■ Mando a distancia 1 Transmisor de señales infrarrojas: emite la señal infrarroja. Oriente esta ventana al sensor del mando a distancia (pág. 9). Nota 2 MARKER VIDEO : establece un Marcador – aparecerá en la esquina superior izquierda de la pantalla cuando la tecla pulsada no esté...
- Page 325 Controles y funciones 0 ENTER: selecciona el menú/opción resaltado. M ANGLE : permite cambiar el ángulo de A STATUS: muestra la información de reproducción la cámara si el vídeo se ha grabado con varios ángulos. (pág. 18). Cuando esta función está disponible se muestra en pantalla Marca de Angulo ( ).
- Page 326 Controles y funciones N Botones de cursor (5/a/2/3): permiten cambiar la selección en la pantalla de menú. ENTER: selecciona el menú/opción resaltado. O TOP MENU : muestra la pantalla de menú principal si el disco contiene un menú. Seleccione la opción deseada mediante 5/a/2/3 y PROGRAM MARKER DIGEST...
- Page 327 Controles y funciones Instalación de las pilas en el mando a distancia Notas – Cambie las dos pilas cuando note que disminuye el alcance del mando a distancia. – Utilice pilas AAA, R03 y UM-4. – Asegúrese de que las polaridades son las correctas. Consulte la ilustración que encontrará...
- Page 328 CONEXIONES Conexión HDMI ■ Conexión con el terminal HDMI – Puede disfrutar de imagen y sonido digital de alta calidad a través del terminal HDMI. – Conecte con firmeza un cable HDMI (de venta en el mercado) a los terminales HDMI. –...
- Page 329 Nota Al conector Al terminal NETWORK – Yamaha no puede garantizar que los dispositivos de memoria USB de todas las marcas funcionen con este reproductor. Dispositivo de memoria USB (de venta en el mercado) Cable de red...
- Page 330 REPRODUCCIÓN Asistente inicial/Configuración Sencilla ■ Configuración con el Asistente inicial/Configuración Sencilla Asistente inicial/Configuración Sencilla le permite configurar fácilmente el idioma, la resolución y la relación de aspecto de la pantalla. La pantalla del Asistente inicial aparece la primera vez que enciende este reproductor después de comprarlo.
- Page 331 Menú HOME/MEDIA Los menús HOME y MEDIA le permiten examinar y reproducir archivos multimedia guardados en discos de Operaciones comunes para la datos, dispositivos de memoria USB y en su red. reproducción de archivos en una carpeta seleccionada Nota Ejemplo: selección de un archivo de película en un –...
- Page 332 Menú HOME/MEDIA 4 Seleccione la carpeta de Foto, Música, VÍdeo o AVCHD Consejo que desea reproducir y, a continuación, pulse ENTER. Para volver a la carpeta principal, pulse 2 o seleccione – Para disfrutar del pase de diapositivas con música, pulse HOME para volver a la pantalla del menú...
- Page 333 Menú HOME/MEDIA ■ Uso de contenidos de red Este reproductor cuenta con la certificación DLNA (pág. 34). Puede administrar fotos, música y vídeos almacenados en servidores DLNA de su red doméstica. Reproducción de contenido compartido 1 Para reproducir archivos guardados en su PC, instale un software de servidor DLNA como, por ejemplo, Windows Media Player 12 y comparta los archivos que desee reproducir.
- Page 334 – Es posible que parte de los contenidos solo estén disponibles en algunos países y que se presenten en idiomas específicos. – Yamaha no garantiza que los servicios de contenidos se seguirán proporcionando ni estarán disponibles durante un periodo de tiempo concreto y rechaza cualquier garantía de este tipo, ya sea expresa o implícita.
- Page 335 Funciones avanzadas de reproducción En este capítulo se explica la reproducción de discos Blu-ray, DVD y CD de venta en el mercado, así como – Normal discos DVD-RW/R grabados. – Shuffle CH (capítulo) – Shuffle TT (título) Nota – Shuffle All –...
- Page 336 Funciones avanzadas de reproducción ■ Menú de estado MUSIC Muestra varios ajustes, cómo los subtítulos, el ángulo y el Ejemplo: Iconos que aparecen al reproducir un archivo número de título/capítulo/pista reproducido. Para mostrar de música el menú de estado, pulse STATUS. El menú de estado consta de los siguientes menús.
- Page 337 Funciones avanzadas de reproducción ■ Uso de Marcador 2 Pulse ENTER para programar el orden de reproducción. VIDEO En un disco de audio, pulse 5/a para seleccionar una Le permite establecer un Marcador en un punto pista y, a continuación, pulse ENTER. especificado del vídeo.
- Page 338 – La carga de los datos (lectura/escritura) puede llevar un tiempo. Notas – Yamaha no puede garantizar que los dispositivos de memoria USB de todas las marcas funcionen con este reproductor. – No utilice un cable de extensión USB cuando conecte un dispositivo de memoria USB al conector USB del reproductor.
- Page 339 AJUSTES Menú SETUP El menú SETUP permite realizar diversos ajustes y configuraciones audiovisuales en las funciones utilizando el mando a distancia. Menú/submenú Opción Función Página Sistema Protector de pantalla Activa/desactiva el protector de pantalla. Reproducción Ajusta el reproductor para que inicie automáticamente la Automática Disco reproducción del disco.
- Page 340 Menú SETUP Menú/submenú Opción Función Página Salida 3D Selecciona vídeos en 3D o 2D. Pantalla de TV Ajusta la relación de aspecto de la pantalla del televisor conectado y ajusta la salida de vídeo. Seleccionar Salida Selecciona la resolución de la salida de vídeo. Configuración de de Video pantalla...
- Page 341 Menú SETUP ■ Ejemplo de funcionamiento del 4. Introduzca la contraseña. menú SETUP Introduzca la contraseña con los botones numéricos. Debe acceder a la pantalla del menú SETUP para realizar – La contraseña predeterminada es 0000. ajustes en el reproductor. A continuación se explican las –...
- Page 342 Menú SETUP ■ Configuración General Cargar configuracion por defecto Puede restablecer todos los ajustes de este reproductor al Los ajustes predeterminados están marcados con “ ”. ajuste predefinido, excepto el ajuste Seguridad (pág. 25). Para obtener información sobre los ajustes Sistema predeterminados, consulte las páginas 21–27.
- Page 343 Menú SETUP Reproducción Marca de Angulo Conexión a Internet Puede ajustar la visualización de la Marca de Angulo Ajuste esta opción en Permitir cuando utilice BD-Live ) cuando se reproducen Blu-ray Disc/DVD con (pág. 20) o DLNA (pág. 15), actualice el software desde la red varios ángulos.
- Page 344 Menú SETUP ■ Configuración de pantalla Seleccionar Salida de Video Puede seleccionar la resolución de salida de vídeo entre Los ajustes predeterminados están marcados con “ ”. Auto, 480i/576i, 480p/576p, 720p, 1080i y 1080p. Cuando se define en Auto, la resolución se ajusta a la resolución máxima según el televisor conectado.
- Page 345 Menú SETUP HDMI 1080p 24Hz Ajuste de color Ajusta los valores de Brillo/Saturación/Tonalidad para Permite la salida de vídeo BD codificado con una cada color (Rojo/Verde/Azul/Amarillo/Cian/Magenta). velocidad de fotogramas de 24 Hz en HDMI 1080p 24Hz. Para utilizar esta función, ajuste Modo de vídeo en Con esta función es posible que disfrute de una Particularizado.
- Page 346 Menú SETUP ■ Acerca de los formatos de salida de audio HDMI Formato de origen Bitstream Recodificar con AS* o SCB** PCM 2 canales Dolby Digital PCM 2 canales sin AS* o SCB** PCM 2 canales con AS* o SCB** PCM 5.1 canales Dolby Digital PCM 5.1 canales...
- Page 347 Menú SETUP ■ Acerca de los formatos de salida de vídeo Si Sistema de TV se define en NTSC Resolución Auto 480i/576i 480p/576p 720p 1080i 1080p BD-Video con 1080p 24/ contenido 60 Hz * HDMI 480i 480p 720p 60 Hz 1080i 60 Hz 1080p/24 Hz Otros...
- Page 348 Le recomendamos la actualización para que el reproductor funcione con el software más actual. Para comprobar la disponibilidad de una actualización de software, visite http://download.yamaha.com/ Nota – No extraiga el dispositivo de memoria USB, no ponga el reproductor en modo de espera ni desenchufe el cable de alimentación o el cable LAN mientras se lleva a cabo la actualización de software.
- Page 349 Consulte la tabla que aparece a continuación cuando el reproductor no funcione correctamente. Si el problema que tiene no aparece en la lista siguiente o las instrucciones no le sirven de ayuda, apague este reproductor, desenchufe el cable de alimentación y póngase en contacto con el centro de servicio o concesionario Yamaha autorizado más cercano. ■ Alimentación...
- Page 350 Resolución de problemas ■ Imagen Problema Posibles causas y soluciones No hay imagen. – Asegúrese de que el cable HDMI esté conectado correctamente. (pág. 10) – Asegúrese de que el televisor o receptor de A/V conectado está ajustado a la entrada correcta.
- Page 351 Resolución de problemas ■ Red Problema Posibles causas y soluciones No se puede conectar a Internet. – Conecte correctamente el cable de red. – Encienda el equipo conectado como, por ejemplo, un módem o enrutador de banda ancha. – Conecte correctamente el módem y/o el enrutador de banda ancha. –...
- Page 352 Glosario AVCHD DLNA AVCHD es un nuevo formato (estándar) para cámaras DLNA (Digital Living Network Alliance) permite de vídeo de alta definición que se puede utilizar para compartir de forma sencilla contenidos digitales a grabar y reproducir imágenes de alta resolución HD. través de una red doméstica, para que pueda disfrutar BD-Live™...
- Page 353 Glosario HDMI Sonido PCM lineal HDMI (High-Definition Multimedia Interface, Interfaz PCM lineal es un formato de grabación de señales Multimedia de Alta Definición) es una interfaz que utilizado para CD de audio y en algunos discos DVD y admite vídeo y audio en una sola conexión digital. La Blu-ray.
- Page 354 Especificaciones ■ Propiedad intelectual – Copyright 2004-2010 Verance Corporation. Cinavia™ es una marca comercial de Verance – El material audio-visual puede consistir de productos Corporation. Protegida por la patente estadounidense con propiedad intelectual que no se deben grabar sin 7.369.677 y patentes internacionales registradas y la autorización del poseedor de dicha propiedad pendientes de aprobación en virtud de la licencia de intelectual.
- Page 355 INFORMACIÓN ADICIONAL Índice ■ ■ ■ Numerics 2ND AUDIO, mando a distancia ...6 ENTER, mando a distancia ....7, 8 Red, conexión ........11 Estado, menú ........18 Red, menú SETUP ....... 25 ■ Estilo subtítulos, menú en pantalla ..17 Reducción de ruido, menú SETUP ..27 A/B, mando a distancia ......7 REPEAT, mando a distancia ....
- Page 356 14 Probeer niet zelf wijzigingen in dit toestel aan te brengen of later nog eens iets in kunt opzoeken. het te repareren. Neem contact op met erkend Yamaha Installeer dit toestel op een goed geventileerde, koele, droge servicepersoneel wanneer u vermoedt dat het toestel reparatie en schone plek —...
-
Page 357: Over Deze Handleiding
Inhoudsopgave 1. Inleiding 4. Instellingen Wat kunt u doen met deze speler ..... 2 SETUP-menu............. 21 Bijgeleverde onderdelen ........2 Voorbeeld van de werking van het SETUP-menu ..23 Instellingen Algemeen ..........24 Over schijven en bestanden ......3 Display Setting.............. 26 Schijf-/bestandstypes die u met deze speler kunt Audio Setting .............. -
Page 358: Inleiding
INLEIDING Wat kunt u doen met deze speler Eenvoudige instelling van taal, resolutie, beeldverhouding p. 12 U kunt taal- en tv-instellingen doorvoeren. In de handel verkrijgbare Blu-ray Disc™/Blu-ray 3D™/DVD/ p. 17 CD-schijven afspelen Naast Blu-ray-schijven kunt u met deze speler ook verschillende andere types schijven afspelen. p. -
Page 359: Over Schijven En Bestanden
Over schijven en bestanden ■ Schijf-/bestandstypes die u met Regiobeheerinformatie voor Blu-ray deze speler kunt gebruiken Disc-/DVD-video's – Schijven van 12 cm en 8 cm kunnen met deze speler – Blu-ray Disc-/DVD-videospelers en schijven hebben worden afgespeeld. Gebruik geen 8 naar 12 cm- een regiocode die aangeeft in welke regio's de schijf adapter. -
Page 360: Een Schijf Laden
Bij gebruik van deze schijven kan de lens worden beschadigd. van uw postadres naar: Cinavia Consumer Information Center, – Neem contact op met het dichtstbijzijnde servicecentrum P.O. Box 86851, San Diego, CA, 92138, Verenigde Staten. goedgekeurd door Yamaha om de lens te laten schoonmaken. -
Page 361: Bediening En Functies
Bediening en functies ■ Voorpaneel 1 p (aan/stand-by) 5 Uitleesvenster op het voorpaneel Hiermee kunt u de speler inschakelen/de stand- Hier wordt informatie betreffende de operationele bymodus activeren. status weergegeven. Als u deze knop gedurende ongeveer 5 seconden (afspelen) ingedrukt houdt, wordt de speler gedwongen gereset Hiermee kunt u het afspelen starten. -
Page 362: Afstandsbediening
Bediening en functies ■ Afstandsbediening 1 Infraroodsignaalzender: verstuurt infraroodsignalen. Richt dit venster op de afstandsbedieningssensor (p. 9). Opmerking 2 MARKER VIDEO : hiermee kunt u een – wordt in de linkerbovenhoek van het scherm weergegeven als de ingedrukte knop niet Bookmark (p. - Page 363 Bediening en functies 9 Cijfertoetsen: voor het invoeren van cijfers of om J SETUP: hiermee kunt u het SETUP-menuscherm tijdens het afspelen over te schakelen naar het spoor/ weergeven (p. 21). hoofdstuk dat overeenstemt met het ingevoerde cijfer. K AUDIO : hiermee kunt u de audiotaal of Afhankelijk van het schijftype en de de indeling wijzigen.
- Page 364 Bediening en functies N Cursortoetsen (5/a/2/3): hiermee kunt u de markering op het menuscherm verplaatsen. ENTER: hiermee kunt u het gemarkeerde menu/item selecteren. O TOP MENU : hiermee kunt u het hoofdmenuscherm weergeven als de schijf een menu PROGRAM MARKER DIGEST ZOOM bevat.
- Page 365 Bediening en functies De batterijen in de afstandsbediening Bedieningsbereik van de plaatsen afstandsbediening Afstandsbedieningssensor 30° 30° Opmerkingen – Vervang beide batterijen als de bedieningsafstand van de afstandsbediening verkleint. – Gebruik hiervoor AAA-, R03-, UM-4-batterijen. – Houd bij het plaatsen van de batterijen rekening met de polariteit.
-
Page 366: Aansluitingen
AANSLUITINGEN HDMI-aansluiting ■ Gebruik van de HDMI-aansluiting – Via de HDMI-aansluiting kunt u genieten van digitale beelden en geluid van hoge kwaliteit. – Sluit een HDMI-kabel (los verkrijgbaar) stevig aan op de HDMI-aansluitingen. – Raadpleeg pagina 28 voor informatie over audio/video-uitgangsformaten. –... -
Page 367: Netwerk- En Usb-Aansluiting
Bij gebruik van een USB- verlengkabel is het mogelijk dat de speler niet juist functioneert. Opmerking Naar de Naar de NETWORK- – Yamaha kan niet garanderen dat de USB- USB-poort aansluiting geheugens van alle merken functioneren met deze speler. USB-geheugen... -
Page 368: Afspelen
AFSPELEN Initiële Wizard/Snelinstelling ■ Instellingen doorvoeren met Initiële Wizard/Snelinstelling Met Initiële Wizard/Snelinstelling kunt u eenvoudig de taal, resolutie en beeldverhouding instellen. Wanneer u deze speler voor het eerst gebruikt na de aankoop, wordt het scherm Initiële Wizard weergegeven. U kunt dezelfde instelling uitvoeren via het menu SETUP = Systeem = Snelinstelling. -
Page 369: Home/Media-Menu
HOME/MEDIA-menu Met het HOME- en MEDIA-menu kunt u door multimediabestanden op gegevensschijven, USB- Basishandelingen voor het afspelen geheugens en uw netwerk bladeren en deze afspelen. van bestanden in een gekozen map Voorbeeld: een filmbestand selecteren op een USB- Opmerking geheugen –... - Page 370 HOME/MEDIA-menu 3 Selecteer het item dat het bestand bevat dat u wilt 6 Selecteer het bestand dat u wilt afspelen en druk afspelen en druk vervolgens op ENTER. vervolgens op ENTER. Wanneer er een videobestand geselecteerd is, wordt het afspelen gestart. Wanneer er een muziekbestand geselecteerd is, wordt het statusscherm weergegeven en wordt het afspelen gestart.
-
Page 371: Netwerkinhoud Gebruiken
HOME/MEDIA-menu ■ Netwerkinhoud gebruiken Deze speler is gecertificeerd als DLNA-server (p. 34). U kunt foto-, muziek- en video-inhoud die opgeslagen is op een DLNA-server beheren op uw thuisnetwerk. Gedeelde inhoud afspelen 1 Om bestanden op uw pc af te spelen, installeert u een DLNA-serversoftware, zoals Windows Media Player 12, en deelt u de bestanden die u wilt afspelen. -
Page 372: Netwerkservices Gebruiken
– Sommige inhoud is mogelijk alleen voor specifieke landen beschikbaar en wordt mogelijk in specifieke talen gepresenteerd. – Yamaha verklaart of garandeert niet dat inhoudservices gedurende een bepaalde tijdsperiode geleverd of beschikbaar zijn en op een dergelijke garantie, nadrukkelijk of geïmpliceerd, kan geen aanspraak worden gemaakt. -
Page 373: Geavanceerd Afspelen
Geavanceerd afspelen In dit hoofdstuk vindt u meer informatie over het afspelen van in de handel verkrijgbare Blu-ray-schijven, DVD's, – Normaal CD's en opgenomen DVD-RW/R-schijven. – Shuffle CH (hoofdstuk) – Shuffle TT (titel) Opmerking – Shuffle All – Random CH (hoofdstuk) –... -
Page 374: Statusmenu
Geavanceerd afspelen ■ Statusmenu MUSIC Hier worden verschillende instellingen weergegeven, Voorbeeld: pictogrammen bij het afspelen van een zoals ondertiteling, camerahoek en het nummer van de muziekbestand titel/het hoofdstuk/het spoor dat wordt afgespeeld. Om het statusmenu weer te geven, drukt u op STATUS. Het statusmenu bevat de volgende menu's. -
Page 375: Bookmark Gebruiken
Geavanceerd afspelen ■ Bookmark gebruiken 2 Druk op ENTER om de afspeelvolgorde te programmeren. VIDEO Druk voor een audioschijf op 5/a om een gewenst Hiermee kunt u een Bookmark invoegen op een bepaald spoor te selecteren en druk vervolgens op ENTER. punt in een video. -
Page 376: Bonusview™ En Bd-Live™ Gebruiken
(lezen/schrijven). ■ De beeld-in-beeldfunctie gebruiken Opmerkingen (afspelen van secundaire audio/ – Yamaha kan niet garanderen dat de USB-geheugens video) van alle merken functioneren op deze speler. – Gebruik geen USB-verlengkabel bij het aansluiten Een BD-Video die secundaire audio en video bevat die... - Page 377 INSTELLINGEN SETUP-menu Met het SETUP-menu kunt u met behulp van de afstandsbediening diverse geluids-/beeldinstellingen doorvoeren voor de functies. Menu/Submenu Item Functie Pagina Systeem Screensaver De screensaver in-/uitschakelen. Schijf Automatisch Instellen dat de speler schijven automatisch begint af te afspelen spelen. HDMI Control Stelt deze speler in om het bedieningssignaal van de Instellingen...
-
Page 378: Setup-Menu
SETUP-menu Menu/Submenu Item Functie Pagina 3D Uitgang Hiermee kunt u 3D- of 2D-video's selecteren. TV Scherm Hiermee kunt u de beeldverhouding van de aangesloten tv instellen en de video-uitgang regelen. Video uit keuze Hiermee kunt u de resolutie van de uitgevoerde video Display Setting selecteren. -
Page 379: Voorbeeld Van De Werking Van Het Setup-Menu
SETUP-menu ■ Voorbeeld van de werking van het 4. Voer uw wachtwoord in. SETUP-menu Voer uw wachtwoord in met behulp van de U moet het SETUP-menuscherm oproepen om de cijfertoetsen. instellingen voor deze speler door te voeren. Hieronder – Het standaardwachtwoord is 0000. volgt de uitleg voor de basisbediening van het SETUP- –... -
Page 380: Instellingen Algemeen
SETUP-menu ■ Instellingen Algemeen Ladingsfout U kunt alle instellingen van de speler terugzetten op de De standaardinstellingen zijn aangegeven met " ". standaardinstellingen, behalve de Veiligheid-instelling (p. 25). Raadpleeg pagina's 21–27 voor meer informatie Systeem over de standaardinstellingen. Screensaver Bijwerken U kunt de screensaver in- of uitschakelen. - Page 381 SETUP-menu Afspelen Netwerk Angle Mark Internetverbinding U kunt instellen dat de Angle Mark ( ) wordt Stel dit item in op In staat stellen wanneer u BD-Live (p. 20), weergegeven wanneer er een Blu-ray Disc/DVD wordt DLNA (p. 15), software-upgrade van het netwerk (p. 30) en afgespeeld met meerdere camerahoeken.
-
Page 382: Display Setting
SETUP-menu ■ Display Setting Video uit keuze U kunt de uitgevoerde videoresolutie selecteren uit Auto, De standaardinstellingen zijn aangegeven met " ". 480i/576i, 480p/576p, 720p, 1080i en 1080p. Wanneer Auto ingesteld is, wordt de resolutie ingesteld op de maximale resolutie voor de aangesloten tv. Raadpleeg voor meer informatie over uitgangsformaten 3D Uitgang "Over de video-uitgangsformaten"... -
Page 383: Audio Setting
SETUP-menu HDMI 1080p 24Hz Kleur aanpassen U kunt de Helderh/Verzadig./Kleurtoon voor elk kleur BD-Video gecodeerd met een framesnelheid van 24Hz (Rood/Groen/Blauw/Geel/Cyaan/Magenta) aanpassen. wordt uitgevoerd in HDMI 1080p 24Hz. Met deze functie Om deze functie te gebruiken, stelt u Videomodus in op kan een vloeiendere beeldweergave worden bereikt. -
Page 384: Over De Audio-Uitgangsformaten
SETUP-menu ■ Over de audio-uitgangsformaten HDMI Bronformaat Bitstream Reencode met SA* of KKG** PCM 2-k Dolby Digital PCM 2-k zonder SA* of KKG** PCM 2-k met SA* of KKG** PCM 5.1-k Dolby Digital PCM 5.1-k zonder SA* of KKG** PCM 5.1-k met SA* of KKG** PCM 7.1-k Dolby Digital... -
Page 385: Over De Video-Uitgangsformaten
SETUP-menu ■ Over de video-uitgangsformaten Wanneer TV-systeem ingesteld is op NTSC Resolutie Auto 480i/576i 480p/576p 720p 1080i 1080p BD-Video met 1080p 24/ 1080p/24Hz- 60 Hz * HDMI 480i 480p 720p 60 Hz 1080i 60 Hz inhoud Overige 1080p 60 Hz Wanneer TV-systeem ingesteld is op PAL Resolutie Auto... -
Page 386: Software-Upgrade
Om na te gaan of er een software-upgrade beschikbaar is, gaat u naar http://download.yamaha.com/ Opmerking – Terwijl de software-upgrade wordt uitgevoerd, mag u het USB-geheugen niet verwijderen, de speler niet in de stand-bystand zetten en het netsnoer/de LAN-kabel niet loskoppelen. -
Page 387: Aanvullende Informatie
Raadpleeg de tabel hieronder wanneer de speler niet naar behoren functioneert. Als het probleem niet hieronder vermeld staat of als de aanwijzingen het probleem niet verhelpen, schakelt u de speler uit, haalt u de stekker uit het stopcontact en neemt u contact op met uw dichtstbijzijnde Yamaha-dealer of -servicecentrum. ■ Stroom... -
Page 388: Beeld
Problemen oplossen ■ Beeld Probleem Mogelijke oorzaken en oplossingen Geen beeld. – Controleer of de HDMI-kabel juist is aangesloten. (p. 10) – Controleer of de juiste ingang op de aangesloten tv of de AV-ontvanger is gekozen. (p. 10) – Houd op het voorpaneel gelijktijdig ingedrukt als er geen schijf is geplaatst of het afspelen is gestopt om de standaardwaarde in te stellen voor de videoresolutie. -
Page 389: Netwerk
Problemen oplossen ■ Netwerk Probleem Mogelijke oorzaken en oplossingen Kan geen verbinding met het internet – Sluit de netwerkkabel correct aan. maken. – Schakel de aangesloten apparatuur zoals een breedbandrouter of modem in. – Sluit de breedbandrouter en/of modem juist aan. –... -
Page 390: Woordenlijst
Woordenlijst AVCHD Dolby Digital Plus AVCHD is een nieuw formaat (standaard) voor HD- Een geluidssysteem ontwikkeld als uitbreiding van videocamera's dat gebruikt kan worden voor het Dolby Digital. Deze audiocoderingstechnologie opnemen en afspelen van HD-beelden met een hoge ondersteunt 7.1-meerkanaalssurroundgeluid. resolutie. -
Page 391: Specificaties
Woordenlijst Lineair PCM-geluid Mac-adres Lineaire PCM is een signaalopnameformaat dat gebruikt Het Mac-adres is een unieke waarde die wordt wordt voor Audio-CD's en voor sommige DVD- toegekend aan een netwerkapparaat voor schijven en Blu-ray-schijven. Het geluid op Audio-CD's identificatiedoeleinden. wordt opgenomen bij een bemonsteringsfrequentie van Ondertitels Dit zijn de tekstregels die onderaan op het scherm 44,1 kHz en met 16 bits. -
Page 392: Auteursrechten
Specificaties ■ Auteursrechten – Copyright 2004-2010 Verance Corporation. Cinavia™ is een handelsmerk van Verance – Audiovisueel materiaal kan bestaan uit materiaal met Corporation. Beschermd door het Amerikaanse auteursrecht dat niet mag worden opgenomen zonder patent 7,369,677 en andere reeds uitgegeven en toestemming van de eigenaar van het auteursrecht. -
Page 393: Index
AANVULLENDE INFORMATIE Index ■ ■ ■ Cijfers 2ND AUDIO, afstandsbediening ...6 Informatie, SETUP-menu ....25 Schermmenu ........17 3D Playback bericht, SETUP-menu ..24 Initiële Wizard ........12 Schijf Automatisch afspelen, 3D Uitgang, SETUP-menu ....26 Ins Spelen, schermmenu .......17 SETUP-menu ........24 Ins Zoeken, schermmenu .....17 Screensaver, SETUP-menu .... -
Page 394: Information About Software
Information about software This product uses the following software. For information (copyright, etc) about each software, read the original sentences stated below. ■ About Linux, Busybox, SquashFS, LIRC, U-boot, c) If the modified program normally reads commands interactively when run, you must cause it, when started running for such interactive use in the most gdb, mtd-utils ordinary way, to print or display an announcement including an appropriate... - Page 395 It is not the purpose of this section to induce you to infringe any patents or other The hypothetical commands ‘show w’ and ‘show c’ should show the appropriate parts property right claims or to contest validity of any such claims; this section has the sole of the General Public License.
- Page 396 In other cases, permission to use a particular library in non-free programs enables a Once this change is made in a given copy, it is irreversible for that copy, so the ordinary greater number of people to use a large body of free software. For example, permission GNU General Public License applies to all subsequent copies and derivative works to use the GNU C Library in non-free programs enables many more people to use the made from that copy.
- Page 397 b) Give prominent notice with the combined library of the fact that part of it is a 16. IN NO EVENT UNLESS REQUIRED BY APPLICABLE LAW OR AGREED work based on the Library, and explaining where to find the accompanying TO IN WRITING WILL ANY COPYRIGHT HOLDER, OR ANY OTHER uncombined form of the same work.
- Page 398 ■ About FreeType THIS SOFTWARE IS PROVIDED BY THE OpenSSL PROJECT “AS IS” AND ANY EXPRESSED OR IMPLIED WARRANTIES, INCLUDING, BUT NOT LIMITED TO, THE IMPLIED WARRANTIES OF MERCHANTABILITY AND FITNESS FOR The FreeType Project LICENSE A PARTICULAR PURPOSE ARE DISCLAIMED. IN NO EVENT SHALL THE 2006-Jan-27 OpenSSL PROJECT OR ITS CONTRIBUTORS BE LIABLE FOR ANY DIRECT, INDIRECT, INCIDENTAL, SPECIAL, EXEMPLARY, OR CONSEQUENTIAL...
- Page 399 o freetype@nongnu.org The Unix configuration script “configure” was produced with GNU Autoconf. It is Discusses general use and applications of FreeType, as well as future and wanted copyright by the Free Software Foundation but is freely distributable. The same holds additions to the library and distribution.
- Page 400 Greg Roelofs 1.10.1. “Patent Claims” means any patent claim(s), now owned or hereafter acquired, including without limitation, method, process, and apparatus claims, in any patent Tom Tanner Licensable by grantor. libpng versions 0.5, May 1995, through 0.88, January 1996, are Copyright (C) 1995, http://www.cs.fsu.edu/~engelen/license.html 1996 Guy Eric Schalnat, Group 42, Inc.
- Page 401 Contributor represents that, except as disclosed pursuant to Section 3.4(a) above, ACKNOWLEDGE THAT THIS SOFTWARE IS NOT DESIGNED FOR USE IN ON- Contributor believes that Contributor’s Modifications are Contributor’s original LINE EQUIPMENT IN HAZARDOUS ENVIRONMENTS SUCH AS OPERATION creation(s) and/or Contributor has sufficient rights to grant the rights conveyed by this OF NUCLEAR FACILITIES, AIRCRAFT NAVIGATION OR CONTROL, OR LIFE- License.
- Page 402 Portions created by gSOAP are Copyright (C) 2001-2009 Robert A. van Engelen, To “propagate” a work means to do anything with it that, without permission, would Genivia inc. All Rights Reserved. THE SOFTWARE IN THIS PRODUCT WAS IN make you directly or secondarily liable for infringement under applicable copyright PART PROVIDED BY GENIVIA INC AND ANY EXPRESS OR IMPLIED law, except executing it on a computer or modifying a private copy.
- Page 403 You may convey verbatim copies of the Program’s source code as you receive it, in A “User Product” is either (1) a “consumer product”, which means any tangible any medium, provided that you conspicuously and appropriately publish on each copy personal property which is normally used for personal, family, or household purposes, an appropriate copyright notice;...
- Page 404 Additional terms, permissive or non-permissive, may be stated in the form of a If you convey a covered work, knowingly relying on a patent license, and the separately written license, or stated as exceptions; the above requirements apply either Corresponding Source of the work is not available for anyone to copy, free of charge way.
- Page 405 IN NO EVENT UNLESS REQUIRED BY APPLICABLE LAW OR AGREED TO 0. Definitions. IN WRITING WILL ANY COPYRIGHT HOLDER, OR ANY OTHER PARTY WHO MODIFIES AND/OR CONVEYS THE PROGRAM AS PERMITTED ABOVE, BE A file is an “Independent Module” if it either requires the Runtime Library for LIABLE TO YOU FOR DAMAGES, INCLUDING ANY GENERAL, SPECIAL, execution after a Compilation Process, or makes use of an interface provided by the INCIDENTAL OR CONSEQUENTIAL DAMAGES ARISING OUT OF THE USE...
- Page 406 THIS SOFTWARE IS PROVIDED BY THE COPYRIGHT HOLDERS AND CONTRIBUTORS “AS IS” AND ANY EXPRESS OR IMPLIED WARRANTIES, Arev Fonts Copyright INCLUDING, BUT NOT LIMITED TO, THE IMPLIED WARRANTIES OF ------------------------------ MERCHANTABILITY AND FITNESS FOR A PARTICULAR PURPOSE ARE DISCLAIMED. IN NO EVENT SHALL THE COPYRIGHT OWNER OR Copyright (c) 2006 by Tavmjong Bah.
- Page 407 English Information for Users on Collection and Disposal of Old Equipment and Used Batteries These symbols on the products, packaging, and/or accompanying documents mean that used electrical and electronic products and batteries should not be mixed with general household waste. For proper treatment, recovery and recycling of old products and used batteries, please take them to applicable collection points, in accordance with your national legislation and the Directives 2002/96/EC and 2006/66/EC.
- Page 408 Deutsch Verbraucherinformation zur Sammlung und Entsorgung alter Elektrogeräte und benutzter Batterien Befinden sich diese Symbole auf den Produkten, der Verpackung und/oder beiliegenden Unterlagen, so sollten benutzte elektrische Geräte und Batterien nicht mit dem normalen Haushaltsabfall entsorgt werden. In Übereinstimmung mit Ihren nationalen Bestimmungen und den Richtlinien 2002/96/EC und 2006/66/EC, bringen Sie alte Geräte und benutzte Batterien bitte zur fachgerechten Entsorgung, Wiederaufbereitung und Wiederverwendung zu den entsprechenden Sammelstellen.
- Page 409 Italiano Informazioni per gli utenti sulla raccolta e lo smaltimento di vecchia attrezzatura e batterie usate Questi simboli sui prodotti, sull’imballaggio, e/o sui documenti che li accompagnano significano che i prodotti e le batterie elettriche e elettroniche non dovrebbero essere mischiati con i rifiuti domestici generici.
- Page 410 Nederlands Informatie voor gebruikers van inzameling en verwijdering van oude apparaten en gebruikte batterijen Deze tekens op de producten, verpakkingen en/of bijgaande documenten betekent dat gebruikte elektrische en elektronische producten en batterijen niet mogen worden gemengd met algemeen huishoudelijk afval. Breng alstublieft voor de juiste behandeling, herwinning en hergebruik van oude producten en gebruikte batterijen deze naar daarvoor bestemde verzamelpunten, in overeenstemming met uw nationale wetgeving en de instructies 2002/96/EC en 2006/66/EC.
- Page 411 xviii...
- Page 412 © 2012 Yamaha Corporation Printed in China BD-S473/G-1...
- Page 413 (NS-B40 + NS-C40 + NS-SW40) SPEAKER PACKAGE PACKAGE ENCEINTES OWNER'S MANUAL MODE D'EMPLOI BEDIENUNGSANLEITUNG BRUKSANVISNING MANUALE DI ISTRUZIONI MANUAL DE INSTRUCCIONES GEBRUIKSAANWIJZING ИНСТРУКЦИЯ ПО ЭКСПЛУАТАЦИИ...
- Page 414 Precautions Please read the following operating precautions before use. Yamaha will not be held responsible for any damage and/or injury caused by not following the cautions below. 1. To assure the finest performance, please read this 1. Do not operate this unit upside down. It may overheat, manual carefully.
- Page 415 Precautions • VOLTAGE SELECTOR Information for Users on Collection and Disposal (For China, Asia and General models) of Old Equipment The voltage selector switch on the rear panel of this This symbol on the products, packaging, unit must be set to your local main voltage BE- and/or accompanying documents means FORE plugging this unit into the AC main supply.
-
Page 416: Package Contents
Contents Package contents..........1 Connecting the speakers ........3 Connection diagram..........3 Installing the speakers........1 Connecting the power cables ......4 Installing the front, center, and surround Using the Subwoofer ......... 4 speakers ............2 Installing the subwoofer........2 Setting the subwoofer volume ......4 Wall-mounting the speakers........2 Troubleshooting .......... -
Page 417: Installing The Speakers
Installing the speakers Installing the front, center, Wall-mounting the speakers and surround speakers You can mount the speakers on the wall as follows. Front speakers: Place the two front speakers on the Install screws into a solid wall or wall support left and right sides of the TV facing directly forward. -
Page 418: Connecting The Speakers
Connecting the speakers Caution: Make sure the power cables for the subwoofer and your other AV components are disconnected from the AC wall outlets before making any connections. Connection diagram Surround speakers Right Left Center speaker SPEAKERS FRONT SURROUND CENTER Amplifier ANTENNA (BD/DVD) -
Page 419: Connecting The Power Cables
(or “S”) for all of the NS-P40 speakers. Release the tab so that it closes securely on the If you’re connecting the subwoofer to a Yamaha DSP bare wire, not the insulation. amplifier or AV receiver, connect to its SUBWOOFER or LOW PASS output. -
Page 420: Troubleshooting
If this product doesn’t work as expected, look for a possible cause below. If the issue you are experiencing is not listed, or you cannot resolve it after reading through these instructions, disconnect the power cable and contact an authorized Yamaha dealer or service center. ■ Front, surround speakers (NS-B40) and center speaker (NS-C40) -
Page 421: Specifications
Yamaha’s discretion, without any charge for parts or labour. Yamaha reserves the right to replace a product with that of a similar kind and/or value and condition, where a model has been discontinued or is considered uneconomic to repair. - Page 422 Précautions Lisez attentivement les précautions d’utilisation suivantes. Yamaha décline toute responsabilité en cas de dommages et/ ou de blessures découlant du non respect de ces consignes. En ce qui concerne le NS-SW40 1. Pour profiter au mieux de votre acquisition, lisez attentivement ce mode d’emploi.
- Page 423 Précautions 11. Si vous notez que cet appareil produit de la distorsion Information concernant la Collecte et le (par exemple, des “bruits secs et répétés”, un Traitement des déchets d’équipements électriques “martèlement”), réduisez le niveau de sortie. Les et électroniques. fréquences très graves que contiennent certaines pistes sonores de film ou certains passages de musique Le symbole sur les produits, l’emballage...
- Page 424 Sommaire Contenu de l’emballage........1 Connexion des enceintes........3 Schéma des connexions........3 Installation des enceintes .........1 Connexion des câbles d’alimentation ....4 Installation des enceintes avant, centrale et Utilisation du subwoofer ........4 surround ............2 Installation du subwoofer ........2 Réglage du volume du subwoofer .......4 Suspension murale des enceintes......2 En cas de problème..........
-
Page 425: Installation Des Enceintes
Installation des enceintes Installation des enceintes avant, Suspension murale des enceintes centrale et surround Vous pouvez suspendre les enceintes au mur de la façon suivante. Enceintes avant: Placez les deux enceintes avant à gauche et à droite du téléviseur, et en les orientant Fixez les vis dans un mur solide ou dans un directement vers l’avant. -
Page 426: Connexion Des Enceintes
Connexion des enceintes Attention: Vérifiez que les câbles d’alimentation du subwoofer et de vos autres éléments AV sont débranchés des prises secteur avant d’ e ffectuer la moindre connexion. Schéma des connexions Enceintes surround Droite Gauche Enceinte centrale SPEAKERS FRONT SURROUND CENTER Amplificateur... -
Page 427: Connexion Des Câbles D'alimentation
Relâchez le levier pour qu’il se referme Si vous raccordez le subwoofer à un amplificateur DSP convenablement en serrant le fil dénudé et ou un ampli-tuner AV Yamaha, utilisez sa sortie non l’isolant. SUBWOOFER ou LOW PASS. Vérifiez que les fils sont bien maintenus en tirant doucement dessus. -
Page 428: En Cas De Problème
Yamaha. ■ Enceintes avant, surround (NS-B40) et enceinte centrale (NS-C40) Problème... -
Page 429: Fiche Technique
Vous pouvez trouver toutes informations complémentaires sur notre site Web (http://europe.yamaha.com/warranty/). Yamaha garantit votre produit contre tout défaut de fabrication, pièces et main d’oeuvre, pour une durée de 2 ans à compter de la première date de vente au détail. Yamaha s’engage, dans les conditions décrites ci-après, à procéder à la réparation du produit défectueux (ou d’un quelconque de ses composants) ou à... - Page 430 Vorsichtsmaßnahmen Bitte lesen Sie sich die folgenden Sicherheitshinweise vor der Inbetriebnahme durch. Yamaha kann für etwaige Schäden und/oder Verletzungen, die durch eine Nichtbeachtung der folgenden Sicherheitshinweise entstehen, nicht haftbar gemacht werden. 1. Um optimales Leistungsvermögen sicherzustellen, 12. Bitte lesen Sie den Abschnitt „Beheben vermeintlicher lesen Sie bitte diese Anleitung aufmerksam durch.
- Page 431 Vorsichtsmaßnahmen und kann zu Feuer, Beschädigung des Gerätes und/oder Verbraucherinformation zur Sammlung und persönlichen Verletzungen führen. Yamaha übernimmt Entsorgung alter Elektrogeräte keine Haftung für Beschädigungen, die auf die Verwendung dieses Gerätes mit einer anderen als der Befindet sich dieses Symbol auf den vorgeschriebenen Netzspannung zurückzuführen sind.
- Page 432 Inhalt Lieferumfang ............1 Anschließen der Boxen ........3 Anschluss-Schema ..........3 Aufstellen der Boxen ..........1 Anschließen der Netzkabel........4 Aufstellen der Front-, Mitten- und Surround- Verwendung des Subwoofers......4 Boxen ...............2 Aufstellen des Subwoofers ........2 Einstellen der Subwoofer-Lautstärke....4 Wandmontage der Boxen ........2 Fehlersuche ............
-
Page 433: Aufstellen Der Boxen
Aufstellen der Boxen Aufstellen der Front-, Mitten- Wandmontage der Boxen und Surround-Boxen Die Boxen kann man mit folgendem Verfahren an der Wand anbringen. Frontboxen: Stellen Sie die beiden Frontboxen links und rechts neben den Fernseher. Sie sollten gerade auf Verankern Sie die Schrauben wie nachstehend die Hörposition gerichtet sein. -
Page 434: Anschließen Der Boxen
Anschließen der Boxen Achtung: Vor dem Anschließen oder Abtrennen der Boxen müssen Sie den Netzanschluss des Subwoofers und der übrigen AV-Geräte lösen. Anschluss-Schema Surround-Boxen Rechts Links Mittenbox SPEAKERS FRONT SURROUND CENTER Verstärker ANTENNA (BD/DVD) DOCK HDMI OUT HDMI 1 HDMI 2 HDMI 3 HDMI 4 GND AM... -
Page 435: Anschließen Der Netzkabel
Geben Sie die Lasche wieder frei, um die Ader Wenn Sie den Subwoofer an einen DSP-Verstärker (nicht aber den Mantel) festzuklemmen. oder AV-Receiver von Yamaha anschließen möchten, Ziehen Sie vorsichtig am Kabel, um zu müssen Sie seine SUBWOOFER- oder LOW PASS- überprüfen, ob es fest sitzt. -
Page 436: Fehlersuche
Wenn sich das Produkt nicht erwartungsgemäß verhält, finden Sie hier eventuell einschlägige Lösungsansätze. Wenn die bei Ihnen auftretende Störung nicht erwähnt wird bzw. wenn Sie sie anhand der erwähnten Hinweise nicht lösen können, müssen Sie sofort den Netzanschluss lösen und sich an Ihren Yamaha-Händler oder eine anerkannte Kundendienststelle wenden. -
Page 437: Technische Daten
Begrenzte Garantie für den Europäischen Wirtschaftsraum (EWR) und die Schweiz Herzlichen Dank, dass Sie sich für ein Yamaha Produkt entschieden haben. In dem unwahrscheinlichen Fall, dass die Garantie für das Yamaha-Produkt in Anspruch genommen werden muss, wenden Sie sich bitte an den Händler, bei dem es gekauft wurde. Sollten Sie auf Schwierigkeiten stoßen, wenden Sie sich bitte and die Yamaha Repräsentanz in Ihrem Land. - Page 438 Säkerhetsföreskrifter Läs igenom följande försiktighetsåtgärder innan användningen. Yamaha kan inte hållas ansvarig för eventuella materiella skador och/eller personskador som uppstår till följd av underlåtenhet att läsa följande försiktighetsåtgärder. 1. Läs noga denna bruksanvisning för att kunna ha största 2. Hantera inte tangenter, reglage eller anslutningskablar möjliga nöje av enheten.
- Page 439 Säkerhetsföreskrifter • Spänningsväljare (VOLTAGE SELECTOR) Användarinformation, beträffande insamling och (Gäller modeller till kina, övriga Asien och allmän dumpning av gammal utrustning exportmodell) Denna symbol, som finns på produkterna, Spänningsväljaren på enhetens bakpanel måste emballaget och/eller bifogade dokument ställas in på den spänning som används i området talar om att de använda elektriska och INNAN enheten ansluts till elnätet.
- Page 440 Innehåll Förpackningens innehåll........1 Anslutning av högtalarna ......... 3 Anslutningsdiagram ..........3 Installation av högtalarna .........1 Anslutning av nätkablarna........4 Installation av front-, center-, och Använda subwoofern ........4 surroundhögtalare..........2 Installera subwoofern ...........2 Ställa in subwoofervolymen.........4 Väggmontering av högtalarna ......2 Felsökning ............5 Tekniska data ............
-
Page 441: Installation Av Högtalarna
Installation av högtalarna Installation av front-, center-, Väggmontering av högtalarna och surroundhögtalare Du kan montera högtalarna på väggen enligt följande. Fronthögtalare: Placera de två fronthögtalarna på Dra i skruvar i en solid vägg eller ett väggstöd vänster och höger sida av TV-apparaten, riktade rakt såsom visas nedan. -
Page 442: Anslutning Av Högtalarna
Anslutning av högtalarna Försiktighet: Kontrollera att nätkablarna till subwoofern och andra AV-komponenter har dragits ut ur vägguttagen innan några anslutningar görs. Anslutningsdiagram Surroundhögtalare Höger Vänster Centerhögtalare SPEAKERS FRONT SURROUND CENTER Förstärkare ANTENNA HDMI OUT (BD/DVD) DOCK HDMI 1 HDMI 2 HDMI 3 HDMI 4 GND AM... -
Page 443: Anslutning Av Nätkablarna
Tryck in och håll kontakttabben intryckt. högtalare anges som små (eller “S”). För in den blottlagda ledningen. Om du ansluter subwoofern till en Yamaha DSP- förstärkare eller AV-receiver, anslut till SUBWOOFER Släpp upp tabben så att den sluter till om den eller LOW PASS-utgången. -
Page 444: Felsökning
Om denna produkt inte fungerar såsom det är tänkt, sök efter möjlig orsak nedan. Om problemet som uppstått inte är medtaget, eller om du inte kan lösa det efter att ha läst igenom anvisningarna, koppla ur nätkabeln och rådfråga en auktoriserad Yamaha-handlare eller servicecenter. ■ Front-, surroundhögtalare (NS-B40) och centerhögtalare (NS-C40) Problem Möjlig orsak... -
Page 445: Tekniska Data
Yamaha förbehåller sig rätten att byta ut en produkt mot en av liknande typ och/eller värde och skick, då en viss modell har upphört eller anses oekonomisk att reparera. - Page 446 Precauzioni Leggere le seguenti precauzioni operative prima dell’uso. Yamaha non sarà ritenuta responsabile per alcun danno e/o lesione causati dal mancato rispetto delle precauzioni riportate di seguito. 1. Per assicurarvi le migliori prestazioni di quest’unità, 1. Non usare quest’unità ribaltata. Essa si può altrimenti leggere con attenzione l’intero manuale.
- Page 447 Precauzioni 14. Se si pensa di non dover usare quest’unità per qualche Informazioni per gli utenti sulla raccolta e lo tempo (ad esempio per andare in vacanza), scollegare il smaltimento di vecchia attrezzatura cavo di alimentazione dalla presa di corrente. 15.
- Page 448 Sommario Contenuto dell’imballo ........1 Collegare gli altoparlanti ........3 Diagramma dei collegamenti ......3 Installare gli altoparlanti ........1 Collegare i cavi dell’alimentazione......4 Installazione degli altoparlanti anteriori, Usare il subwoofer..........4 centro, e surround ..........2 Installare il subwoofer ..........2 Impostare il volume del subwoofer.....4 Montaggio degli altoparlanti a muro....2 Risoluzione dei problemi........
-
Page 449: Installare Gli Altoparlanti
Installare gli altoparlanti Installazione degli altoparlanti Montaggio degli altoparlanti a muro anteriori, centro, e surround Potete montare gli altoparlanti a muro come segue. Altoparlanti anteriori: Posizionate i due altoparlanti Inserite le viti in una parete o su un supporto anteriori a sinistra e a destra del televisore, in modo da parete come mostrato di seguito. -
Page 450: Collegare Gli Altoparlanti
Collegare gli altoparlanti Attenzione: Accertatevi che i cavi dell’alimentazione del subwoofer e degli altri dispositivi AV siano scollegati dalle prese a muro CA prima di eseguire qualsiasi collegamento. Diagramma dei collegamenti Altoparlanti surround Destro Sinistro Altoparlante centro SPEAKERS FRONT SURROUND CENTER Amplificatore ANTENNA... -
Page 451: Collegare I Cavi Dell'alimentazione
“S”) per tutti gli altoparlanti NS-P40. fili, non sull’isolante. Se collegate il subwoofer a un amplificatore DSP o a un Per controllare che il collegamento sia stato ricevitore AV di Yamaha, collegatelo alla sua uscita effettuato correttamente, tirate leggermente il SUBWOOFER o LOW PASS. cavo. -
Page 452: Risoluzione Dei Problemi
Se il prodotto non funziona come dovrebbe, cercate una possibile causa nella seguente sezione. Se il problema non è elencato o, nonostante le istruzioni, non riuscite a risolverlo, staccate il cavo dell’alimentazione e contattate un rivenditore autorizzato Yamaha o il centro di assistenza. ■ Altoparlanti anteriori, surround (NS-B40) e altoparlante centro (NS-C40) -
Page 453: Specifiche Tecniche
(o sostituire, a discrezione esclusiva di Yamaha) il prodotto difettoso o qualsiasi sua parte senza alcun addebito per le parti o per il lavoro. Yamaha si riserva il diritto di sostituire un prodotto con uno di tipo, valore e/o condizione simile nel caso un modello particolare non sia più... - Page 454 Precauciones Lea las siguientes precauciones de funcionamiento antes de iniciar el uso del aparato. Yamaha no se responsabilizará de cualquier daño o lesión causada por no seguir las precauciones que aparecen a continuación. Para el NS-SW40 1. Para asegurar el mejor rendimiento posible, lea con atención este manual.
- Page 455 Precauciones 12. La vibración generada por el sonido superbajo puede Información para Usuarios sobre Recolección y distorsionar la imagen de un televisor. En este caso, Disposición de Equipamiento Viejo separe la unidad del televisor. 13. Cuando desconecte el cable de alimentación de la toma Este símbolo en los productos, embalaje, de corriente, sujete la clavija;...
-
Page 456: Contenido Del Paquete
Contenido Contenido del paquete........1 Conectar los altavoces........3 Diagrama de conexión .........3 Instalar los altavoces ..........1 Conectar los cables de alimentación ....4 Instalar los altavoces frontales, central, y Utilizar el subwoofer.......... 4 surround ............2 Instalar el subwoofer..........2 Ajustar el volumen del subwoofer.......4 Instalar los altavoces en la pared......2 Solucionar problemas ........ -
Page 457: Instalar Los Altavoces
Instalar los altavoces Instalar los altavoces frontales, Instalar los altavoces en la pared central, y surround Puede instalar los altavoces en una pared de la manera siguiente. Altavoces frontales: Sitúe los dos altavoces frontales en los lados derecho e izquierdo del televisor Fije los tornillos a una pared firme o en un totalmente hacia delante. -
Page 458: Conectar Los Altavoces
Conectar los altavoces Precaución: Antes de realizar las conexiones, compruebe que los cables de alimentación para el subwoofer y los otros componentes AV no estén conectados a las tomas de CA. Diagrama de conexión Altavoces Surround Derecho Izquierdo Altavoz central SPEAKERS FRONT SURROUND... -
Page 459: Conectar Los Cables De Alimentación
Si conecta el subwoofer a un amplificador DSP de no la parte del aislamiento. Yamaha o a un receptor AV, conéctelo a su Compruebe que la conexión sea segura SUBWOOFER o a la salida LOW PASS. -
Page 460: Solucionar Problemas
Yamaha autorizado. ■ Altavoces frontales, surround (NS-B40), y central (NS-C40) -
Page 461: Especificaciones
Yamaha se compromete, sujeto a las condiciones listadas más abajo, a reparar el producto o cualquier pieza (o piezas) que tenga defectos, o a sustituirlo, a discreción de Yamaha, sin cobrar ningún honorario por las piezas o la mano de obra. - Page 462 Voorzorgsmaatregelen Gelieve de volgende voorzorgsmaatregelen te lezen alvorens het toestel te gebruiken. Yamaha is niet aansprakelijk voor schade en/of letsels die zijn veroorzaakt doordat onderstaande voorzorgsmaatregelen niet in acht zijn genomen. 1. Om verzekerd te kunnen zijn van optimale prestaties, 13.
- Page 463 Voorzorgsmaatregelen 9. De zeer lage tonen die door dit toestel geproduceerd Informatie voor gebruikers van inzameling en worden kunnen leiden tot ‘rondzingen’ bij gebruik van verwijdering van oude apparaten. een draaitafel. Zet dit toestel in voorkomende gevallen verder weg van de draaitafel. Dit teken op de producten, verpakkingen 10.
- Page 464 Inhoud Geleverde onderdelen ........1 Aansluiten van de speakers......3 Aansluitschema .............3 Opstellen van de speakers ........1 Aansluiten van de netsnoeren ......4 Plaatsing van de front-, midden- en Gebruik van de subwoofer ....... 4 surroundspeakers ...........2 Installeren van de subwoofer.......2 Instellen van het subwoofervolume....4 Wandmontage van de speakers ......2 Verhelpen van problemen........
- Page 465 Opstellen van de speakers Plaatsing van de front-, midden- Wandmontage van de speakers en surroundspeakers U kunt de speakers als volgt aan de wand monteren. Frontspeakers: Zet de twee frontspeakers links en Draai de schroeven zoals hierna getoond in een rechts van de TV.
- Page 466 Aansluiten van de speakers Voorzichtig: Vóór het aansluiten of afkoppelen van de speakers moet u de aansluiting van de subwoofers en de overige AV-apparaten op het lichtnet verbreken. Aansluitschema Surroundspeakers Rechts Links Middenspeaker SPEAKERS FRONT SURROUND CENTER Versterker ANTENNA HDMI OUT (BD/DVD) DOCK HDMI 1...
- Page 467 (maar niet de kabelmantel) worden Als u de subwoofer op een DSP-versterker of AV- vastgeklemd. receiver van Yamaha wilt aansluiten, moet u de SUBWOOFER- of LOW PASS-uitgang gebruiken. Test de stevigheid van de verbinding door voorzichtig aan de kabel te trekken.
- Page 468 Wanneer dit product niet naar behoren lijkt te werken, vindt u hier eventueel de oplossing. Als u niets vindt over de bij u optredende storing of als u het probleem niet kunt verhelpen, moet u meteen de aansluiting op het lichtnet verbreken en contact opnemen met uw Yamaha-dealer of een erkende herstellingsdienst. ■ Front-, surroundspeakers (NS-B40) en middenspeaker (NS-C40)
- Page 469 (5) Gebreken aan het systeem waarin het product wordt ingebouwd en/of onverenigbaarheid met derde producten. (6) Gebruik van een product dat in de Europese Economische Ruimte en/of Zwitserland werd ingevoerd, maar niet door Yamaha, en dat niet voldoet aan de technische of veiligheidsnormen van het land van gebruik en/of de standaardspecificaties van producten die door Yamaha in de Europese Economische Ruimte en/of Zwitserland worden verkocht.
- Page 470 Меры предосторожности Прочитайте описание следующих мер предосторожности перед использованием аппарата. Yamaha не несет ответственность за любые повреждения и (или) травмы, вызванные несоблюдением приведенных ниже мер предосторожности. 1. Для обеспечения наилучшего результата, 12. Перед тем как прийти к заключению о поломке...
- Page 471 указанное, опасно и может стать причиной и в сопроводительных документах пожара, поломки аппарата и (или) привести к указывают на то, что подержанные травме. Компания Yamaha не несет электрические и электронные ответственности за поломку или ущерб, вызванные использованием аппарата при приборы не должны...
- Page 472 Содержание Содержимое упаковки ........1 Подключение колонок........3 Схема подключения ...........3 Установка колонок ...........1 Подключение силовых кабелей.......4 Установка центральной, фронтальных Использование сабвуфера ......4 колонок и колонок окружающего звучания ............2 Установка уровня громкости сабвуфера..4 Установка сабвуфера .........2 Поиск и устранение неисправностей ..5 Колонки...
-
Page 473: Установка Колонок
Установка колонок Установка центральной, Колонки для настенного монтажа фронтальных колонок и Вы можете выполнить монтаж колонок на стене, колонок окружающего звучания как показано ниже. Установите винты в твердую стену или Фронтальные колонки: Разместите две опору стены, как показано на рисунке ниже. фронтальные... -
Page 474: Подключение Колонок
Подключение колонок Предупреждение: Перед выполнением каких-либо подключений убедитесь в том, что силовые кабели сабвуфера и прочих аудиовидеокомпонентов отсоединены от розеток переменного тока. Схема подключения Колонки окружающего звучания Правая Левая Центральная колонка SPEAKERS FRONT SURROUND CENTER Усилитель ANTENNA (BD/DVD) HDMI OUT DOCK HDMI 1 HDMI 2... -
Page 475: Подключение Силовых Кабелей
Отпустите защелку таким образом, чтобы акустических систем NS-P40. она надежно прижала оголенную часть При подсоединении сабвуфера к DSP-усилителю провода, а не изоляцию. Yamaha или AV-ресиверу, подключите его к Проверьте надежность подключения, выходу SUBWOOFER или LOW PASS. слегка потянув кабели. Подключение силовых кабелей... -
Page 476: Поиск И Устранение Неисправностей
возможных причин. Если в списке нет проблемы, с которой Вы столкнулись, или же Вы не можете ее решить даже после прочтения данных указаний, отсоедините силовой кабель и обратитесь к ближайшему авторизированному дилеру Yamaha или в сервисный центр. ■ Фронтальные колонки, колонки окружающего звучания (NS-B40) и... -
Page 477: Технические Характеристики
Технические характеристики ■ Фронтальные колонки, колонки ■ Сабвуфер (NS-SW40) окружающего звучания (NS-B40) и Тип ....Advanced Yamaha Active Servo Technology II центральная колонка (NS-C40) Головка..16-см конический низкочастотный динамик с магнитным экранированием Тип Выходная мощность усилителя........50 Вт NS-B40 ..Широкополосная фазоинверторная система... - Page 478 Технические характеристики Printed in Indonesia WY61990 © 2011 Yamaha Corporation...