Panasonic DMR-ES20DEB Operating Instructions Manual
Panasonic dvd recorder operating instructions
Hide thumbs
Also See for DMR-ES20DEB:
- Quick start manual (7 pages) ,
- Operating instructions manual (56 pages)
Table of Contents
Advertisement
Operating Instructions
DVD Recorder
Model No. DMR-ES20DEB
Panasonic
DVD RECORDER DMR-ES20D
This DVD Recorder is for viewing and recording free to view channels only, not pay TV or encrypted channels.
Sales and Support Information
Direct Sales at Panasonic UK
Order accessory and consumable items for your product with ease and confidence by phoning
our Customer Care Centre
Monday - Thursday 9:00am - 5:30pm, Friday 9:30am - 5:30pm (Excluding public holidays).
Or go online through our Internet Accessory ordering application at www.panasonic.co.uk
Most major credit and debit cards accepted.
All enquiries, transactions and distribution facilities are provided directly by Panasonic UK Ltd.
It couldn´t be simpler!
Also available through our internet is direct shopping for a wide range of finished products,
take a browse on our website for further details.
Customer Care Centre
For customers within the UK: 08705 357357
Visit our website for product information: www.panasonic.co.uk
E-mail: customer.care@panasonic.co.uk
Before connecting, operating or adjusting this product, please read the instructions completely.
Please keep this manual for future reference.
DVD RECORDING
DVD-RAM / DVD-R / DVD-RW / +R
OPEN/CLOSE
REC
/x1.3
Advertisement
Table of Contents

Related Manuals for Panasonic DMR-ES20DEB


Summary of Contents for Panasonic DMR-ES20DEB
-
Page 1: Operating Instructions
Model No. DMR-ES20DEB Panasonic DVD RECORDER DMR-ES20D This DVD Recorder is for viewing and recording free to view channels only, not pay TV or encrypted channels. Sales and Support Information Direct Sales at Panasonic UK Order accessory and consumable items for your product with ease and confidence by phoning our Customer Care Centre Monday - Thursday 9:00am - 5:30pm, Friday 9:30am - 5:30pm (Excluding public holidays). -
Page 2: Table Of Contents
Table of Contents Important Safety Warnings / Caution Before You Start Included Accessories Product Introduction Remote control Front Panel Rear Panel Display 21-pin Scart Socket Connecting with a 21-pin Scart cable Setup with Q Link Setup without Q Link Connecting with Audio/Video cable Connecting with S Video cable Connecting to Satellite Receiver Connecting with RF cable (Aerial cable) -
Page 3: Important Safety Warnings / Caution
Safety Precautions Inside of product Important Safety Warnings The moulded three pin mains plug is supplied for your safety and convenience and must NOT be cut off. A 5 amp fuse is fitted in the mains plug. If the fuse has to be replaced, it must be of the same rating and approved by ASTA or BSI to BS1362. -
Page 4: Before You Start
Dear customer Thank you for your trust and your decision to purchase this top-quality device. Panasonic is one of the leading manufacturers of entertainment electronics devices. We are sure that you will be completely satisfied with this device. With the new Quick Start feature, the unit is ready for use within approx. 1 second. -
Page 5: Product Introduction
They must not be thrown into the household refuse. Product Introduction This unit is a DVD recorder with an integrated DVB tuner. This means that you can receive and record both analogue and terrestrial digital channels without having to connect an additional DVB receiving unit (set-top box). -
Page 6: Remote Control
EXT LINK TIMER TIME SLIP STATUS STTL PROG CHECK Panasonic DVD/TV EUR7729KK0 Turn the television set on and off. Select the AV input on the television set. CH: Select the channel on the television set. VOLUME VOLUME: Volume control of the television set. - Page 7 Press AV. Each press of the button switches between TV reception and AV input. If you use another Panasonic device at the same location, change the mode of the remote control so that you can operate the units independently of each other.
-
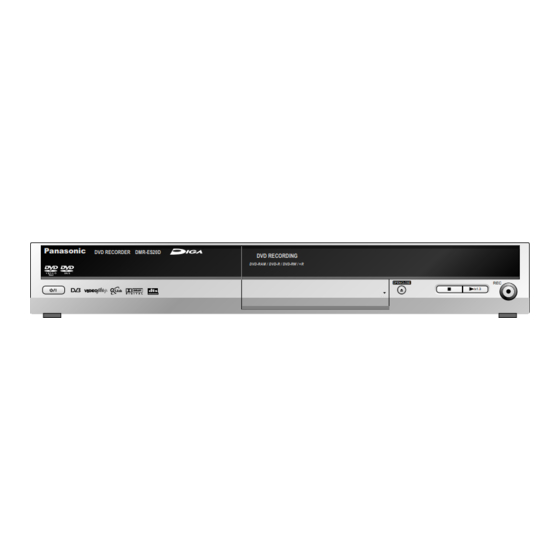
Page 8: Front Panel
Front Panel Disc Tray DVD RECORDER DMR-ES20D Panasonic Rear Panel RF OUT RF IN DVD RECORDING DVD-RAM / DVD-R / DVD-RW / +R S VIDEO IN VIDEO IN L/MONO - AUDIO IN - R Standby/on switch Press to switch the unit from on to standby mode or vice versa. In standby mode, the unit is still consuming a small amount of power. -
Page 9: Display
Display 21-pin Scart Socket 21-pin Scart Socket 11 13 15 17 19 10 12 14 16 18 20 PLAY Information on the display TIMER-controlled recording. Blinking: There are less than 10 minutes until the start of a programmed TIMER recording. The device is not set to TIMER standby mode. External-Link display On: A TIMER-controlled recording is being performed by an external device. -
Page 10: Connecting With A 21-Pin Scart Cable
If your television doesn't support Q Link follow the steps for Auto-Setup without Q Link on page 11 If your television supports Q Link or RGB, connect it to the DVD Recorder with a fully wired 21-pin Scart cable. SETUP - Connection - [AV1 Output] Note For all connections additional cables and equipment shown are not supplied. -
Page 11: Setup With Q Link
(Registered trademark of Panasonic) Note that you must first perform a station search if you use the TV for the first time. If you have a Panasonic television, [Download from TV] will be displayed automatically at the beginning of the station transfer. -
Page 12: Connecting With Audio/Video Cable
Connect the RF OUT (Aerial output) of the DVD Recorder to the Aerial input of the television set. Connect the AV4 OUT (AUDIO L/R, VIDEO) of the DVD Recorder to the input of the television set. Connect the DVD Recorder and the television set to the AC mains socket. -
Page 13: Connecting To A Satellite Receiver
Connect aerial to the RF IN (Aerial input) of the DVD Recorder. Connect the parabolic antenna to the Aerial in connector of the satellite receiver. Connect the DVD Recorder´s RF OUT (Aerial output) to the TV set’s Aerial in connector. -
Page 14: Connecting With Rf Cable (Aerial Cable)
With the Standby/on switch turn on the DVD Recorder. Automatic tuning for all available TV stations begins. Approximate duration is 5 minutes. - While Auto-Setup is running the first digit of the DVD Recorder display will flash. After a while it will stop flashing and the RF output channel number will be displayed. -
Page 15: Removing Interference / Changing Rf Output Channel
If using a Scart cable please see the note below. Press ENTER to finish this setting. Set the RF output channel of the DVD Recorder to [- -] (RF OFF) if the DVD Recorder is connected to the TV via the 21-pin Scart cable. -
Page 16: Component Video Out
COMPONENT VIDEO OUT COMPONENT VIDEO OUT socket These sockets can be used for interlace or progressive output and deliver a clearer picture than the S VIDEO OUT socket. Connections via these sockets output colour difference signals (P /P ) and brightness signal (Y) separately. The properties of the COMPONENT VIDEO input socket are dependent on the television set or screen. -
Page 17: External Devices
External devices This device can playback stereo sound in Dolby Digital (2 channels). Connect an amplifier with built-in Dolby Digital decoder in order to be able to enjoy Surround Sound. Connect this unit to a device with a DTS decoder in order to be able to play DVDs with this symbol. -
Page 18: Tv Guide
TV Guide Tue 12/05/05 10:45 ENTER TV Guide: Landscape Wed13/05/05 19:45 Category Prog.Type Wed 13th All Services All Types 19:00~20:00 Emmerdale Time: 19:30 20:00 20:30 21:00 21:30 BBC 1 East... D.I.Y. SOS Red Cap BBC 2 Holiday Programme Holi... Hot Wars ITV 1 The Bill Emm... - Page 19 If you disconnect the unit from AC mains or switch to standby in Quick Start [Off] mode, the programme information data is cleared and need to be reloaded after Power ON. This DVD Recorder is for viewing and recording free to view channels only, not pay TV or encrypted channels.
-
Page 20: Handling Discs
DVD lens cleaner Compatible models Only for Panasonic`s DVD recorders. Do NOT use this cleaner with any other Panasonic DVD products or with the DVD products of any other companies since doing so may damage the products. - Page 21 12cm / 8cm Unfinalised CPRM compatible discs with "one time only recorded" -RW VR playback only recording. Recorded on another DVD Recorder. 12cm / 8cm Recorded on another DVD Recorder. DVD-V playback only The disc must be finalised eventually.
-
Page 22: Playback
Playback Switch the unit on. PLAY/x1.3 Playback Press OPEN/CLOSE to open the disc tray. Place the disc in the disc tray. Press PLAY . The disc tray is closed and playback begins. The reading of the disc may take some time! RAM -R -RW V +R -RW VR... -
Page 23: Selecting Programmes/Titles For Playback
Playback DIRECT NAVIGATOR TITLE VIEW DVD RAM BBC1 12/ 9 THU Page 02/02 Previous Next ENTER SUB MENU Select Previous Next RETURN DVD-RAM PLAY x1.3 Output takes place in PCM with a digital connection. Quick View is cancelled if SKIP programme begins that was not recorded with Dolby Digital. -
Page 24: Splitting A Recording Into Chapters
Playback CREATE CHAPTER Splitting a recording into chapters Press CREATE CHAPTER during playback. During playback press SKIP or SKIP MANUAL SKIP MANUAL SKIP Press MANUAL SKIP during playback. The playback jumps ahead approximately 30 seconds. TIME SLIP RAM -R TIME SLIP -RW V +R Press TIME SLIP. -
Page 25: Mp3 Playback
MP3 playback MENU Group 1 : Set Me Free Track Tree Total 1 01- Father TOTAL 1/ 12 01- Have your Way 01- Holy Spirit 01- Latter Rain 01- Love Of Heaven 01- Niemals Prev. 01- Only Truth Next 01- The Song Of The Lord SELECT 01- Never 01- We Seek His Face... -
Page 26: Jpeg Playback
JPEG playback FUNCTIONS JPEG - MP3 Disc CD(MP3/JPEG) JPEG Playback mode Playback MENU Recording TV Guide TIMER RECORDING MENU VIDEO Plus+ Select file type. To Others JPEG ENTER RETURN ENTER RETURN 13:30:49 21/ 6 Date 16/11/2004 1 / 22 CD (JPEG) JPEG Menu PICTURE (JPEG) VIEW CD(JPEG) -
Page 27: Recording
Recording DIRECT NAVIGATOR TITLE VIEW DVD-RAM BBC1 23/9 THU BBC1 23/9 THU ITV 1/10 FRI ITV 1/10 FRI Previous Page 01/01 Next Current recording RAM -R -RW V +R You can record up to 99 titles on one disc (+R: 49 titles). If you use an unformatted DVD-RAM, you must format it before the first recording. -
Page 28: Recording Modes And Approximate Recording Times In Hours
The station must be transmitting PDC and the exact time must be set for PDC to work. The DVD Recorder detects whether a station is transmitting PDC only during the tuning process. If PDC is introduced or discontinued by a station you will need to re-tune the DVD Recorder before it becomes aware of this. -
Page 29: Manual Programming
TIMER-controlled recordings TIMER Remain 1:58 SP RECORDING 12:09:37 18/11 THU Disc STTL Nr Name Datum No. Name Date Start Stop Stop Mode Mode Start space 01 BBC1 18/11 THU 0:00 0:30 02 ITV 18/11 THU 10:00 11:30 New Timer Programme Press ENTER to store new programme. -
Page 30: Timer Recording In The Tv Guide
No digital EPG data exists for analogue stations. A TIMER programming needs to be made manually. This DVD Recorder is for viewing and recording free to view channels only, not pay TV or encrypted channels. in the TV Guide list. -
Page 31: Programming Recordings With Video Plus
For your DVD Recorder to recognise the VIDEO Plus+ Codes for each satellite station, you must teach your DVD Recorder which channel or AV input to record from for the first time. Otherwise when setting a VIDEO Plus+ recording, the [- -] symbol will appear in the channel position indicating that the DVD Recorder does not know which channel position to set. -
Page 32: Timer Recordings Via External Devices
TIMER-controlled recordings SETUP AV2 Settings AV2 Input Video Ext Link Ext Link 1 Tuning Disc Picture Sound Ext Link Display Ext Link 1 Ext Link 2 Connection Ext Link 2 Others SELECT ENTER RETURN Ext Link 1: For digital receivers that send a special recording control signal, e.g. -
Page 33: Functions Selection Menu
FUNCTIONS Selection Menu FUNCTIONS DVD-RAM Disc Protection Off Playback DIRECT NAVIGATOR Recording TV Guide TIMER RECORDING VIDEO Plus+ To Others ENTER RETURN FUNCTIONS Disc Protections Off DVD-RAM PLAYLISTS DIRECT NAVIGATOR FLEXIBLE REC SETUP TV Guide DISC MANAGEMENT TIMER RECORDING VIDEO Plus + To Others Return ENTER... -
Page 34: Functions Selection Menu
FUNCTIONS Selection Menu TIMER Remain 1:58 SP RECORDING 12:09:37 18/11 THU STTL Disc Nr Name Datum Stop No. Name Date Start Start Stop Mode Mode space 01 BBC1 19/11 THU 8:00 8:30 02 ITV 19/11 THU 8:20 9:00 03 CH4 20/11 THU 10:30 11:30... -
Page 35: Direct Navigator
FUNCTIONS Selection Menu DIRECT NAVIGATOR TITLE VIEW DVD RAM BBC1 12/ 9 THU Previous Page 02/02 Next ENTER SUB MENU Previous Next Select RETURN DIRECT NAVIGATOR TITLE VIEW DVD-RAM BBC1 12/ 9 THU Erase Previous Properties Nächste Edit Chapter View Erase TERRALUNA Remaining Time... - Page 36 FUNCTIONS Selection Menu Erase Properties Edit Enter Name Chapter View Set up Protection Cancel Protection Partial Erase Change Thumbnail Divide Title Set up Protection Set up title protection. SELECT ENTER RETURN DIRECT NAVIGATOR Partial Erase PLAY Start 01 TERRALUNA Next Exit 0:00.35 Start...
-
Page 37: Chapter View
FUNCTIONS Selection Menu RETURN DIRECT NAVIGATOR TITLE VIEW DVD-RAM BBC1 23/9 THU ITV 1/10 FRI BBC1 12/9 THU ASTRAL AUTOMOBIL TERRALUNA Erase Properties Previous Next Edit Chapter View DIRECT NAVIGATOR CHAPTER VIEW DVD-RAM 03 ITV 1/ 10 FRI Erase Chapter Create Chapter Previous Next... -
Page 38: Playlists
FUNCTIONS Selection Menu To Others PLAYLISTS Create DVD-RAM 03 ITV 1/10 FRI CARS Source Title Page 01/01 Source Chapter Page 001/001 Chapters in PLAYLIST Page 001/001 Create Chapter PLAYLISTS Create DVD-RAM 03 ITV 1/10 FRI CARS Source Title Page 01/01 Source Chapter Page 001/001 Chapters in PLAYLIST... - Page 39 FUNCTIONS Selection Menu To Others Erase Properties Edit Create Copy Chapter View Enter Name Change Thumbnail Copy Copy PLAYLIST Copy Cancel SELECT ENTER RETURN PLAYLISTS Change Thumbnail DVD-RAM Change Exit 0:00.02 Change Start play and select the image 0:00.02 of a thumbnail. PLAYLISTS Edit Playlists Press FUNCTIONS.
-
Page 40: Edit Chapter
FUNCTIONS Selection Menu To Others PLAYLISTS PLAYLIST VIEW DVD-RAM 23/ 9 THU 0:30 1/10 FRI 0:10 1/10 FRI 0:20 Erase Properties Edit Chapter View PLAYLISTS CHAPTER VIEW DVD-RAM 03 ITV 1/10 FRI 0:00 Add Chapter Move Chapter Create Chapter Previous Next Seite 01/01 Combine Chapters... -
Page 41: Setup
FUNCTIONS Selection Menu To Others SETUP Press FUNCTIONS in stop mode. to selec t [To Others] and confirm with ENTER. to select SETUP and confirm with ENTER. to select the desired sub menu and use to select the desired setting and confirm with ENTER. to select the desired option and confirm with ENTER. - Page 42 FUNCTIONS Selection Menu To Others SETUP Edit Profiles Auto-Setup Restart Digital Tuning Add New DVB Service Disc Edit Profiles Signal Quality Picture All Services PROFILE 1 Analogue Sound 1 BBC ONE 1 BBC ONE Manual 2 BBC TWO 2 BBC TWO Display 7 BBC CHOICE Download from TV...
- Page 43 FUNCTIONS Selection Menu To Others Auto-Setup Restart Warning--all stored tuning data will be lost ! Do you want to proceed ? SELECT ENTER RETURN Add New DVB Service 2 New Services added. ENTER RETURN Signal Quality 1 BBC ONE DVB CH30 CH + RETURN CH –...
-
Page 44: Disc
FUNCTIONS Selection Menu To Others Manual Tuning Name Name BBC1 BBC2 * * * * Manual SELECT Tuning Name BBC1 Name Channel ENTER RETURN NICAM Delete Title Page CHANGE ENTER RETURN RETURN : leave ENTER : store Download from TV Warning--all currently stored stations will be replaced by new ones !! -
Page 45: Picture
Digital Audio Output Select the appropriate setting if an external unit is connected to the DIGITAL AUDIO OUT of the DVD Recorder. PCM Down Conversion Select the audio output mode at a scanning frequency of 96 kHz or 88.2 kHz. -
Page 46: Display
FUNCTIONS Selection Menu To Others SETUP DVB Preferred Subtitles English On-Screen Messages Automatic Grey Background Tuning FL Display Bright Disc New Service Message Automatic Picture Sound Display Connection SELECT Others RETURN New Service A new DVB service has been found. Add to the list of "All Services"? SETUP TV Aspect... -
Page 47: Others
Clock setting The clock will normally be set correctly during Auto-Setup however, in some circumstances the DVD Recorder cannot set the clock automatically. In this case follow the operation steps below to manually set the clock. to switch automatic mode to [Off] and confirm with ENTER. -
Page 48: Others
FUNCTIONS Selection Menu To Others SETUP System Update EPG Download in Standby Software Update in Standby Tuning Software Update Search Now Disc Picture DVB Version: 0.31 Sound Display SELECT Connection ENTER Others RETURN System Update A new software version has been found. Update your software? SETUP Others... -
Page 49: Disc Magement
FUNCTIONS Selection Menu To Others DISC MANAGEMENT Remain 0:59(XP) Title No. 1 DVD-RAM Used 0:01 Disc Name Disc Protection Erase all titles Format Disc SELECT ENTER RETURN Disc Protection Disc Formatierung Set up Disc Protection ? Erase all titles Disc Formatierung All titles and PLAYLISTS will be erased. -
Page 50: Auto-Play Select, Finalize
FUNCTIONS Selection Menu To Others DISC MANAGEMENT Title No. 1 Remain 0:59(XP) DVD-R Used 0:01 Disc Name Auto-Play Select Top Menu Finalize Auto-Play Select SELECT ENTER RETURN Top Menu Title 1 Finalize Finalizing is necessary for compatible playback. It will take approximately 15 minutes. Finalize the disc ? Finalize Finalize will make this disc playback only. - Page 51 DISPLAY menus DISPLAY menus contain information on the disc or the unit. With DVD-Video you can use the repeat function, change subtitles and perspectives, with DVD playback, you can change the picture and sound setting. Depending on the status of the unit (playback, stop), there are some entries that cannot be selected or changed. Subtitles, soundtrack and recording angle can only be selected if they were recorded on the disc.
-
Page 52: Status Displays
STATUS displays (Banner) DVB only 1 BBC ONE WALES Bad Signal 10:46 PROFILE 1 Coronation Street Change Category 20:00 ~ 20:55 Encrypted Multi-Audio 1 Name Programme position and name of the current station. Signal Condition [No signal; bad Signal; No Service] Shows the signal quality of the current station. -
Page 53: Informations
The status information changes depending on the function, e.g. PLAY, REC or REC PLAY. This DVD Recorder is a precision unit. Handle it carefully and do not expose it to vibrations during recording. Otherwise there may be breaks or noises in the recordings. -
Page 54: Before Requesting Service
Before requesting service FUNCTION No function possible. The unit is switched on but cannot be used. The error code «H », «U or «F » appears: The unit automatically switches to standby mode. PICTURE No picture. Television reception worsens when the unit is connected. - Page 55 Before requesting service PLAYBACK Playback does not start. Black screen is played. DVD-Video will not play. No reaction when the button is pressed. A title or chapter is not played back after being selected. Alternative soundtracks and subtitles cannot be selected. The soundtrack/subtitle language does not match the language selected in the SETUP menu.
-
Page 56: Index
Specifications Recording System DVD Video Recording format (DVD-RAM), DVD-Video format (DVD-R), DVD-Video format (DVD-RW) Recordable discs DVD-RAM : Ver. 2.0 Ver. 2.1/3×–SPEED DVD-RAM Revision 1.0 Ver. 2.2/5×–SPEED DVD-RAM Revision 2.0 DVD-R : for General Ver. 2.0 for General Ver. 2.0/4×–SPEED DVD-R Revision 1.0 for General Ver.