Table of Contents
Advertisement
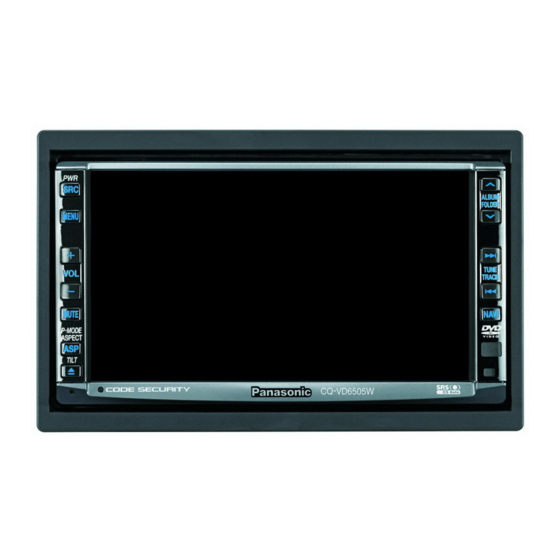
뉂ÓÂÌÌ˚È DIN 6,5-‰˛ÈÏÓ‚˚È ‡‚ÚÓÏÓ·ËθÌ˚È ¯ËÓÍӽ͇ÌÌ˚È ˆ‚ÂÚÌÓÈ Üä-ÏÓÌËÚÓ/DVD-ÂÒË‚Â
PWR
SRC
MENU
VOL
MUTE
P-MODE
ASPECT
ASP
TILT
CQ-VD6505W
Dual DIN In-dash 6.5" Widescreen Color LCD Monitor/DVD Receiver
ALBUM
PWR
FOLDER
MUTE
SRC
VOL
TUNE
ENTER / BAND
TRACK
ENT
TOP MENU
NAVI
RET
RETURN
DVD MENU
CAR AV
CQ-VD6505W
Model:
TEXT
Advertisement
Chapters
Table of Contents
Troubleshooting

Related Manuals for Panasonic CQ-VD6505W


Summary of Contents for Panasonic CQ-VD6505W
- Page 1 뉂ÓÂÌÌ˚È DIN 6,5-‰˛ÈÏÓ‚˚È ‡‚ÚÓÏÓ·ËθÌ˚È ¯ËÓÍӽ͇ÌÌ˚È ˆ‚ÂÚÌÓÈ Üä-ÏÓÌËÚÓ/DVD-ÂÒË‚Â ALBUM FOLDER MENU TUNE TRACK MUTE NAVI P-MODE RETURN ASPECT TILT CQ-VD6505W Dual DIN In-dash 6.5” Widescreen Color LCD Monitor/DVD Receiver Model: MUTE ENTER / BAND TOP MENU DVD MENU CAR AV CQ-VD6505W TEXT...
-
Page 2: Safety Information
They contain instructions about how to use the system in a safe and effective manner. Panasonic assumes no responsibility for any problems resulting from failure to observe the instructions given in this manual. - Page 3 Installation of this unit requires special skills and experi- ence. For maximum safety, have it installed by your dealer. Panasonic is not liable for any problems resulting from your own installation of the unit. Follow the instructions to install and wire the prod- uct.
- Page 4 OF PROCEDURES OTHER THAN THOSE SPECIFIED HEREIN MAY RESULT IN HAZARDOUS RADIATION EXPOSURE. DO NOT OPEN COVERS AND DO NOT REPAIR BY YOUR- SELF. REFER SERVICING TO QUALIFIED PERSONNEL. CQ-VD6505W (continued) This system is designed so that you cannot see moving pictures while you are driving.
-
Page 5: Notes On Use
Qty.: 1 service. ¡Accessories and their parts numbers are subject to modification without prior notice due to improvements. Example: “Before Disc Playback” page 16) Qty.: 1 Qty.: 1 Installation Instructions) CQ-VD6505W... -
Page 6: Features
Features Panasonic welcomes you to our constantly growing family of electronic products owners. We endeavor to give you the advantages of precise electronic and mechanical engineering, manufactured with carefully selected components, and assembled by people who are proud of the reputation their work has built for our company. -
Page 7: Table Of Contents
¢ Settings ... 28 Menu operation User, screen, audio, DVD, input/output, radio ¢ Troubleshooting ... 41 ¢ Maintenance ... 47 ¢ Notes on Discs ... 48 ¢ Language Code List... 49 ¢ Definition of Terms ... 50 ¢ Specifications... 51 CQ-VD6505W... -
Page 8: Preparation
¡Improper use of a battery may cause overheating, an explosion or ignition, resulting in injury or a fire. Note: ¡Battery Information: Battery Type: Panasonic lithium battery (CR2025) Battery Life: Approximately 6 months under normal use (at room temperature) Remote Control Unit... -
Page 9: Symbols Used In This Manual
“––” is displayed. Discos compatibles Compatible Discs Disc Marks The following pictographs are used for the descriptions of disc operation. page 17-21) : DVD : VCD (Video CD) : CD : CD-R/RWs containing MP3 files : CD-R/RWs containing WMA files CQ-VD6505W... -
Page 10: Name Of Controls And Functions
Note: ¡ [MENU], [ASP], [NAVI], [ : This book refers to connections to the Panasonic car navigation system that will come onto the market in the future. Descriptions regarding the car navigation system are boxed with a dotted line. [SRC] ¡Switches on/off the power. -
Page 11: Remote Control
¡Selects (vertically) or adjusts an operation or item. ¡Selects a band. ¡Shows OSD. ¡Searches for broadcast stations and memorizes them automatically. ¡Determines an operation or item. ¡Displays the DVD/title menu. (Operations vary according to the media.) CQ-VD6505W... -
Page 12: Touch Panel Operation Overview
Note : ¡The screen above appears when no external device is connected to AV1, AV2, and the Expansion Module (CY-EM100N, option). CQ-VD6505W ¡Do not use a pen or other sharp implements to page 47) operate the touch panel. ¡Do not bump the front panel. - Page 13 ¡ Refer to the description of each mode for how to operate the operation screen. Showing the hidden part of the screen. Some items have continued parts. You can see the continued parts by pressing DVD mode Standard Screen Standard Screen Operation Screen OSD OFF * CQ-VD6505W...
-
Page 14: General
Preparation: Turn your car’s ignition key to the ACC or ON position. General Operations Operations Power ON : Power OFF : Display Open/Close Source selection …… Touch/Press and hold for more than 2 seconds CQ-VD6505W [MUTE] CQ-VD6505W – [SRC] [SRC] [SRC] [SRC] – –... - Page 15 Down Mutes the sound. To cancel, press again. q Press and hold for more than 2 sec- onds. w Press to adjust. Setup is the same as from MENU. Refer to DISPLAY UNIT for details. page 30) page 32) CQ-VD6505W...
-
Page 16: Before Disc Playback
DVDs with a region number other than “2” ¡ “3” , “4” , “5” or “ALL” CQ-VD6505W Playing back a photo CD disc with this unit could ¡ damage the data that is recorded on the disc. CD-R/RW CQ-VD6505W2 *... - Page 17 MENU MUTE P-MODE ASPECT TILT CQ-VD6505W [u] (eject) Disc Insert Press [u] to open the display. ¡The mode that supports the disc is selected, and play- back starts. Caution ¡When the disc is inserted or ejected, to prevent disc scratches never exert any downward force on the disc.
-
Page 18: Disc Player
Operation Buttons Audio Mode MP3/WMA mode display Source Button Playing time Operation Buttons mode display Source Button Current track Operation Buttons Title/text scroll CQ-VD6505W [SRC] w Touch (DVD) on the MENU Source Selection Screen. MUTE P-MODE ASPECT TILT To switch Operation Screen ON, touch the center of touch panel or press [ENTER] on the remote control. -
Page 19: Basic Operations
To resume normal playback, touch/press / [5]. To cancel, touch again. To cancel, touch and hold for more than 2 seconds again. To cancel, touch again. To cancel, touch again. To cancel, touch and hold again. {F= FOLDER (folder)} CQ-VD6505W... - Page 20 ¡When the current disc is not ready for the on-screen direct operation, perform operations with the buttons on the remote control or the unit. ¡The on-screen direct operation of the DVD menu is not available in the DVD changer mode. CQ-VD6505W (continued) Discs Discs [DVD MENU]...
- Page 21 : the right channel audio is output on both the left and MONO.R right speakers. is touched, the operation buttons disappear. Return Audio language/ Angle/ Subtitle language ¡ Touch during playback. ¡ Touch during playback. ¡ Touch during playback. page 36) ANGLE MARK previous page) or is at the DVD CQ-VD6505W...
-
Page 22: Notes On Mp3/Wma
¡Never assign the “.mp3”, or “.wma” file name extension to a file that is not in the MP3/WMA format. This may not only produce noise from the speaker damage, but also damage your hearing. CQ-VD6505W Display Information Displayed items ¡ CD-TEXT Disc title Track title ¡... - Page 23 Sampling frequency 32, 44.1, 48 kHz 16, 22.05, 24 kHz 32, 44.1, 48 kHz Root Folder (Root Directory) Folder Selection In the order – File Selection In the order – Tree 2 Tree 3 Tree 4 Tree 8 (Max.) CQ-VD6505W...
-
Page 24: Radio
MENU RADIO FM SETUP Tuning Operations Band Selection List Selection Refer to the next page. Station Selection Seek Tuning …… Touch/Press and hold CQ-VD6505W Source Button [SRC] w Touch (RADIO) on the Source Selection MENU Screen. MUTE P-MODE ASPECT TILT... -
Page 25: Preset Memory
– page 38) RADIO FM SETUP AUTO PRESET The preset station selected in the step q is interchanged with the targeted preset chan- – – nel selected in the step w (Preset Swap). blinks once EACH EACH EACH EACH CQ-VD6505W... -
Page 26: Av1/Av2
INPUT is not skipped even if ¡If no operation is performed for 10 seconds or touched, the operation buttons disappear. ¡AV terminal is not used for the Panasonic car navigation system (available in future). Refer to for setting. NAVI SETUP... - Page 27 CQ-VD6505W...
-
Page 28: Settings
Hands-free setting RADIO Radio FM SETUP Setting for FM stations AM SETUP Setting for AM stations (*1) Please refer to the System Upgrade Guidebook. CQ-VD6505W (Language setting). MENU DISPLAY page 30) page 30) page 30) page 31) page 31) page 32) -
Page 29: Menu Operation
Touch desired setting. page 30 ) Determines the setting and goes back to the pre- vious menu out of the menu. Determines the setting and gets out of the menu. ALBUM FOLDER TUNE TRACK NAVI CQ-VD6505W [}] [{] (Select/adjust) CQ-VD6505W... -
Page 30: Display Unit
¡Record your registered ID code and keep it in a secure location. (Fill in the ID code memo to use the unit. In case you forget the ID code, please consult your nearest Panasonic Service Center. 4 digits numeric code default: none until “COMPLETED!”... - Page 31 (Security LED setting) : LED indicator not blinking with ignition key being at out-of-ACC : LED indicator blinking with ignition key being at out-of-ACC default: (Language setting) : displays the menu in English. : displays the menu in Chinese. default: ENGLISH CQ-VD6505W...
- Page 32 : lightens the depth of color on the display. : deepens the depth of color on the display. TINT (Adjust the image tone or tint) : emphasizes red in the color image. : emphasizes green in the color image. CQ-VD6505W INPUT/OUTPUT RADIO USER SOUND SETUP Sound Set Up...
- Page 33 (Applies to the Sub-woofer) Setting range: off, +1 to +10 default: off (Adjusts the SRS effect) (Adjusts the SRS effect (front) on rear speakers) (Adjusts the SRS effect (center) on rear speakers) Setting range: off, +1 to +10 default: +5 CQ-VD6505W...
- Page 34 * A subwoofer (option, CJ-SW3003 recommended) is required. A power amplifier (option) is also required for connecting a subwoofer. Note: ¡While the private mode is active, only adjusted. CQ-VD6505W PHASE : subwoofer phase 0 degree 0° 180° : subwoofer phase 180-degree inverted Note: ¡...
- Page 35 : up Setting range: 63 Hz to 200 Hz default: 125 Hz (High Pass Filter) : up Setting range: off, 63 Hz to 200 Hz default: off is set to CS Auto is enabled only on the front speakers CQ-VD6505W...
- Page 36 ¡ These adjustments being executed, playback will start from the beginning of a disc. : English : Chinese : French OTHER : other language. Input the language code. page 49) CQ-VD6505W INPUT/OUTPUT RADIO DISPLAY Display aspect and DVD software mode DVD ASPECT NARROW WIDE...
-
Page 37: Input Select
AV2. INPUT SELECT OUTPUT SELECT H-F SETUP default: default: INPUT/OUTPUT RADIO (Navigation set up) System Upgrade Guidebook) (AV1 skip) default: (AV2 skip) default: is not enabled because the con- System Upgrade Guidebook) System Upgrade Guidebook) System Upgrade Guidebook) CQ-VD6505W... - Page 38 (Noise suppression) : narrows the frequency bandwidth to be NARROW received to prioritize noise reduction. : goes between : widens the frequency bandwidth to be WIDE received to prioritize sound quality. CQ-VD6505W RADIO default: AUTO default: EACH NARROW WIDE default:...
-
Page 39: Other Settings
MENU MUTE P-MODE ASPECT TILT CQ-VD6505W [ASP] Aspect Ratio Default: NORMAL Mode: 4 types Press and hold [ASP] on the display unit to change the aspect ratio as follows. NORMAL ¡The conventional display image has a 4 to 3 ratio of horizontal to vertical. - Page 40 Default: Private mode off Press and hold [ASP] (P•MODE) on the main unit for more than 2 seconds to activate the private mode func- tion or inactivate it in turn. CQ-VD6505W ALBUM FOLDER TUNE TRACK...
-
Page 41: Troubleshooting
Service Center. The product should be serviced only by qualified personnel. Please refer checking and repair to professionals. Panasonic shall not be liable for any accidents arising out of neg- lect of checking the unit or your own repair after your checking. - Page 42 Sound skipping or noise Sound skipping due to vibration Disc unejectable CQ-VD6505W (continued) Antenna installation or wiring of antenna cable is faulty. aCheck whether the antenna mounting position and its wiring are correct. In addition, check to see whether the antenna ground is securely connected to the chassis.
- Page 43 48) for other cases. The disc is in the video recording (VR) format. aPlay video formatted discs. Refer to “Before Disc Playback” ( page 48) for other cases. page 16) or “Notes on Discs” page 16) or “Notes on Discs” CQ-VD6505W...
-
Page 44: Display Settings
Unable to turn on the power of the main unit through the remote control CQ-VD6505W (continued) AUTO dimmer is selected. aSelect one of the dimmer levels from among 1 to 4 to make the dimmer adjustment become free from light intensity. -
Page 45: Sound Settings
Playing back a disc having a subwoofer channel ¡Subwoofer is set to No sound from the ¡Private mode is set to subwoofer ¡Pro Logic is set to NONE in the speaker setting. aSet subwoofer to aSet private mode to aSet Pro Logic to CQ-VD6505W... - Page 46 ¡ There may be cases when the disc numbers affected by an error are displayed before “NON PLAYABLE DISC”. In case you forget the ID code... In case you forget the ID code, please consult your nearest Panasonic Service Center. ID code memo Copy the memo below, fill in the ID code, and keep it in a secure location.
-
Page 47: Maintenance
Product Servicing If the suggestions in the charts do not solve the problem, we recommend that you take it to your nearest authorized Panasonic Service Center. The product should be serviced only by a qualified technician. Replacing the Fuse Use fuses of the same specified rating (15 A). Using dif-... -
Page 48: Notes On Discs
Discs with burrs Please remove the burrs before use. CQ-VD6505W Disc insert The surfaces of new discs tend to be slippery. Therefore, when using such a disc for the first time, it may not load satisfactorily even when it has been inserted into the unit. -
Page 49: Language Code List
8469 Telugu 8471 Tajik 8472 Thai 8473 Tigrinya 8475 Turkmen 8476 Tagalog 8479 Tonga 8482 Turkish 8484 Tatar 8487 8575 Ukrainian 8582 Urdu 8590 Uzbek 8673 Vietnamese 8679 Volapük 8779 Wolof 8872 Xhosa 8979 Yoruba 9072 Chinese 9085 Zulu CQ-VD6505W... -
Page 50: Definition Of Terms
This refers to a screen on which the playback picture of wide-screen DVDs or VCD (Video CD)s is cut off at the left and right sides. CQ-VD6505W Playback control (VCD (Video CD)) If the VCD (Video CD) has “With Playback Control”... -
Page 51: Specifications
: –20 °C – +80 °C : 6.5-inch wide : 143 x 79 x 164 mm : 280 880 pixels (234 vertical x 400 horizontal x 3) : Over 99.99% : Transparent color filter for- : TFT (Thin Film Transistor) active matrix format CQ-VD6505W... - Page 52 CQ-VD6505W Matsushita Electric Industrial Co., Ltd. Web Site : http://panasonic.net YFM284C681CA PTW0107-1027 Printed in China...
-
Page 53: Cq-Vd6505W
Installation Instructions àÌÒÚÛ͈Ëfl ÔÓ ÏÓÌÚ‡ÊÛ CQ-VD6505W Model: TEXT... - Page 54 PLEASE FOLLOW THE LAWS AND REGULATIONS OF YOUR STATE, PROVINCE OR COUNTRY FOR INSTALLATION OF THE UNIT. • TO REDUCE THE RISK OF FIRE OR ELECTRIC SHOCK OR PRODUCT DAMAGE, DO NOT EXPOSE THIS APPLIANCE TO RAIN, SPLASHING, DRIP- PING OR MOISTURE. CQ-VD6505W...
- Page 55 CY-TUN133W option) CD Changer (CX-DP880, option) DVD Changer (CX-DH801W, option) Contents Safety Information...2 Upgrade Options ...3 Installation ...4 Electrical Connections ...8 Main Unit Rear Monitor CQ-VD6505W Expansion Module (CY-EM100N, option) iPod ® Hands-Free Kit featuring Bluetooth technology ® (CY-BT100N, option) CQ-VD6505W...
-
Page 56: Installation Precautions
This product should be installed by a professional installer, if possible. In case of difficulty, please consult your nearest author- ized Panasonic Service Centre. 1. This system is to be used only in a 12 V DC battery system (car) with negative ground. - Page 57 ¡Do not bump the front panel. <ZZBISVD6503> Failure to observe the above may damage or break the glass on the surface of the touch panel. Diagram Qty. <YEAJ012890> ø x 8 page 7) Transportation Bracket Round Head Screw (5 ø x 8 mm) CQ-VD6505W...
- Page 58 Tapping Screw (5 mmø x 16 mm) To the unit r Mounting Bolt (5 mmø) CQ-VD6505W (continued) (When using Mounting Collar w) IMPORTANT When this unit is installed in dashboard, ensure that there is sufficient air flow around the unit to prevent damage from overheating.
-
Page 59: Removing Procedures
Flat-Head Screw (5 mmø x 8 mm) Removing Procedures Remove the trim plate q. Lock release. q Insert the lock cancel plate e until you hear a click. w Pull the unit out. Pull the unit out with both hands. CQ-VD6505W... -
Page 60: Electrical Connections
CAMERA-IN CQ-VD6505W 8 m m M A X Fuse (15 A) Refer fuse replacement to your nearest authorized Panasonic Service Centre. Do not try fuse replacement by yourself. Video Input Terminal (AV1-IN) Video Input Terminal (AV2-IN) Connect a VCR, camcorder, other brand’s car navigation system, etc. - Page 61 : This book refers to connections to the Panasonic car navigation system that will come onto the market in the future. Descriptions regarding the car navigation system are boxed with a dotted line.
- Page 62 Attach a Clip Connector !2 to the end of the side brake (parking brake) connection lead. Comes up to this point. Side Brake (Parking Brake) Connection Lead (Bright green) CQ-VD6505W (continued) Foot brake Brake light Clip Connector w The Clip Connector !2 is connected to the power source side lead of the side brake (parking brake) lever.
- Page 63 F U S E 1 5 A F U S E 1 5 A > P B T < J A M - S A a CQ-VD6505W (Rear) External Amplifier Control Power Lead Note: ¡Connect both the power control lead of the TV...
- Page 64 BATTERY 5 A (Yellow) To the car battery, continuous +12 V DC Power Lead (Red) (not used) (R) (Red) (L) (White) RCA Cord (not used) CQ-VD6505W (continued) (option) Power Connector (Supplied with CX-DH801W) CHANGER IN Conversion Cable for DVD/CD Changer...
- Page 65 Note: ¡ Refer to the operating instructions for the connected devices, in addition. (Supplied with CX-DP880) (R) (Red) RCA Cord (L) (White) 8 m m M A X CQ-VD6505W (Rear) CD Changer CX-DP880 (option) Power Connector CHANGER IN DIN Connector...
- Page 66 (L) (White) (Red) Camcorder (option) Expansion Module CY-EM100N DVD Changer CX-DH801W (option) VIDEO-CNT (L) (White) (R) (Red) CQ-VD6505W (R) (Red) (L) (White) VIDEO OUT AUDIO OUT (Video) (Yellow) (option) (Video) (Yellow) Direct Cable for iPod CHANGER IN (CA-DC300N, option) Conversion Cable...
- Page 67 ¡ Please observe what shapes the connectors of the connecting devices are and where each of them is connected to in order to establish a proper connection. (L) (White) (Video) (Yellow) (R) (Red) 8 m m M A X CQ-VD6505W (Rear) Caution ¡For people sitting in the front seats, please enjoy only audio during driving. Audio Right...
- Page 68 Electrical Connections Connection with Rear View Camera Note: ¡ Refer to the operating instructions for the connected devices, in addition. CQ-VD6505W (Rear) 8 m m M A X !0 Power Connector Reverse Lead (Violet/white stripe) Connecting the Reverse Lead If using an optional rear view camera, the reverse lead must be connected.
- Page 69 CQ-VD6505W...
- Page 70 Matsushita Electric Industrial Co., Ltd. Web Site : http://panasonic.net YFM294C102CA PTW0107-1027 Printed in China...
- Page 71 System Upgrade Guidebook àÌÒÚÛ͈Ëfl ÔÓ ‡Ò¯ËÂÌ˲ ÒËÒÚÂÏ˚ CQ-VD6505W Model:...
- Page 72 They contain instructions about how to use the system in a safe and effective manner. Panasonic assumes no responsibility for any problems resulting from failure to observe the instructions given in this manual.
- Page 73 Installation of this unit requires special skills and experi- ence. For maximum safety, have it installed by your dealer. Panasonic is not liable for any problems resulting from your own installation of the unit. Follow the instructions to install and wire the prod- uct.
- Page 74 Before Reading These Instructions Panasonic welcomes you to our constantly growing family of electronic products owners. We endeavor to give you the advantages of precise electronic and mechanical engineering, manufactured with carefully selected components, and assembled by people who are proud of the reputation their work has built for our company.
- Page 75 ¡Market conditions regarding optional devices vary with countries and regions. For further information, consult your dealer. ¡If a non-Panasonic product is connected to this unit, we do not guarantee the operations of the product. ¡If iPod with Video is connected, no more iPod can be con- nected.
- Page 76 Before Reading These Instructions Simultaneous Multi-Device Connection CQ-VD6505W Only 1 unit Expansion Module (CY-EM100N, option) Note: ¡ Refer to individual instruction and instal- lation manuals for each device for detailed installation and wiring. CQ-VD6505W System upgrade sample System-up Connector Conversion Cable for DVD/CD Changer...
- Page 77 Touch Panel Operation Overview...8 Each Source TV Tuner Control...10 CD Changer Control...12 DVD Changer Control ...13 Bluetooth Hands-Free Kit ...16 iPod Control...18 Center Speaker: EAB-CF2 Panasonic Power amplifier CQ-VD6505W ALBUM FOLDER MENU TUNE TRACK MUTE NAVI P-MODE ASPECT TILT CQ-VD6505W...
-
Page 78: Touch Panel Operation Overview
¡ When an this unit without involving the Expansion Module (CY- EM100N, option), any of them appears at the AV2 position. CQ-VD6505W ¡Do not use a pen or other sharp implements to Operating operate the touch panel. ¡Do not bump the front panel. - Page 79 To switch Operation Screen ON, touch the center of touch panel or press [ENTER] on the remote control. The operation screen is not available in the video mode. Note: ¡Refer to the description of each mode for how to operate the operation screen. Standard Screen Standard Screen Operation Screen OSD OFF * CQ-VD6505W...
-
Page 80: Tv Tuner Control
Selection Channel Seeking Displaying TV Menu Selecting an Item on the TV Menu …… Touch/Press and hold CQ-VD6505W ¡For receiving TV broadcasts, stop your car where there is no obstacle to broadcast reception around. Source Button w Touch (TV) MENU on the Source Selection Screen. - Page 81 ¡ Exit from the preset writing. Down ¡ Preset channel deleting mode display appears. Select a preset number that you want to [}] [{] [}] [{] delete. [BAND] Determine. – – – ¡ Exit from the preset channel deletion. CQ-VD6505W...
-
Page 82: Cd Changer Control
CD Changer Control ¡CD changer functions are designed for optional Panasonic CD changer unit. (CX-DP880) CD Changer Mode Selection q Touch “Source Button”. Press [SRC] to change to the CD Changer mode. To switch Operation Screen ON, touch Basic Operations... -
Page 83: Dvd Changer Control
Press [SRC] to change to the DVD Changer mode. Note: ¡Be sure to connect RCA cord (video)(yellow) of the Panasonic DVD Changer to AV2-IN and set page 20). Otherwise the CH VIDEO INPUT changer cannot be controlled through this unit. - Page 84 …… Touch/Press and hold Chapter/title/track Selection Showing menu and selecting an item * Note on VCD: For VCD, press [RETURN] instead of [DVD MENU] . CQ-VD6505W (continued) Note: ¡Reverse slow playback is not possible. – – [DVD MENU] []] [[]...
- Page 85 CQ-VD6505W...
-
Page 86: Bluetooth Hands-Free Kit
Blinks slowly: Pairing/Reconnecting [Hang-on]/Blue LED [Hang-up]/Red LED Example: DVD mode CQ-VD6505W Connection of the optional Bluetooth hands-free kit allows users to talk on a handsfree cellular phone in a car. Note: ¡ CY-BT100N is designed only for receiving calls. It cannot send calls. - Page 87 ¡ Reception of a call at power-off does not turn on the power of this unit. -related operations in the AUDIO CQ-VD6505W...
-
Page 88: Ipod Control
¡ The iPod equipped with a dock connector is exclusive- ly connectable. Basic Operations Operations Track/file Selection Fast Forward/ Fast Reverse Title Scroll Pause …… Touch/Press and hold CQ-VD6505W Source Button [SRC] w Touch (iPod) on the Source MENU Selection Screen. (Content varies with connected devices) - Page 89 File indicator A number up to 999 is displayable. Title scroll Play/pause Play setting File up/down Back to 1-upper directory Playback category selection button Playback by playlist (default) Playback by album Playback by song Playback by artist {S= SONG (song)} CQ-VD6505W...
-
Page 90: Settings
: down, : up Connection with Panasonic car navigation system : This book refers to connections to the Panasonic car navigation system that will come onto the mar- ket in the future. Descriptions regarding the car navigation system are boxed with a dotted line. - Page 91 Preparation: Connect Bluetooth hands-free kit (CY- BT100N). ( Installation Instructions) BOTH L ch R ch is selectable. However, the setting is not (Hands-free Set Up) (Hands-free speaker) : Front Left/Right speaker : Front Left only : Front Right only default: BOTH CQ-VD6505W...
-
Page 92: Troubleshooting
Service Center. The product should be serviced only by qualified personnel. Please refer checking and repair to professionals. Panasonic shall not be liable for any accidents arising out of neg- lect of checking the unit or your own repair after your checking. - Page 93 [ u ]. If failure persists, press the reset switch. (Press the reset switch in the CD changer). If normal operation is not restored, call the store where you purchased the unit or the nearest Panasonic Service Center. The type of the file that is selected is not supported.
- Page 94 Matsushita Electric Industrial Co., Ltd. Web Site : http://panasonic.net YFM284C682CA PTW0107-2037 Printed in China...