Table of Contents
Advertisement
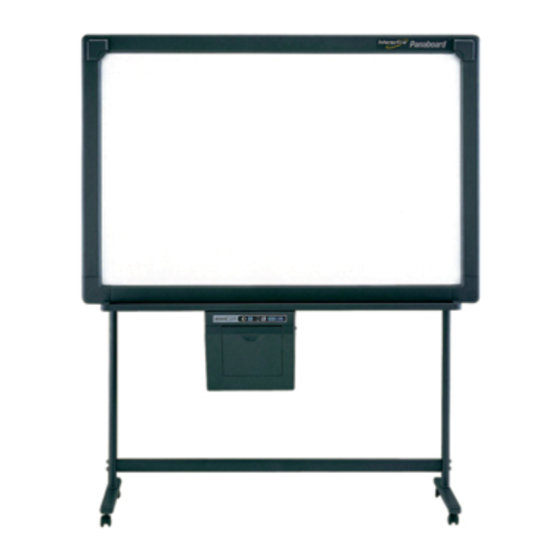
Panaboard
Panaboard
D
To assemble this unit, please refer to the Installation Manual on pages 72 through 84.
D
Before operating this unit, please read these instructions completely.
After reading them, keep them for future reference.
D
Because of the nature of the print film, all the printed text will remain on the film.
D
This product is designed for installation by a qualified servicing dealer.
Installation performed by non-authorized individuals could cause safety-related problems with
the operation of this equipment.
D
To locate the closest authorized dealer in your area, please call 1-800-449-8988.
Electronic Print Board
(Interactive Panaboard)
Operating Instructions
(for qualified service personnel)
with Installation Manual
KX-BP800
MODEL NO.
Stand and wall-mounting kit are optional.
Advertisement
Chapters
Table of Contents

Related Manuals for Panasonic Panaboard KX-BP800


Summary of Contents for Panasonic Panaboard KX-BP800
-
Page 1: Operating Instructions
To locate the closest authorized dealer in your area, please call 1-800-449-8988. Electronic Print Board (Interactive Panaboard) Operating Instructions with Installation Manual (for qualified service personnel) MODEL NO. Stand and wall-mounting kit are optional. KX-BP800... - Page 2 Thank you for purchasing the Panasonic Electronic Print Board. For optimum performance and safety, please read these instructions carefully. Things you should keep a record of @ @ @ @ @ @ @ @ e ? @ @ @ @ @ @ @ @ e ?
- Page 3 WARNING: TO PREVENT FIRE OR SHOCK HAZARD, DO NOT EXPOSE THIS PRODUCT TO RAIN OR ANY TYPE OF MOISTURE. THE SOCKET-OUTLET MUST BE NEAR THIS EQUIPMENT AND MUST BE EASILY ACCESSIBLE. Federal Communications Commission Requirements Note: This equipment has been tested and found to comply with the limits for a Class A digital device, pursuant to part 15 of the FCC Rules.
- Page 4 Features The KX-BP800 is equipped with two interactive functions; Projector mode and Whiteboard mode, in addition to a regular electronic print board that utilizes plain paper. It is possible to use this product as follows. CElectronic print board Functions CAllows copying up to 9 copies per screen...
- Page 5 CAllows the user to record the information being written or erased in a file that can be played back as a movie and it can be edited if needed. CPC Interface (Option) When the optional PC Interface Kit (KX-BP095) is used, you can scan monochrome images from the KX-BP800 into a computer running Microsoft printer of the KX-BP800.
-
Page 6: Table Of Contents
Table of Contents Before you start Precautions ... 8 Part Names and Functions ... 12 CThe control panel ... 13 Using Installing Thermal Transfer Film ... 14 Loading Copy Paper ... 16 Making Copies ... 18 CCopy types and procedures ... 19 Replacing Thermal Transfer Film ... - Page 7 Using Whiteboard Mode ... 43 CBasic operation flow in Whiteboard mode ... 43 CAbout Whiteboard window ... 45 View Window or Whiteboard Window Operation ... 46 CDifferences between the View window and CMenu configuration ... 46 CTool bars ... 48 CCreate an IPB document (Whiteboard window only) ...
-
Page 8: Precautions
Precautions Never remove the cover, or take apart or modify the product. This will void the warranty. Do not put drinks or other liquids on the tray. Do not use the electronic print board in an excessively humid or dusty location. Do not position the electronic print board in a location where it is not stable. - Page 9 CDo not install the unit where it may be exposed to direct sunlight, near heating Installation equipment, or near air-conditioning vents as this may cause stretching and/or discoloration of the screen. CDo not install the unit in locations having a temperature of 10°C (50°F) or lower or where the temperature may change suddenly as this may disable the unit’s ability to make copies.
- Page 10 Precautions Power cord CBefore moving the unit, disconnect the power cord from the electrical power socket and AC inlet, and disconnect the interactive cable from the interactive and Interactive connector and a PC. Then coil them for transportation. Failure to do these cause the cord and cable to be damaged if they are stepped on or if they catch on cable something while the unit is being moved.
- Page 11 Battery If batteries are used improperly, batteries may leak, causing corrosion of the product, or they may burst. To prevent this, always follow the precautions given below. CAlways remove batteries from the Electronic Pen and Electronic Eraser if they are not to be used for an extended period of time.
-
Page 12: Part Names And Functions
Panasonic KX-BP800 Electronic Eraser (See page 25) Pen Holder Lever Electronic Pen/Electronic Eraser Position Receiver... -
Page 13: The Control Panel
The control panel Name Panel This lamp indicator notifies the user when the time to replace the thermal transfer film is approaching (estimated) and of the printing contrast used during copying. Indicator off : Normal printing contrast. Indicator on : Darker than normal printing contrast. Contrast/ Indicator flashing : Almost time to replace the thermal transfer film. -
Page 14: Installing Thermal Transfer Film
Installing Thermal Transfer Film Load the thermal transfer film into the film cassette and install in the printer. Set the power switch to on ( | ). C" " will flash on the multi-copy/error indicator when the thermal transfer film has run out. Push down the printer open lever and open the printer door. - Page 15 Load the thermal transfer film into the film cassette. CLoad the thermal transfer film into the film cassette so that the blue gear inserted in the thermal transfer film is located on the blue label side of the film cassette. Push in the direction of the arrow until you hear all four gear shafts click in place.
-
Page 16: Loading Copy Paper
Loading Copy Paper It is possible to load up to 80 sheets of Letter size copy paper [assuming a paper weight of 80g/m Note that only Letter paper may be used. When the unit is first used or when " paper, load copy paper as described below. - Page 17 Pull the paper cover forward as shown in the right figure. Note CThe magnets are used as fasteners to hold the paper cover closed. To prevent paper jams such as those caused by multiple sheets feeding, once fan the paper thoroughly, square it, align it with the guide inside, and insert as far as it will go.
-
Page 18: Making Copies
To ensure quality copies, please use the markers (Big). CThe markers for interactive (Small) draw thin lines. The quality of the copies may be reduced when these markers are used. Panasonic Power Switch Copy Key KX-BP800 Output Paper... -
Page 19: Copy Types And Procedures
Copy types and procedures Copy Type Copying the front Press of the screen Press Copying the back of the screen Press Select the number of copies (1 to 9) by pressing Making multiple Press copies (up to 9) CPress Press Making 2-screen copies C C Copying the front and... -
Page 20: Replacing Thermal Transfer Film
Thermal transfer film is replaced as follows. Notes on Replacing Thermal Transfer Film COnly use the designated product (KX-BP081 or KX-BP082) from Panasonic as the replacement film. (Note that using another type of replacement film may result in degraded printing quality or damage to the unit.) -
Page 21: Paper Jams
Paper Jams Remove paper jams by the following procedure when copy paper does not come out of the output port or when " flashes on the multi-copy/error indicator. Push down the printer open lever to open the printer door. Remove the film cassette with both hands. Remove all jammed paper. - Page 22 Paper Jams Install the film cassette. CInsert the film cassette into the printer so that the blue gear on the cassette aligns with the blue label on the printer and then insert the gear shafts on both sides of the cassette into the grooves inside the printer.
- Page 23 To prevent paper jams such as those caused by multiple sheets feeding, once fan the paper thoroughly, square it, align it with the guide inside, and insert as far as it will go. Note CDo not stack more copy paper in the unit than the maximum paper limit indicated by the guide (see figure to the right) as this may result in paper jams.
-
Page 24: Before Using The Interactive Function
Before Using the Interactive Function Setting the Electronic Pen Remove the battery cover on the pen holder, insert the batteries as shown in the figure to the right, and re-attach the battery cover. CAlways use “AAA” size (alkaline) batteries and be sure that their polarity is properly oriented. -
Page 25: Csetting The Electronic Eraser
Setting the Electronic Eraser Remove the eraser cover, insert the batteries as shown in the figure to the right, and re-attach the eraser cover. CAlways use “AAA” size (alkaline) batteries and be sure that their polarity is properly oriented. CDo not mix old and new, different type batteries when replacing batteries. -
Page 26: System Requirements
Before Using the Interactive Function System requirements Computer: CPU: Port: Operating System: Memory: Hard Disk Space: Connecting to the PC Connect one end of the proprietary interactive cable supplied to the interactive connector under the tray and the other end to the computer's communication (COM) port. -
Page 27: Cinstalling The Software
(2) Follow the instructions on the screen to complete the installation. C C When the installation of the Interactive Panaboard Software is completed, “Interactive Panaboard” group will be entered under “Panasonic” at the Program menu. Under the “Interactive Panaboard” group, there will be three items, Interactive Panaboard Software, Help and Operating Instructions. - Page 28 Before Using the Interactive Function C C In order to view the Operating Instruction Manual on the CD ROM, Reference of the Interactive Panaboard Operating Instructions in CD-ROM C C Adobe ® ® Acrobat Reader is necessary to refer to the Operating Instructions. If it is not installed on your computer, install Adobe Instructions.
-
Page 29: Using The Interactive Panaboard Software
Turn on the power of the Interactive Panaboard. Turn on the computer's power and start up Windows. Click the [Start] button, and then click [Programs] · [Panasonic] · [Interactive Panaboard] · CThe Interactive Panaboard Software runs, and the COM detection dialog box appears to show the Interactive Panaboard is detected. -
Page 30: The Interactive Panaboard Software
Using the Interactive Panaboard Software Pop-up menu configuration of the Interactive Panaboard Software Right-click the in the Taskbar to get the pop-up menu. Following operations are possible in the pop-up menu. Select Mode... : Calibrate : Tool Draw : View Window : Display the View window. Open/Close Whiteboard window : Settings... -
Page 31: Creference The Help
CAdjustment The Electronic Pen or the Electronic Eraser position may largely shift by the using environment. In this case, adjust the position according to the following procedures to improve the shifted position. (1) Right-click the icon in the Taskbar and click [Settings] · [Adjustment...] in the pop-up menu. -
Page 32: Projector Mode
Projector Mode Precautions when using a projector Interactive Upper Limit Mark 100mm (1 Projector CWhen using a projector to project images, be sure to display the image so that it is centered left-to-right on the electronic print board screen and with at least a 50 mm (2") gap between the top of the image and the screen border. -
Page 33: Cbasic Operation Flow In Projector Mode
Basic operation flow in Projector mode This section explains the flow of basic operations when using the Interactive Panaboard Software in the Projector mode. We recommend trying the operations in accordance with the following steps to help you completely understand the operations in the Projector mode. CFor any explanations on the operations of the Projector mode, the Electronic Pen will be referred to as "Mouse"... - Page 34 Projector Mode CUse the Electronic Pen as a mouse After the calibration is completed, the Electronic Pen can be used as a mouse for the projected computer screen on the Interactive Panaboard. (1) If the Desktop Drawing Tool is not displayed, right-click the icon and click [Tool] ·...
- Page 35 CRecord image and handwritten lines data on the Desktop Data of handwritten lines drawn or erased on the Desktop using the Desktop Drawing Tool can be recorded in Interactive Panaboard format files (extension ".ipb", referred to as IPB documents) along with the initial Desktop image.
-
Page 36: Cabout Desktop Drawing Tool
Projector Mode Remark: CMany different operations can be executed in the displayed IPB document. Save the IPB document in another file format. (See page 50.) Switch a page of the IPB document. (See page 54.) Edit a page of the IPB document. (See page 54.) Playback the IPB document. -
Page 37: Cdesktop Drawing Tool Operation
REC Stop: Stop recording and store the recording data. Page No.: Display the page number which is being recorded. Before recording, it is (0). When the Recording start button is depressed, it displays as (1), and following pages will be numbered accordingly. New Page: Saves current page recordings and starts the process to record the next page. - Page 38 Projector Mode C C Change Marker/Eraser settings Change the width and color of the markers and the size of the eraser used in the Desktop Drawing Tool. The marker width and color can be changed for four marker colors. (1) Click (Setting) in the Desktop Drawing Tool.
- Page 39 C C Save Desktop in image file Save the background image of the Desktop and handwritten lines that were drawn on the Desktop as an image file. (1) Click (Capture) in the Desktop Drawing Tool. C C The Save As dialog box will appear. (2) Enter the folder where you want to save the file, the file name and the file type.
- Page 40 Projector Mode C C Record drawing data in IPB document Create an IPB document to record work performed on the Interactive Panaboard. Clicking (REC Start) in the Desktop Drawing Tool will record the Desktop image at that moment as a background and any handwritten lines drawn or erased on the Desktop on a page in stroke units.
- Page 41 Note CDo not change the Desktop resolution while recording data. If changed, the Desktop image will not be displayed properly in the View window. Remark: CWhile recording data, page numbers can be verified by starting to record data, the data value is "0" and will change to "1" when The value will then count up for each page break.
-
Page 42: Cabout View Window
Projector Mode About View window Desktop background data and data of handwritten lines recorded using the Desktop Drawing Tool can be displayed in the View window as well as browsed, reproduced and edited. In the View window, display and edit of the IPB documents which is recorded by the Desktop Drawing Tool are possible. -
Page 43: Whiteboard Mode
Whiteboard Mode Basic operation flow in Whiteboard mode This section explains the flow of basic operations when using the Interactive Panaboard Software in the Whiteboard mode. We recommend trying the operations in accordance with the following steps to help you completely understand the operations in the Whiteboard mode. - Page 44 Whiteboard Mode C C Save drawing data in a file All drawing and erasing operations of the Interactive Panaboard which are reproduced on a page in the Whiteboard window are automatically recorded. And if the data is saved in the Interactive Panaboard format file (extension ".ipb", referred to as IPB documents), the details of meetings and discussions written in the Panaboard can be played back and edited later.
-
Page 45: Cabout Whiteboard Window
About Whiteboard window Whiteboard window is a function to reproduce the drawn lines by using the Electronic Pen and the Electronic Eraser onto the Interactive Panaboard to the computer screen. Recorded image data can be saved as IPB document. So that you can see the file later. The following functions are available;... -
Page 46: View Window Or Whiteboard Window Operation
View Window or Whiteboard Window Operation Differences between the View window and the Whiteboard window The View window of the Projector mode and the Whiteboard window of the Whiteboard mode are windows which function to display and edit IPB documents in which the contents of work performed on the Interactive Panaboard are recorded. - Page 47 Export Image: Output the page to the image file (Bitmap, JPEG, TIFF). HTML: Output the page to the HTML file. Close View window: Close the View window. (View window only) Close Whiteboard window: Close the display of the Whiteboard window. [Edit] menu Undo: Return the drawing lines line by line.
-
Page 48: Ctool Bars
View Window or Whiteboard Window Operation Main Toolbar: Page/Play: Markers/Eraser: Status Bar: [Settings] menu Information: Play: Markers and Eraser: Change the color and size of the marker and size of the eraser. Export Image: File: Options: [Help] menu Help Topics: About: Tool bars Following menus can be used in the View window or Whiteboard window. -
Page 49: Ccreate An Ipb Document (Whiteboard Window Only)
CMarkers/Eraser Toolbar Black Marker Arrow To display a Toolbar, click the [View] menu and then click the Toolbar you want to display (any one of [Main], [Page/Play], [Markers/Eraser]) and add a check mark. If the Toolbar is already displayed, add a check mark next to that Toolbar. To turn off the Toolbar, click [View] menu and remove the check mark from the Toolbar you want to hide. -
Page 50: Csave The Ipb Document
View Window or Whiteboard Window Operation Remark: CTo open a recently opened file, click the file name you want to open in the [File] menu. Eight recently opened IPB documents will be displayed in the [File] menu. CThe IPB documents can also be opened by double-clicking the file icon in the file system. Whether an IPB document is created in Projector mode or Whiteboard mode, the contents are managed internally and when opened, the mode they were created in will be switched to automatically. - Page 51 Remark: CWhen saving multiple pages, files for a certain number of pages (for example, n pages) are created and 2 digits "01, 02, --- 0n" to represent the page are added on the end of the file name. CSettings such as size and compression when saving the IPB document as an image file are managed in [Export Image...] in the [Settings] menu.
- Page 52 View Window or Whiteboard Window Operation [Export Contents] group Thumbnail Image: Page Date: Created Date: Modified Date: Participants: Manager: Subject: Description: Contacts: Company: Note CWe recommend saving HTML files in folders where HTML files exported from other IPB documents are not stored.
-
Page 53: Cchange Display Method
Change display method C C Display expanded/reduced page You can expand the page and display a portion of the page larger or reduce the page and display the entire page. (1) Position the cursor over [Zoom] in the [View] menu and click the percentage (%) you want to display. -
Page 54: Cswitch A Page Of The Ipb Document
View Window or Whiteboard Window Operation Switch a page of the IPB document C C Display first page (1) Click [Go to First Page] in the [Page/Play] menu. C C Display previous page (1) Click [Go to Previous Page] in the [Page/Play] menu. C C Display next page (1) Click [Go to Next Page] in the [Page/Play] menu. - Page 55 (4) To erase handwritten lines, click C C The shape of the mouse cursor changes to (5) Drag the mouse to the area on the page you want to erase. Remark: CTo return to the state before the changes, click [Undo] in the [Edit] menu. CThe width and color of the markers and the size of the eraser can be changed.
- Page 56 View Window or Whiteboard Window Operation C C Delete currently displayed page (1) Display the page you want to delete in the main view. (2) Click [Delete Current Page] in the [Edit] menu. C C A dialog box will be displayed asking you to confirm the delete. (3) Click the [OK] button to delete.
-
Page 57: Cplayback The Ipb Document
C C Copy selected page range to other application by dragging and dropping You can copy data to other applications by dragging and dropping the selected page area. To perform this operation, the application copied to must support OLE (Object Linking and Embedding). (1) Open the file where the data will be copied to and adjust the position of the application window such that the page to be copied and the file to be copied to are displayed in the screen. -
Page 58: Cprint The Ipb Document
View Window or Whiteboard Window Operation Print the IPB document C C Confirm print image of the IPB document before printing (1) Click [Print Preview] in the [File] menu. C C Switch to the Print Preview screen. (2) Click the [Close] button to exit the Print Preview and return the display mode to the original state. - Page 59 [Summary] Enter a summary of the recorded meeting here. Title: Enter the title of the meeting. Participants: Enter the participants of the meeting. Company: Enter the name of the company. Manager: Enter the individuals responsible for the contents of the meeting. Create On: Automatically displays the date and time the IPB document was created.
- Page 60 View Window or Whiteboard Window Operation (2) To change the width of the markers, either enter a width in right side of the marker whose width will be changed or click the up/down arrows on the right side to set a desired width. To change the color of the markers, click marker whose color will be changed.
- Page 61 (2) The following items can be set. [Export Image Files] group Image Size: To change the size when saving a page as an image file, enter a desired width and height. Check (turn ON) the [Constrain Proportions] check box when setting the aspect ratio of the page to an identical value even if the page dimensions change while saving it as the image file.
- Page 62 View Window or Whiteboard Window Operation C C Option setting Set the display method of the file name in the Title bar and the display unit system. (1) Click [Options...] in the [Settings] menu. C C The Options dialog box will appear. (2) The following items can be set.
-
Page 63: Remote Conferencing Using Microsoft ® Netmeeting
Remote Conferencing using Microsoft ® About NetMeeting ® ® Microsoft NetMeeting is a software to share information with the computer connected in the network. When the Interactive Panaboard is connected with the computer connected in the network and NetMeeting possible to confer on the remote place using the Projector mode or the Whiteboard mode of the Interactive Panaboard Software. - Page 64 Remote Conferencing using Microsoft Note CYou cannot call people on the Internet that you have located on Wed-based directory servers if your Internet connection uses a proxy server that does not support NetMeeting CWhen you share a program and decide to allow someone to control it, remote users can use the File Open and File Save dialog boxes in your program to gain access to or delete files on your computer or network.
-
Page 65: Daily Care And Maintenance
Daily Care and Maintenance Always turn off the power switch and unplug the power plug when cleaning outside and inside the unit. Cleaning the screen and the unit Gently wipe the screen film and unit with a water-dampened cloth that has been thoroughly wrung. Use a commercially available white board cleaner for hard-to-clean stains. - Page 66 Daily Care and Maintenance Clean the Printer Head Dampen the tip of a cotton swab in ethyl alcohol and gently wipe the printer head. Note CNever touch the printer head or the surrounding area with your hands as this may disable copying.
-
Page 67: Troubleshooting
Replacing the Batteries in the Electronic Pen and the Electronic Eraser As the lifetime of the batteries in the Electronic Pen or the Electronic Eraser comes near to the end, the message “Low Battery” appears on the PC screen to which the electronic print board is connected using interactive functions. - Page 68 Troubleshooting Symptom The screen does not advance when the COPY or ADVANCE keys are pressed. Contrast/Remaining film indicator flashes. The computer can not recognize the electronic print board when the interactive function is used. The Electronic Pen position may shift when the Projector mode is used.
-
Page 69: Cmeanings Of Various Displays
Meanings of various displays The following table describes the meaning of each of the symbols which may flash in the Multi-Copy/Error indicator. Indication Cause Out of paper. The printer door is not closed securely. The thermal transfer film is slack or has run out. -
Page 70: Specifications
It is not always possible to normally detect the position within 100 mm (3 of the position receiver and 35 mm (1 48 hours [Continuously at 25 ° C (77 ° F)] When using Panasonic “LR03” (“AAA” size) alkaline batteries. KX-BP800 AC100 -120 V, 50/60 Hz 2.2 A/ 0.1 A... -
Page 71: Cconsumable And Accessories
The Electronic Pen [a marker for interactive (Small) inserted in the pen holder] and the Electronic Eraser are used with the interactive function.\ CPC Interface (Option) When the optional PC Interface Kit (KX-BP095) is used, you can scan monochrome images from the KX-BP800 into ® a computer running Microsoft Windows KX-BP800. -
Page 72: Installation Manual
Assembling the Print Board ... 73 ..... . . CAssembly Print Board Operations Check . -
Page 73: Assembling The Print Board
Assembling the Print Board Assembly Assembly of the optional stand or wall-mounting kit. If you are using a stand, refer to page 78. If you are using a wall-mounting kit, refer to page 81. Remove the print board from the shipping box. Remove the joints, then remove the print board from the shipping box. - Page 74 Assembling the Print Board Attach the print board. If you are using a stand: 1. Hang the print board on the attachment fixtures of the stand. 2. Use the two wing bolts (M5 12 mm) provided with the stand to fasten the print board to the lower stand attachment fixtures as shown below.
- Page 75 Attach the power cord. 1. Securely fit the supplied power cord into the AC inlet on the printer unit. AC Inlet 2. Fit the power cord into the cord holder. Do not force it. Wipe the screen film surface. Wipe the screen film gently with a water-dampened cloth that has been thoroughly wrung.
-
Page 76: Print Board Operations Check
Print Board Operations Check After assembling the print board, perform the procedures presented in the following table to make sure it functions properly. Normal print board operations check Step Turn on the power switch. Open the printer door and attach the supplied thermal transfer film, then close the printer door. -
Page 77: C Interactive Operations Check
Interactive operations check Connect the print board to the PC according to the instructions of page 26 using the supplied interactive cable. Install the software on the PC according to the instructions of page 27 and check that the interactive function operates. If the Electronic Pen position shifts, adjust the position according to the instructions of page 31. -
Page 78: Assembling The Optional Stand (Kx-Bp065)
Assembling the Optional Stand Accessories The package box for the optional stand includes the parts noted below; please confirm that all parts are present before beginning installation. Part name Stand base Pipe Cover Side bar Side bar Screw M8 45mm (1 Fixture (left) Fixture... -
Page 79: Cassembly
Assembly Assembling the stand Assembling the fall-prevention extension legs. The fall-prevention extension legs increases the safety of the electronic print board. Fall-prevention extension legs 1 Do not tighten the screw Assembling the Optional Stand CCaster locks are attached to the back side. Locking casters side. - Page 80 Assembling the Optional Stand Attach the attachment fixtures Assemble and install the print board. Please refer to assembly instructions on page 74. (KX-BP065) with the four wing-bolts.
-
Page 81: Wall-Mounting Kit (Kx-B063)
[ KX-BP800 is 103 kgf (227 Ibs). ] 2. The position of the intended installation is of adequate size for the selected Panaboard. [ KX-BP800 is 1,575 mm X 1,524 mm (5'2" 5').] 3. An outlet is within 3 m (9'10 Accessories The package includes the parts noted below ;... -
Page 82: Cwall-Mounting Procedure
BRefer to the section "Attaching the wall-mounting fixtures" (pages 83 and 84) for drilling in the wall and attaching the mounting fixtures. Mount the print board. (Please refer to page 74.) 1,005N [ 103 kgf (227 Ibs) ] for KX-BP800. Wall-mounting template (provided with KX-BP800) -
Page 83: Cattaching The Wall-Mounting Fixtures
Attaching the wall-mounting fixtures The electronic print board must be mounted with the method most suited to the material of the wall. Three methods are presented here. (Other options may be available in your area.) BAttaching to metal or concrete walls Stud plugs (sold in stores) are needed. - Page 84 Wall-mounting Kit (KX-B063) BAttaching to plasterboard walls Split-wing toggles (sold in stores) are needed. Plasterboard split-wing toggle Arms Arms BAttaching to wooden walls Use wood screws (sold in stores). Wooden wall Insert each bolt through a hole in the wall-mounting fixture and into the hole in the wall beneath so that the arms of the split-wing...
- Page 85 MEMO...
- Page 86 These Operating Instructions are printed on recycled paper. Panasonic Digital Imaging Solutions Company Business Unit of Matsushita Electric Corporation of America Two Panasonic Way, Secaucus, New Jersey 07094 © 2001 Kyushu Matsushita Electric Co., Ltd. All Rights Reserved. PBQX50256ZB K0601E0...