Table of Contents
Advertisement
Advertisement
Table of Contents
Troubleshooting

Related Manuals for Omron BP742CANN


Summary of Contents for Omron BP742CANN
- Page 1 ® INSTRUCTION MANUAL 5 series Blood Pressure Monitor Model BP742CANN...
-
Page 2: Table Of Contents
TABLE OF CONTENTS Before using the monitor INTRODUCTION..................3 IMPORTANT SAFETY INFORMATION............4 Operating Instructions 1. KNOW YOUR DEVICE ................8 1.1 Display symbols...............10 1.2 Before Taking a Measurement..........12 2. PREPARATION ..................13 2.1 Battery Installation ..............13 2.2 Setting the Date and Time ............14 3. -
Page 3: Introduction
INTRODUCTION ® Thank you for purchasing the OMRON BP742CANN Blood Pressure Monitor. Your new blood pressure monitor uses the oscillometric method of blood pressure measurement. This means the monitor detects your blood movement through your brachial artery and converts the movements into a digital reading. An oscillometric monitor does not need a stethoscope so the monitor is simple to use. -
Page 4: Important Safety Information
IMPORTANT SAFETY INFORMATION Warning: Indicates a potentially hazardous situation which, if not avoided, could result in death or serious injury. (General Usage) DO NOT adjust medication based on measurement results from this blood pressure monitor. Take medication as prescribed by your physician. Only a physician is qualified to diagnose and treat High Blood Pressure. - Page 5 IMPORTANT SAFETY INFORMATION Caution: Indicates a potentially hazardous situation which, if not avoided, may result in minor or moderate injury to the user or patient or damage to the equipment or other property. (General Usage) Always consult your physician. Self-diagnosis of measurement results and self- treatment are dangerous.
- Page 6 Wipe the dust off from the power plug. Unplug monitor when not in use. Disconnect the power plug before cleaning. Use only an OMRON AC adapter designed for this device. Use of unsupported adapters may damage and/or may be hazardous to the device. (Battery Usage) Do not insert the batteries with their polarities incorrectly aligned.
- Page 7 IMPORTANT SAFETY INFORMATION General Precautions • Do not forcibly crease the arm cuff or the air tube excessively. • Do not press the air tube while taking a measurement. • To unplug the air plug, pull on the air plug at the connection with the monitor, not the tube itself.
-
Page 8: Know Your Device
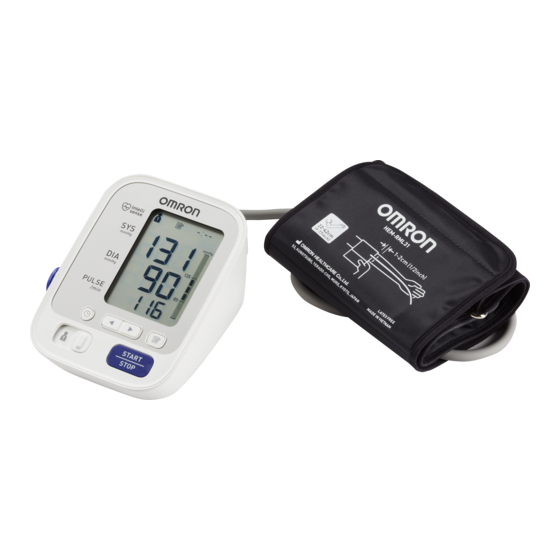
1. KNOW YOUR DEVICE Contents: Monitor, arm cuff, battery set, instruction manual, quick start guide Monitor: A. Display G. Battery compartment B. Up/Down buttons H. Air jack AC adapter jack C. USER ID selection switch D. Date/Time setting button (for optional AC adapter) E. - Page 9 1. KNOW YOUR DEVICE Display: M. USER ID symbol R. Memory symbol N. Systolic blood pressure S. Average value symbol O. Diastolic blood pressure T. Date/Time display P. Low battery symbol U. Movement error symbol Q. Heartbeat symbol V. Irregular heartbeat symbol (Flashes during measurement.) W.
-
Page 10: Display Symbols
1. KNOW YOUR DEVICE 1.1 Display symbols Irregular Heartbeat Symbol ( Normal Heartbeat When the monitor detects an irregular rhythm Pulse two or more times during the measurement, the irregular heartbeat symbol will appear on Blood pressure the display with the measurement values. Irregular Heartbeat An irregular heartbeat rhythm is defined as a Short Long... - Page 11 1. KNOW YOUR DEVICE Blood Pressure Level Indicator 2013 ESH/ESC Guidelines for the management of arterial hypertension Definitions of hypertension by office and home blood pressure levels Office Home Systolic Blood Pressure ≥ 140 mmHg ≥ 135 mmHg Diastolic Blood Pressure ≥...
-
Page 12: Before Taking A Measurement
1. KNOW YOUR DEVICE 1.2 Before Taking a Measurement To help ensure an accurate reading, follow these directions: 1. Avoid bathing, drinking alcohol or caffeine, smoking, exercising and eating for 30 minutes before taking a measurement. Rest for at least 15 minutes before taking the measurement. -
Page 13: Preparation
2. PREPARATION 2.1 Battery Installation Remove the battery cover. Insert 4 “AA” batteries as indicated in the battery compartment. Replace the battery cover. Notes: • When the low battery symbol ( ) appears on the display, turn the monitor off, then replace all batteries at the same time. Long life alkaline batteries are recommended. -
Page 14: Setting The Date And Time
2. PREPARATION 2.2 Setting the Date and Time Set the monitor to the correct date and time before taking a measurement for the first time. Press the button. Push to change the year. Push button to confirm the year and then the month flashes. Repeat the same steps to change the month, day, hour, and minute. -
Page 15: Using The Device
3. USING THE DEVICE 3.1 Applying the Arm Cuff Remove tight-fitting clothing or tight rolled up sleeve from your left upper arm. Do not place the arm cuff over thick clothes. Insert the air plug into the air jack securely. - Page 16 •The blood pressure can differ between the right arm and the left arm, and the measured blood pressure values can be different. OMRON recommends to always use the same arm for measurement. If the values between both arms differ substantially, please check with your physician which arm to use for your...
-
Page 17: How To Sit Correctly
3. USING THE DEVICE 3.2 How to Sit Correctly To take a measurement, you need to be relaxed and comfortably seated, under comfortable room temperature. Avoid bathing, drinking alcohol or caffeine, smoking, exercising or eating 30 minutes before taking a measurement. •... -
Page 18: Taking A Measurement
3. USING THE DEVICE 3.3 Taking a Measurement Notes: • To stop the measurement, press the START/STOP button once to deflate the arm cuff. • Remain still and quiet while taking a measurement. The monitor is designed to take measurements and store the measurement values in the memory for 2 people using USER ID 1 and USER ID 2. - Page 19 3. USING THE DEVICE Press the START/STOP button. The arm cuff will start to inflate automatically. START INFLATE DEFLATE COMPLETE If your systolic pressure is more than 210 mmHg After the arm cuff starts to inflate, press and hold the START/STOP button until the monitor inflates 30 to 40 mmHg higher than your expected systolic pressure.
- Page 20 3. USING THE DEVICE Remove the arm cuff. Press the START/STOP button to turn the monitor off. The monitor automatically stores the measurement result in its memory. It will automatically turn off after 2 minutes. Note: Wait 2-3 minutes before taking another measurement. Waiting between measurements allows the arteries to return to the condition prior to taking a measurement.
-
Page 21: Using The Guest Mode
3. USING THE DEVICE Using the Guest Mode The monitor stores measurement values for 2 users in the memory. The guest mode can be used to take a single measurement for another user. No measurement values are stored in the memory when the guest mode is selected. Press and hold the START/STOP button for more than 3 seconds. -
Page 22: Using The Memory Function
3. USING THE DEVICE 3.4 Using the Memory Function The monitor automatically stores the results up to 50 sets for each user (1 and 2). It can also calculate an average value based on the last 3 measurement values taken within 10 minutes. - Page 23 3. USING THE DEVICE To View the Measurement Values Stored in Memory Select your User ID (1 or 2). Press the button. The Memory number appears for a second before the pulse rate is displayed. Alternating date/time The newest set is numbered “1”. display Press the button to view the values stored in memory.
- Page 24 3. USING THE DEVICE To View the Average Value Select your User ID (1 or 2). Press and hold the button for more than 3 seconds. Notes: • If the previous measurement was taken without setting the date and time, the average value is not calculated.
-
Page 25: To Delete All The Values Stored In Memory
3. USING THE DEVICE To Delete All the Values Stored in Memory The values stored in the memory are deleted by USER ID. Select your User ID (1 or 2). Press the button, while the memory symbol appears. While holding the button down, press the START/ STOP button for more than ... -
Page 26: Error Messages And Troubleshooting
4. ERROR MESSAGES AND TROUBLESHOOTING 4.1 Error Messages Error Display Cause Solution Remove the arm cuff. Wait 2 - 3 minutes and then take another Irregular heartbeats are measurement. Repeat the steps detected. in section 3.3. If this error continues to appear, contact your physician. - Page 27 4. ERROR MESSAGES AND TROUBLESHOOTING Error Display Cause Solution Insert the plug securely. Air plug disconnected. Refer to section 3.1. Apply the arm cuff tighter. Arm cuff is applied too loosely. Refer to section 3.1. Replace the arm cuff with a new Air is leaking from the arm cuff.
- Page 28 4. ERROR MESSAGES AND TROUBLESHOOTING Error Display Cause Solution Repeat measurement. Remain still and do not talk during Movement during measurement. measurement. Refer to section 3.3. Remove any clothing interfering Clothing is interfering with the with the arm cuff. arm cuff. Refer to section 3.1.
-
Page 29: Troubleshooting
4. ERROR MESSAGES AND TROUBLESHOOTING 4.2 Troubleshooting Problem Cause and Solution Replace all batteries with new ones. No power. Check the battery installation for proper placement of the battery polarities. No display appears on the monitor. Refer to section 2.1. Blood pressure varies constantly. -
Page 30: Maintenance And Storage
5. MAINTENANCE AND STORAGE 5.1 Maintenance To protect your device from damage, please observe the following: • Store the device and the components in a clean, safe location. • Do not use any abrasive or volatile cleaners. • Do not wash the device and any components or immerse them in water. -
Page 31: Storage
5. MAINTENANCE AND STORAGE 5.2 Storage Unplug the air plug from the air jack. Gently fold the air tube into the arm cuff. Note: Do not bend or crease the air tube excessively. Do not store the device in the following situations: •If the device is wet. -
Page 32: Optional Medical Accessories
5. MAINTENANCE AND STORAGE 5.3 Optional Medical Accessories Arm cuff Arm circumference Arm circumference 7" - 9" (17 - 22 cm) 9” - 17” (22 - 42 cm) CD-CS9 CD-WR17 (Model: HEM-CS24) (Model: HEM-RML31) AC Adapter HEM-ADPTW5... -
Page 33: Using The Optional Ac Adapter
5. MAINTENANCE AND STORAGE Using the Optional AC Adapter Insert the AC adapter plug into the AC adapter jack on the rear side of the monitor. Plug the AC adapter into an electrical outlet. To disconnect the AC adapter, unplug the AC adapter from the electrical outlet first, and then remove the AC adapter plug from the monitor. -
Page 34: Specifications
6. SPECIFICATIONS Model BP742CANN HEM-7131-CA Display LCD digital display Measurement range Pressure: 0 to 299 mmHg Pulse: 40 to 180 beats / min. Pressure: 3 mmHg or 2% of reading Accuracy Pulse: 5% of display reading Inflation Fuzzy-logic controlled by electric pump... - Page 35 6. SPECIFICATIONS Notes: • These specifications are subject to change without notice. • In the clinical validation study, the 5th phase was used on 85 subjects for determination of diastolic blood pressure. • This device has not been validated for use on pregnant patients.
-
Page 36: Fcc Statement
7. FCC STATEMENT FCC CAUTION Changes or modifications not expressly approved by the party responsible for compliance could void the user’s authority to operate the equipment. Note: This equipment has been tested and found to comply with the limits for a Class B digital device, pursuant to part 15 of the FCC Rules. -
Page 37: Limited Warranty
PURPOSE. IMPLIED WARRANTIES AND OTHER TERMS THAT MAY BE IMPOSED BY LAW, IF ANY, ARE LIMITED IN DURATION TO THE PERIOD OF THE ABOVE EXPRESS WARRANTY. OMRON SHALL NOT BE LIABLE FOR LOSS OF USE OR ANY OTHER SPECIAL, INCIDENTAL, CONSEQUENTIAL OR INDIRECT COSTS, EXPENSES OR DAMAGES. - Page 38 8. LIMITED WARRANTY This warranty provides you with specific legal rights, and you may have other rights that vary by jurisdiction. Because of special local requirements, some of the above limitations and exclusions may not apply to you. FOR CUSTOMER SERVICE www.omronhealthcare.ca Visit our web site at: 1-800-634-4350...
-
Page 39: Guidance And Manufacturer's Declaration
• The Essential Performance of the BP742CANN including AC-adapter is to measure a blood pressure and a pulse rate and using the memory function. The BP742CANN including AC-adapter may be interfered with by other equipment, even if that other equipment complies with CISPR EMISSION requirements. - Page 40 Guidance and manufacturer’s declaration - electromagnetic emissions OMRON BP742CANN including AC-adapter is intended for use in the electromagnetic environment specified below. The customer or the user of this OMRON BP742CANN including AC-adapter should assure that it is used in such environment.
- Page 41 Guidance and manufacturer’s declaration - electromagnetic immunity OMRON BP742CANN including AC-adapter is intended for use in the electromagnetic environment specified below. The customer or the user of this OMRON BP742CANN including AC-adapter should assure that it is used in such environment.
- Page 42 Guidance and manufacturer’s declaration - electromagnetic immunity OMRON BP742CANN including AC-adapter is intended for use in the electromagnetic environment specified below. The customer or the user of this OMRON BP742CANN including AC-adapter should assure that it is used in such environment.
- Page 43 If the measured field strength in the location in which the OMRON BP742CANN including AC-adapter is used exceeds the applicable RF compliance level above, the OMRON BP742CANN including AC-adapter should be observed to verify normal operation.
- Page 44 OMRON BP742CANN including AC-adapter OMRON BP742CANN including AC-adapter is intended for use in an electromagnetic environment in which radiated RF disturbances are controlled. The customer or the user of this OMRON BP742CANN including AC-adapter can help prevent electromagnetic interference by maintaining a...
- Page 45 Manufactured for: OMRON HEALTHCARE Co., Ltd. 53, Kunotsubo, Terado-cho, Muko, Kyoto, 617-0002 JAPAN Distributed by: OMRON HEALTHCARE, INC. 1925 West Field Court, Lake Forest, IL 60045 U.S.A. www.omronhealthcare.ca © 2015 OMRON HEALTHCARE, INC. Made in Vietnam 9100846-1A...