Palm Treo Treo 680 User Manual
Palm user guide smartphone treo 680
Hide thumbs
Also See for Treo Treo 680:
- User manual (306 pages) ,
- Starting manual (52 pages) ,
- Read this first manual (10 pages)
Table of Contents
Advertisement
Quick Links
Advertisement
Table of Contents

Related Manuals for Palm Treo Treo 680


Summary of Contents for Palm Treo Treo 680
- Page 1 ® ™ Your Palm Treo Smartphone User Guide...
- Page 2 Disclaimer and limitation of liability Palm, Inc. and its suppliers assume no responsibility for any damage or loss resulting from the use of this guide. Palm, Inc. and its suppliers assume no responsibility for any loss or claims by third parties that may arise through the use of this software.
-
Page 3: Table Of Contents
Synchronizing information—the basics ........23 Chapter 2: Moving around on your Palm Moving around the screen . - Page 4 Customizing phone settings ......... . . 69 What are all those icons? .
- Page 5 Installing applications ..........170 Removing applications .
- Page 6 Third-party applications ..........237 Error messages .
-
Page 7: Welcome
Email application for receiving and • sending email (business and personal) Palm OS ® personal info applications for • storing your appointments, to-do lists, memos, and more Expansion card slot that accepts cards •... - Page 8 Read This First setup booklet • Quick Reference Guide • Palm Software Installation CD, which • includes the following: ® Palm Desktop software • Bonus software for your smartphone • Your Palm Treo 680 Smartphone User • Guide (this guide) Palm warranty •...
-
Page 9: What Do I Need To Get Started
What do I need to get started? This guide helps you set up your Treo 680 and quickly learn to use it. To get started, you need all the items that came in the Treo 680 box (see What’s in the box? ), plus the following: A SIM card. - Page 10 W E L C O M E...
-
Page 11: Chapter 1: Setting Up
Setting up Congratulations on the purchase of your new Palm smartphone. You’re about to discover the many things about your smartphone that will help you better manage your life and have fun, too. As you become more familiar with your smartphone, you’ll want to personalize the settings and add applications to make it uniquely yours. - Page 12 In this chapter Treo 680 overview ........7 Inserting the SIM card and battery.
-
Page 13: Treo 680 Overview
Side button Send Phone Protect your screen. Be careful to store your smartphone away from items that might scratch or crush the screen. Visit www.palm.com/treo680gsm to find carrying cases and other useful accessories. 5-way navigator and Earpiece Center button Power/End... - Page 14 S E T T I N G U P Back view Stylus Self-portrait mirror Camera lens Expansion slot door The Treo 680 speaker IMPORTANT includes a large magnet, so be sure to keep your smartphone away from credit cards or other items that could be demagnetized.
-
Page 15: Inserting The Sim Card And Battery
Top view Infrared (IR) port Ringer switch The Ringer switch silences all DID YOU KNOW sounds at once. You don’t need to hunt for Off buttons all over the device. Inserting the SIM card and battery Your SIM card contains account information such as your phone number and voicemail access number. - Page 16 S E T T I N G U P 4 Align the notch on the SIM card with the notch in the SIM tray. Insert the notched end of the SIM card into the SIM tray, and then press the other end of the card until it falls into place.
-
Page 17: Charging The Battery
replacement batteries, see Replacing the battery. 7 Slide the battery door onto the back of the smartphone until it clicks into place. 8 Your Treo screen wakes up and begins the setup process. When the language selection screen appears, select the language you want to use, and then follow the onscreen instructions to set up your Treo. - Page 18 S E T T I N G U P 1 If necessary, connect the international adapter to the AC charger plug. 2 Plug the AC charger into a wall outlet. 3 Connect the charger cable to the bottom of your smartphone. Make sure the arrow on the connector is facing up, toward the screen.
-
Page 19: Maximizing Battery Life
If the battery is fully drained, it may take a few moments for the indicator light to turn on when you begin charging. If the indicator light does not turn on when you connect your smartphone to the AC charger, double-check the cable connection and the electrical outlet to which it is connected. - Page 20 As with any mobile phone, if you are in • an area with no wireless coverage, your Treo searches for a signal, which www.palm.com/ consumes power. If you cannot move to an area of better coverage, temporarily turn off your phone. While your phone is off, you can continue to use the nonwireless features of your Treo.
-
Page 21: Making Your First Call
Making your first call 1 Press Phone 2 If prompted, press Center off Keyguard (see Locking your keyboard (Keyguard) for more info). If Check SIM Card appears in the title bar, see Inserting the SIM card and battery. If No Service appears in the title bar, you’re outside a wireless coverage area. -
Page 22: Setting Up Your Computer For Synchronization
It’s easier to enter names, phone numbers, and addresses using the big keyboard on your computer than the keyboard on your smartphone. Whether you enter or change information on your ® computer (using Palm Desktop software or Microsoft Outlook for... - Page 23 • CD drive • Available USB port • Upgrading from another Palm OS If you are setting up your first Palm NOTE ® device, skip ahead to Installing the desktop synchronization software. You can transfer all compatible applications and information from your previous Palm OS device—whether it’s a handheld or a...
- Page 24 C:\Program Files\Palm\<device name>\PalmOS5 Incompatible Apps. (Can’t find a Palm folder in Program Files? Then look for a folder labeled palmOne or Handspring instead. For more info, see I can’t find my user folder.)
- Page 25 3 Synchronize your previous device with your previous desktop software to back up your information one last time. 4 Install the desktop synchronization software from your new Palm Software Installation CD (see Installing the desktop synchronization software). 5 During the installation process, sync your Treo 680 with your new desktop software as instructed.
- Page 26 Installing the desktop synchronization software Even if you already own a IMPORTANT Palm OS device and have installed a previous version of the desktop software, you must install the software from the Palm Software Installation CD that came with your Treo 680.
- Page 27 Palm Desktop software or Microsoft Outlook. Whether you select to synchronize NOTE with Microsoft Outlook or Palm Desktop software, Palm Desktop software is still installed on your computer. If you use Outlook as your desktop email application, select Outlook as your desktop synchronization software.
- Page 28 S E T T I N G U P 4 With the sync button facing up, connect the sync cable to the bottom of your smartphone. Do not press the sync button until you are instructed to do so. Sync cable 5 Connect the charger cable to the bottom of your smartphone.
-
Page 29: Synchronizing Information-The Basics
What syncs and where Calendar, Contacts, Memos, and • Tasks sync with Outlook Pictures & Videos syncs with • Palm Desktop All apps sync with Palm Desktop All apps sync with Palm Desktop S E T T I N G U P... - Page 30 For more sync options, including which apps sync, see Synchronizing information— advanced. BEFORE YOU BEGIN you must install Palm Desktop software from the Palm Software Installation CD that came with your Treo 680—even if you sync with Outlook or another third-party application.
-
Page 31: Chapter 2: Moving Around On Your Palm ® Treo ™ 680 Smartphone
Have you ever been to a new city and felt a bit lost until you figured out that the numbered streets run north/south and the avenues run east/west? Learning to move around on your smartphone is similar. Most Palm OS same set of controls. So once you learn how to use these ®... - Page 32 In this chapter Moving around the screen ....... . 27 Using the keyboard .
-
Page 33: Moving Around The Screen
Moving around the screen To move around the Treo 680 screen, you can use the 5-way navigator for one-handed navigation, or you can tap items on the screen with the stylus. With use, you will find your own favorite way to scroll, highlight, and select menu items. - Page 34 M O V I N G A R O U N D O N Y O U R P A L M Highlighting and selecting items On most screens, one item—a button, a list entry, or a check box—is highlighted by default.
- Page 35 Highlighting text You can use the stylus to highlight text on the screen. Tap and drag the stylus across the text • you want to highlight. To highlight a word, double-tap it. • To highlight a paragraph, triple-tap it. • Accessing command buttons In most applications, command buttons such as New, OK, and Details appear at the...
- Page 36 M O V I N G A R O U N D O N Y O U R P A L M Most menu items have menu shortcuts listed in the menu. To use a menu shortcut, press Menu plus the shortcut letter. You don’t have to see the menu item to use the menu shortcut.
-
Page 37: Using The Keyboard
Using the keyboard Option Shift/Find Your keyboard may have a different NOTE layout based on the country where you purchased your smartphone. M O V I N G A R O U N D O N Y O U R P A L M Space ®... - Page 38 M O V I N G A R O U N D O N Y O U R P A L M When using the keyboard, most people find it easiest to hold the Treo with two hands and use the tips of both thumbs to press the keys.
- Page 39 Some application views DID YOU KNOW automatically default to Option Lock, such as the Dial Pad tab in the Phone application or the Calculator. In this case, you do not need to press Option to enter numbers. Entering other symbols and accented characters Symbols and accented characters that do not appear on the keyboard are available by...
- Page 40 M O V I N G A R O U N D O N Y O U R P A L M Symbols and accented characters Enter… Then press select… á à ä â ã å æ Á À Ä Â Ã Å Æ b or B ß...
-
Page 41: Opening Applications
Opening applications When you open an application using a quick button or Applications View, you automatically close the app you were previously using. Phone Calendar M O V I N G A R O U N D O N Y O U R P A L M Using the quick buttons The front of the Treo 680 has three quick buttons—Phone, Calendar, and... - Page 42 M O V I N G A R O U N D O N Y O U R P A L M Each of quick button opens two applications: To access a button’s primary application, • simply press the button. Button To access a button’s secondary •...
- Page 43 Press Applications repeatedly to • cycle through various categories of applications. See Applications settings for more info on categories. Enter the first few letters of the • application’s name to highlight it. For M O V I N G A R O U N D O N Y O U R P A L M example, if you press P , it highlights Phone;...
- Page 44 ® ™ M O V I N G A R O U N D O N Y O U R P A L M T R E O 6 8 0 S M A R T P H O N E...
-
Page 45: Chapter 3: Your Phone
You can creatively manage multiple calls, such as swapping between calls, sending text messages to ignored calls, and creating conference calls with up to five callers. Your Palm perform all these tasks with ease. And you can do more than manage your phone calls, too. You can send... - Page 46 In this chapter Turning your Treo 680 on and off ......41 Making calls ......... . . 43 Receiving calls .
-
Page 47: Turning Your Treo 680 On And Off
Turning your Treo 680 on and off Throughout this guide we use the NOTE term smartphone to describe your device and its physical aspects. We use the term phone to describe the feature of your Treo that lets you connect to your wireless service provider network to make and receive calls and transmit data. - Page 48 Y O U R P H O N E Turning your phone on and off When your phone is on, it is connected to your wireless service provider’s network (provided you are in a coverage area) so that you can make and receive phone calls and use wireless services, such as email, messaging, and the web browser.
-
Page 49: Making Calls
You can choose which tab DID YOU KNOW appears when you press the Phone button. See Customizing the Main tab in the Phone application for details. If you change the default tab, you need to modify the steps in this chapter accordingly. Making calls There are several ways to make a call. - Page 50 Y O U R P H O N E 3 Press Send After you enter a phone number, you can also press Center on the 5-way to select whether you want to make a phone call or send a text message to that number. Dialing by contact name You need to have names and numbers in your contact list before you can make a call...
- Page 51 To restart your search, press Backspace to delete letters you’ve entered. Or press Phone to return to the Main tab in the Phone application. 4 Select the number you want to dial. 5 Press Send to make the call. To see more info for a contact, highlight the name and press Center on the 5-way to view the address, company, and other details.
- Page 52 Y O U R P H O N E Dialing from a web page or message Your Treo recognizes most phone numbers that appear on web pages or in text, email, or multimedia messages. 1 Select the phone number on the web page or in the message.
-
Page 53: Receiving Calls
You can send a text message DID YOU KNOW from Contacts or your Call Log by highlighting a number, pressing Center on the 5-way, and then selecting Message. Receiving calls To receive calls, your phone must be on. This is different from having only the screen turned on (see Turning your phone on and off). -
Page 54: Using Voicemail
Y O U R P H O N E To ignore a call, do one of the following: Send the call to voicemail: Press Power/ or select Ignore. Send the caller a text message: Select Ignore with Text. This option sends the call to voicemail and opens a text message addressed to the caller. - Page 55 Voicemail notification When you have a new voicemail message, you are notified with an Alert dialog box. To dismiss the Alert dialog box, select • To play the message, select Listen. • When you have messages that you have not listened to, a Voicemail appears in the title bar of the Phone application.
-
Page 56: What Can I Do When I'm On A Call
Y O U R P H O N E What can I do when I’m on a call? When you make or receive a call, Active Call View appears. If the screen dims during a call, press any key except Send or Power/End to restore the screen brightness. - Page 57 Lets you make another call while the first call is on hold; see Making a second call for details. For info on handling a second incoming call, see Receiving a second call (call waiting). Opens the Dial Pad so you can use it to dial additional numbers, such as an extension or a response to a voice prompt.
- Page 58 Y O U R P H O N E 1 (Optional) If you want to continue talking while viewing another application, select Speakerphone or connect a headset (see Using a hands-free device). 2 Press Applications 3 Select the icon for the application you want to open.
- Page 59 To disable the Add New Number • prompt, check the Don’t ask me this again box, and then select Cancel. If you don’t add a number right away, follow these steps to add it later. 1 Press Phone 2 Select the Call Log tab.
- Page 60 Y O U R P H O N E waiting tone and the Call Waiting dialog box appears. You can do any of the following to handle the second call: To place the current call on hold and • answer the new call, press Send or select Answer.
- Page 61 If you want to continue a conversation with one of the people on a conference call, you can extract that call from the conference. Select Extract Call (the onscreen button on the far right), and then select the call you want to extract.
-
Page 62: How Many Minutes Have I Used
Y O U R P H O N E 1 Press Phone 2 Press Menu 3 Select Options, and then select Call Preferences. 4 Select the Forward all calls pick list and select Off. 5 Select any of the following pick lists: When busy: Forwards calls if the phone is busy. -
Page 63: Entering Names And Phone Numbers
Entering names and phone numbers Contacts is where you enter information about the people you want to stay in contact with. You can get to this info from the Phone application, to dial phone numbers and create favorites, and from the Messaging and email applications, to send messages. - Page 64 Y O U R P H O N E Add a note to an entry: Select Note Display additional fields for this contact: Select Plus 7 After you enter all the information, select Done. Import contacts from your SIM card quickly and easily.
- Page 65 If you assign pictures to your DID YOU KNOW contacts in Microsoft Outlook or Palm Desktop software and you install the desktop software from the Palm Software Installation CD, the pictures are automatically added to your contact entries on your smartphone when you sync.
- Page 66 4 Select Select Business Card from the Record menu. can beam it to another device with an IR port—provided the device supports beaming with Palm OS Main tab in the Phone application, open the Record menu, and then select Beam Business Card.
-
Page 67: Defining Favorite Buttons
Viewing your SIM Phonebook 1 Press Phone 2 Select the Contacts tab. 3 Press Menu 4 Select Options, and then select Preferences. 5 Make sure the Show SIM Phonebook box is checked. 6 Select OK. 7 In the Contacts list, select the category pick list at the top of the screen and select SIM Phonebook. - Page 68 Record menu and then selecting Organize Favorites. For more info about upgrading, see Upgrading from another ® Palm OS device. Creating a speed-dial favorite button 1 Press Phone 2 Select the Favorites...
- Page 69 7 (Optional) Select More, and then select advanced options: Extra Digits: Defines additional digits to dial, such as a password or extension. To enter a one-second pause, insert a , (comma) between digits. To add a longer pause, either enter more commas, or enter a p to add a 3-second pause.
-
Page 70: Using A Hands-Free Device
Y O U R P H O N E To arrange your favorites, open the Record menu and select Organize Favorites. Highlight the favorite you want to move, and then press and hold Option + Up or Down to move the button to another position. Select Done. - Page 71 Bluetooth wireless technology to listen to music files. To listen to music in stereo, you can purchase the Palm 2-in-1 Stereo Headset. If you want to use a stereo headset with a 3.5mm connector, then you need to purchase a stereo adapter.
- Page 72 Y O U R P H O N E Connecting to a Bluetooth hands-free device Partnership Two devices—for KEY TERM example, your smartphone and a hands-free device—that can connect because each device finds the same passkey on the other device. Once you form a partnership with a device, you don’t need to enter a passkey to connect with that device again.
- Page 73 4 Select Setup Devices. 5 Select Hands-free Setup. 6 Follow the onscreen instructions to create a partnership with the specific hands-free device. When prompted, enter a passkey. Some hands-free devices IMPORTANT have a predefined passkey; if so, you can find the passkey in the documentation for that device.
- Page 74 Y O U R P H O N E earpiece on your Treo. When a call comes in, your smartphone rings and the hands-free device beeps. Even if you answer the call on your Treo, the call goes to the hands-free device. If you prefer to route calls to the earpiece on your Treo, you can change the settings on your smartphone to do this;...
-
Page 75: Customizing Phone Settings
3 Do one of the following: To send all calls to your hands-free device: Check the Always route calls to handsfree box. Select the Auto answer pick list and select whether you want your hands-free device to automatically answer incoming calls and how quickly it answers. - Page 76 Y O U R P H O N E 5 Select the Volume pick list and select the volume level. 6 Select the Vibrate pick list and select when you want your smartphone to vibrate for an incoming call. 7 (Optional) Check the Escalate ring tone volume box if you want the ring to play softly and then increase to full volume the longer it rings.
- Page 77 6 Select Done twice. You can also create a new sound by selecting New in Sound & Alerts Preferences. Selecting Phone alert tones You can set various tones for various types of alerts. 1 Press Phone 2 Press Menu 3 Select Options, and then select Sound Preferences.
- Page 78 Y O U R P H O N E Volume Side button Adjusting ringer volume When a call is not in progress and music is not playing, press the Volume button on the side of your Treo to adjust ringer volume, and then press the Side button to confirm your selection.
- Page 79 You can also set the DID YOU KNOW background for Calendar Agenda View. See Customizing display options for your calendar for details. Fade: Adjusts the intensity level of the wallpaper image. Typing…: Sets whether typing in the Main tab in the Phone app displays the Dial Pad and enters numbers you want to dial, or whether it displays the Contacts tab and starts a contacts...
- Page 80 Y O U R P H O N E Always dial +1 in front of the area code: Adds a 1 in front of 10-digit phone numbers. This option is available only when Dialing from North America is enabled. To 7 digit numbers: Adds a prefix to 7-digit numbers.
-
Page 81: What Are All Those Icons
Your Treo 680 is compatible with select TTY devices. You can connect a TTY/TDD machine to your smartphone through the headset jack, but you cannot use your headset jack with a headset while this mode is enabled. Please check with the manufacturer of your TTY device for connectivity information and to ensure that the TTY device supports digital wireless... - Page 82 Y O U R P H O N E Your phone is on and you are in your wireless service provider’s coverage area. If you are outside a coverage area, No Service or No Service—SOS Only appears instead. No Service means that there is no coverage at all and No Service—SOS Only means that you can call only...
- Page 83 This icon replaces the Bluetooth icon when your smartphone is connected to a Bluetooth hands-free device. This icon appears in dark blue when a call is in progress and in light blue when a call is not in progress. This icon replaces the Bluetooth icon when your smartphone is connected to your computer using a dial-up networking...
- Page 84 Y O U R P H O N E GPRS (General Packet Radio KEY TERM Service) A mobile connectivity technology that provides persistent data connections. (Additional charges may apply.) EDGE (Enhanced Data rate for GSM KEY TERM Evolution) An enhanced version of GPRS that delivers data speeds that are up to three times faster than standard GPRS connections.
-
Page 85: Chapter 4: Your Email And Other Messages
Your email and other messages You already know how efficient email and messaging are for staying in touch. Now your Palm you a new level of convenience: email on the go. Enjoy the ease and speed of communicating with friends, family, and colleagues anywhere you can access your wireless service provider’s data network. - Page 86 In this chapter Which email application should I use? ..... . . 81 The VersaMail application....... . . 81 Messaging .
-
Page 87: Which Email Application Should I Use
VersaMail Application on your computer for info on sending and receiving messages and customizing your VersaMail settings. Windows: Start>Programs>Palm Mac: Insert the Palm Installation CD and click the link to the User Guide for the VersaMail Application in the Documentation folder. - Page 88 Y O U R E M A I L A N D O T H E R M E S S A G E S you want to transfer those settings to your smartphone. You plan to use VersaMail to access •...
- Page 89 Sweden: Bredbandsbolaget, Chello, Com Hem, Tele2, TeliaSonera Mail, Vodafone Euromail, and yahoo!. Switzerland: Bluewin, GMX, green.ch, Orange, Sunrise (my), Sunrise Freesurf, SwissOnline, Tiscali, and yahoo!. Taiwan: HiNet Umail. Thailand: AIS Mail. United Kingdom: Blueyonder, BT Internet, BT Openworld, BT Yahoo!, Clara.net, Demon, Freeserve, Lycos, NTL, O2, Orange, Pipex, Tiscali, UK Online, Virgin, Vodafone, Wanadoo, and...
- Page 90 Y O U R E M A I L A N D O T H E R M E S S A G E S 5 Enter the username for your email account. Your username usually appears before the @ symbol in your email address.
- Page 91 6 Enter the username for your email account. Your username usually appears before the @ symbol in your email address. For some email providers, such as NOTE Gmail, your username is your entire email address. Check with your email provider if you are not sure what to enter as your username.
- Page 92 Y O U R E M A I L A N D O T H E R M E S S A G E S Drafts: Saves the message so you can continue working on it at another time. VersaMail makes up to five DID YOU KNOW attempts to send a message;...
- Page 93 Attaching ringtones 1 Create the message to which you want to attach the ringtone. 2 On the New Message screen, select the red paper clip icon in the upper-right corner. 3 From the Type pick list, select Sounds. Ringtones that are copy-protected appear in the Sounds application with a lock icon.
- Page 94 Y O U R E M A I L A N D O T H E R M E S S A G E S 3 If a large incoming message is truncated, select More When viewing a message, tap the scroll arrows at the top of the screen to view the previous or next message.
- Page 95 Viewing attachments There are a number of attachment types you can open with the built-in software on your smartphone (for example, Microsoft Word, Excel, PowerPoint, and PDF files; ringtones; and photos). 1 From any folder, open the message with the attachment you want to view. Messages with downloaded attachments appear with a paper clip icon to the left of the message icon.
- Page 96 Y O U R E M A I L A N D O T H E R M E S S A G E S The message includes a meeting invitation. This message has high priority. You can rearrange the message list to make it easier to find and view messages.
- Page 97 User Guide for the VersaMail Application on your computer. Windows: Start>Programs>Palm Mac: Insert the Palm Installation CD and click the link to the User Guide for the VersaMail Application in the Documentation folder.
- Page 98 Y O U R E M A I L A N D O T H E R M E S S A G E S 3 Select Auto Sync. 4 Check the Auto-sync box. 5 Select the Every pick list and select the time interval, from 5 minutes to 12 hours.
- Page 99 Setting preferences for getting messages 1 From any mailbox screen, press Menu 2 Select Options, and then select Preferences. 3 Select Incoming. 4 Set any of the following preferences, and then select OK. Get: Indicates whether to get message subjects only or entire messages. Ask Every Time: Indicates if you want to see a dialog box for selecting subjects only or entire messages each...
- Page 100 Exchange Server; information does not sync with the desktop software application on your computer, such as Microsoft Outlook or Palm Desktop software. Other information that is stored on your computer, such as tasks and memos, continues to synchronize with your desktop...
-
Page 101: Messaging
Exchange ActiveSync account, see the User Guide for the VersaMail Application on your computer. Windows: Start > Programs > Palm Mac: Insert the Palm Installation CD and click the link to the User Guide for the VersaMail Application in the Documentation folder. - Page 102 Y O U R E M A I L A N D O T H E R M E S S A G E S If the recipient’s name isn’t in the list • of recent addresses or your Contacts list, enter the phone number or email address.
- Page 103 Multimedia messages consist of text, photos, videos, and sounds presented as one or more slides.You can include any of the following items: Item Supported File Types Pictures JPEG, GIF , WBMP Videos MPEG4, 3GGP , 3GPP2 Ringtones MIDI Sound clips AMR, QCELP 1 Press Messaging 2 Select New.
- Page 104 Y O U R E M A I L A N D O T H E R M E S S A G E S When creating a message, you can preview or delete an item. Highlight the item, press Center on the 5-way, and then select Remove, View, or Play.
- Page 105 Call Back: Dials the sender’s phone • number. Go To Msg: Opens the message so you • can view its full contents. Delete: Moves the message from your • Inbox to the Deleted folder. When you receive a message, you can also press Send to call the sender.
- Page 106 Y O U R E M A I L A N D O T H E R M E S S A G E S To save a sound, press Menu • select Save Sound from the Message menu. You can access saved sounds later by pressing Applications Sounds...
- Page 107 3 Press Menu 4 Select View, and then select Sort by Name or Sort by Date. Deleting messages You can delete several messages at once from any folder by using the Purge command. To delete an individual message, highlight it in the message list, and then select Delete. 1 Press Messaging 2 Select the folder list in the title bar and select the folder that contains the...
- Page 108 Y O U R E M A I L A N D O T H E R M E S S A G E S Continue an existing chat: Select a message that displays the Chat icon. 3 Enter your message. Pale gray text indicates that a message is pending or enroute.
- Page 109 appear in the alert when you receive a new message, or whether you want the alert to hide the text and prompt you to go to the message. Message validity period: Indicates how long you want an outgoing message to be valid. 5 Select the Chat tab and set any of the following preferences for chat sessions.
- Page 110 Y O U R E M A I L A N D O T H E R M E S S A G E S Even when roaming: Indicate whether you want to automatically receive multimedia messages while roaming. Network Configuration: Indicate if you want to use Automatic or Manual message retrieval.
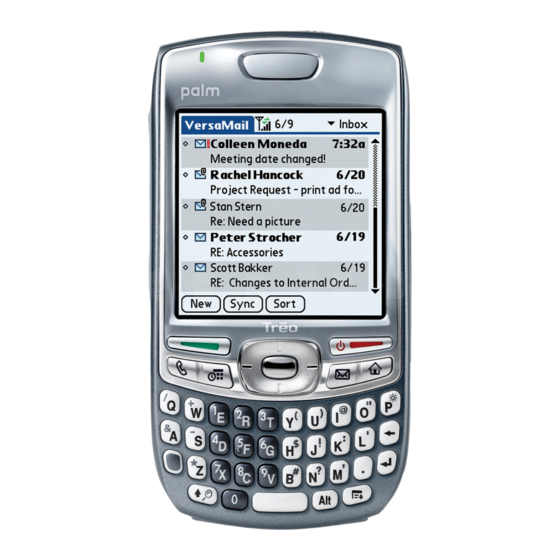
- Page 111 What are all those icons? By default, the Messaging app shows the Inbox folder. To view a different folder, select the folder list in the title bar and select a different folder from the list. The message descriptions in the Inbox, Outbox, and Sent folders show the message status: Unread messages appear in bold.
- Page 112 Y O U R E M A I L A N D O T H E R M E S S A G E S...
-
Page 113: Chapter 5: Your Connections To The Web And Wireless Devices
Benefits Carry the web with you • Store web pages for offline • viewing ® feature of your Palm Treo Connect to Bluetooth headsets • and car kits Connect your computer to the • Internet through your smartphone ™... - Page 114 In this chapter Web browser ......... . 109 Connecting your computer to the Internet through your Treo .
-
Page 115: Web Browser
Web browser ® The Blazer web browser on your Treo provides quick and easy access to web pages. You can view most sites you use on your computer, including those with security and advanced features, such as JavaScript and frames. To browse the web, you must activate data services from your wireless service provider. - Page 116 Y O U R C O N N E C T I O N S T O T H E W E B A N D W I R E L E S S D E V I C E S 1 Press Applications to open the Blazer web browser.
- Page 117 Gets the latest version of the current web page. This is sometimes called refreshing the web page. Opens a list where you can select Fast mode (no images or style sheets) or Normal mode (with images and style sheets). Creating a bookmark With bookmarks, you can instantly access a web page without entering the address every time.
- Page 118 Y O U R C O N N E C T I O N S T O T H E W E B A N D W I R E L E S S D E V I C E S You can make Bookmarks DID YOU KNOW View the default view when you open the...
- Page 119 1 In Bookmarks View, press Menu 2 Select Edit Bookmarks from the Bookmarks menu. 3 Enter a title for this page of bookmarks. 4 Use the stylus to drag and drop a bookmark into the desired slot. You can move a bookmark within the current page or move it to a different bookmark page by dragging and dropping it on one of the Bookmark Page...
- Page 120 Y O U R C O N N E C T I O N S T O T H E W E B A N D W I R E L E S S D E V I C E S 1 Go to the page with the link to the file you want to download.
- Page 121 1 Use the stylus to highlight the text you want to copy. 2 Press Menu 3 Select Edit, and then select Copy. 4 Go to the app in which you want to paste the text and position the cursor where you want to paste the text. 5 Press Menu 6 Select Edit, and then select Paste.
- Page 122 Y O U R C O N N E C T I O N S T O T H E W E B A N D W I R E L E S S D E V I C E S Home Page: Sets the page that appears when you select Restore Default: Selects the original...
- Page 123 Don’t download images! • Determines whether images appear when you load a web page. If you select not to view images, you can still see any image by selecting the placeholder box on the web page. Lots of pretty graphics slowing you down? Browse the web faster by enabling the Don’t download images! option.
-
Page 124: Connecting Your Computer To The Internet Through Your Treo
Y O U R C O N N E C T I O N S T O T H E W E B A N D W I R E L E S S D E V I C E S Connecting your computer to the Internet through... - Page 125 6 Select your computer from the Trusted Devices list, and then select OK. 7 Make up a passkey, enter it on the Bluetooth Security screen, and then select OK. The passkey can be up to 16 numbers. You need this passkey in the next NOTE step, so be sure to write it down exactly.
- Page 126 Y O U R C O N N E C T I O N S T O T H E W E B A N D W I R E L E S S D E V I C E S 2 Double-click the icon or option representing your smartphone.
-
Page 127: Connections With Bluetooth Devices
1 On your computer, right-click the icon or option representing your smartphone. 2 Click Disconnect. Connections with Bluetooth devices With the built-in Bluetooth wireless technology on your Treo, you can connect to a number of Bluetooth devices, including a hands-free device such as a headset or car kit, a printer, or a GPS receiver, as well as to other smartphones and handhelds that are equipped with... - Page 128 Y O U R C O N N E C T I O N S T O T H E W E B A N D W I R E L E S S D E V I C E S Requesting a connection with another Bluetooth device 1 Press Applications...
- Page 129 Some Bluetooth devices IMPORTANT have a preset passkey; if so, you can find the passkey in the documentation for that device. Other devices provide a screen where you enter a passkey that you make up. In either case, you must use the same passkey on both your smartphone and the other Bluetooth device.
- Page 130 Y O U R C O N N E C T I O N S T O T H E W E B A N D W I R E L E S S D E V I C E S Use the Visible option only when you need your smartphone to be accessible for an extended period of time.
-
Page 131: Chapter 6: Your Photos, Videos, And Music
Are you tired of carrying both your MP3 player and your phone? ® ™ Your Palm Treo 680 smartphone solves both problems. You can keep your favorite photos right on your Treo—videos, too. And there's no need to carry an expensive MP3 player; you can play music on your Treo. - Page 132 In this chapter Camera..........127 Pictures &...
-
Page 133: Camera
1 Press Applications and select Camera 2 By default, the Camera application stores pictures you take in the PALM folder on your expansion card (if a card is inserted). Otherwise, Camera stores pictures in the PALM album on your Treo. To store a picture in a different location, select one of the following: <Album name>: Stores the picture in... - Page 134 3 By default, the Camera application stores videos you record in the PALM folder on your expansion card (if a card is inserted). Otherwise, Camera stores...
- Page 135 PALM album on your Treo. To store a video in a different location, select one of the following: <Album name>: Stores the video in the selected album. The storage location is based on the location of the album (smartphone or expansion card).
- Page 136 Y O U R P H O T O S , V I D E O S , A N D M U S I C Opens a dialog box where you can select how you want to send the video: Messaging, Bluetooth, or Email.
-
Page 137: Pictures & Videos
4 Select Done. Pictures & Videos Viewing a picture In addition to viewing the pictures you capture with the built-in camera, you can view pictures captured on many popular digital cameras or downloaded from the Y O U R P H O T O S , V I D E O S , A N D M U S I C Internet. - Page 138 Y O U R P H O T O S , V I D E O S , A N D M U S I C 5 If the picture has a voice caption, select to hear it. 6 Tap the picture or press Center return to Thumbnail View.
- Page 139 3 Press Menu , select Options, and then select Auto-hide Toolbar Off if you want to see the toolbar. 4 Press Space to start the slide show. 5 Press Center to return to the previous view. To set slide show options such as background music and transitions, open the Options menu and select Slideshow Setting.
- Page 140 Y O U R P H O T O S , V I D E O S , A N D M U S I C 1 From the Album list, select the album that contains the picture(s) or video(s) you want to copy.
- Page 141 ® Install the Palm Files application from the Palm Software Installation CD to easily browse and manage files on an expansion card. To change the name, add a caption, or view other picture or video information, highlight (or open) the item, open the Photo (or Video) menu, and select Details.
-
Page 142: Pocket Tunes
QuickTime from the Palm Software Installation CD. On a Windows computer, you can view and edit synchronized pictures and videos in the Palm Media desktop application. ® Open Palm Desktop software and click the Media icon. You can refer to the... - Page 143 5 Click the Rip Music tab, click the Format pick list, and then select mp3. Click OK. 6 Click Tools, and then click Options. 7 Click the Devices tab, select Palm Handheld from the Devices list, and then click Properties. 8 Click the Quality tab, uncheck the Convert files as required by this handheld (recommended) box.
- Page 144 Y O U R P H O T O S , V I D E O S , A N D M U S I C Uncheck 9 Click OK, and then click OK again. You now have set up Windows Media Player to transfer MP3 files to the Pocket Tunes application on your smartphone.
- Page 145 4 Do one of the following: Windows: Open Windows Media Player on your computer. Select the Sync tab, and then select Palm Handheld from the drop-down list. Select Start Sync. The files are transferred to your smartphone. Do not press the sync button on NOTE your cable.
- Page 146 Y O U R P H O T O S , V I D E O S , A N D M U S I C WINDOWS ONLY 1 On your computer, open Windows Media Player. 2 Insert the music CD into your computer’s CD drive.
- Page 147 Choose song: Displays a list of songs to choose from. Pause: Pauses playback. You can also press Space to DID YOU KNOW pause and resume playback, as well as use the 5-way to navigate among songs or pause and resume playback. To adjust the volume during NOTE playback, press the Volume button on the...
- Page 148 Y O U R P H O T O S , V I D E O S , A N D M U S I C 5 Select Add Song. Select the songs you want to include on the playlist. 6 Select Save List.
-
Page 149: Chapter 7: Your Personal Information Organizer
Your personal information organizer Say good-bye to paper calendars and throw away those scribbled to-do lists. Your Palm you need to organize your personal information and keep it with you wherever you go. You never lose your information, even if your battery is completely drained. - Page 150 In this chapter Calendar ..........145 World Clock .
-
Page 151: Calendar
Calendar Calendar is a powerful organizer application that helps you manage your schedule. You can view your calendar by day, week, or month, or as an agenda list that combines your Tasks list and email notifications with your appointments. Schedule repeating meetings or a block of vacation time by creating an event that repeats at an interval you specify. - Page 152 (Not available in Agenda View.) Creating an event If you have several appointments to enter, it’s more efficient to use Palm software or Microsoft Outlook on your computer and then synchronize your Treo 680 with your computer. For more information, see Synchronizing information—the basics.
- Page 153 To automatically assign a time zone to your events, open the Options menu, select Preferences, and check the New events use time zones box. All your new events will be assigned to your local time zone (existing events aren’t affected), and you can change the time zone setting for individual events.
- Page 154 Y O U R P E R S O N A L I N F O R M A T I O N O R G A N I Z E R 7 Enter a description for the event. A diamond appears next to the description of an untimed event.
- Page 155 Color-coding your schedule Use color-coding to quickly spot various types of events. For example, make appointments with family green, coworkers blue, and friends red. Follow these steps to create a category and assign it a color code. 1 In Day View, select an event description or select an empty time slot.
- Page 156 Y O U R P E R S O N A L I N F O R M A T I O N O R G A N I Z E R Customizing display options for your calendar 1 Press Menu 2 Select Options, and then select Display Options.
- Page 157 indicate under which category the event is filed. 6 Select Month and set any of the following options: Show Category List: The Category pick list appears in Month View. Timed Events: The events that are scheduled for a specific time appear in Month View.
-
Page 158: World Clock
Y O U R P E R S O N A L I N F O R M A T I O N O R G A N I Z E R 5 Select the Vibrate pick list and select when you want your smartphone to vibrate for an event alarm. - Page 159 Selecting cities World Clock shows the system date and time above the world map. If you selected the option to get the date and time from the mobile network (see Setting the date and time), your wireless service provider network automatically updates the time display to match the local time when you travel.
-
Page 160: Tasks
Y O U R P E R S O N A L I N F O R M A T I O N O R G A N I Z E R 4 Enter the name of the city. 5 Select Location, select Map, select the location of the city, and then select OK. - Page 161 1 Select the task to which you want to assign details. 2 Select Details. 3 Set any of the following: Priority: Select the priority number for this task (1 is most important). Later you can arrange your tasks based on the importance of each task.
- Page 162 Y O U R P E R S O N A L I N F O R M A T I O N O R G A N I Z E R If you accidentally check off a task and need to uncheck it, highlight the task again and press Center on the 5-way to uncheck it.
- Page 163 Deleting a task 1 Select the task you want to delete. 2 Press Menu 3 Select Delete Task from the Record menu. 4 Select OK. To save memory, you can purge all completed tasks. Open the Record menu and select Purge. Select OK. Customizing Tasks The Tasks Preferences screen enables you to control the appearance of the Tasks list...
- Page 164 Y O U R P E R S O N A L I N F O R M A T I O N O R G A N I Z E R...
-
Page 165: Chapter 8: Your Memos And Documents
Your memos and documents With its ability to store large amounts of important information, your ® ™ Palm Treo 680 smartphone lets you take your office with you— including your Microsoft Office and PDF files. You can keep updated copies of the files on both your smartphone and your computer so that you can work on them in the most convenient location any time. - Page 166 In this chapter Documents To Go Professional ......161 Memos..........162 Voice Memo .
-
Page 167: Documents To Go Professional
Documents To Go Professional The Palm Software Installation CD NOTE includes the Documents To Go software. On your smartphone, the companion for Documents To Go is named Documents and it’s already installed on your smartphone. With the Documents application, you can take your important office info with you. -
Page 168: Memos
Installation CD, you can also click the Documents To Go icon on your computer, and then click Help. Install the Files application from the Palm Software Installation CD to easily browse and manage files on an expansion card. Opening a document... -
Page 169: Voice Memo
You can assign categories to your memos. Open the memo you want to change, select the category pick list at the top of the screen, and select a category. Deleting a memo 1 Open the memo you want to delete. 2 Press Menu 3 Select Delete Memo from the Record menu. - Page 170 Y O U R M E M O S A N D D O C U M E N T S Listening to a voice memo 1 Press Applications Voice Memo 2 In the Voice Memo list, navigate to the voice memo title and then press Center to select it.
-
Page 171: Chapter 9: Your Application And Info Management Tools
Synchronization is a great way to transfer, update, and back up ® info on your Palm Treo simply means that info you entered or updated in one place (your Treo or your computer) is automatically updated in the other. - Page 172 In this chapter Using Find ..........167 Viewing and using the alerts .
-
Page 173: Using Find
Using Find The Find feature locates any text in the built-in applications and databases and in some third-party applications. The Find feature searches for the group of characters you specify, including characters that are part of a word. Find is not case-sensitive. -
Page 174: Calculator
Y O U R A P P L I C A T I O N A N D I N F O M A N A G E M E N T T O O L S In the Alert dialog box, you can do any of the following: Check the box next to the alert to •... - Page 175 Selecting functions in Advanced Calculator Mode 1 Switch to Advanced Mode (see the preceding procedure). 2 Press Menu 3 Select Options, and then select the type of function you want to use: Math: Advanced mathematical functions such as exponents, roots, and logarithms.
-
Page 176: Installing Applications
Treo 680, go to www.palm.com/treo680gsm. The instructions in this section tell NOTE you how to install basic PRC (Palm OS application) and PDB (Palm OS database) files on your Treo. Some Palm OS software uses an installer or wizard to guide you through the process. - Page 177 Palm Quick Install icon on the Windows desktop. Mac: Drag and drop the file(s) onto the Send To Handheld droplet in the Palm folder. 2 Select your device name from the User list, and then click OK. 3 Synchronize your Treo with your computer to install the application(s) on your Treo 680.
-
Page 178: Removing Applications
Want to install an app to an expansion card rather than your smartphone? Windows: Open Palm the file to the Expansion Card pane. Mac: In the menu for Palm Desktop software, click HotSync, select Install Handheld files, and select expansion card as the file’s destination. -
Page 179: Viewing Application Info
Y O U R A P P L I C A T I O N A N D I N F O M A N A G E M E N T T O O L S If you upgraded from a previous version of Palm Desktop, your Backup subfolder may be located in the palmOne or Handspring folder. -
Page 180: Sending Information With Bluetooth Wireless Technology
Y O U R A P P L I C A T I O N A N D I N F O M A N A G E M E N T T O O L S 5 At the bottom of the screen, select the type of information you want to view: Version: The version numbers of applications on your Treo 680. - Page 181 2 Select Bluetooth On. 3 Open an application. 4 Select the entry or category you want to send. You cannot send an item that has a lock next to it. 5 Press Menu 6 Select Send from the leftmost menu. 7 Select Bluetooth, and then select OK.
-
Page 182: Beaming Information
(infrared) port so that you can beam information to another device with an IR port—provided the other device supports IR communications with Palm OS devices. The IR port is located on the top of your Treo 680, next to the Ringer switch, behind... - Page 183 For best results, the path between the two devices must be clear of obstacles, and both devices must be stationary. If you have difficulty beaming, shorten the distance and avoid bright sunlight. Beaming an entry You can beam an individual entry or item such as a contact or a picture.
- Page 184 Y O U R A P P L I C A T I O N A N D I N F O M A N A G E M E N T T O O L S Beaming an application Not all applications can be beamed.
-
Page 185: Synchronizing Information-Advanced
Synchronizing information— advanced Changing which applications sync By default, information from Calendar, Contacts, Memos, Pictures & Videos, and Tasks is updated each time you synchronize your smartphone. You can change which applications synchronize. For example, if you don’t use the Memos application and you want to speed up synchronization, you can turn off synchronization for Memos. - Page 186 4, 5, 6, and 7 for each application you want to change. 9 Click Done. MAC ONLY 1 Double-click the Palm Desktop in the Palm folder. 2 From the HotSync menu, select Conduit Settings. 3 From the User pop-up menu, select your device name.
- Page 187 If you want the information in one NOTE location (smartphone or computer) to completely replace the information in the other location for that app, select one of the two overwrite options. For example, if the Calendar info on your smartphone is accurate but the info on your Mac has become corrupted, select Handheld overwrites Macintosh for the Calendar...
- Page 188 Y O U R A P P L I C A T I O N A N D I N F O M A N A G E M E N T T O O L S After you form a partnership with a device, you can change the Visibility setting back to Hidden.
- Page 189 1 Press Applications and select HotSync 2 Select Local. 3 Select the pick list below the HotSync icon, and then select the name of the PC you set up for Bluetooth synchronization (see Setting up a Bluetooth connection for synchronization). 4 Select the HotSync icon on your smartphone.
- Page 190 Be patient; synchronization may take a few minutes. MAC ONLY 1 Double-click the HotSync manager icon in the Palm folder. 2 Click the HotSync Controls tab, and then select Enabled. 3 Click the Connection Settings tab, and then check the On box next to IR port.
-
Page 191: Using Expansion Cards
Using expansion cards The expansion card slot on your Treo 680 enables you to add SD cards and MultiMediaCard cards to extend the storage capacity of your Treo 680 (expansion cards sold separately). Here are some examples of what SD and MultiMediaCard expansion cards can store: Photos •... - Page 192 Y O U R A P P L I C A T I O N A N D I N F O M A N A G E M E N T T O O L S 2 Hold your Treo with the screen facing you, and hold the card with the label facing you.
- Page 193 2 Select the icon for the application you want to open. 3 Press Center to open the application. Install the Files application from the Palm Software Installation CD to easily browse and manage files on an expansion card. Accessing items stored on an expansion card When an expansion card contains items such as pictures or songs, you can’t view...
- Page 194 Y O U R A P P L I C A T I O N A N D I N F O M A N A G E M E N T T O O L S 1 Press Applications 2 Press Menu 3 Select Copy from the App menu.
- Page 195 3 Select Card Info 4 Press Menu 5 Select Rename Card from the Card menu. 6 Enter a new name for the card. 7 Select OK. If you have trouble copying info to, renaming, or formatting an expansion card, make sure the card is not write-protected. Press Applications and select Card Info.
- Page 196 Y O U R A P P L I C A T I O N A N D I N F O M A N A G E M E N T T O O L S...
-
Page 197: Chapter 10: Your Personal Settings
Your personal settings Customizing your Palm make it match your lifestyle and work even harder for you. On your Treo you can easily customize the sounds, fonts, screen colors, and more. Take advantage of different levels of security. Prevent making an accidental (and expensive) phone call by locking the keyboard. -
Page 198: In This Chapter
In this chapter System sound settings........193 Display and appearance settings . -
Page 199: System Sound Settings
System sound settings Silencing sounds You can immediately silence all alerts, ringtones, music that plays through the built-in speaker, and system sounds by sliding the Ringer switch to the Sound Off position. This does not mute the audio during a phone call. 1 Slide the Ringer switch to the Sound position. -
Page 200: Display And Appearance Settings
Y O U R P E R S O N A L S E T T I N G S 3 Select the System Volume and Game Volume pick lists and select the volume levels. 4 Select Done. Display and appearance settings Adjusting the brightness Depending on the lighting conditions in... - Page 201 4 Select a font style. (In the web browser, select the Font size pick list and select Large or Small.) Small font Large font Small bold font Large bold font 5 Select OK. Setting display formats Formats Preferences enable you to select number conventions based on geographic regions.
- Page 202 Y O U R P E R S O N A L S E T T I N G S Aligning the screen to correct tapping problems Occasionally, your Treo screen may need to be readjusted. If this problem occurs, you may see the wrong feature being activated when you tap the screen.
-
Page 203: Applications Settings
Applications settings You can change the Applications settings on your Treo so that you can easily access the applications you use most often. You can arrange and display your applications by category, reassign the buttons on your Treo, and select default applications for specific tasks. - Page 204 Y O U R P E R S O N A L S E T T I N G S 1 Press Applications 2 Press Menu 3 Select Options, and then select Preferences. 4 Select the View By pick list and select List.
-
Page 205: Locking Your Treo And Info
Changing default applications Sometimes one application looks for another application to handle information (for example, a mail application might open a browser when you select a link in an email message). Your smartphone comes with a set of predefined applications to handle email, messaging, and browser requests from other applications. - Page 206 Y O U R P E R S O N A L S E T T I N G S Treo: You can set your Treo to require a password for you to see any information on your Treo. Entries: You can mask or hide entries marked as private and set your smartphone to require a password for viewing them.
- Page 207 Power/End when the screen is 4 Select Done. Locking your screen You can set your smartphone to automatically lock the screen’s touch-sensitive features in certain situations. 1 Press Applications and select Prefs 2 Select Keyguard. 3 Check any of the following boxes: Incoming calls received: Disables the screen when the phone rings.
- Page 208 Y O U R P E R S O N A L S E T T I N G S 1 Press Phone 2 Press Menu 3 Select Options, and then select Phone Lock. 4 Check the Lock SIM box. 5 When prompted, enter the current PIN and select OK.
- Page 209 Palm Desktop software, you must remember your password to restore your info. However, if you do not use password protection in Palm Desktop software, you can restore all previously synchronized info the next time you sync (see Synchronizing information— the basics).
- Page 210 Y O U R P E R S O N A L S E T T I N G S Press Applications • your settings and continue using your Treo. After you create a password, you can lock your system manually. Press Applications and select Security.
- Page 211 Follow these steps to recover from a lost password: 1 Press Applications and select Security 2 Select the Password box. 3 Select Lost Password. 4 Select Yes. If you want additional security for Palm Desktop files, you may want to purchase a third-party solution.
-
Page 212: System Settings
Y O U R P E R S O N A L S E T T I N G S Entering owner information You can use Owner Preferences to record information that you want to associate with your Treo 680, such as your name, company name, and home phone number. - Page 213 3 Select the Automatically set pick list and select one of the following settings: Date, time and time zone: The date, time, and time zone are acquired from your wireless service provider’s network (if settings are available from the network). Date and time: Lets you set the time zone manually.
-
Page 214: Connecting To A Vpn
Y O U R P E R S O N A L S E T T I N G S 3 Set any of the following preferences: Brightness: Sets the intensity of the screen and keyboard backlights. Drag the slider or press Left to adjust the brightness level. - Page 215 VPN client on your smartphone to use this feature. For information about third-party VPN client software, see the Palm Software Installation CD or visit www.palm.com/ treo680gsm. Y O U R P E R S O N A L S E T T I N G S 1 Install your third-party VPN client.
- Page 216 Y O U R P E R S O N A L S E T T I N G S...
-
Page 217: Chapter 11: Common Questions
C H A PT ER Common questions Although we can’t anticipate all the questions you might have, this chapter provides answers to some of the most commonly asked questions. For additional information and answers to other common questions, visit www.palm.com/ treo680gsm-support. - Page 218 In this chapter Upgrading..........213 Desktop software installation.
-
Page 219: Upgrading
Treo 680. WINDOWS ONLY 1 On your computer, click Start>Programs>Palm>Safe HotSync. 2 Follow the instructions on the screen. 3 Locate the Old_Apps folder on your computer. This folder is usually located inside one of the following folders:... - Page 220 <Mac hard drive> : Users : <your Mac username> : Documents : Palm : Users 2 Select your user folder and Option-drag it to your Mac desktop to make a copy of that folder.
-
Page 221: Desktop Software Installation
Palm Software Installation CD that came with your new Treo 680. Other versions of the desktop software may not work with your Treo 680. 5 Insert the Palm Software Installation CD to restart the installation. Always use the same IMPORTANT... - Page 222 1 Remove the battery from your smartphone, and then reinsert it. Don’t know how? See Replacing the battery. 2 When the Palm logo appears, press and hold Up until the black status bar at the bottom of the screen fills and...
-
Page 223: Replacing The Battery
1 Remove the battery from your smartphone, and then reinsert it. Don’t know how? See Replacing the battery. 2 When the Palm logo appears, press and hold Power/End until the black status bar at the bottom of the screen fills and disappears, and then release... - Page 224 C O M M O N Q U E S T I O N S Failure to use the proper battery CAUTION may result in a risk of personal injury or product damage, and it voids your smartphone warranty. 1 Press Power/End the screen.
-
Page 225: Screen
6 If that doesn’t work, perform a hard reset (see Performing a hard reset). To find carrying cases that protect the screen and other useful accessories, visit www.palm.com/treo680gsm. The screen doesn’t respond accurately to taps or it activates wrong features 1 Press Applications... -
Page 226: Synchronization
Similarly, if your computer crashes and your Palm Desktop info is damaged, you can recover your info by synchronizing with your smartphone. To make sure you always have an up-to-date backup of your info, synchronize frequently. - Page 227 If an app that you deleted reappears on your smartphone, try deleting the app from your Backup folder. Palm Desktop does not respond to a sync attempt 1 Make sure that the USB sync cable is securely connected to the USB port on...
- Page 228 C O M M O N Q U E S T I O N S Mac: Find the Palm folder on your Mac hard drive. Double-click the HotSync manager icon in the Palm folder. In the Connection Settings panel, set the Local Setup port to Palm USB.
- Page 229 View Log. Mac: Open Palm Desktop software. From the HotSync menu, select View Log. If you upgraded from a previous Palm OS device or received a system error, such as Sys0505, there may be conflicts with software on your smartphone.
- Page 230 For more information, consult the company that makes the PIM. 2 If multiple Palm OS devices are synchronizing with your computer, make sure the name of the device you are synchronizing appears in the User field on the toolbar of Palm Desktop software.
- Page 231 Treo 680. If you’re not sure whether this software is installed, reinstall Palm Desktop software from the Palm Software Installation CD that came with your smartphone. C O M M O N Q U E S T I O N S...
- Page 232 4 Uncheck the New events use time zones box (if it’s checked). 5 On your computer, open Palm Desktop software and correct the wrong entries. 6 On your computer, manually enter any Calendar info you added to your smartphone since the last time you synchronized.
-
Page 233: Phone
To avoid this problem in the IMPORTANT future, do not assign time zones to your events. Palm Desktop software does not support time zones. The text of my memos is truncated after I sync If you use your desktop software to create... - Page 234 C O M M O N Q U E S T I O N S 4 Perform a soft reset (see Performing a soft reset). The other person hears an echo Try decreasing the volume on your Treo • to avoid coupling or feedback on the other person’s end.
-
Page 235: Hands-Free Devices
To find carrying cases that can help prevent your smartphone from making calls, as well as other useful accessories, visit www.palm.com/treo680gsm. C O M M O N Q U E S T I O N S Hands-free devices Bluetooth range is up to 30 feet in optimum environmental conditions. -
Page 236: Email
Bluetooth hands-free device and your phone on the same side of your body. Some features of my Bluetooth hands-free device don’t work with my Treo Check the Palm compatibility list at • www.palm.com/treo680gsm-support to ensure that your device is compatible. Check the documentation that came •... -
Page 237: Messaging
the VersaMail Application in the Documentation folder. Messaging I can’t tell if data services are available When your phone is on, icons appear in the title bar in the Main tab in the Phone application to indicate whether data services are available and whether a data connection is active. -
Page 238: Web
C O M M O N Q U E S T I O N S Delays can also occur between the time that a message is sent and the time it is received. Make sure that either of the following •... - Page 239 5 Select the Service pick list and select your wireless service provider’s data service. 6 Select Connect. 7 If the connection is successful, go the web browser. If you still can’t make a connection, perform a soft reset (see Performing a soft reset). 8 If your phone did not turn on automatically after the soft reset, press and hold Power/End...
- Page 240 C O M M O N Q U E S T I O N S It takes a long time for a web page to load If it is taking longer than usual to load web pages, you may have traveled from an EDGE service area to a GPRS service area.
-
Page 241: Camera
My Bluetooth DUN connection isn’t working Check all of the following: Press Applications and select • Bluetooth . Make sure the Bluetooth setting is On. You have already formed a partnership • between your Treo 680 and your computer (see Creating a partnership between your Treo and your computer). -
Page 242: Making Room On Your Treo
Remember that when you synchronize your smartphone with your computer, your camera images are stored in the My Pictures/Palm Photos folder on your hard drive (see Viewing pictures and videos on your computer). Making room on your Treo... -
Page 243: Third-Party Applications
from your Treo (see Viewing pictures and videos on your computer). Music: Music files often consume a lot of memory. Move music files to an expansion card, or delete large files from your Treo. Messaging: Multimedia content can also consume a lot of memory. Move multimedia content to an expansion card, or delete large files from your Treo (see Deleting messages). -
Page 244: Error Messages
Windows: C:\Program Files\Palm\<device name> Mac: Mac hard drive> : Applications : Palm : Users : <device name> Can’t find a Palm folder in Program NOTE Files? Then look for a palmOne or Handspring folder instead. For more info, see I can’t find my user folder. - Page 245 Sometimes you might want to know more about an error. Your Treo 680 uses a special interface to show error messages in greater detail. 1 Press Phone 2 Enter #*377 , and then press Send C O M M O N Q U E S T I O N S 3 Review the screen with details about the conditions that led up to the most recent automatic reset.
- Page 246 C O M M O N Q U E S T I O N S...
-
Page 247: Where To Learn More
Information: Many dialog boxes have a Tips icon in the upper-right corner. Select the Tips icon to learn about the tasks you can perform in that dialog box. Online support from Palm: For up-to-date ™ Treo downloads, troubleshooting, and support information, go to www.palm.com/treo680gsm-support. - Page 248 W H E R E T O L E A R N M O R E...
-
Page 249: Terms
Palm OS first synchronize your Treo 680, you are asked to give it a device name. This name appears in the User list in Palm Desktop software. Every Palm OS device that is synchronized with the same computer must have a unique device name. - Page 250 The keyboard key that enables you to access the alternative feature that appears above the letter on each key. ® Palm Desktop software A PIM application for computers that helps you manage your personal information and keep your personal information...
- Page 251 Palm OS The operating system of your Treo 680. Palm OS is known for its simplicity of use and for the large number of compatible third-party applications that can be added to your smartphone. Palm™ Quick Install The component on your Windows...
- Page 252 User folder The folder on your computer that contains the information you enter in Palm Desktop software and the information you enter on your smartphone and synchronize with Palm Desktop software.
-
Page 253: Regulatory Information
Radio Device EMC EN300-328 Radio Equipment Emissions EN55024 Digital Device EMC EN60950 Product Safety EN50360/50361 SAR Safety Manufacturers Name: Palm Inc. Importer Name/Address: Roy Bedlow Buckhurst Court London Road Wokingham, Berkshire RG40 1PA, Type of Equipment: Smartphone Model Number: Treo 680... - Page 254 SAR values at or below the federal standard of 1.6 W/kg are considered safe for use by the public. To view the highest reported (FCC) SAR values of the Palm 680 smartphone, visit www.palm.com/38086. FCC Radiofrequency Emission This smartphone meets the FCC Radiofrequency Emission Guidelines and is certified with the FCC as.
- Page 255 density. Power density is defined as power per unit area. For example, power density can be expressed in terms of milliwatts (one thousandth of a watt) per square centimeter (mW/cm2) or microwatts (one millionth of a watt) per square centimeter (µW/cm2). The quantity used to measure how much RF energy is actually absorbed by the body is called the Specific Absorption Rate or SAR.
- Page 256 human body absorbs RF energy most efficiently. For products that only expose part of the body, such as wireless phones, exposure limits in terms of SAR only are specified. The exposure limits used by the FCC are expressed in terms of SAR, electric and magnetic field strength, and power density for transmitters operating at frequencies from 300 kHz to 100 GHz.
- Page 257 SAR levels is typically found in the exhibits associated with the grant. Once a grant is accessed, the exhibits can be viewed by clicking on “View Exhibit. ” Grants authorized prior to 1998 are not part of the electronic database but, rather, have been documented in the form of paper records.
- Page 258 likened to a thin pancake centered around the antenna system. The individual pattern for a single array of sector antennas is wedge-shaped, like a piece of pie. As with all forms of electromagnetic energy, the power decreases rapidly as one moves away from the antenna.
- Page 259 databases, you can contact Donald Campbell at dcampbel@fcc.gov or 202-418-2405. Can local and state governmental bodies establish limits for RF exposure? Although some local and state governments have enacted rules and regulations about human exposure to RF energy in the past, the Telecommunications Act of 1996 requires the Federal Government to control human exposure to RF emissions.
- Page 260 built-in antennas, often called “cell, ” “mobile, ” or “PCS” phones. These types of wireless phones can expose the user to measurable radiofrequency energy (RF) because of the short distance between the phone and the user's head. These RF exposures are limited by Federal Communications Commission safety guidelines that were developed with the advice of FDA and other federal health and safety agencies.
- Page 261 What steps can I take to reduce my exposure to radiofrequency energy from my wireless phone? If there is a risk from these products--and at this point we do not know that there is--it is probably very small. But if you are concerned about avoiding even potential risks, you can take a few simple steps to minimize your exposure to radiofrequency energy (RF).
- Page 262 In addition, if the cell phone presents a risk of injury to the user, FDA may also take regulatory action. The most important...
- Page 263 Any electronic device that contains an external entry point for plugging in anything from cables to docking stations is susceptible to entry of ESD. Devices that you carry with you, such as your Palm device, build up ESD in a unique way because the static electricity that may have built up on your body is automatically passed to the device.
- Page 264 Consultez notre site web www.palm.com/fr pour plus d'informations. Waste disposal Please recycle appropriately. For appropriate recycling and disposal instructions please visit: www.palm.com/ environment. Précautions d'usage de votre téléphone mobile Le taux de DAS(1) (Débit d’ A bsorption Spécifique) de votre Treo 680 smartphone est 0,655 w/kg Conseils d'utilisation pour réduire le niveau d'exposition aux...
-
Page 265: Specifications
Intel PXA270 Bulverde processor, 312MHz Expansion SD/MultiMediaCard/SDIO card slot Battery • • ® Palm OS version Palm OS 5.4.9 Camera • • • • Size 4.44 in. x 2.33 in. x 0.84 in. (112.9mm x 59.3mm x 22.4mm) Weight 5.3 ounces (150 grams) - Page 266 Mac OS 10.2 –10.3 with USB port • Later versions may also be supported • Contacts • Calendar • Memos • Tasks • Voice Memo • Documents To Go • Professional ® Calculator Basic and • Advanced World Clock • ® Palm Desktop software •...
- Page 267 Operating and storage 32°F to 104°F (0°C to 40°C) • temperature range 5% to 90% relative humidity (RH) • S P E C I F I C A T I O N S...
- Page 268 S P E C I F I C A T I O N S...
-
Page 269: Index
81–95, 208 Favorites pages files 161, 208 HotSync manager information items on expansion cards items on pick lists music player on-device documentation Palm online support Pocket Tunes Quick Tour secure websites 109, 110, 234 voicemail 48, 49 web browser 36, 110... - Page 270 Active Call View screen 52, 68 active calls. See phone calls Add Bookmark command Add Call button Add Contact command Add New Number dialog box Add New Number prompt Add Song button Add to album command adding accessories additional security attachments 86–87 Bluetooth devices...
- Page 271 setting for clock Album command Album list 131, 133, 135 albums. See photo albums; video albums Alert dialog box 49, 99, 167 alert icon Alert Sound pick list alert tones 71, 92, 104 alerts See also alarms clearing displaying message text in receiving messages and 92, 98 responding to...
- Page 272 See also events Archive folder area codes area conversions arrow icons ASF files Ask to add unknown phone numbers option Attach image option Attach ringtone option Attach Signature check box Attach voice memo option attachments adding 86–87 displaying downloading multimedia messages and multiple files and opening pictures as...
- Page 273 Beam command 177, 178 Beam From pick list Beam Receive pick list Beam Status dialog box 177, beaming battery life and defined overview 176–178 troubleshooting 177, 178 turning off bell 76, 167, 220 birthdays blank screens blank text messages blank time slots Blazer application See also web browser blinking bell...
- Page 274 restoring factory defaults speed-dialing with web browsing and Buttons Preferences screen cache 117, 237 Calc button calculating disk space calculator 33, 168 Calculator application calculator modes calendar See also Calendar application customizing 150–151 deleting events from displaying saving scheduling events for 147, 148 selecting alarm tones for selecting specific dates on...
- Page 275 color-coding in contacts and 57, 60 creating events and 149, 150 memos and naming receiving from Bluetooth tasks and 155, 156, 157 Category command category marker Category pick list 150, 151, Center button certificates changing bookmarks button defaults contact information default applications email accounts events...
- Page 276 compressed files 170, 171 computers connecting smartphone to 16, 21 creating partnerships for downloading applications installing applications from 171, 215 installing synchronization software on quarantined files on 19, 213 setting up DUN connections for synchronizing with transferring information to transferring multimedia to transferring music from 138, 139–140 Con button (calculator)
- Page 277 QuickText phrases signatures speed-dial buttons 62–63 tasks text messages 95–98 voice memos wallpaper CSD (circuit-switched data) current date and time current events Current Privacy pick list 204, customer service (Palm) customizing applications 197–198 I N D E X...
- Page 278 buttons calendar 150–151 camera chat sessions contacts email 91–94 Keyguard messaging options smartphone 151, 191 system date and time system sounds tasks web browser 115–117 daily events Daily Repeating Events check box daily schedules data. See information data service icons data services 81, 109 data transfer...
- Page 279 129, 134, 136 desktop software. See Palm Desktop software Details button Details command Device Name field 66, 176 device names Bluetooth devices and 176, 181 defined entering 19, 220 devices See also Bluetooth devices; hands-free devices; smartphone...
- Page 280 Down button (navigator) 29, 30 downloading applications 113, 171 attachments email messages files 113, 131, 170 multimedia messages Palm-specific information and updates ringtones text messages Downloads bookmark drafts 86, 96 Drafts button drained battery icon draining the battery Draw on command...
- Page 281 attaching ringtones attaching videos to 130, 133 attaching voice memos to checking creating 85, 109 email accounts customizing 91–94 defining favorite buttons deleting 90, 236 email application dialing from downloading email applications forwarding Email icon opening attachments for email options email providers removing attachments for emergency calls...
- Page 282 Event Details dialog box 148, 149 events changing color-coding creating 146, 147 deleting displaying 73, 145, 150, incorrect time zones and scheduling repeating setting alarms for setting preferences for synchronizing troubleshooting viewing categories of viewing duration of Excel spreadsheets Exchange ActiveSync Exchange Address Book Exchange Servers exiting applications...
- Page 283 browsing checking size of deleting downloading 113, 131, incompatible applications 18, 19 moving to expansion cards 19, 237 opening 161, 162 saving streaming transferring to smartphone 17, 161 Files application financial calculator financial functions Find dialog box Find More button Find Text on Page command finding chat sessions...
- Page 284 full charge (battery) Game Volume pick list General Packet Radio Service (GPRS) technology getting started 3, 5, 15, 241 GIF files Glossary glow (highlight) GPRS connections 234, 244 GPRS technology GPS receivers gradients graphics. See images grouping photos or videos groupware hands-free devices adding...
- Page 285 183, inserting battery SIM card installer installing applications 170–171, 213 bonus software 24, 170 Palm Desktop software 17, 171, 215 synchronization software 20–21 third-party applications VPN client software interference 228, 230 international characters. See alternate characters international clock. See...
- Page 286 international settings. See language settings Internet 107, 131, 170, 232 See also web browsing; websites interruptions Into album pick list invalid characters IR communications IR port beaming from 177, 178 defined location of synchronizing with items in pick lists items on screen activating highlighting selecting...
- Page 287 lock codes Lock Device dialog box Lock icon 110, 133, 172, 177 Lock SIM check box locking keyboard 41, 200 phone 201–202 screen Treo smartphone 202, logging in to corporate servers logic functions looking up contacts Lookup button loops losing information 189, 203, 217 passwords...
- Page 288 Message command message icons message lists Message Tone pick list Message validity period pick list messages See also email; multimedia messages; text messages adding graphical elements adding multiple recipients arranging in folders chat sessions and checking status of checking voicemail creating 95, 97, 98 defining favorite buttons...
- Page 289 Microsoft Word documents 79, 87, 161 minutes usage information (phone) mirror mismatched language setups MMS messaging services 95, 231, 244 mobile networks modems Modify FDN command monitoring phone status Month View 145, 151 Move to command moving around on screen moving through web pages 110, 116 MP3 files...
- Page 290 32, 168 offline synchronization offline viewing (web) OK button online forums online support (Palm) opening Alert dialog box application menus applications 7, 35, 36, 52, Applications View Bookmarks View 15, 76 Call Log...
- Page 291 PALM folder 127, 128 Palm OS software 17, 170, Palm OS-compatible applications Palm Quick Install. See Quick Install Palm Software Installation 2, 20, 215 paper clip icon 86, 89 partial battery icon partnerships 67, 118, 245...
- Page 292 voicemail and Paste command 43, 115 pasting phone numbers text Pause button pausing music streamed content video playback 130, 132 video recording voice memos 163, 164 PCs. See personal computers PDB files PDF files 87, 161 pending alerts 99, 220 pending messages personal computers connecting smartphone to...
- Page 293 opening 36, 42 overview selecting wallpaper for selecting wireless networks from setting alert tones from setting dialing preferences status icons for 75–77 using TTY Phone button 7, 35, 36 Phone Call screen phone calls See also phone; phone numbers adding a second adjusting volume for answering multiple automatically answering...
- Page 294 personalizing removing from albums 134, 135 repositioning rotating saving 100, 128, 130 selecting as backgrounds sending 86, 128, 133 setting default size setting preferences for storing 125, 127 viewing 130, 131, 136 pick lists 28, 30 Pics&Videos icon picture formats Picture list pictures See also images;...
- Page 295 preferences alarm tones alert tones applications 198, 199 buttons calculator camcorder camera contact information country-specific dialing email 91, 93–94 events hands-free devices Keyguard messaging 102–104 owner information phone 55, 56, 73 power settings ringtones 69, 70 system colors system date and time 147, system sounds tasks...
- Page 296 Redial list redirector (websites) I N D E X reducing storage space Refresh command refresh icon (browser) refreshing web pages Regulatory Information reinstalling Palm Desktop software reinstalling third-party applications 213, 214, 217 Remember Last Category option Reminder Sound pick list reminders.
- Page 297 resizing text Resolution pick list resolution settings (camcorder) resolution settings (camera) restarting Treo smartphone. See resets restoring factory defaults resuming playback 114, 141 Return key Review photos/videos pick list RF emissions 247, 248 Right button (navigator) 29, 30 ringer adjusting volume silencing turning off Ringer switch...
- Page 298 turning on or off 229, 243 waking up screen fonts screen protectors scroll arrows 28, 88 scrolling scrolling preferences SD cards SDIO cards search results searching for contacts 45, 58, 73 specific characters text 115, 167 wireless services secondary applications secure websites 109, 110, security...
- Page 299 Show Calendar event check 73, 151 Show Categories check box Show Category Column check box Show Category List check 150, 151 Show Completed Items check box Show Due Dates check box 155, 157 Show Due Tasks check box Show Messages check box Show Priorities check box Show Records option 204,...
- Page 300 32, 34, 96 photos 125, 127 smartphone 7, 8 45, 62–63 videos 125, 128 streaming content style sheets 111, 116 stylus 8, 27, 30 submitting web forms support (Palm) support (wireless service provider) 75–77 114, 246...
- Page 301 Swap button symbols 32, 34, 57, 96 sync. See synchronization; synchronizing Sync automatically check box sync button 22, 24, 139 sync cable 21, 24 synchronization ActiveSync and Bluetooth devices and 181, 182 caution for changing defaults for 179, 180, 181, 189 device names and overview preparing for...
- Page 302 Tasks application changing fonts for opening synchronizing information Tasks button Tasks list 145, 155, 156, 157 Tasks Preferences screen technical support (Palm) technical support (wireless service provider) telephone calls. See phone; phone calls temperature conversions text copying entering...
- Page 303 41, 208, 229 smartphone 11, 41 speakerphone touch-sensitive features Typing starts contacts search option unauthorized users Unfiled category uninstalling Palm desktop software third-party applications 172, 216 Unknown Caller pick list unlocking the keyboard Treo smartphone 202, unread messages 77, 105,...
- Page 304 entering 110, 116 in text messages USB hub 21, 222 USB ports Use color for pick list user discussion groups user folders 214, 220, 246 User Guide usernames 84, 85 Verizon Wireless preset buttons and VersaMail application accessing email and adding attachments from 86–87 creating email messages...
- Page 305 bookmarks virtual private networks connection status 76, 110, 120, 231, 232 Visibility pick list contact information 45, 58 voice captions current date and time due dates 156, 157 email messages 87, 88 error messages event categories Voice Memo application events 73, 145, 150, 151 favorite buttons Voice Memo list...
- Page 306 Web icon web links assigning to favorite buttons creating email from highlighting Palm online support selecting web pages accessing 109, 111, 233 bookmarking 111–113 caching 117, 237 changing fonts for changing layouts for...
- Page 307 redirectors and submitting transactions 110, 234 Week View weight conversions Wide Page Mode (browser) Windows systems installing applications from installing to expansion cards and removing applications and requirements for sending email and 81, 91 synchronization defaults synchronizing with 179, 183, 221, 223 transferring music from 137, 139, 140 viewing multimedia on...
- Page 308 I N D E X...