Table of Contents
Advertisement
Available languages
Available languages
OPERATOR'S MAnUAL
MAnUAL DEL OPERADOR
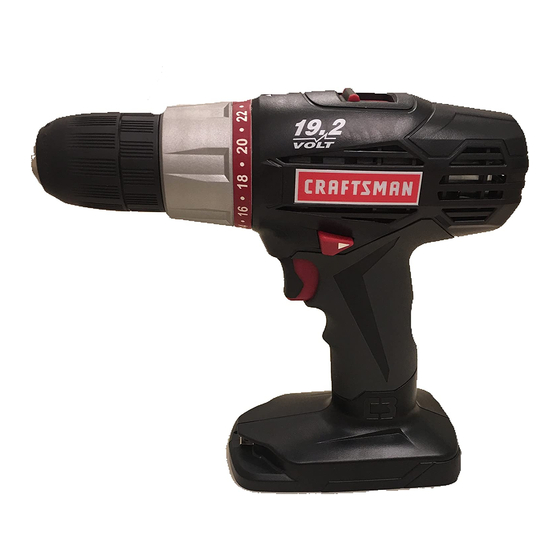
1/2 in., 19.2 VOLT 2-SPEED DRILL-DRIVER
VARIABLE SPEED/REVERSIBLE
TALADRO-DESTORnILLADOR DE 19,2 V
13 mm (1/2 pulg.) DOS VELOcIDADES
Model No. / Número de modelo
315.DD2010
WARnInG:
To reduce the risk of injury,
the user must read and understand the
operator's manual before using this
product.
ADVERTEncIA:
riesgo de lesiones, el usuario debe leer
y comprender el manual del operador
antes de usar este producto.
Customer Help Line: 1-800-932-3188
Teléfono de atención al consumidor: 1-800-932-3188
Sears Brands Management Corporation, 3333 Beverly Rd., Hoffman Estates, IL 60179 USA
Visit the Craftsman web page: www.sears.com/craftsman
Visite el sitio web de Craftsman: www.sears.com/craftsman
990000182
11-13-12 (REV:03)
Para reducir el
Save this manual for future reference
Guarde este manual para futuras consulta
Advertisement
Table of Contents

Related Manuals for Craftsman 315.DD2010


Summary of Contents for Craftsman 315.DD2010
- Page 1 Teléfono de atención al consumidor: 1-800-932-3188 Sears Brands Management Corporation, 3333 Beverly Rd., Hoffman Estates, IL 60179 USA Visit the Craftsman web page: www.sears.com/craftsman Visite el sitio web de Craftsman: www.sears.com/craftsman Save this manual for future reference 990000182 Guarde este manual para futuras consulta...
-
Page 2: Table Of Contents
With proof of purchase, defective product will be replaced free of charge. For warranty coverage details to obtain free replacement, visit the web site: www.craftsman.com This warranty does not cover bits which are expendable part(s) that can wear out from normal use within the warranty period. -
Page 3: General Power Tool Safety Warnings
GEnERAL POWER TOOL SAFETY WARnInGS PERSOnAL SAFETY WARnInG Read all safety warnings and all Stay alert, watch what you are doing and use instructions. Failure to follow the warnings and common sense when operating a power tool. Do instructions may result in electric shock, fire and/or not use a power tool while you are tired or under serious injury. -
Page 4: General Power Tool Safety Warnings
GEnERAL POWER TOOL SAFETY WARnInGS Store idle power tools out of the reach of children Use power tools only with specifically designated and do not allow persons unfamiliar with the power battery packs. Use of any other battery packs may tool or these instructions to operate the power tool. -
Page 5: Drill-Driver Safety Warnings
DRILL-DRIVER SAFETY WARnInGS Use auxiliary handle(s), if supplied with the tool. Do not crush, drop or damage battery pack. Do Loss of control can cause personal injury. not use a battery pack or charger that has been dropped or received a sharp blow. A damaged ... -
Page 6: Symbols
SYMBOLS The following signal words and meanings are intended to explain the levels of risk associated with this product. SYMBOL SIGnAL MEAnInG Indicates an imminently hazardous situation, which, if not avoided, will result DAnGER: in death or serious injury. Indicates a potentially hazardous situation, which, if not avoided, could result WARnInG: in death or serious injury. -
Page 7: Features
FEATURES PRODUcT SPEcIFIcATIOnS Clutch .............. 24 Positions Chuck ............1/2 in. Keyless Torque ..............340 in.lb. Motor ............... 19.2 Volt DC Switch ......VSR (Variable Speed Reversible) Battery Pack Voltage ........19.2 Volt DC No Load Speed ....... 0-400/0-1,400 r/min. (RPM) knOW YOUR DRILL-DRIVER kEYLESS cHUck See Figure 1, page i. -
Page 8: Operation
This product will accept Craftsman 19.2 V lithium-ion ® decreased trigger pressure. battery packs and Craftsman 19.2 V nickel-cadmium nOTE: You might hear a whistling or ringing noise from battery packs. the switch during use. Do not be concerned; this is a For complete charging instructions, refer to the Operator’s... - Page 9 OPERATIOn kEYLESS cHUck use. Also, raise the front of the drill slightly to keep the bit from falling out of the chuck jaws. See Figure 4, page i. Insert the bit. The drill has a keyless chuck to tighten or release drill bits in the chuck jaws.
-
Page 10: Operation
OPERATIOn If the bit jams in the workpiece or if the drill stalls, • Bend or burn bits; and stop the tool immediately. Remove the bit from the • Produce off-center or irregular-shaped holes. workpiece and determine the reason for jamming. When drilling large holes in metal, start with a small bit, nOTE: This drill has an electric brake. -
Page 11: Maintenance
WARnInG: When servicing, use only identical See Figures 10 - 12, page ii. Craftsman replacement parts. Use of any other part The chuck may be removed and replaced by a new one. can create a hazard or cause product damage. - Page 12 CRAFTSMAN 19.2 VOLT DRILL-DRIVER – MODEL NUMBER 315.DD2010 The model number will be found on a plate attached to the motor housing. Always mention the model number in all correspondence regarding your DRILL-DRIVER or when ordering repair parts. SEE BACK PAGE FOR PARTS ORDERING INSTRUCTIONS...
- Page 13 Fig. 1 Fig. 3 Fig. 6 A - Direction of rotation selector (forward/ reverse/center lock) (selector de sentido de rotación [adelante/atrás seguro en el centro]) A - Torque adjustment ring (anillo de ajuste de B - Switch trigger (gatillo del interruptor) fuerza de torsión) C - Forward (marcha adelante) B - To decrease torque (para disminuir la fuerza...
- Page 14 Fig. 11 Fig. 9 A - Screwdriver (destornillador) Fig. 12 Fig. 10 A - Mallet (mazo de goma) B - Hex key (llave hexagonal) A - Mallet (mazo de goma) B - Keyless chuck (porta brocas de apriete sin llave) C - Hex key (llave hexagonal) D - Chuck jaws (mordazas del portabrocas)
-
Page 15: Advertencias De Seguridad Para Herramientas Eléctricas
ADVERTENCIAS DE SEGURIDAD PARA HERRAMIENTAS ELÉCTRICAS exterior. Usando un cordón adecuado para el exterior ADVERTENCIA Lea todas las advertencias de se disminuye el riesgo de descargas eléctricas. seguridad y las instrucciones. El incumplimiento Si inevitablemente debe utilizar una herramienta de las advertencias e instrucciones puede eléctrica en un lugar húmedo, utilice un interruptor ocasionar descarga eléctrica, fuego o lesiones... - Page 16 ADVERTENCIAS DE SEGURIDAD PARA HERRAMIENTAS ELÉCTRICAS Utilice la herramienta eléctrica, los accesorios No vista ropas holgadas ni joyas. Recójase el cabello si está largo. Las ropas holgadas y las joyas, y brocas, hojas y cuchillas de corte, ruedas de esmeril, etc.
-
Page 17: Advertencias De Seguridad Taladro Inalámbrico
ADVERTENCIAS DE SEGURIDAD taladro inaláMbriCo Utilice los mangos auxiliares que se suministran No coloque herramientas de baterías ni las baterías con la herramienta. Cualquier pérdida de control mismas cerca del fuego o del calor. De esta manera puede causar lesiones. se reduce el riesgo de explosiones y de lesiones. -
Page 18: Símbolos
SíMboloS Las siguientes palabras de señalización y sus significados tienen el objeto de explicar los niveles de riesgo relacionados con este producto. SíMbolo SEÑAL SigniFiCado Indica una situación peligrosa inminente, la cual, si no se evita, causará la muerte Peligro: o lesiones serias. -
Page 19: Características
CaraCteríStiCaS eSPeCiFiCaCioneS del ProduCto Portabrocas ..... 13 mm (1/2 pulg.), de apriete sin llave Embrague ............24 posiciones Motor ..........19,2 volts, corr. cont. Fuerza de torsión ......38,4 Nm (340 lb.pulg.) Interruptor ....VSR (reversible de velocidad variable) Voltaje del paquete de baterías ..19,2 volts, corr. cont Velocidad en vacío ...... -
Page 20: Funcionamiento
19,2 V y los paquetes de gatillo del interruPtor ® baterías Craftsman de níquel-cadmio de 19,2 V. Vea la figura 3, página i. Para conocer todas las instrucciones de carga, consulte Para ENCENDER el taladro, oprima el gatillo del el Manual del operador correspondiente a su modelo de interruptor. -
Page 21: Funcionamiento
FunCionaMiento Si se pone el interruptor de gatillo en la posición de eMbrague de FuerZa de torSiÓn ajuStable aPagado (seguro en el centro) se evita el peligro de Este producto viene equipado de un embrague de fuerza arrancar accidentalmente la producto cuando no está de torsión ajustable para atornillar diferentes tipos de usándose. - Page 22 FunCionaMiento Comience a taladrar a una velocidad muy baja para No utilice ninguna llave para apretar o aflojar las mordazas del portabrocas. impedirle a la broca abandonar el punto inicial. Aumente la velocidad a medida que la broca penetra Retire la broca.
-
Page 23: Mantenimiento
PortabroCaS ADVERTENCIA: Al dar servicio a la herramienta, Vea las figuras 10 a 12, página ii. utilice solamente piezas de repuesto Craftsman El portabrocas puede desmontarse y reemplazarse con idénticas. El empleo de piezas diferentes puede uno nuevo.