Orion SkyQuest IntelliScope XT10 Instruction Manual
Dobsonian telescope
Hide thumbs
Also See for SkyQuest IntelliScope XT10:
- Instruction manual (20 pages) ,
- Instruction manual (12 pages) ,
- Instruction manual (20 pages)
Advertisement
Advertisement
Table of Contents

Related Manuals for Orion SkyQuest IntelliScope XT10


Summary of Contents for Orion SkyQuest IntelliScope XT10
- Page 1 Manual orion ® SkyQuest intelliScope ™ ® Xt6, Xt8, Xt10 #9182, #9183, #9184 Customer Support (800) 676-1343 E-mail: support@telescope.com Corporate Offices (831) 763-7000 89 Hangar Way, Watsonville CA 95076 Providing Exceptional Consumer Optical Products Since 1975 IN 226 Rev. G 06/08...
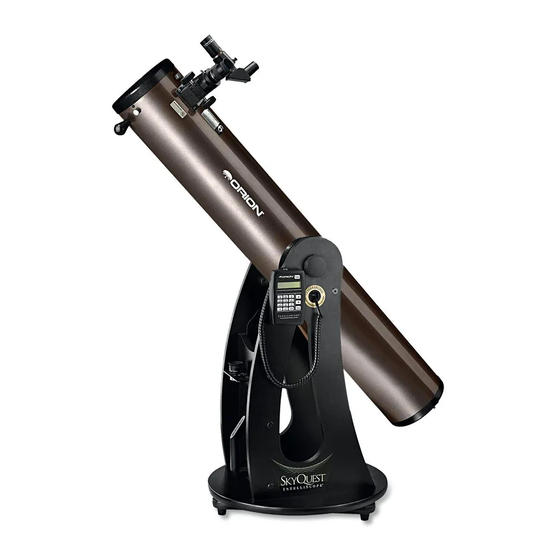
- Page 2 Secondary mirror holder with 4-vane spider (not visible) Navigation knob Retaining knob (opposite side) Computerized Object Locator (optional) Right side panel Eyepiece rack Front brace Handle Top baseplate Ground baseplate Figure 1. The SkyQuest XT8 IntelliScope Finder scope Finder scope bracket Eyepiece Focuser Optical tube...
-
Page 3: Table Of Contents
Congratulations on your purchase of an Orion SkyQuest XT IntelliScope Dobsonian. It is a high-perfor- mance astronomical instrument designed to provide dazzling views of celestial objects and unprecedented ease of use. With the addition of the optional IntelliScope Computerized Object Locator (Controller), you gain the ability to locate and view thousands of celestial objects with the push of a button. -
Page 4: Assembly
Now that you have unpacked the boxes and familiarized yourself with all the parts in front of you, it’s time to begin assembly. The optics of the telescope are already installed in the tube, so most of the required assembly concerns the Dobsonian base. - Page 5 hole, and the large hole lines up with the central hole in the baseplate. Thread an encoder board mounting screw into the predrilled starter hole with a Phillips screwdriver and tighten until just tight. 6. Place one fender washer (H) onto the azimuth axis screw (I).
- Page 6 This causes problems when the observ- er tries to accurately center and track an object for viewing, especially at higher powers. Also, the telescope becomes very sensitive to balance, requiring additional equipment such as counterweight systems or springs to compensate.
- Page 7 The finder scope arrives pre-installed in its bracket, but must be placed into the dovetail holder on the telescope tube. Insert the base of the finder scope into the dovetail holder located adjacent to the focuser (Figure 12b). Lock the bracket into position by tightening the knurled thumbscrew on the dovetail holder.
-
Page 8: Using Your Telescope
It should appear as shown in Figure 1. The dust cap on the front of the telescope tube should always remain in place when the telescope is not in use. It is also a good idea to store eyepieces in an eyepiece case and to replace the cover caps on the focuser and finder scope when the telescope is idle. -
Page 9: Focusing The Telescope
A good way to set the altitude tension is to point the telescope at about a 45° angle with the eyepiece and finder scope removed. Loosen the altitude tension knob until the front of the optical tube starts to drift upward. - Page 10 Insert the 10mm eyepiece in the focuser then tighten the thumbscrew(s). If you were careful not to bump the telescope, the object should still be visible in the field of view. Notice that the object being viewed is now larger, but somewhat dimmer.
- Page 11 The base has a handle for easy carrying. With the retaining and tensioning knobs of the CorrecTension(XT) system hold- ing the optical tube captive on the base, the entire telescope can be carried as one unit. (This is not practical for the XT10 due to its hefty weight and size.) This requires some caution,...
-
Page 12: Alignment (Collimation) Of The
(Figure 17). Now, lift the telescope by the handle. Once the telescope is in the horizontal position, you can carry the entire unit with one hand while supporting the optical tube with the other hand. -
Page 13: Aligning The Secondary Mirror
Orion LaserMate Laser Collimator. The center ring need not be removed from the primary mirror! Preparing the telescope for Collimation Once you get the hang of collimation, you will be able to do it quickly even in the dark. - Page 14 Star-testing the telescope When it is dark, point the telescope at a bright star high in the sky and center it in the eyepiece’s field of view. Slowly defocus the image with the focusing knob. If the telescope is correctly collimated, the expanding disk should be a perfect circle (Figure 24).
-
Page 15: Astronomical Observing
When moved from a warm indoor location outside to cooler air (or vice-versa), a telescope needs time to cool to the out- door temperature. The bigger the instrument and the larger the temperature change, the more time will be needed. - Page 16 SkyQuest XT8 and XT10 models are designed to accept an optional Orion Cooling Accelerator Fan (#7814). When attached to the rear cell of the telescope, the fan hastens the equilibration of the primary mirror to ambient temperature. D. let Your Eyes Dark-adapt...
-
Page 17: Optional Intelliscope Computerized
Certain photograph aids, such as the Orion SteadyPix, can help in taking photos by the afocal method. -
Page 18: Care And Maintenance
7. Care and Maintenance If you give your telescope reasonable care, it will last a lifetime. Store it in a clean, dry, dust-free place, safe from rapid chang- es in temperature and humidity. Do not store the telescope outdoors, although storage in a garage or shed is OK. -
Page 19: Specifications
Water will run off a clean surface. Cover the mirror surface with a tis- sue, and leave the mirror in a warm area until it is completely dry before reassembling the telescope. 8. Specifications SkyQuest Xt6 intelliScope... - Page 20 This warranty does not apply if, in Orion’s judgment, the instrument has been abused, mishandled, or modified, nor does it apply to normal wear and tear. This warranty gives you specific legal rights, and you may also have other rights, which vary from state to state.