Table of Contents
Advertisement
Available languages
Available languages
Thank you for purchasing this product.
For optimum performance and safety, please read these instructions carefully.
Please keep this manual for future reference.
Muchísimas gracias por haber adquirido este aparato.
Para un desempeño y seguridad óptimos, por favor lea estas instrucciones cuidadosamente.
Guarde este manual para su consulta en el futuro.
For Canada
If you have any questions, visit:
www.panasonic.ca/english/support
PP
Sistema estéreo con reproductor
Owner's Manual
Manual del propietario
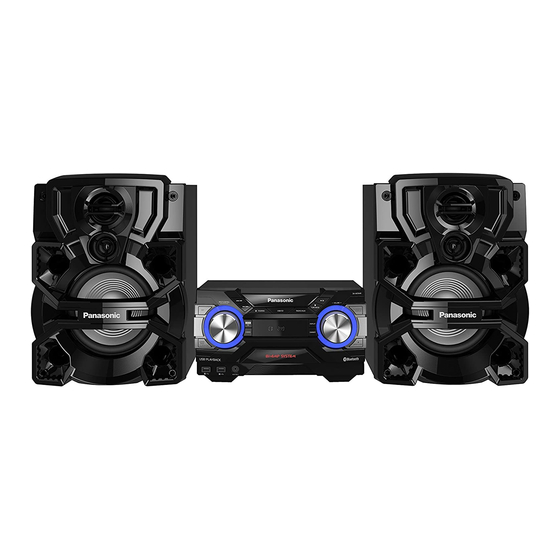
CD Stereo System
de discos compactos
SC-AKX640
Model No.
RQT0B22-Y
Advertisement
Table of Contents

Related Manuals for Panasonic SC-AKX640


Summary of Contents for Panasonic SC-AKX640
- Page 1 Owner’s Manual Manual del propietario CD Stereo System Sistema estéreo con reproductor de discos compactos SC-AKX640 Model No. Thank you for purchasing this product. For optimum performance and safety, please read these instructions carefully. Please keep this manual for future reference.
-
Page 2: Table Of Contents
Your system and the illustrations can look differently. IMPORTANT SAFETY These operating instructions are applicable to the following system. System SC-AKX640 INSTRUCTIONS Main unit SA-AKX640 Speakers SB-AKX880 Read these operating instructions carefully before using the unit. Follow the safety instructions on the unit and the applicable safety instructions listed below. -
Page 3: Safety Precautions
Safety precautions WARNING! CAUTION: TO REDUCE THE RISK OF ELECTRIC Unit SHOCK, DO NOT REMOVE SCREWS. • To reduce the risk of fire, electric shock or product NO USER-SERVICEABLE PARTS damage, INSIDE. – Do not expose this unit to rain, moisture, dripping or REFER SERVICING TO QUALIFIED splashing. -
Page 4: References
Bluetooth SIG, Inc. and any use About Bluetooth ® of such marks by Panasonic Corporation is under license. Other trademarks and trade names are those of their respective owners. Panasonic bears no responsibility for data and/or information that can possibly be compromised during a Google Play and Android are trademarks of Google Inc. -
Page 5: Connections
Connections Connect the AC power supply cord only after all the other connections have been made. Connect the AM loop antenna. Connect the speakers. Stand the antenna up on its base until it clicks. Connect the speaker cables to the corresponding terminals. -
Page 6: Overview Of Controls
Overview of controls Do the procedures with the remote control. You can also use the buttons on the main unit if they are the same. Standby/on switch [`], [1] Press to turn the unit from on to standby mode or vice versa. -
Page 7: Preparing The Remote Control
Remote control sensor Preparing the remote control Distance: Within approximately 7 m (23 ft) Angle: Approximately 20° up and down, 30° left and right Select MP3 album or track Press [ALBUM/TRACK] to select album or track. Browse tracks or albums Turn [MULTI CONTROL] to browse. -
Page 8: Preparing Media
Using the main unit Preparing media Press and hold [ –PAIRING] until “PAIRING” is shown. Select “SC-AKX640” from the Bluetooth ® menu of Disc the device. Note: Press [CD x] (main unit: [x OPEN/CLOSE]) to You can pair up to 8 devices with this system. If a 9th device open the disc tray. -
Page 9: Media Playback
Play menu Media playback CD USB The following marks indicate the availability of the feature. Press [PLAY MENU]. CD-R/RW in CD-DA format or with MP3 files. USB device with MP3 files. Press [Y, U] to select the setting and then press Bluetooth ®... -
Page 10: Radio
█ Note on disc Radio • This system can play CD-R/RW with CD-DA or MP3 format content. • Before playback, finalize the disc on the device it was Preparation recorded on. Press [RADIO/AUX] to select “FM” or “AM”. • Some CD-R/RW cannot be played because of the condition of the recording. -
Page 11: Sound And Illumination Effects
█ Selecting a preset station Sound and illumination effects Press the numeric buttons, [2] or [6] to select the preset station. Using the main unit Sound effects Press [TUNE MODE] to select “PRESET”. Preset EQ Press [2/3] or [5/6] to select the preset Press [EQ] (main unit: [LOCAL EQ]) to select station. -
Page 12: Dj Functions
[OK]. You can download and install the free Android™ app Or press [2/3] or [5/6] on the main unit to “Panasonic MAX Juke” on Google Play™ for additional select the effect. features, such as to request song playback from multiple devices simultaneously. For details on the app, Note: refer to the site below. -
Page 13: Sleep Timer
Sleep timer External equipment The sleep timer turns off the system after the set time. Preparation Press [SLEEP] to select the setting (in minutes). • Disconnect the AC power supply cord. To cancel, select “OFF”. • Turn off all equipment and read the appropriate operating instructions. -
Page 14: Others
Connecting a portable audio equipment Others You can play music from a portable audio equipment. Preparation Auto off • Turn off the equalizer (if any) of the portable audio equipment to prevent sound distortion. This system automatically turns off when you do not use •... -
Page 15: Troubleshooting
® • The protection circuit has been activated due to the audio output to “SC-AKX640” manually. Read the continuous use at high volume output. This is to protect the operating instructions of the device for details. system and maintain the sound quality. -
Page 16: Remote Control Code
█ Main unit displays Remote control code “ADJUST CLOCK” When other Panasonic equipment responds to the • The clock is not set. Adjust the clock. remote control of this system, change the remote control “ADJUST TIMER” code for this system. -
Page 17: Specifications
Specifications █ █ Amplifier section Bluetooth section ® RMS output power stereo mode Version Bluetooth ® Ver. 2.1 + EDR Front Hi (both ch driven) Class Class 2 350 W per channel (3 Ω), 1 kHz, 30% THD Supported profiles A2DP, AVRCP, SPP, OPP Front Lo (both ch driven) 500 W per channel (2 Ω), 100 Hz, 30% THD... -
Page 18: Limited Warranty (Only For Canada)
One (1) year, parts and labour This warranty is given only to the original purchaser, or the person for whom it was purchased as a gift, of a Panasonic brand product mentioned above sold by an authorized Panasonic dealer in Canada and purchased and used in Canada, which product was not sold “as is”, and which product was delivered to you in new condition in the original... - Page 19 (1) This device may not cause harmful interference, and (2) this device must accept any interference received, including interference that may cause undesired operation. Responsible Party: Panasonic Corporation of North America Two Riverfront Plaza, Newark, NJ 07102-5490 Support Contact: http://shop.panasonic.com/support...
- Page 20 MODELO NÚMERO SC-AKX640 Mantenga estas instrucciones de funcionamiento a mano para consultas futuras. NÚMERO DE SERIE 1. Lea estas instrucciones.
-
Page 21: Accesorios Suministrados
Medidas de seguridad ¡ADVERTENCIA! PRECAUCIÓN: PARA REDUCIR EL RIESGO DE Unidad SACUDIDA ELÉCTRICA, NO QUITE • Para reducir el riesgo de incendios, descargas LOS TORNILLOS. eléctricas o daños en el producto, NO EXISTEN EN EL INTERIOR – No exponga esta unidad a la lluvia, humedad, goteo PIEZAS REPARABLES POR EL o salpicaduras. - Page 22 Bluetooth SIG, Inc. y Acerca de Bluetooth ® cualquier uso de dichas marcas por parte de Panasonic Corporation se realiza bajo licencia. Otros nombres de marcas y marcas comerciales son propiedad de sus Panasonic no se responsabiliza por datos y/o respectivos propietarios.
- Page 23 Conexiones Conecte el cable de alimentación de CA sólo después de haber hecho todas las demás conexiones. Conecte la antena de cuadro de AM. Conecte las bocinas. Ponga la antena en posición vertical sobre su base Conecte los cables de la bocina a las terminales hasta que haga clic.
- Page 24 Visión general de los controles Lleve a cabo los procedimientos con el control remoto. Usted también puede usar los botones de la unidad principal si son iguales. Interruptor de alimentación en espera/conectada [`], [1] Pulse este interruptor para cambiar del modo de alimentación conectada al modo de alimentación en espera o viceversa.
- Page 25 Sensor del control remoto Cómo preparar el control Distancia: A aproximadamente 7 m (23 pies) Ángulo: Aproximadamente 20° hacia arriba y hacia remoto abajo, 30° a la izquierda y derecha Selecciona álbum MP3 o pista Pulse [ALBUM/TRACK] para seleccionar álbum o pista.
- Page 26 Uso de la unidad principal Cómo preparar los medios Pulse y mantenga pulsado [ –PAIRING] hasta que se visualice “PAIRING”. Seleccionar “SC-AKX640” desde el menú Disco Bluetooth del dispositivo. ® Nota: Pulse [CD x] (unidad principal: [x OPEN/CLOSE]) Se pueden parear hasta 8 dispositivos con este sistema. Si se para abrir la bandeja del disco.
- Page 27 Menú de reproducción Reproducción de medios CD USB Las siguientes marcas indican la disponibilidad de la Pulse [PLAY MENU]. función. CD-R/RW en formato CD-DA o con archivos Pulse [Y, U] para seleccionar la configuración y MP3. después pulse [OK]. Dispositivo USB con archivos MP3. Dispositivo Bluetooth ®...
- Page 28 █ Nota sobre el disco Radio • Este sistema puede reproducir CD-R/RW con contenido formato CD-DA o MP3. • Antes de realizar la reproducción finalice el disco en el Preparación equipo en el que se grabó. Pulse [RADIO/AUX] para seleccionar “FM” o “AM”. •...
- Page 29 █ Selección de una emisora preconfigurada Efectos de sonido y de la Pulse los botones numéricos, [2] o [6] para seleccionar la estación preconfigurada. iluminación Uso de la unidad principal Pulse [TUNE MODE] para seleccionar “PRESET”. Efectos de sonido Pulse [2/3] o [5/6] para seleccionar la Ecualizador predeterminado estación preconfigurada.
- Page 30 O pulse [DJ JUKEBOX/SAMPLER] en la unidad sonido o el sonido de muestra entre las canciones. principal para seleccionar “JUKEBOX”. Uso de la aplicación “Panasonic MAX Juke” Pulse [Y, U] para seleccionar el efecto y después Puede descargar e instalar la aplicación gratuita de pulse [OK].
- Page 31 Temporizador de apagado automático Equipo externo El temporizador de apagado automático apagará el Preparación sistema después de la hora configurada. • Desconecte el cable de alimentación de CA. Pulse [SLEEP] para seleccionar la configuración (en • Apague todos los equipos y lea las instrucciones minutos).
- Page 32 Cómo conectar un equipo de audio Otros portátil Puede reproducir música desde un equipo de audio Apagado automático portátil. Preparación Este sistema se apaga automáticamente cuando no lo • Apague el ecualizador (si existe alguno) del equipo de usa durante aproximadamente 20 minutos. audio portátil para evitar la distorsión del sonido.
- Page 33 • El circuito de protección se ha activado debido al uso “SC-AKX640”. Lea las instrucciones de operación del continuo a un volumen alto. Esto sirve para proteger el dispositivo para obtener más detalles.
- Page 34 El sistema no se usó durante 20 minutos y se apagará en un minuto. Para cancelar, pulse cualquier botón. Código del control remoto “ERROR” Cuando otro equipo Panasonic responda al control • Se realizó una operación incorrecta. Lea las instrucciones e remoto de este sistema, cambie el código del control intentar nuevamente.
- Page 35 Especificaciones █ █ Sección del amplificador Sección de Bluetooth ® Potencia de salida RMS en modo estéreo Versión Bluetooth ® Versión 2.1 + EDR Frontal alto (ambos controlados por los canales) Clase Clase 2 350 W por canal (3 Ω), 1 kHz, 30% THD Perfiles admitidos A2DP, AVRCP, SPP, OPP Frontal bajo (ambos controlados por los canales)
- Page 36 (2) este dispositivo debe aceptar toda interferencia recibida, incluida la interferencia que podría causar su operación no deseada. Parte responsable: Panasonic Corporation of North America Two Riverfront Plaza, Newark, NJ 07102-5490 Contacto de Soporte: http://shop.panasonic.com/support Panasonic Canada Inc.