Table of Contents
Advertisement
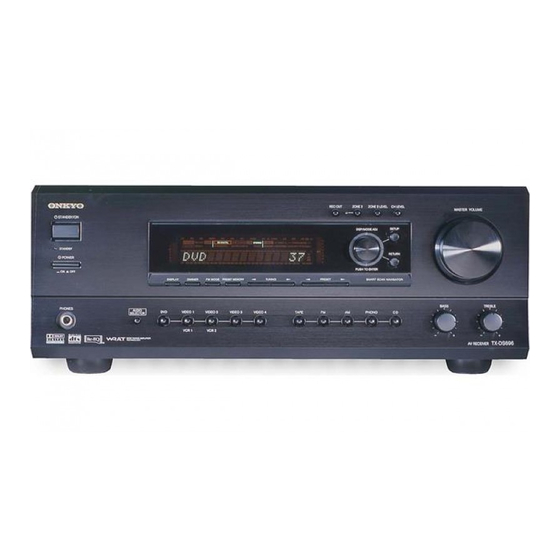
AV Receiver
TX-DS696
Instruction Manual
Thank you for purchasing the Onkyo AV Receiver.
Please read this manual thoroughly before making
connections and plugging in the unit. Following the
instructions in this manual will enable you to obtain
optimum performance and listening enjoyment from
your new AV Receiver. Please retain this manual for
future reference.
Contents
Appendix
2
8
22
46
61
Advertisement
Table of Contents

Related Manuals for Onkyo TX-DS696


Summary of Contents for Onkyo TX-DS696
-
Page 1: Instruction Manual
AV Receiver TX-DS696 Instruction Manual Thank you for purchasing the Onkyo AV Receiver. Please read this manual thoroughly before making connections and plugging in the unit. Following the instructions in this manual will enable you to obtain optimum performance and listening enjoyment from your new AV Receiver. -
Page 2: Before Using Important Safeguards
WARNING: TO REDUCE THE RISK OF FIRE OR ELECTRIC SHOCK, DO NOT EXPOSE THIS APPLIANCE TO RAIN OR MOISTURE. CAUTION: TO REDUCE THE RISK OF ELECTRIC SHOCK, DO NOT REMOVE COVER (OR BACK). NO USER-SERVICEABLE PARTS INSIDE. REFER SERVICING TO QUALIFIED SERVICE PERSONNEL. -
Page 3: Precautions
3. AC Fuse The fuse is located inside the chassis and is not user-serviceable. If power does not come on, contact your Onkyo authorized service station. 4. Care From time to time you should wipe the front and rear panels and the cabinet with a soft cloth. -
Page 4: Table Of Contents
Displaying Radio Text (RT) ... 28 Performing a PTY scan ... 28 Performing a TP scan ... 28 Enjoying music or videos with the TX-DS696 ... 29 Basic operation ... 29 Temporarily turning off the sound ... 29 Adjusting the bass and treble ... 29 Listening with headphones ... - Page 5 ELECTRONICS GmbH INDUSTRIESTRASSE 20 82110 GERMERING, GERMANY declare in own responsibility, that the ONKYO product described in this instruction manual is in compliance with the corresponding technical standards such as EN60065, EN55013, EN55020 and EN61000-3-2, -3-3 (or EN60555-2, -3) GERMERING, GERMANY A.HORIUCHI...
-
Page 6: Features
I Onscreen graphical displays in 7 colors and a superimpose mode I Smart Scan Navigator with LEDs Supplied accessories Check that the following accessories are supplied with the TX-DS696. AM loop antenna × 1 Remote controller × 1 Batteries (AA, R6 or UM-3) × 2 I 5.1-Channel input... -
Page 7: Before Using This Unit
INPUT 2 VIDEO MONITOR VIDEO 1 VIDEO 2 VIDEO 3 VIDEO 4 REMOTE CONTROL S VIDEO AV RECEIVER VOLTAGE PHONO TAPE TX-DS696 MODEL NO. / SELECTOR PRE OUT CAUTION: FRONT SURR CENTER SEE INSTRUCTION MANUAL FRONT SURR CENTER OPTICAL COAXIAL FOR CORRECT SETTING. -
Page 8: Front Panel Facilities
Front panel facilities Here is an explanation of the controls and displays on the front panel of the TX-DS696. Front panel STANDBY/ON STANDBY POWER PHONES AUDIO SELECTOR For European model DISPLAY RT/PTY/TP Front panel display Rec out indicator Sleep indicator... - Page 9 Lights when the TX-DS696 is in the standby state and flashes when a signal is received from the remote controller. STANDBY/ON button [19] Press to turn on the TX-DS696 when in the standby state. Press again to return the TX-DS696 to the standby state. REC OUT button [44] Press the REC OUT button to output the audio signals to a recording component for recording purposes.
-
Page 10: Remote Controller
DS696 in standby and does not turn the power completely off. SLEEP button [30] Sets the sleep function. The SLEEP button enables you to set the TX-DS696 to turn off automatically after a specified time period. DIRECT MACRO button [58, 59] For executing and programming the Direct Macro function. - Page 11 INPUT SELECTOR buttons [26, 29, 45, 46, 49] Selects an input source. Same as the input selector buttons on front panel of the TX-DS696. The input source for each buttons is given here. DVD:DVD, CD:CD, V1:VIDEO1, V2:VIDEO2, V3:VIDEO3, V4:VIDEO4, T1:TAPE, T2:Not used with the TX-DS696, TUN:FM/AM, PH:PHONO.
-
Page 12: Connections
Connections Here is explanation of how to connect the main components to the TX-DS696 in the standard manner. There are many ways that any one component can be connected, and it is up to you to decide which method best fits your situation. The directions given here are only one option and should only be thought of as such. -
Page 13: Connecting Your Audio Components
MULTI PRE OUT CHANNEL INPUT With the initial settings of the TX-DS696, the CD input source is set for digital input at the OPTICAL 1 jack. If the digital connection is made at a different jack, this must be changed at the Setup menu: Input Setup → Audio Setup → Digital Input (see pages 24, 39). -
Page 14: Connecting Your Video Components
L (White) Connecting your video components Below is an example of how you can connect your video components to the TX-DS696. Refer to the diagram above for the following connection examples. The flow of the video signals is as follows: •... - Page 15 Using an RCA-type audio connection cable, connect the audio output terminal on the video cassette recorder to the same VIDEO 2 IN audio jacks on the TX-DS696 and audio input terminal to the VIDEO 2 OUT audio jacks. Make sure that you properly connect the left channel to the L jack and the right channel to the R jack.
-
Page 16: Connect To Devices With Z Terminals
If the power cord for an z-connected component is connected to the AC OUTLET on the TX-DS696, or if the TX-DS696 is turned on, this function will not work. Also, if you are using the TX-DS696 for the remote zone (Zone 2), this function will not work. -
Page 17: Connect To Devices With Multichannel Output
By connecting a DVD player, MPEG decoder, or other component that has a multi channel port, you can playback the audio with 5.1 channel output. So, be sure to prepare a cable that can properly connect the TX-DS696 to the peripheral device. -
Page 18: Connecting The Speaker Cable
This other room or area is referred to as the remote zone (Zone 2), while the room where the TX-DS696 is located is the main zone. The diagram below shows how to make the proper connections for the remote zone. -
Page 19: Connecting The Power
STANDBY indicator will light (same condition after step 2 below). • Before you plug in the TX-DS696, confirm that all connections have been made properly. • Turning on the power may cause a momentary power surge, which might interfere with other electrical equipment on the same circuit, such as computers. -
Page 20: Connecting Antennas
Connecting antennas To use the tuner of TX-DS696, it is necessary to prepare the supplied FM and AM antennas. • Adjustment and placement of the FM and AM antennas for better reception must be done while listening to a station broadcast. -
Page 21: Connecting An Fm Outdoor Antenna
(Indoor) AM loop antenna Note: If you are using the TX-DS696 worldwide model in a region where AM frequencies are delineated by 10-kHz steps, be sure to set the AM Freq Step Setup setting accordingly (see page 42). Directional linkage... -
Page 22: Speaker Setup
Your speaker settings: Monitor Center Front Use the buttons on the TX-DS696 to navigate through the menus and set the various settings and parameters according to your system setup and layout. Buttons to be used Setup button:... -
Page 23: Speaker Distance Submenu
• To exit the setting mode immediately, press the SETUP button. DSP / MODE ADJ Speaker Distance submenu This submenu provides settings that tell the TX-DS696 how far PUSH TO ENTER away your speakers are located from the listening position so that it can provide the optimum sound space. -
Page 24: Level Calibration Submenu
• To exit the setting mode immediately, press the SETUP button. About the other settings The factory settings for your TX-DS696 are given in the table on page 12. If you connect your system in accordance with these factory settings, there is no need to change them. However, if you do not, you will need to change the settings that do not match. -
Page 25: Listening To Radio Broadcasts
Listening to Radio Broadcasts One of the features of the TX-DS696 that is most frequently used is its ability to play FM and AM broadcast radio stations. The TX- DS696 provides a number of listening modes perfect for listening to the radio and getting the most out of your audio system. -
Page 26: Presetting A Radio Station
Listening to Radio Broadcasts PRESET MEMORY PRESET STANDBY/ON STANDBY POWER DISPLAY DIMMER FM MODE PRESET MEMORY TUNING PHONES AUDIO VIDEO VIDEO VIDEO VIDEO SELECTOR Presetting a radio station 1. Tune into the radio station you desire (see “Tuning into a radio station” ). 2. -
Page 27: Listening To Rds Broadcasts
DS696 may not be exactly the same as the ones broadcast by the radio station. Also, unusual characters may appear on the display if the TX-DS696 receives characters that cannot be displayed correctly. This is not a malfunction. • When an RDS station broadcasting PS information is selected, the name of the station is displayed instead of the frequency. -
Page 28: Displaying Radio Text (Rt)
Displaying Radio Text (RT) If the station you are currently tuned into is broadcasting RT signals, they will be displayed in the front display on the TX-DS696. If the station does not, this function will be ignored. 1. To display the radio text, press the RT/PTY/TP button once. -
Page 29: Enjoying Music Or Videos With The Tx-Ds696
PHONES Input source buttons Though the TX-DS696 is often used to listen to the radio, it does not show you its true ability until it is used to play music or watch videos, DVDs, and the like. The TX-DS696 has the latest in state-of- the-art features to play back today’s acoustic technologies with the... -
Page 30: Switching The Display
FM/AM + Listening mode Adjusting the brightness of the front display You can adjust the brightness of the front display of the TX-DS696 with DIMMER button on the remote controller or on the TX-DS696 front panel with other than European models. -
Page 31: Changing The Audio Mode
To make the BASS and TREBLE dials work for multichannel sources, you must first set the tone control to “On.” 1. Turn the tone control on by pressing either the jog dial on the TX-DS696 or the DIRECT button on the remote controller. TX-DS696 When pressed only once, the current setting appears, so press twice to change the setting. -
Page 32: Using Listening Mode
“Auto” and use the digital input jacks (OPTICAL or COAXIAL) to connect the DTS source. • The DTS indicator on the TX-DS696 lights while a DTS source is played. When playback finishes and the DTS signal transmission stops, the TX-DS696 remains in DTS mode and the DTS indicator remains lit. -
Page 33: Changing The Listening Mode
Listening Mode Preset sub-menu is also changed. Note: If you want to switch between Dolby Pro Logic II Movie and Dolby Pro Logic II Music at the TX-DS696, press the jog dial and select “Surround” for the listening mode. REC OUT... -
Page 34: Setup Menus
For use as reference when performing the setting procedures, this manual shows both the OSD menu displayed on your television monitor and the display on the front of the TX-DS696. The Setup menu consists of a main screen that is divided up into 5 menus: Speaker Setup, Input Setup, Listening Mode Setup, Preference, and OSD Setup. -
Page 35: Navigating Through The Setup Menu
Setup menu. However, you can use the buttons on the TX-DS696 as well. When using the buttons on the TX-DS696, refer to the table on the right and pages 22 to 24. In addition to the display of the Setup menu on your television monitor, the corresponding menu will also be displayed in the front display on the TX-DS696. -
Page 36: Speaker Setup Menu
Setup menus 1. Speaker Setup menu The settings here are also explained on pages 22 to 24. Refer to those pages for reference. Menu 1.Speaker Setup 1.Speaker Setup 2.Input Setup 3.Listening Mode Setup 4.Preference 1.Speaker Config 5.OSD Setup 2.Speaker Distance 3.Level Calibration |ENTER| Quit:|OSD| |ENTER|Quit:|SETUP|... -
Page 37: Speaker Config Sub-Menu
RC-440M remote controller. See pages 30, 31. Calibrating the speaker levels (1) When this sub-menu is entered, the TX-DS696 will emit a pink noise from the front left speaker. At this time, the Master volume automatically increases to the reference level (0dB). Remember the level of this noise and then press the that this can be adjusted to any level between –12 and 12... -
Page 38: Input Setup Menu
2. Input Setup menu This menu allows you to setup the various input sources available with the TX-DS696. Each input source may have a great number of settings that are difficult to keep track of, so we recommend making a chart to record what you have set and for which component to prevent confusion later. -
Page 39: Audio Setup Sub-Menu
Digital Input This setting tells the TX-DS696 which input source button on the front panel is connected with which digital input jack on the rear panel. To perform this setting, you must first select a digital input source at the front panel and then set the name of the digital input jack it is connected to here. -
Page 40: Listening Mode Preset Sub-Menu
Setup menus 2-3. Listening Mode Preset sub-menu With the TX-DS696, you can set a different listening mode for each different signal type that comes from each input source and also set the parameters for the listening mode itself. For example, if your... -
Page 41: Listening Mode Setup Menu
Setup menus 3. Listening Mode Setup menu This menu allows you to make adjustments to the various listening modes. These adjustments are in the form of parameters and each one is explained below. Note that some parameters cannot be set for some listening modes and that no sub-menu will have all parameters. -
Page 42: Preference Menu
30 and 79. b. Power On Volume This sets a designated volume setting for the TX-DS696 to be set every time that the power is turned on. This prevents the TX-DS696 from being turned on while it is set to an extremely high volume and suddenly output very loud sounds. -
Page 43: Osd Setup Menu
(For all models other than USA and Canadian models) The default setting is “Auto,” which means that the television format is detected and automatically set by the TX-DS696. However, if you know the correct format, you can use this setting to choose either... -
Page 44: Recording
Recording the input source (REC OUT selector) When using the TX-DS696 to record a source, you must select that source to be output from the TAPE OUT jacks. Recording the same source that you are listening to: 1. -
Page 45: Enjoying Music In The Remote Zone
Tip: When using Zone 2, even if you put the TX-DS696 in the standby state, it will not affect Zone 2 and the volume in Zone 2 can still be adjusted. Moreover, components that have their power supply connect to the AC OUTLET connector on the TX-DS696 will not be turned off. -
Page 46: Remote Controller
For example, if you wish to select the CD input source at the TX-DS696 with the remote controller, first press the RCVR MODE button to select the TX-DS696 and then press the CD (INPUT SELECTOR) button. Calling up a preset radio station 1. -
Page 47: Controlling An Onkyo Cd Player
DISC HOME THEATER CONTROLLER RC-440M Controlling an Onkyo CD player The z connector of the Onkyo compact disc player must be connected to the TX-DS696 (see page 16). 1. Press the CD MODE button. The CD MODE button lights green. -
Page 48: Controlling An Onkyo Dvd Player
ANGLE HOME THEATER CONTROLLER RC-440M Controlling an Onkyo DVD player The z connector of the Onkyo DVD player must be connected to the TX-DS696 (see page 16). 1. Press the DVD MODE button. The DVD MODE button lights green. 2. Press the desired operation button. -
Page 49: Controlling An Onkyo Md Recorder
HOME THEATER CONTROLLER RC-440M CABLE MUTING Controlling an Onkyo MD recorder The z connector of the Onkyo MD recorder must be connected to the TX-DS696 (see page 16). 1. Press the MD MODE button. The MD MODE button lights green. STDBY 2. -
Page 50: Learning A Pre-Programming Code
First enter 601 and if it does not operate properly, enter 613. No. 600: This code is for Onkyo DVD players that have an z terminal that you are connecting to the TX-DS696 with an z cable. -
Page 51: Pre-Programming Codes
BRAND SETTING No. DENON 602, 609 HITACHI KENWOOD MAGNAVOX 606, 613 MARANTZ MITSUBISHI 608, 613 ONKYO 600, 601, 613 PANASONIC PIONEER PROSCAN SONY TOSHIBA YAMAHA 609, 614 ZENITH 613, 615 BRAND SETTING No. -
Page 52: Operationing Your Programmed Remote Controller
0,1 to 9: Numeric keys ENTER: Confirm You may also use the following buttons: : Adjusts the volume at the TX-DS696 MUTING: Activates the muting function at the TX-DS696 Numeric keys ENTER CABLE MODE (Cable Tuner Mode) 1. Press the CABLE MODE button. -
Page 53: Vcr Mode (Vcr Mode)
0,1 to 9, +10: Numeric keys You may also use the following buttons: : Adjusts the volume at the TX-DS696 MUTING: Activates the muting function at the TX-DS696 TV MODE (TV Mode) 1. Press the TV MODE button. The TV button lights green. -
Page 54: Programming The Commands Of Remote Controllers For Other Devices Into The Remote Controller
Programming the commands of remote controllers for other devices into the remote controller 5 to 15 cm (2 to 6 inches) HOME THEATER CONTROLLER RC-440M Programming procedure When programming the commands of another remote controller to the RC-440M remote controller, you must first decide under which MODE button you want the commands to be linked. -
Page 55: Programming The Commands Of Remote Controllers For Other Devices Into The Remote Controller
You may, however, use these buttons to program the codes for other remote controllers. If you wish to restore the Onkyo preset codes after you program new codes, you must first erase the new codes (see page 56). -
Page 56: Erasing The Programmed Command From One Button
Programming the commands of remote controllers for other devices into the remote controller HOME THEATER CONTROLLER RC-440M HOME THEATER CONTROLLER RC-440M Erasing the programmed command from one SEND/LEARN button indicator You can only erase memorized commands and not preset ones. 1. -
Page 57: Using A Macro Function
1. Point the remote controller at the TX-DS696 and press the CD MODE button. 2. Press the MODE MACRO, and verify that the devices operate properly. -
Page 58: Programming The Direct Macro Function
1. Point the remote controller at the TX-DS696 and press the DIRECT MACRO button. It may take a while for the macro to finish transmitting, so be sure to continue pointing the remote controller at the device until the SEND/LEARN indicator turns off. -
Page 59: Erasing A Macro From The Mode Macro Button
Using a Macro function MODE buttons HOME THEATER CONTROLLER RC-440M DIRECT MACRO HOME THEATER CONTROLLER RC-440M Erasing a macro from the MODE MACRO button 1. Press and hold down the desired MODE button, press the MODE MACRO button, and then release both buttons. -
Page 60: Erasing All Commands And Macros That Have Been Programmed
Using a Macro function HOME THEATER CONTROLLER RC-440M Macro mode programming memo: MACRO MODE MODE MACRO MACRO ↓ ↓ RCVR Operation 1 Operation 2 Operation 3 Operation 4 Operation 5 Operation 6 Operation 7 Operation 8 Operation 9 Operation 10 Operation 11 Operation 12 Operation 13... -
Page 61: Specifications
Specifications AMPLIFIER SECTION Continuous Average Power output (FTC) All channels: 100 W per channel min. RMS at 8 Ω, 2 channels driven from 20 Hz to 20 kHz with no more than 0.08% total harmonic distortion. 125 W min. RMS at 6 Ω, 2 channels driven from 1 kHz with no more than 0.1% total harmonic distortion. -
Page 62: Troubleshooting Guide
If a problem occurs while you are using the remote controller, first try to operate the controls on the front panel of the TX-DS696 to make sure that it is not due to a malfunction (or worn out batteries) in the remote controller. -
Page 63: Video And Audio
© Point the remote controller at the remote sensor of the TX- DS696. • Remote controller is too far from the TX-DS696. © Operate the remote controller within 5 meters (16 feet). • Remote controller is functioning in a different mode ©... -
Page 64: Electronics Gmbh Industriestrasse
Sales & Product Planning Div. : 2-1, Nisshin-cho, Neyagawa-shi, OSAKA 572-8540, JAPAN Tel: 072-831-8111 Fax: 072-833-5222 ONKYO U.S.A. CORPORATION 18 Park Way, Upper Saddle River, N.J. 07458, U.S.A. Tel: 201-785-2600 Fax: 201-785-2650 E-mail: onkyo@onkyousa.com ONKYO EUROPE ELECTRONICS GmbH Industriestrasse 20, 82110 Germering, GERMANY Tel: 089-849-320 Fax: 089-849-3265 E-mail: info@onkyo.de...