Onkyo T T-4555 Instruction Manual
Am/fm tuner; dab/am/fm tuner
Hide thumbs
Also See for T T-4555:
- Instruction manual (36 pages) ,
- Service manual (34 pages) ,
- Brochure & specs (8 pages)
Table of Contents
Advertisement
Quick Links
AM/FM Tuner
T-4555
DAB/AM/FM Tuner
T-4555
Instruction Manual
Thank you for purchasing an Onkyo Tuner. Please
read this manual thoroughly before making connec-
tions and plugging in the unit.
Following the instructions in this manual will enable
you to obtain optimum performance and listening
enjoyment from your new Tuner.
Please retain this manual for future reference.
(European model)
(U.K. model)
Contents
Introduction .................................... 2
Connections ................................. 10
Enjoying Audio Sources.............. 15
Troubleshooting........................... 26
Specifications .............................. 27
E
n
Advertisement
Table of Contents

Related Manuals for Onkyo T T-4555


Summary of Contents for Onkyo T T-4555
-
Page 1: Instruction Manual
T-4555 DAB/AM/FM Tuner T-4555 Instruction Manual Thank you for purchasing an Onkyo Tuner. Please read this manual thoroughly before making connec- tions and plugging in the unit. Following the instructions in this manual will enable you to obtain optimum performance and listening enjoyment from your new Tuner. -
Page 2: Important Safety Instructions
WARNING: TO REDUCE THE RISK OF FIRE OR ELECTRIC SHOCK, DO NOT EXPOSE THIS APPARATUS TO RAIN OR MOISTURE. CAUTION: TO REDUCE THE RISK OF ELECTRIC SHOCK, DO NOT REMOVE COVER (OR BACK). NO USER-SERVICEABLE PARTS INSIDE. REFER SERVICING QUALIFIED PERSONNEL. -
Page 3: Precautions
5. Never Touch this Unit with Wet Hands—Never handle this unit or its power cord while your hands are wet or damp. If water or any other liquid gets inside this unit, have it checked by your Onkyo dealer. 6. Handling Notes •... -
Page 4: Features
Features ❑ Tuner board upgrade capability ❑ 12V trigger IN/OUT ❑ RS232 port ❑ IR IN/OUT ❑ Hi-rigidity, anti-resonant chassis ❑ Aluminium front panel ❑ RI (Remote Interactive) capable European Model ❑ Automatic AM/FM tuning ❑ 40 AM/FM presets ❑ RDS (Radio Data System) ❑... -
Page 5: Table Of Contents
Contents Introduction Important Safety Instructions...2 Precautions ...3 Features ...4 Supplied Accessories ...4 Getting to Know the T-4555 ...6 Front Panel ...6 Display...6 Rear Panel...7 Remote Controller ...8 Remote Controller ...8 Before Using the T-4555 ...9 Installing the Batteries ...9 Aiming the Remote Controller ...9 Connections Connecting Antennas ...10 Connecting the Indoor FM Antenna...10... -
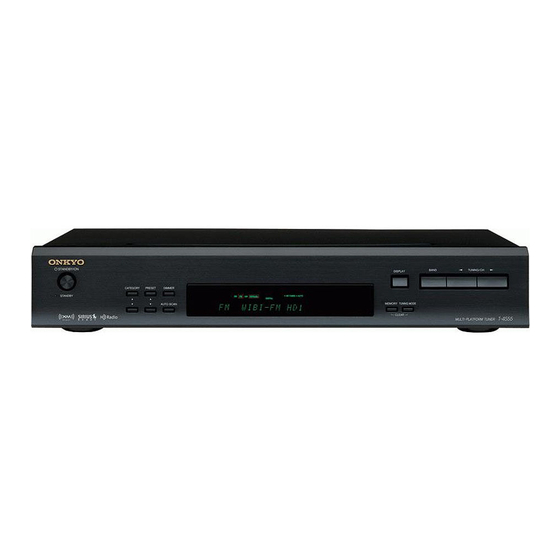
Page 6: Getting To Know The T-4555
Getting to Know the T-4555 Front Panel C 4 5 For detailed information, refer to the pages in parentheses. STANDBY/ON button (15) Sets the T-4555 to On or Standby. STANDBY indicator (15) Lights up when the T-4555 is on Standby. CATEGORY [ ]/[ ] buttons Selects categories for satellite radio. -
Page 7: Rear Panel
These two identical (Remote Interactive) jacks can be connected to the jacks on your other Onkyo components for interactive control. To use , the T-4555 must be connected with an cable and an audio cable. 12V TRIGGER IN/OUT (13) The 12V TRIGGER IN jack can be connected to the... -
Page 8: Remote Controller
Remote Controller Remote Controller STANDBY/ON button (15) Sets the T-4555 to On or Standby. Number buttons (16, 23) Used to select radio presets by number, and to enter AM/FM station frequencies and DAB channel num- bers in Direct Tuning mode. DIRECT TUNING button (16) Selects the Direct Tuning mode. -
Page 9: Before Using The T-4555
Before Using the T-4555 Installing the Batteries Open the battery compartment, as shown. Insert the two supplied batteries (AA) in accordance with the polarity diagram inside the battery compartment. Close the battery compartment. Notes: • If the remote controller doesn’t work reliably, try replacing the batteries. -
Page 10: Connecting Antennas
Connecting Antennas This section explains how to connect the supplied indoor FM antenna, AM loop antenna, and DAB antenna, and how to connect commercially available outdoor FM and AM antennas. ■ European model FM antenna jack AM antenna push terminals ■... - Page 11 Connecting Antennas—Continued Connecting the DAB Antenna (C-DAB Tuner Board Only) Screw the supplied DAB antenna’s plug onto the DAB ANTENNA jack. Once the T-4555 is ready for use, you’ll need to select a DAB station and adjust the position of the DAB antenna to achieve the best possible reception.
-
Page 12: Connecting The T-4555
TUNER Amplifier Note: • If the T-4555 is used with another Onkyo component, such as the A-9555, refer to its instruction manual as well. RCA Audio Connection Color Coding • Red plugs are used for the right channel, white •... -
Page 13: Connecting The 12V Trigger Jacks
Connecting the T-4555—Continued With (Remote Interactive), you can control your -capable Onkyo CD player, T-4555, and so on with your amp’s remote controller. • To use , you must make an analog audio con- nection between your amplifier and each audio component. -
Page 14: Controlling Components That Are Out Of Range
Connecting the T-4555—Continued Controlling Components That Are Out of Range You can use the following multi-room kits to control the T-4555 when it’s out of range of the remote controller: • Multiroom AV distribution and control systems such ® as those made by Niles and Xantech Controlling the T-4555 When It’s Out of Range... -
Page 15: Turning On And Listening To Am And Fm Radio
Turning On and Listening to AM and FM Radio STANDBY/ON TUNING MODE STANDBY indicator STANDBY/ON DIMMER TUNING/CH TUNING MODE BAND Turning On the T-4555 Connect the power cord to a suit- able wall outlet. Press the [STANDBY/ON] button on the T-4555 or remote control- ler. -
Page 16: Tuning Into Stations By Frequency
Turning On and Listening to AM and FM Radio—Continued Number buttons DIRECT TUNING Tuning into Stations by Frequency You can tune into AM and FM stations directly by entering the appropriate frequency. Press the [DIRECT TUNING] but- ton. Remote controller (Actual display depends on country.) Within 8 seconds, use the num- ber buttons to enter the fre-... -
Page 17: Using Rds
Turning On and Listening to AM and FM Radio—Continued Using RDS RDS only works with European and U.K. models and only in areas where RDS broadcasts are available. ■ What is RDS? RDS stands for Radio Data System and it’s a method of transmitting data in FM radio signals. - Page 18 Turning On and Listening to AM and FM Radio—Continued RT/PTY/TP AUTO SCAN PRESET Displaying Radio Text (RT) When tuned to an RDS station that’s broadcasting RT text information, you can display information. Press the [RT/PTY/TP] button once. The RT information scrolls across the display.
-
Page 19: Listening To Dab Digital Radio
Listening to DAB Digital Radio AUTO SCAN TUNING/CH AUTO SCAN BAND Press the [BAND] button repeat- edly to select DAB. indicator lights up. Remote controller When tuned into a DAB station, the TUNED indicator appears. DAB indicator Station name Selecting DAB for the Very First Time The very first time you select DAB, the Auto Tuning function automatically scans the DAB Band III and L-Band for the multiplexes (i.e., stations) available in... -
Page 20: Dab Setup
Listening to DAB Digital Radio—Continued Displaying DAB Radio Information Press the [DISPLAY] button repeatedly to display more information about the current DAB station. 1. DLS (Dynamic Label Segment) When tuned to a station that’s broadcasting DLS text data, the text will scroll across the display. 2. -
Page 21: Scan Mode
Listening to DAB Digital Radio—Continued Scan Mode This setting determines which DAB bands are scanned by the Auto Tuning function (see page 19). Use the Left and Right Arrow [ the following options, and then press [ENTER]. UK: Band III (11B–12D). WorldW (Worldwide): Band III (5A–13F) and L-Band (LA–LW). -
Page 22: Using Presets
Using Presets AUTO SCAN MEMORY PRESET PRESET –/+ AUTO SCAN Presetting Your Favorite Stations You can store any combination of up to 40 of your favorite AM, FM, and DAB radio stations as presets. ■ Using the T-4555: Tune into the station that you want to store as a preset. -
Page 23: Changing The Remote Id
Changing the Remote ID If the T-4555’s remote controller interferes with other Onkyo components located in the same room, you can change the remote control ID. You can select remote control ID #1, #2, or #3. By default, the remote control ID is set to #1. -
Page 24: Optional Tuner Boards
Optional Tuner Boards The following optional tuner boards are available for the T-4555: • For T-4555 European model: C-DAB board (AM/FM/DAB tuner) • For T-4555 U.K. model: C-AMFM board (AM/FM tuner) Board slot Caution: • Before installing or removing a board, be sure to turn off the T-4555 and unplug the power cord from the wall outlet. Failure to do so could seriously damage your equipment. -
Page 25: Installing A Board
Optional Tuner Boards—Continued Installing a Board Use the Allen wrench, hexagonal socket head screws, removal thumbscrews, and so on supplied with the board. Turn off the T-4555, and then unplug the power cord from the wall outlet. Use the supplied Allen wrench to unscrew the two hexagonal socket head screws that are securing the existing board or blanking plate. -
Page 26: Troubleshooting
If you have any trouble using the T-4555, look for a solution in this section. If you can’t resolve the issue yourself, try resetting the T-4555 before contacting your Onkyo dealer. To reset the T-4555 to its factory defaults, turn it on and, while holding down the [MEMORY] button, press the [STANDBY/ON] button. -
Page 27: Specifications
• The T-4555 and remote controller may be set to different remote control IDs. Set the T-4555’s remote control ID first, and then set the remote controller to the same ID (see page 23). Others Interactive control with other Onkyo • Make sure the cables and analog audio cables are connected correctly (see page 12). Connecting only an won’t work. - Page 28 Unit 1&12, 9/F, Ever Gain PlazaTower 1, 88, Container Port Road, Kwai Chung, N.T., HONG KONG Tel: 852-2429-3118 Fax: 852-2428-9039 http://www.ch.onkyo.com/ SN 29344319 (C) Copyright 2006 ONKYO CORPORATION Japan. All rights reserved. HOMEPAGE http://www.onkyo.com/ I0608-1 * 2 9 3 4 4 3 1 9 *...