Table of Contents
Advertisement
AV Receiver
TX-SR504
TX-SR504E
TX-SR8450
Instruction Manual
Thank you for purchasing an Onkyo AV Receiver.
Please read this manual thoroughly before making
connections and plugging in the unit.
Following the instructions in this manual will enable
you to obtain optimum performance and listening
enjoyment from your new AV Receiver.
Please retain this manual for future reference.
Contents
Introduction ..................................... 2
Connection .................................... 16
Turning On & First Time Setup..... 32
Basic Operation
Playing your AV components ....... 36
Listening to the Radio .................. 38
Enjoying the Listening Modes ..... 48
Advanced Operation ..................... 54
Troubleshooting ............................ 62
E
n
Advertisement
Table of Contents

Related Manuals for Onkyo TX-SR504E


Summary of Contents for Onkyo TX-SR504E
- Page 1 TX-SR504 TX-SR504E TX-SR8450 Instruction Manual Thank you for purchasing an Onkyo AV Receiver. Please read this manual thoroughly before making connections and plugging in the unit. Following the instructions in this manual will enable you to obtain optimum performance and listening enjoyment from your new AV Receiver.
-
Page 2: Important Safety Instructions
WARNING: TO REDUCE THE RISK OF FIRE OR ELECTRIC SHOCK, DO NOT EXPOSE THIS APPARATUS TO RAIN OR MOISTURE. CAUTION: TO REDUCE THE RISK OF ELECTRIC SHOCK, DO NOT REMOVE COVER (OR BACK). NO USER-SERVICEABLE PARTS INSIDE. REFER SERVICING QUALIFIED PERSONNEL. -
Page 3: Precautions
5. Never Touch this Unit with Wet Hands—Never handle this unit or its power cord while your hands are wet or damp. If water or any other liquid gets inside this unit, have it checked by your Onkyo dealer. 6. Handling Notes •... -
Page 4: Supplied Accessories
We, ONKYO EUROPE ELECTRONICS GmbH LIEGNITZERSTRASSE 6, 82194 GROEBENZELL, GERMANY declare in own responsibility, that the ONKYO product described in this instruction manual is in compliance with the corresponding technical standards such as EN60065, EN55013, EN55020 and EN61000-3-2, -3-3. GROEBENZELL, GERMANY... -
Page 5: Features
Features Amplifier • 7-channel amplifier • 75 watts per channel rms into 8 ohms, 2 channels driven, 20 Hz to 20 kHz, less than 0.08% total har- monic distortion (FTC rating) • WRAT (Wide Range Amplifier Technology) • Optimum Gain Volume Circuitry Processing •... -
Page 6: Enjoying Home Theater
Enjoying Home Theater Speaker Sets A and B You can use two sets of speakers with the AV receiver: speaker set A and speaker set B. Speaker set A should be used in your main listening room for up to 7.1-channel playback. *While speaker set B is on, speaker set A is reduced to 5.1-channel playback. -
Page 7: Table Of Contents
...31 Correcting Sound and Picture Sync ... 58 Controlling Other Components... 59 Entering Remote Control Codes... 59 Remote Control Codes for Onkyo Components Connected via Resetting REMOTE MODE Buttons ... 60 Resetting the Remote Controller ... 60 Troubleshooting ... 62 If you can’t resolve an issue, try resetting the AV... -
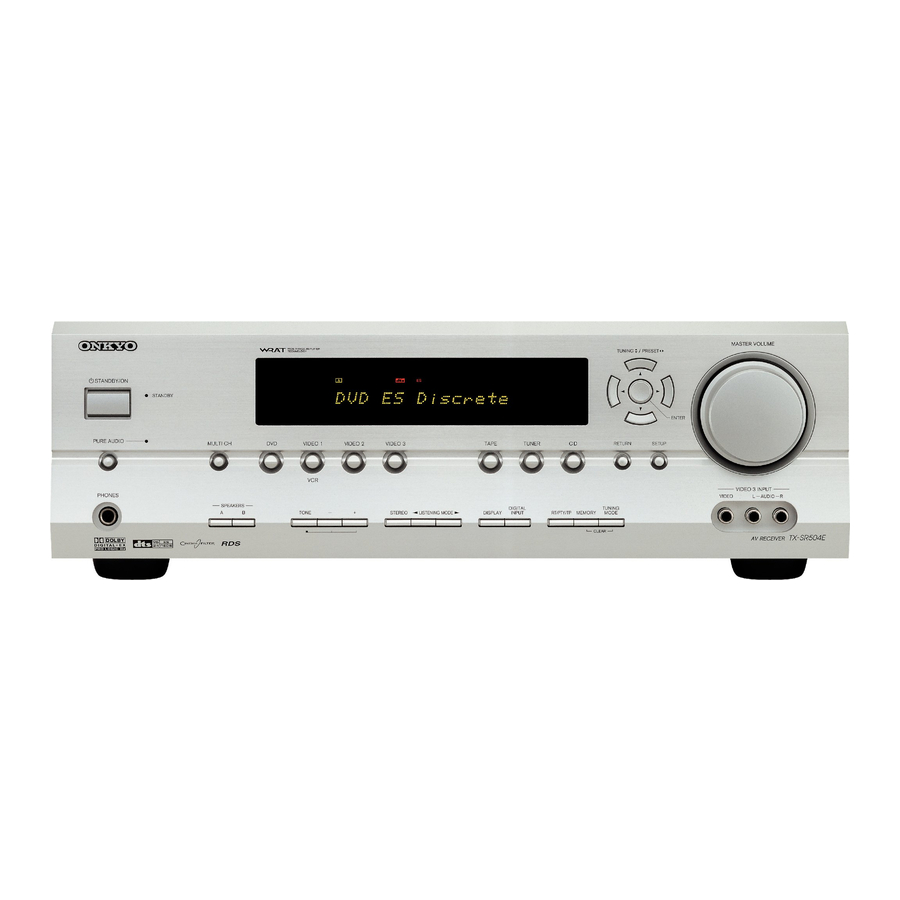
Page 8: Getting To Know The Av Receiver
Getting to Know the AV Receiver Front Panel North American Model STANDBY/ON STANDBY MULTI CH PHONES SPEAKERS Other Models STANDBY/ON STANDBY PURE AUDIO MULTI CH PHONES SPEAKERS For detailed information, see the pages in parentheses. STANDBY/ON button (32) Sets the AV receiver to On or Standby. STANDBY indicator (32) Lights up when the AV receiver is on Standby and flashes while a signal is being received from the... - Page 9 Getting to Know the AV Receiver—Continued TONE, [–], and [+] buttons (46) Used to adjust the bass and treble. STEREO button (48) Selects the Stereo listening mode. LISTENING MODE [ ] buttons (48) Select the listening modes. DISPLAY button (37) Displays various information about the currently selected input source.
-
Page 10: Rear Panel
This switched AC outlet can be used to supply power to another AV component. The type of outlet depends on the country in which you purchased your AV receiver. -capable Onkyo com- See pages 16–31 for hookup information. (Only some models) FRONT... -
Page 11: Remote Controller
Remote Controller Installing the Batteries To open the battery compartment, press the small hollow and slide open the cover. Insert the two supplied batteries (AA/R6) in accordance with the polarity diagram inside the battery compartment. Slide the cover shut. Notes: •... -
Page 12: Using The Remote Controller
Some of the remote controller operations described in this manual may not work as expected with other com- ponents. RECEIVER/TAPE Mode RECEIVER/TAPE mode is used to control the AV receiver. It can also be used to control an Onkyo cassette recorder connected via ON/STANDBY RECEIVER TAPE... - Page 13 Remote Controller—Continued For detailed information, see the pages in parentheses. ON/STANDBY button (32) Sets the AV receiver to On or Standby. INPUT SELECTOR buttons (36) Used to select the input sources. MULTI CH button (37) Selects the multichannel DVD input. DIMMER button (46) Adjusts the display brightness.
-
Page 14: Dvd Mode
Remote Controller—Continued DVD Mode By default, the remote controller is set to control an Onkyo DVD player. To select your DVD player as the input source, press: RECEIVER ON/STANDBY REMOTE MODE RECEIVER TAPE INPUT SELECTOR MULTI CH TAPE TUNER + 10... - Page 15 Remote Controller—Continued CD/MD/CDR/HDD Mode By default, the remote controller is set to control an Onkyo CD player. To select the input source, press: CD player RECEIVER MD or CD recorder TAPE Next generation HDD- compatible component TAPE * If you’re using an MD, CDR, or HDD component, you must change the Input Display (see page 33).
-
Page 16: Connection
Connecting Your Speakers Speaker Configuration For the best surround-sound experience, you should con- nect seven speakers and a powered subwoofer. The following table shows which channels you should use based on the number of speakers that you have. Number of speakers: ✓... -
Page 17: Connecting Speaker Set A
Connecting Your Speakers—Continued Connecting Speaker Set A Strip 5/8" (15 mm) of insu- lation from the ends of the speaker cables, and twist the bare wires tightly, as shown. Unscrew the terminal. Fully insert the bare wire, making sure that it’s touching the threaded shaft in the center. -
Page 18: Connecting Antennas
Connecting Antennas This section explains how to connect the supplied indoor FM antenna and AM loop antenna, and how to connect commercially available outdoor FM and AM antennas. The AV receiver won’t pick up any radio signals without any antenna connected, so you must connect the antenna to use the tuner. -
Page 19: Connecting An Outdoor Fm Antenna
Connecting Antennas—Continued Connecting an Outdoor FM Antenna If you cannot achieve good reception with the supplied indoor FM antenna, try a commercially available out- door FM antenna instead. Notes: • Outdoor FM antennas work best outside, but usable results can sometimes be obtained when installed in an attic or loft. -
Page 20: Connecting Your Components
Connecting Your Components About AV Connections • Before making any AV connections, read the manuals supplied with your other AV components. • Don’t connect the power cord until you’ve completed and double-checked all AV connections. Optical Digital Jacks The AV receiver’s optical digital jacks have shutter-type covers that open when an optical plug is inserted and close when it’s removed. -
Page 21: Connecting Audio And Video Signals To The Av Receiver
Connecting Your Components—Continued Connecting Audio and Video Signals to the AV Receiver By connecting both the audio and video outputs of your DVD player and other AV components to the AV receiver, you can switch the audio and video signals simultaneously simply by changing the input source on the AV receiver. : Signal Flow Video Audio... -
Page 22: Connecting A Tv Or Projector
Connecting Your Components—Continued Connecting a TV or Projector Step 1: Video Connection Choose a video connection that matches your TV ( , Step 2: Audio Connection Choose an audio connection that matches your TV ( , • With connection , you can listen to and record audio from your TV and listen via speaker set B. •... -
Page 23: Dvd Player
Connecting Your Components—Continued Connecting a DVD player Step 1: Video Connection Choose a video connection that matches your DVD player ( , You must connect the AV receiver to your TV via the same type of connection. Step 2: Audio Connection Choose an audio connection that matches your DVD player ( , •... - Page 24 Connecting Your Components—Continued Hooking Up the Multichannel DVD Input If your DVD player supports multichannel audio formats such as DVD-Audio or SACD, and it has a multichannel analog audio output, you can connect it to the AV receiver’s multichannel DVD input. Use a multichannel analog audio cable, or several normal audio cables, to connect the AV receiver’s DVD IN FRONT L/R, CENTER, SURROUND L/R, SURR BACK L/R, and SUBWOOFER jacks to the 7.1-channel analog audio output on your DVD player.
-
Page 25: Connecting A Vcr Or Dvd Recorder For Playback
Connecting Your Components—Continued Connecting a VCR or DVD Recorder for Playback With this hookup, you can use your VCR’s tuner to listen to your favorite TV programs via the AV Hint! receiver, useful if your TV has no audio outputs. Step 1: Video Connection Choose a video connection that matches your VCR or DVD recorder ( , You must connect the AV receiver to your TV via the same type of connection. -
Page 26: Connecting A Vcr Or Dvd Recorder For Recording
Connecting Your Components—Continued Connecting a VCR or DVD Recorder for Recording Step 1: Choose a video connection that matches your VCR or DVD recorder ( tion. The video source to be recorded must be connected to the AV receiver via the same type of connection. Step 2: Make the audio connection Connection VIDEO 1 OUT S... -
Page 27: Satellite, Cable, Set-Top Box, Or Other Video Source
Connecting Your Components—Continued Connecting a Satellite, Cable, Set-top box, or Other Video Source With this hookup, you can use your satellite or cable receiver to listen to your favorite TV programs Hint! via the AV receiver, useful if your TV has no audio outputs. Step 1: Video Connection Choose a video connection that matches the video source ( , You must connect the AV receiver to your TV via the same type of connection. -
Page 28: Cd Player Or Turntable
Connecting Your Components—Continued Connecting a CD Player or Turntable ■ CD Player or Turntable (MM) with Built-in Phono Preamp Step 1: Choose a connection that matches your CD player ( , phono preamp. COAXIAL Connect one or the other Connection must be assigned (see page 33) -
Page 29: Hdd-Compatible Component
Connecting Your Components—Continued Connecting an HDD-compatible Component As of this printing, the Onkyo Remote Interactive Dock is the only HDD-compatible component available. ■ For HDD-compatible components that support video Connect your HDD-compatible component’s analog audio output jacks and S-Video output jack to the AV receiver’s VIDEO 2 IN L/R jacks and VIDEO 2 IN S... -
Page 30: Connecting A Cassette, Cdr, Minidisc, Or Dat Recorder
AC OUTLET does not exceed the stated capacity (e.g., 100 W). Notes: • Onkyo components connected via connected directly to a wall outlet, not the AV receiver’s AC OUTLET. • The socket type and capacity depends on the country in which you purchased the AV receiver. -
Page 31: Connecting Onkyo Components
Connecting Your Components—Continued Connecting Onkyo Components Step 1: Make sure that each Onkyo component is connected to the AV receiver with an analog audio cable (con- nection in the hookup examples) (see pages 22 to 30). Step 2: Make the connection. -
Page 32: Turning On The Av Receiver
■ Have you connected a component to a digital audio input? If you have, see “Assigning Digital Inputs to Input Sources” on page 33. ■ Have you connected an Onkyo MD recorder, CD recorder, or next generation HDD-compatible component? If you have, see “Changing the Input Display” on page 33. -
Page 33: First Time Setup
TAPE VIDEO Note: HDD can be selected for the TAPE input selector or VIDEO 2 input selector, but not both at the same time. -capable Onkyo MiniDisc to work properly, you must change this 1, 2 1, 2 MASTER VOLUME... -
Page 34: Minimum Speaker Impedance Setup (Not North American Model)
First Time Setup—Continued ON/STANDBY INPUT SELECTOR MULTI CH TAPE TUNER + 10 D TUN --/--- DIMMER INPUT GUIDE TOP MENU SP A / B 2–8 ENTER PLAYLIST/CAT RETURN RETURN LISTENING MODE STEREO SURROUND Minimum Speaker Impedance Setup (not North American model) If the impedance of any of the connected speakers is 4 ohms or more but less than 6, set the minimum speaker impedance to “4 ohms.”... - Page 35 First Time Setup—Continued Use the Down [ ] button to select “Center,” and then use the Left and Right [ select Small, Large, or None. Small: Select if the center speaker is small. Large: Select if the center speaker is large.
-
Page 36: Playing Your Av Components
Playing Your AV Components Basic AV Receiver Operation MULTI CH STANDBY/ON STANDBY MULTI CH VIDEO VIDEO VIDEO PHONES SPEAKERS TONE STEREO LISTENING MODE Remote controller AV receiver RECEIVER VIDEO VIDEO VIDEO TAPE TUNER TAPE TUNER Remote AV receiver controller SPEAKERS Remote controller AV receiver... -
Page 37: Using The Multichannel Dvd Input
Playing Your AV Components—Continued ON/STANDBY REMOTE MODE RECEIVER TAPE INPUT SELECTOR M D/CDR MULTI CH MULTI CH TAPE TUNER CABLE + 10 D TUN --/--- DIMMER SLEEP DISC ALBUM INPUT LISTENING MODE STEREO SURROUND AUDIO SUBTITLE RANDOM REPEAT LEVEL - LEVEL + TEST TONE CH SEL... -
Page 38: Listening To The Radio
Listening to the Radio Listening to AM/FM stations STANDBY/ON STANDBY MULTI CH VIDEO VIDEO VIDEO PHONES SPEAKERS TONE STEREO LISTENING MODE With the built-in tuner, you can enjoy AM and FM radio stations. Use the [TUNER] input selector TUNER button to select AM or FM. In this example, FM has been selected. -
Page 39: Presetting Am/Fm Stations And Xm Channels
Listening to the Radio—Continued ■ Tuning into Stations by Frequency You can tune into AM and FM stations directly by enter- ing the appropriate frequency. ON/STANDBY REMOTE MODE RECEIVER TAPE INPUT SELECTOR M D/CDR Number buttons MULTI CH TAPE TUNER CABLE D TUN + 10... - Page 40 Listening to the Radio—Continued Using RDS (European Models Only) RDS only works with European models and only in areas where RDS broadcasts are available. When tuned into an RDS station, the RDS indicator appears. RDS indicator ■ What is RDS? RDS stands for Radio Data System and is a method of transmitting data in FM radio signals.
- Page 41 Listening to the Radio—Continued Displaying Radio Text (RT) STANDBY/ON STANDBY PURE AUDIO MULTI CH VIDEO VIDEO VIDEO TAPE TUNER PHONES SPEAKERS DIGITAL TONE STEREO LISTENING MODE DISPLAY INPUT RT/PTY/TP MEMORY CLEAR When tuned to an RDS station that’s broadcasting text information, the text can be displayed.
-
Page 42: Listening To Xm Satellite Radio ® (North American Models Only)
Listening to the Radio—Continued Listening to XM Satellite Radio (North American Models Only) Important XM Radio Information To receive XM Radio on this receiver you need to purchase an optional XM Passport System and sub- scribe to XM’s paid programming. Please note that XM is currently only licensed to provide service to the contiguous 48 United States (not available in Alaska and Hawaii) and portions of Canada. - Page 43 Listening to the Radio—Continued Signing Up for XM Satellite Radio Before you can use XM Satellite Radio, you must first sign up for an account. You’ll need a major credit card and your XM Satellite Radio ID, which you can get from the AV receiver, as explained below, or from the Passport System package and itself.
- Page 44 Listening to the Radio—Continued STANDBY/ON STANDBY MULTI CH VIDEO VIDEO VIDEO PHONES SPEAKERS TONE STEREO LISTENING MODE DISPLAY Selecting XM Channels from the Front Panel: Press the [TUNING MODE] button to select “Channel Search” or TUNING MODE “Category Search” mode. Press the [ENTER] button repeat- edly to select a category.
- Page 45 Listening to the Radio—Continued ENTER STANDBY/ON STANDBY MULTI CH VIDEO VIDEO VIDEO TAPE TUNER RETURN PHONES SPEAKERS DIGITAL TUNING TONE STEREO LISTENING MODE DISPLAY INPUT DIMMER MEMORY MODE CLEAR Positioning the XM Passport System You can check the signal strength of the XM radio signal and adjust the position of the XM Passport System accordingly.
-
Page 46: Common Functions
Common Functions This section explains functions that can be used with any input source. ON/STANDBY REMOTE MODE RECEIVER TAPE INPUT SELECTOR MULTI CH TAPE TUNER DIMMER + 10 D TUN --/--- DIMMER SLEEP DISC ALBUM INPUT GUIDE TOP MENU SP A / B ENTER PLAYLIST/CAT PLAYLIST/CAT... -
Page 47: Using The Sleep Timer
Common Functions—Continued Using the Sleep Timer With the sleep timer, you can set the AV receiver so that it turns off automatically after a specified period. Press the remote controller’s [SLEEP] button repeatedly to select the required sleep time. SLEEP You can set the sleep time from 90 to 10 minutes in 10 minute steps. -
Page 48: Using The Listening Modes
Using the Listening Modes Selecting Listening Modes For a description of each listening mode, see “About the Listening Modes” on page 50. • The Dolby Digital and DTS listening modes can only be selected if your DVD player is connected to the AV receiver with a digital audio connection (coaxial or optical). - Page 49 DTS-ES Discrete DTS-ES Matrix DTS+Neo:6 DTS+Dolby EX DTS+PLIIx Music DTS+PLIIx Movie Mono Movie Orchestra Onkyo Unplugged ✔ Original Studio-Mix TV Logic All Ch Stereo Full Mono *1. In the Pure Audio and Direct listening modes, 32 kHz, 44.1 kHz, and 48 kHz PCM is processed at 64 kHz, 88.2 kHz, and 96 kHz respectively. In listening modes other than Pure Audio, Direct, and Stereo, 64 kHz, 88.2 kHz, and 96 kHz PCM is processed at 32 kHz, 44.1 kHz, and 48 kHz...
-
Page 50: About The Listening Modes
Using the Listening Modes—Continued About the Listening Modes The AV receiver’s listening modes can transform your listening room into a movie theater or concert hall, with high fidelity and stunning surround sound. The illustration shows which speakers are active in each listening mode with 7.1 channel speaker sys- tem. - Page 51 System playback is scalable from 5.1 to 7.1 multichannel surround playback. Onkyo Original DSP Modes Mono Movie This mode is suitable for old movies and other mono sources. The center speaker outputs the sound as it is, while reverb is applied to the sound output by the other speakers, giving presence to even mono material.
-
Page 52: Using The Late Night Function
Using the Listening Modes—Continued ON/STANDBY REMOTE MODE RECEIVER TAPE INPUT SELECTOR MULTI CH TAPE TUNER + 10 D TUN --/--- DIMMER SLEEP DISC ALBUM INPUT GUIDE TOP MENU SP A / B ENTER ENTER PLAYLIST/CAT RETURN LISTENING MODE STEREO SURROUND AUDIO SUBTITLE RANDOM... - Page 53 Using the Listening Modes—Continued Press the [SETUP] button. Setup closes. SETUP The Audio Adjust settings are explained below. Input Channel Settings ■ Multiplex This setting determines which channel is output from a stereo multiplex source. Use it to select audio channels or languages with multiplex sources, multilingual TV broadcasts, and so on.
-
Page 54: Recording
Recording This section explains how to record the selected input source to a component with recording capability, and how to record audio and video from different sources. Recording the Input Source You can only record to a component that’s connected to the TAPE OUT or VIDEO 1 OUT jacks. -
Page 55: Advanced Setup
Advanced Setup Advanced Speaker Settings The Crossover Frequency, Double Bass, and Speaker Distance settings cannot be changed while a pair of headphones is connected, speaker set B is on, or the multichannel DVD input is being used. Crossover Frequency This setting only applies to the speakers that you speci- fied as Small in the “Speaker Configuration”... - Page 56 Advanced Setup—Continued Speaker Distance With these settings, you can specify the distance from each speaker to the listening position. Measure and make a note of the distance from each speaker to the listening position. Press the [RECEIVER] REMOTE RECEIVER MODE button, followed by the [SETUP] button.
-
Page 57: Digital Input Signal Formats
Advanced Setup—Continued Use the Left and Right [ buttons to adjust the speaker level, and use the Down [ ton to select the next speaker. The levels can be adjusted from –12 to +12 dB in 1 dB steps (–15 to +12 dB for the subwoofer). -
Page 58: Correcting Sound And Picture Sync
Advanced Setup—Continued Correcting Sound and Picture Sync When using progressive scanning on your DVD player, you may find that the picture and sound are out of sync. With this setting, you can correct this by delaying the audio signals. You can set it from 0 to 100 milliseconds (ms) in 20 millisecond steps. -
Page 59: Controlling Other Components
Controlling Other Components You can use the AV receiver’s remote controller (RC-647M) to control your other AV components, including those made by other manufacturers. This sec- tion explains how to enter the necessary remote control code for the component that you want to control (e.g., DVD player, TV, or VCR). -
Page 60: Remote Control Codes For Onkyo Components Connected Via
AV receiver, and operate the component. If you want to control an Onkyo component by pointing the remote controller directly at it, or you want to control an Onkyo component that’s not connected via... - Page 61 Controlling Other Components—Continued To control another component, point the remote controller at it and use the buttons explained below. (You must select the appropriate remote control mode first.) With some AV components, certain buttons may not work as expected, and some may not work at all. ■...
-
Page 62: Troubleshooting
If you can’t resolve the issue yourself, try resetting the AV receiver before contacting your Onkyo dealer. To reset the AV receiver to its factory defaults, turn it on and, while holding down the [VIDEO 1] button, press the [STANDBY/ON] button. - Page 63 Troubleshooting—Continued • The surround back speakers are not used with all lis- tening modes. Select another listening mode (page 50). • Not much sound may be produced by the surround back speakers with some sources. • Make sure the speakers are configured correctly (page 34).
- Page 64 • With some AV components, certain buttons may not work as expected, and some may not work at all. • To control an Onkyo component that’s connected via , point the remote controller at the AV receiver. Be sure to enter the appropriate remote control code first (see page 60).
- Page 65 five seconds, and then plug it back in again. Onkyo is not responsible for damages (such as CD rental fees) due to unsuccessful recordings caused by the unit’s malfunction. Before you record important data, make sure that the material will be recorded cor- rectly.
-
Page 66: Specifications
Specifications Amplifier Section Rated Output Power (FTC) All channels: 75 watts minimum continuous power per channel, 8 ohm loads, 2 channels driven from 20 Hz to 20 kHz, with a maximum total harmonic distortion of 0.08% 100 watts minimum continuous power per channel, 6 ohm loads, 2 channels driven at 1 kHz, with a maximum total harmonic distortion of 0.1%... - Page 67 Memo...
- Page 68 Units 2102-2107, Metroplaza Tower I, 223 Hing Fong Road, Kwai Chung, N.T., HONG KONG Tel: 852-2429-3118 Fax: 852-2428-9039 http://www.ch.onkyo.com/ SN 29344181 (C) Copyright 2006 ONKYO CORPORATION Japan. All rights reserved. HOMEPAGE http://www.onkyo.com/ I0602-1 * 2 9 3 4 4 1 8 1 *...
- Page 69 Remote Control Codes 1. While holding down the REMOTE MODE button that you want to set, press the [DISPLAY] button for 3 seconds. 2. Use the number buttons to enter the 4-digit remote control code. Codes de télécommande 1. Maintenez le bouton REMOTE MODE à initialiser enfoncé...
- Page 70 1347 Memorex 0690 Metronic 0690 Mitsubishi 1521, 0521, 1403 Mustek 0730 0785, 1404 Nintaus 1051 Norcent 1003, 0872 Onkyo 0627, 1612(RI) Orion 1419 Palsonic 0835, 0852 0703, 1010, 1011, Panasonic 1362, 1462, 1490, 1762 Philco 0690 0675, 0854, 1260, Philips...
- Page 71 0826, 0028, 0037 1373 1208 Magnavox 0038 Marantz 0038, 0180, 0435 Memorex 0180 Musical Fidelity 0393 0721, 1208 Onkyo 1327(RI), 1817 1063, 0037, 0468, Optimus 0087, 0179, 0426 Panasonic 0388, 0752 Philips 0274 1063, 1062, 1087, Pioneer 0468, 0192 1062, 0468, 0053,...
- Page 72 TV Codes 0264 Acura 0009 0653, 0108, 0092, Addison 1150 Admiral 0463, 0163 0761, 0783, 0815, Advent 0842 Aiko 0092 Aiwa 0701, 1180 0060, 0812, 0702, 0030, 0264, 0218, Akai 0009, 0208, 0672, 0729, 0745, 0753, 1207 Akura 0264, 0218 0037, 0218, 0009, Alba 0371...
- Page 73 0047, 0051, 0451, 0180, 0030, 1447, 1454, 0560, 0092, 1147, 1347 0037 Geloso 0009 Genexxa 0218, 0163 Gibralter 0017, 0030 Gintai 1150 Go Video 0886 0154, 0030, 0037, GoldStar 0001, 0056, 0109, 1150, 1378 0037, 0634, 0343, Goodmans 0360, 0371, 0374 Gorenje 0370 0218...
- Page 74 TV Codes 0154, 0156, 0051, 0053, 0030, 0264, 0508, 0009, 0056, 0170, 1150, 1182, 1378, 1456 Neckermann 0556, 0037 0037 Netsat 0037 0009, 0092, 0161, Newave 1150 0037, 0264, 0218, Nikkai 0035 Nikko 0030, 0092 Noblex 0154 0548, 0606, 0480, Nokia 0631 Norcent...
- Page 75 0037, 0698, 0712, Teac 0264, 0009, 0418, 1149 Technics 0250, 0051 Technisson 0714 Techwood 0051, 0056 0051, 0264, 0218, Teco 0653, 0009, 0092 0054, 0180, 0150, Teknika 0060, 0056, 0092 Teleavia 0343 0702, 0625, 0056, Telefunken 0109, 0335, 0343, 0896 Teletech 0009 Tensai...
- Page 76 VCR Codes 1972 Admiral 0209, 0479 0348, 0307, 0352, Aiwa 0124, 0479, 1291 Akai 0041, 0315, 0175 Akiba 0072 0209, 0072, 0352, Alba 0315 Alienware 1972 American High 0035 Amoisonic 0479 0162, 0226, 0480, Anam 1037 Anam National 0162, 1562, 0226 Anitech 0072 Baird...
- Page 77 0047, 0046, 0159, Sanyo 1330 Saville 0352 Schaub Lorenz 0041 Schneider 0072 Scott 0184, 0121 0035, 0047, 0046, Sears 1237 Seleco 0041 0209, 0807, 0848, Sharp 1285 Shintom 0072 Singer 0072 Sonic Blue 0614, 0616 Sonolor 0046 0035, 0033, 0636, 1032, 1232, 1295, Sony 1296, 1447, 1448,...
- Page 78 CABLE CABLE/SAT Codes Cable Converter 0003, 0008, 0033 Americast 0899 Amstrad 1222 Bell South 0899 British Telecom 0003 Cable & Wireless 1068 Clearmaster 0883 ClearMax 0883 Contec 0019 Coolmax 0883 0877, 1877, 0477, Daeryung 0008 Digeo 1187 Director 0476 DX Antenna 1500 Filmnet 0443...
- Page 79 Satellite Receiver Hirschmann 0173 Hisense 1535 0819, 1250, 1284, Hitachi 1525 0775, 1775 Hughes 0749, 1749, 1442 Hughes Network 1142, 0749, 1749, Systems 1442, 1443, 1444 Humax 1176, 1427, 1675 1535 Indovision 0887 ISkyB 0887 Jerrold 0869 0775, 0492, 1170, 1531, 1775 0173, 0200, 0442, Kathrein...
- Page 80 Units 2102-2107, Metroplaza Tower I, 223 Hing Fong Road, Kwai Chung, N.T., HONG KONG Tel: 852-2429-3118 Fax: 852-2428-9039 http://www.ch.onkyo.com/ SN 29344188A (C) Copyright 2006 ONKYO CORPORATION Japan. All rights reserved. HOMEPAGE http://www.onkyo.com/ I0603-2 * 2 9 3 4 4 1 8 8 A *...