Table of Contents

Related Manuals for Brother GT-341


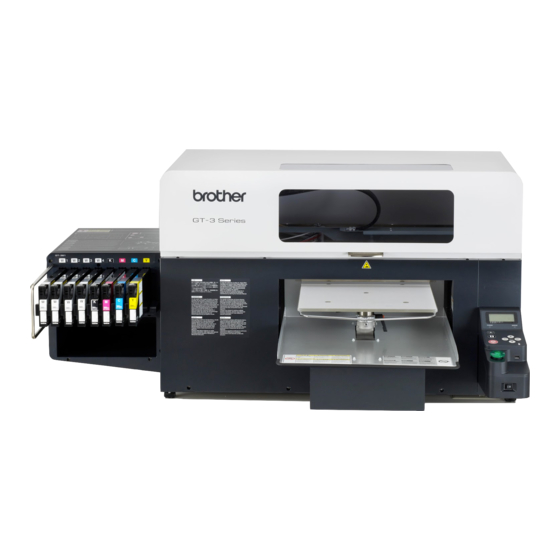
Summary of Contents for Brother GT-341
- Page 1 INSTRUCTION MANUAL GT-3 Series Please read this manual before using the printer. Please keep this manual within easy reach for quick reference. GARMENT PRINTER GT Series US support homepage http://www.brother-usa.com/Garmentprinters/...
- Page 2 MEMO Note based on California law (USA) on the use and handling of Perchlorate This product contains a CR Coin Lithium Battery which contains Perchlorate Material – special handling may apply. See http://www.dtsc.ca.gov/hazardouswaste/perchlorate. GT-3 Series...
-
Page 3: Safety Instructions
Thank you very much for buying a BROTHER printer. Before using your new printer, please read the safety instructions below and the explanations given in the instruction manual. SAFETY INSTRUCTIONS [1] Safety indications and their meanings This instruction manual and the indications and symbols that are used on the printer itself are provided in order to ensure safe operation of this printer and to prevent accidents and injury to yourself or other people. -
Page 4: Environmental Requirements
If any liquid gets inside the printer, immediately turn off the power switch and disconnect the power cord. Contact Brother to arrange a service call to resolve. CAUTION Environmental requirements Use the printer in an area which is free from The ambient temperature should be within the range of 18 ... - Page 5 Keep the grease out of the reach of children. When replacing parts installing optional accessories, be sure to use only genuine Brother parts. Brother will not be held responsible for any accidents or problems resulting from the use of non-genuine parts. GT-3 Series...
- Page 6 The following warning labels appear on the printer. Please follow the instructions on the labels at all times when using the printer. If the labels have been removed or are difficult to read, please contact your nearest Brother dealer. Watch your fingers, or you may be injured.
- Page 7 Grease Wash Liquid Waste Ink Tank Pretreatment (20kg) Maintenance Solution (5kg) Ink Cartridge Pretreatment (5kg) 0085Y GT-3 Series...
-
Page 8: Table Of Contents
CONTENTS 1. Read This First ................................1 1-1. Precautions................................1 1-2. Unpacking Your Printer ............................5 1-3. Required Condition..............................5 1-3-1. Environment..............................5 1-3-2. Electrical Requirements..........................6 1-3-3. Software Information............................6 1-3-4. Other Requirements............................6 1-3-5. Consumable Requirements and Options ....................7 2. Identifying Your Printer’s Parts............................8 2-1. Front ..................................8 2-2. - Page 9 4. Printing Directly from Applications..........................53 4-1. Basic Printing Procedure ............................54 4-2. Setting the Applications’ Print Condition.......................54 4-2-1. Common Notice for All Applications ......................54 4-2-2. Settings for CorelDRAW ..........................56 4-2-3. Settings for Adobe Photoshop........................62 4-2-4. Settings for Adobe Illustrator .........................68 4-2-5. Settings for Adobe Photoshop Elements.....................73 4-2-6.
- Page 10 6-2. Regular Maintenance............................121 6-2-1. Daily Cleaning White for replacing dull White Ink (Once a day, before printing) ........121 6-2-2. White Agitation to save the waste .......................121 6-2-3. White Tube Cleaning (once a week)......................122 6-2-4. Waste Ink Disposal............................125 6-2-5. Replacing the Platen Sheet ..........................126 6-2-6.
-
Page 11: Read This First
1. Read This First 1-1. Precautions Please observe the following precautions before using your printer. GT-3 represents the common specifications of GT-381, GT-361 and GT-341 models. The individual specifications are described with each model name. Please advise the following to your customers who buy your printed materials: ... - Page 12 1. Read This First Never refill ink, never reconstruct ink cartridges; ink may cohere inside the cartridge bag, tube or even Print Head and may cause serious damage to your printer. We assume no responsibility for any problem caused by using them. Only genuine new ink cartridges should be used. The ink cartridges should always be installed;...
- Page 13 However, in this manual, the ® marks or marks are not used. Brother logo is registered trademark of Brother Industries, Ltd. Microsoft and Windows are either registered trademarks of Microsoft Corporation in the United States and/or other countries.
- Page 14 This software cannot be used if the customer disagrees with this agreement. 1. Ownership The ownership of this software and any reproductions belongs to Brother Industries (herein referred to as "Company") or its supplier, Wind River KK. This agreement does not transfer this company's software copyright to the customer.
-
Page 15: Unpacking Your Printer
"How to uncrate" Manual <Note> Filter Cartridges (8 for GT-381, 6 for GT-361, 4 for GT-341) are installed in both Ink Cartridge Slots. Keep them since they should be used for maintenance & transport operations. 1-3. Required Condition Please use your printer under the conditions described in this section. -
Page 16: Electrical Requirements
1. Read This First 1-3-2. Electrical Requirements Power: Single-phase 100-240 V, 50/60 Hz Power Consumptions: 0.4 A (average) 1-3-3. Software Information Supported OS: Windows Vista, Windows 7, Windows 8 (32bit/64bit) Latest Windows XP (32 bit), Supported Interface: USB 2.0 Minimum System Requirements: 256 MB RAM (512 MB or more is recommended), 128 MB free disk space (256 MB or more is recommended), 1 GHz CPU (2 GHz or more is recommended.) -
Page 17: Consumable Requirements And Options
1. Read This First T-shirt (printed material): Cotton 100% Light-colored polyester-mixed cotton (cotton should be 50% or more) Dark-colored polyester-mixed cotton (cotton should be 70% or more) <Note> • Some manufacturing brands may not work as good as 100% cotton garment. You need to test prior to your production, especially when you print on something new and unknown materials. -
Page 18: Identifying Your Printer's Parts
2. Identifying Your Printer’s Parts 2. Identifying Your Printer’s Parts 2-1. Front 0043Y Name Description Platen Holds the T-shirt to be printed. Platen Sheet Prevents a T-shirt from slipping so that an image is printed on your desired position. T-shirt Tray Keeps parts of T-shirt hanging from the Platen (e.g. -
Page 19: Right
2. Identifying Your Printer’s Parts 2-2. Right 0044Y Name Description Exhaust slot The outlet of the Exhaust Fan. Do not cover; Leave the space of 20 cm or more to release the exhaust air. 2-3. Rear 0045Y Name Description AC cord socket Inserts AC cord. -
Page 20: Inside Of The
2. Identifying Your Printer’s Parts 2-4. Inside of the Front Cover Cancel any operation, restore the Platens and turn off your printer before opening the Front Cover. Lift the Front Cover with both hands until the lock is set when opening. Keep pushing the Stop Lever to release the lock and close the Front Cover with both hands. -
Page 21: Upper Part Of The Maintenance Unit
2. Identifying Your Printer’s Parts 2-5. Upper part of the Maintenance Unit 0048Y Name Description Caps (Front: Color side) Cover the surface of the Print Heads and absorb ink in head cleaning. From the left black, magenta, cyan, and yellow. Caps (Back: White side) Cover the surface of the Print Heads and absorb ink in head cleaning. -
Page 22: Under The Platen
2. Identifying Your Printer’s Parts 2-6. Under the Platen 0049Y Name Description Platen Fixing Lever Fixes the Platen. Tighten/Loosen this lever to install/uninstall the Platen and to adjust the Platen height. <In case [B] that you cannot rotate Platen Fix Lever (1) by hitting the Platen (3)> Move the Platen Height Adjustment Lever (2) to the A position in the right image and loose the Platen Fixing Lever (1). -
Page 23: Control Panel
2. Identifying Your Printer’s Parts 2-7. Control Panel 0050Y Name Description Error Lamp OFF: no errors ON: one or more errors have been detected. See "7-4. Error messages". Power Lamp ON: shows the power is ON. Head Cleaning Cleans all the Print Heads with normal cleaning. (the number of cleaning depends on the Button model). -
Page 24: Display
2. Identifying Your Printer’s Parts 2-7-1. Display The following image indicates that GT-3 has received a print data and ready to print. The Display indicates Job, printer status and the information needed for printing operations. 01e0026Y Item Shown Description Job Name Shows the indentified name of the print data, which is automatically set by Printer Driver. -
Page 25: Menu List
2. Identifying Your Printer’s Parts 2-7-2. Menu List Push either one of the OK Button, Up Button, Down Button and Back Button to go into the Menu. Menu Content Executes Head Cleaning of either one by one or of all four Print Heads. See "7-2-2. - Page 26 Auto Job Delete: Deletes the print data automatically after the print number which is set with Printer Driver is finished. Default is OFF. GT-341 mode (No White): Sets the printer to stop all the operation of White Heads. See "6-2-5. Required Maintenance for the Long Storage".
-
Page 27: Getting Started
3. Getting Started 3. Getting Started Before using your printer, it needs to be correctly setup as described in this chapter. WARNING Do not handle the power cord with wet hands, otherwise it may cause electric shocks. Do not set up the printer in a dusty environment. If dust collects inside the printer, it may cause fire or electric shocks or problems with correct operation. -
Page 28: Placing Your Printer
3. Getting Started 3-1. Placing Your Printer Uncrate and Setting the printer by following the steps in Uncrate Manual, which is packed with the printer. Locate your printer taking the following into account. Environmental conditions are suitable. Avoid direct sunlight, dust and extremes of humidity. ... -
Page 29: Turning On/Off Your Printer
3. Getting Started 3-2. Turning On/Off Your Printer <Note> Before you connect the power cord, make sure: The Ink Cartridges, Wiper Cleaners and Flushing Sponge et al. are adequately installed. Waste ink tube is properly set the Waste Ink Tank*. ... -
Page 30: Turning Off Your Printer
3. Getting Started 3-2-2. Turning Off Your Printer When you have finished using your printer, follow the instructions below to turn it off. (1) Make sure that your printer is [standby] or [ready] mode. (2) Select [Platen Reset] in Menu to store the Platen in the printer. (3) Press Power Switch to turn OFF your printer. -
Page 31: Preparing Your Pc
This section describes how to install the GT-3 Printer Driver (FileOutput), manuals (Basic Operation Manual/ Instruction Manual), Brother GT-3 File Viewer, and other tools. Make sure the steps because there are some different dialogs shown in Windows XP / Windows Vista / Windows 7 / Windows 8. -
Page 32: Connection With Usb 2.0 Cable: For Windows Xp
3. Getting Started 3-3-3. Connection with USB 2.0 Cable: for Windows XP (1) Connect the USB 2.0 cable to your printer (power OFF). <Note> We do not recommend connection via a USB hub to the printer. (2) Connect the other end of the USB 2.0 Cable to your PC. (3) Turn on your GT-3 printer. - Page 33 (6) Click "Finish" when "Completing the Found New Hardware Wizard" dialog. (7) Open "Printers and Faxes" in "Control Panel". (8) Click either "Brother GT-3" "Brother GT-3 FileOutput" icon and select "Set as Default Printer" on “File” menu. This will help to do the layout with your application software.
-
Page 34: Network Setting: For Windows Xp
3. Getting Started 3-3-4. Network Setting: For Windows XP 3-3-4-1. Assignment of your computer’s IP Address <Note> Jump to “3-3-4-2. Assignment of GT-3’s IP Address” if you r PC has already been assigned IP address. Select [ Network and Internet Connection] in the Control Panel. Select [ Network Connection ]. - Page 35 3. Getting Started Select [ Local Area Connection ]. Click the [ Properties ] Button. GT-3 Series...
- Page 36 3. Getting Started Select [ Internet Protocol (TCP/IP) ] and click the [ Properties] Button. Assign the defined number of IP address, Subnet mask and Default gateway to your PC and click [ OK ] button. (The numbers below are examples.) GT-3 Series...
-
Page 37: Assignment Of Gt-3'S Ip Address
3. Getting Started 3-3-4-2. Assignment of GT-3’s IP Address Assign the GT-3’s IP address after you finish assigning your computer’s IP address. Turn ON the GT-3 with your PC and GT-3 are connected with USB 2.0 cable. Execute the GT-3 Maintenance and select [ IP address Assignment ]. - Page 38 3. Getting Started IP address is successfully assigned to GT-3. The error dialog appears if some irregular numbers are assigned as IP address in the step (2), Subset mask or Default gateway. Confirm the numbers and re-enter. GT-3 Series...
-
Page 39: Setting On The Lan
3. Getting Started 3-3-4-3. GT-3 Setting on the LAN Connect your PC with GT-3 with LAN cable and turn ON the printer. Select [ Printers and Faxes ] and select [ File ] > [ Add Printer ]. The Wizard starts. Click the [ Next ] Button. GT-3 Series... - Page 40 3. Getting Started Select the [ Local printer attached to this computer ] and click the [ Next ] Button. Select [ Create a new port] and [ Standard TCP/IP Port ] as the Type of port. Click the [ Next ] Button. GT-3 Series...
- Page 41 3. Getting Started The Wizard starts. Click the [ Next ] Button. Input the IP address that you assigned in the Step (2) of “3-3-4-2. Assignment of GT-3’s IP Address” and click the [ Next ] Button. GT-3 Series...
- Page 42 3. Getting Started Wait for a while and then the dialog changes to the following [ Add Standard TCP/IP Printer Port Wizard ]. Select [ Custom ] in the Device Type and click the [ Settings… ] Button. Select [ LRP ] in Protocol, input [ BINARY_P1 ] in Queue Name of LPR Settings, and click the [ OK ] Button.
- Page 43 3. Getting Started (10) [ Add Standard TCP/IP Printer Port Wizard ] is finished. Click the [ Finish ] Button. (11) The dialog goes back to the [ Add Printer Wizard ] and the Install Printer Software starts. Click the [ Have Disk ] Button.
- Page 44 (12) Click the [ Browse… ] Button and select the [ 32bit_OS ] folder in the Installer, and then click the [ OK ] Button. (Only 32 bit OS is available for Windows XP.) (13) Confirm that [ Brother GT-3 ] should be selected in the Printers, and click the [ Next ] Button. GT-3 Series...
- Page 45 3. Getting Started (14) Select [ Replace existing driver ] and click the [ Next ] Button. (15) The dialog shows "Set as Default Printer (better to select GT-3 File Output Printer Driver as Default Printer)", “Share name: Not shared” and “Test Page: No” and click the [ Next ] Button. (16) The final dialog appears to show that GT-3 has successfully added to your PC.
-
Page 46: Installation Of Pc For Windows Vista / Windows 7 / Windows 8 (32 Bit / 64 Bit)
Refer first to "3-3-2. PC preparation: For Windows XP (32 bit)" and confirm the process. Install the file Output Printer Driver "Brother GT-3 FileOutput" first to your PC. Tools and manuals are installed together from Install CD, and PC must be restarted. Then PC is connected to USB 2.0 cable, the printer turned ON, and USB 2.0 cable connected to the printer. -
Page 47: Connection With Usb 2.0 Cable: For Windows Vista / Windows 7 / Windows 8
(4) After installation, open "Printers" in "Control Panel" of PC. (5) Click either "Brother GT-3" or Brother GT-3 FileOutput icon and select "Set as Default Printer" on “File” menu. This will help to do the layout with your application software. The PC setup is now completed. -
Page 48: Network Setting: For Windows Vista / Windows 7 / Windows 8
3. Getting Started 3-3-7. Network Setting: For Windows Vista / Windows 7 / Windows 8 3-3-7-1. Assignment of your computer’s IP address <Note> Jump to “3-3-7-2. Assignment of GT-3’s IP Address” if you r PC has already been assigned IP address. When your PC has not been assigned IP address, connect your PC to the Network with LAN cable first and then select [ Network and Internet ] and select [ Network and Sharing Center ]. - Page 49 3. Getting Started Click the [ Properties ] Button. The following caution appears when [ User Account Control ] is ON. Select [ Continue ] Button to go next. GT-3 Series...
- Page 50 3. Getting Started Select [ Internet Protocol Version 4 (TCP/IPv4) ] and click the [ Properties ] Button. Assign the defined number of IP address, Subnet mask and Default gateway to your PC and click [ OK ] button. (The numbers below are examples.) GT-3 Series...
-
Page 51: Assignment Of Gt-3'S Ip Address
3. Getting Started 3-3-7-2. Assignment of GT-3’s IP Address Assign the GT-3’s IP address after you finish assigning your computer’s IP address. The following caution appears when [ User Account Control ] is ON. Select [ Allow ] Button to go next. Turn ON the GT-3 with your PC and GT-3 are connected with USB 2.0 cable. - Page 52 3. Getting Started Assign the defined number of IP address, Subnet mask and Default gateway to GT-3,and click [ OK ] button. (The numbers below are examples.) IP address is successfully assigned to GT-3. The error dialog appears if some irregular numbers are assigned as IP address in the step (3), Subset mask or Default gateway.
-
Page 53: Setting On The Lan
3. Getting Started 3-3-7-3. GT-3 Setting on the LAN Connect your PC with GT-3 with LAN cable and turn ON the printer. Windows Vista: Select [ Printers ] from the [ Control Panel ]. Windows 7: Select [ Devices and Printers ] from the [ Control Panel ]. Windows 8: Select [ View devices and printers ] from the [ Control Panel ]. - Page 54 3. Getting Started Select [ Create a new port ] and [ Standard TCP/IP Port ] as the Type of port. Click the [ Next ] Button. Input the IP address that you assigned in the Step (3) of “3-3-7-2. Assignment of GT-3’s IP Address”, and turn OFF the check box [ Query the printer and automatically select the driver to use ].
- Page 55 3. Getting Started The following “Detecting TCP/IP Port” dialog appears and then it changes automatically to “Add Printer”. The message “The device is not found on the network” appears. Select [ Custom ] and click the [ Settings… ] Button. GT-3 Series...
- Page 56 3. Getting Started Select [ LRP ] in Protocol, input [ BINARY_P1 ] in Queue Name of LPR Settings, and click the [ OK ] Button. The Wizard will soon go back to the Step (6). Click the [ Next ] Button. GT-3 Series...
- Page 57 3. Getting Started The dialog goes back to the [ Add Printer ] and the Install Printer Software starts. Click the [ Have Disk ] Button. (10) Click the [ Browse… ] Button and select either [ 32bit_OS ] or [ 64bit_OS ] folder in the Installer depending on your PC, and then click the [ OK ] Button.
- Page 58 3. Getting Started (11) Confirm that [ Brother GT-3 ] should be selected in the Printers, and click the [ Next ] Button. (12) Select [ Replace the current driver ] and click the [ Next ] Button. (13) The dialog shows “Printer Name”, "Set as Default Printer (better to select GT-3 File Output Printer Driver as Default Printer)", “Share name: Not shared”.
-
Page 59: Opening The Installed Manuals
Wizard. 3-3-8. Opening the installed manuals (1) Click “All Programs” on “Start” menu. (2) Select "Manuals“ in "Brother GT-3 Tools”. (3) Click the manual you want to open. The language is the same that is selected in installation. <Note>... -
Page 60: Opening The Useful Tools
"GT_Tshirts.cpl" for CorelDRAW are available. The colors are the same in GT Color Chart "ColorChart_1200.ar3" and "ColorChart_600.ar3" in "Test Data“ in "Brother GT-3 Tools". Print Color Chart to check the colors that your Printer actually provides as color formula guide. (CorelDRAW does not allow putting the same colors in one color palette so we provide two different color palettes.) -
Page 61: How To Use Firmware Update Tools
Download the new Firmware program from the Web site when informed. Read the Firmware program with GT-3 Firmware Update Tool in "Brother GT-3 Tools" and update the Firmware program inside the printer. (1) Select "All Programs" on "Start" menu of your PC. -
Page 62: Setting Up Your Printer
3. Getting Started 3-4. Setting Up Your Printer Adjust the display contrast and the speaker volume as required. 3-4-1. Adjusting the Display Contrast (1) Press the OK Button on your printer’s Control Panel to go to the Menu. (2) Use the Up/Down Button to select [ Printer Setting ] > [ LCD Contrast ] and then press the OK Button. The following display appears. -
Page 63: Printing Directly From Applications
If any liquid gets inside the printer, immediately turn off the power switch and disconnect the power cord. Contact Brother to arrange a service call to resolve. Do not use the printer when smoke or a bad odor coming from the printer, otherwise it may cause fire or electric shocks or problems with correct operation. -
Page 64: Basic Printing Procedure
4. Printing Directly from Applications 4-1. Basic Printing Procedure (1) Set the proper color settings and print conditions of the application. For precise editing and output, applications such as Adobe Photoshop, Illustrator, CorelDRAW, Paint Shop Photo Pro are recommended, e.g. to deal with higher resolution images (200 dpi or higher). See “4-2. - Page 65 4. Printing Directly from Applications Print Layout: Your printer has a large print area 14x16 inches (35 x 40 cm). Any application has a rule to do the layout in printing, e.g. Microsoft Internet Explore sets the artwork at the center top, and Microsoft Power Point does at the center middle.
-
Page 66: Settings For Coreldraw
4. Printing Directly from Applications 4-2-2. Settings for CorelDRAW Color settings: (1) Select [ Tools ] > [ Color Management ] (2) CorelDRAW 10/11/12: Select “Color Management off” as the style. CorelDRAW 10/11/12 CorelDRAW X3/X4: Select RGB radio button. Check the left top menu: it changes [default settings] to [ Custom (Current settings not saved)]. - Page 67 4. Printing Directly from Applications CorelDRAW X5: Select the menu as shown in the below and click OK. Default color settings Color Profiles: RGB: sRGB IEC61966-2.1 CMYK: U.S. Web. Coated (SWOP) v2 Primary color mode: RGB Rendering intent: Relative colorimetric CorelDRAW X5 GT-3 Series...
- Page 68 (1) Select [ File ] > [ Print Setup ] menu. (2) Select either one from “Brother GT-3 (for USB 2.0)”, “Brother GT-3 (for LAN)”, or "Brother GT-3 FileOutput" for the printer to be used. Select either one of those as your PC's default printer then the settings will be easier.
- Page 69 Open the [Color] tab and make the settings below: Select the radio button "use document color settings" Color conversions performed by: "Brother GT-3 File Output" or "Brother GT-3" Correct colors using color profile: " RGB IEC61966-2.1 Rendering intent: Relative colorimetric <Important!>...
- Page 70 4. Printing Directly from Applications Convert to Bitmap: (1) Select [ Bitmaps ] > [ Convert to Bitmap... ] menu. (2) CorelDRAW 10/11/12: Make sure that "Color" is RGB and "Apply ICC Profile" is OFF. 200 - 400 dpi is enough for solid clipart.
- Page 71 4. Printing Directly from Applications <Important!> The platen size may become 14x16 inches when pressing Set From Printer, even after setting the size of 10x12 inches at "Document Properties" dialog box of Printer Driver. To make print data in platen size of 10x12 inches, set Width : 254 mm (10 inch), Height : 304.8 mm (12 inch).
-
Page 72: Settings For Adobe Photoshop
4. Printing Directly from Applications 4-2-3. Settings for Adobe Photoshop Color settings: (1) Select [ Edit ] > [ Color Settings ] menu. The Color Settings window appears. (2) Make Color settings as follows, and then click “OK". Advanced Mode: Check Working Spaces: RGB: sRGB IEC61966-2.1 CMYK: U.S. - Page 73 (1) Select [ File ] > [ Print with Preview Alt + Ctrl + P ] menu (depends on versions). When the default printer of the PC used is set either "Brother GT-3” or "Brother GT-3 FileOutput", the layout is set in this window.
- Page 74 4. Printing Directly from Applications Photoshop CS2/CS3 Make print options as follows, go to [Page Setup...] to do Printer Driver settings, and then click “Print”. More Options: click Pull-down menu: Color Management Print: Document: Profile: sRGB IEC IEC61966-2.1 or untagged Options: Color Handing: Let Printer Determine Colors Photoshop CS2 (Continued on the next page)
- Page 75 4. Printing Directly from Applications Photoshop CS4/CS5 Make print options as follows, go to [Page Setup...] > [Printer Settings] to do Printer Driver settings, and then click “Print”. Color Management: Document Color Handling: Printer Manages Colors Rendering Intent: Relative Colorimetric Photoshop CS4/CS5 <...
- Page 76 4. Printing Directly from Applications Color Swatch in Useful Tools: (1) See "3-3-9. Opening the Useful Tools" and download Photoshop Color Swatch (called palette in CorelDRAW) "GT_Colors_T.aco". (2) Select [ Window ] and check [ Swatches ] to show. Click the little triangle at the right top of the window (in the orange circle below) to show the submenu.
- Page 77 4. Printing Directly from Applications Change RGB=255 bitmap white to RGB=254: RGB=255 (paper color) white is always transparent with no ink printed. When you print an image like photo, there may be RGB=255 white spots and they will be ink holes. Normally you can select RGB=255 white directly with the menu in select and replace to RGB=254 white.
-
Page 78: Settings For Adobe Illustrator
4-2-4. Settings for Adobe Illustrator <Important!> Set either one from “Brother GT-3 (for USB 2.0)”, “Brother GT-3 (for LAN)”, or "Brother GT-3 FileOutput" as the default printer before you go on to the following steps, otherwise, an image may be printed incorrectly. - Page 79 4. Printing Directly from Applications Opening the new file: Set the New Document settings as follows: Width: 14 in (355.6 mm) Height: 16 in (406.4 mm) Orientation: Portrait Color Mode: RGB Color Illustrator CS2 Printing: (1) Click [ File ] > [ Print ] menu. (2) Illustrator 10/CS: Make sure the following settings.
- Page 80 4. Printing Directly from Applications Illustrator CS2/CS3/CS4/CS5: Make sure the following settings. Document Profile and Printer Profile are either "sRGB IEC61966-2.1" or "Untagged RGB". Color Handling: Let Illustrator determine Colors Rendering Intent: Relative Colorimetric Click "Setup" to do Printer Driver Settings. Illustrator CS2/CS3/CS4/CS5 GT-3 Series...
- Page 81 Platen 10 x 12 automatically. Confirm the Platen Size in the Printer Driver window before you print. Do not check “Print to File” on Print window to make print files. Use "Brother GT-3 FileOutput" printer driver. (Continued on the next page)
- Page 82 4. Printing Directly from Applications An image that is smaller than 14 x 16 inches (e.g. a letter-size image) may not be printed on proper positions, or may result in errors. If this happens follow the steps below to correct. (1) Open "Document Setup"...
-
Page 83: Settings For Adobe Photoshop Elements
4. Printing Directly from Applications 4-2-5. Settings for Adobe Photoshop Elements Color settings and print settings are required before printing. After the printer driver is installed, set the Colors before editing the document. Color settings: (1) Select "Color Settings..." on "Edit" menu. The Color Settings window appears. -
Page 84: Settings For Paint Shop Photo Pro
If you have entered the Job Comment, it will be displayed. Do not check “Print to File” on Print window to make print files. Use "Brother GT-3 FileOutput" printer driver. 4-2-7. Printing From Other Applications If the application does not have Color Settings, the Color space is sRGB (Windows standard). -
Page 85: Setting The Printer Driver Condition
"Rollover help" indicates in the bottom of the dialog. Move the pointer on the menu. The information can be seen with GT File Viewer when you use Brother GT-3 FileOutput Printer Driver to make AR3 file. See the following pages for details. -
Page 86: Selecting Machine Mode
7)] and [ View Devices and Printers (Windows 8)] and select the printer and right-click to select [ Property ]. Change the Machine Mode to either GT-361 or GT-341 and click [ OK ] button. Restart the application. This change is available after you execute the application. -
Page 87: Entering The Job Comment
PC Data Error occurs when you send a GT-381 print data with White Ink data to GT-361, or a GT-381/GT-361 print data with White Ink data to GT-341. Any GT-3 can print a " Color Only" print data. 4-3-5. Setting the Resolution Select the resolution in printing, either [ 1200 dpi x 1200 dpi ] or[ 600 dpi x 600 dpi ]. -
Page 88: White Settings
4. Printing Directly from Applications 4-3-6. White Settings The following menu appears on when either [ Color + White ] or [ White Only ] is selected. Adjust the volume of White Ink for Highlight (White Ink volume for whitish colors) and Mask (underbase White Ink to cover the print media for CMYK Inks). -
Page 89: Print With Black Ink On Black Garment
4. Printing Directly from Applications Print "WhiteVolume_1200.ar3" or "WhiteVolume_600.ar3" to find out the optimal Highlight / Mask. Those data are in [ All Program ] > [ Brother GT-3 Tools ] > [ Test Data ]. How to open the WhiteVolume_600.ar3 and WhiteVolume_1200.ar3 Image of WhiteVolume_1200.ar3 printed on Lavender T-shirt (R=174, G=111, B=255) -
Page 90: Color Multiple Pass Printing
(blurring). Print “InkVolume_1200.ar3" or “InkVolume_600.ar3" first and select the best ink volume by sliding the Ink Volume tab. It is in [ All Program ] > [ Brother GT-3 Tools ] > [ Test Data ]. Example 1 (50% cotton 50% polyester thin T-shirt) "7"... -
Page 91: Settings For White Ink
4. Printing Directly from Applications 4-3-11. Settings for White Ink This menu is available only for White ink ([ Color + White ] and [ White Only ]). RGB=255 white (paper color) is always transparent with no ink printed. RGB=0 black is transparent too when [ Print with Black ink ] is checked OFF, when black color is expressed with the background T-shirt body color. -
Page 92: Printing The Image File On Transparent Layer
[ Transparent Layer ] > [ Create ARTR File ] to create ARTR file. Step 4: Open the PNG file with RGB info made by Microsoft Paint and print with Brother GT-3 FileOutput Printer Driver, by importing the transparent layer info file (ARTR) with [ Transparent Layer ] > [ Import ARTR File ]. - Page 93 4. Printing Directly from Applications Step 2: Save the RGB info and transparent info to different PNG files. Open the PNG file with Microsoft Paint (Windows XP and Vista) and then the transparent info will be ignored. Save as another PNG file with [ File ] > [ Save as ... ]. Transparent info is ignored and the image is indicated as shown in the left.
- Page 94 4. Printing Directly from Applications Delete the Red, Green and Blue Channels in the Channels. Right-click the channel to be deleted and select [ Delete Channel ] . Click the "Red" Channel and right-click to select [ Delete Channel ]. The dialog box “Flatten layers?”...
- Page 95 (1) Open "test_TR.PNG" file with Photoshop. (successive operation from (10) of Step 2 in the previous page) (2) Select [ File ] > [ Print ] and execute Brother GT-3 FileOutput. Adjust the settings of the print position and the size, and click [ Page Setup ...] (some versions: Properties) to open the Printer Driver settings.
- Page 96 1. Check-OFF (3) Select [ File ] > [ Print ] and select Brother GT-3 FileOutput and print "test_RGB.PNG". Align the print position exactly the same as the ARTR file in (2) of Step 3.. Select [ Page Setup ...] (some versions: Properties) and open the Printer Driver settings.
-
Page 97: Setting Print Direction As Uni-Directional
4. Printing Directly from Applications (4) Check the Transparent Layer Checkbox and click the radio button [ Import ARTR File ]. Select the ARTR file "test.ARTR" with transparent info that was made in (6) of Step 3. Select "test.artr". (5) Click [ OK ] Button here and in the Main Setting too and print. The AR3 file, the combination of RGB info and transparent info included, is saved. -
Page 98: Printing Color Chart
Color gamut. Print the T-shirt and Color Chart will work something like Pantone's Color Formula Guide. It is in [ All Program ] > [ Brother GT-3 Tools ] > [ Test Data ]. The colors in this chart correspond to the Color Palettes (Swatches) for CorelDRAW, Adobe Photoshop and Illustrator. -
Page 99: Uninstalling / Installing The Platen
4. Printing Directly from Applications 4-4. Uninstalling / Installing the Platen Replace the Platen for your print material. When the option Platen e.g. Youth Platen is used, be sure to set "Platen Size" in Printer Driver menu (see "4-3-3. Selecting the Platen Size"). 4-4-1. -
Page 100: Installing The Platen
4. Printing Directly from Applications 4-4-2. Installing the Platen (1) Place the Platen. (2) Tighten the Platen Fixing Lever securely. <Note> Adjust the Platen Height (see "4-5. Placing the T-shirt on the Platen "). Platen Fixing Lever GT-3 Series... -
Page 101: Lowering The Platen Height
4. Printing Directly from Applications 4-4-3. Lowering the Platen height The Platen height can be lowered by 13 mm by replacing the Bush Platen Shaft and the Platen Positioning Plate to "Platen Lowering Set" (option). Prepare a hexagon wrench (3 mm). The adjustable height of the Platen (from the left most position "A"... - Page 102 4. Printing Directly from Applications (3) Replace the Bush Platen Shaft with Platen Height Adjustment Lever assembled and the Platen Positioning Plate to the "Platen Lowering Set" (option). Positioning jig Bush platen shaft Platen positioning plate Machined surface Platen height adjustment lever <Note>...
-
Page 103: Placing The T-Shirt On The Platen
4. Printing Directly from Applications 4-5. Placing the T-shirt on the Platen CAUTION Ensure there is adequate space left for safe working. The Platen moves forward while operating. Do not handle the platen while printing. If your hand gets caught between the platen or the T-shirt tray and the covers, it may be injured. - Page 104 To align a T-shirt easily, you can print a grid on the Platen Sheet. It is in [ All Program ] > [ Brother GT-3 Tools ] > [ Useful Tools ]. Grid14x16.ar3 is for the standard Platen 14x16. (See "3-3-9. Opening the Useful Tools".)
- Page 105 4. Printing Directly from Applications (7) Press the Platen Button to insert the Platen, and check the clearance between the flap of the Clearance Sensor and the T-shirt. If the Platen height is appropriate, the space is around 2.0 mm, to avoid the fuzzy fibers on the surface.
-
Page 106: Printing
4. Printing Directly from Applications 4-6. Printing CAUTION Ensure there is adequate space left for safe working. The Platen moves forward while operating. Do not handle the platen while printing. If your hand gets caught between the platen or the T-shirt tray and the covers, injury may result. - Page 107 4. Printing Directly from Applications How to dilute Pretreatment : You can have some margins to dilute Pretreatment. Select the ratio for your material and purpose. Standard: Pretreatment 1 L + Distilled Water 2 L ( 1:2 volume ratio) thinner mix: Pretreatment 1 kg + Distilled Water 2 kg ( 1:2 weight ratio) rich mix: Pretreatment 1 L + Distilled Water 1 L ( 1:1 volume ratio)
- Page 108 4. Printing Directly from Applications How to apply with the roller: (1) Pour the Pretreatment onto the tray. Place the roller into pretreatment and make it absorb enough pretreatment. Our option Roller is recommended to apply even and smooth. (2) Draw the roller softly and remove unnecessary pretreatment. Roll back and forth smoothly and slowly. Weight the T-shirt before / after then you can see the amount of applied Pretreatment to help you acquaint.
-
Page 109: Making One Print
4. Printing Directly from Applications 4-6-2. Making One Print GT-3 receives the next print data from PC in printing. Just before you press the Print Button, confirm the Job Comment (or file name) and the counter on the display of the Control Panel. (1) Make sure the Print Button has been turned on, which indicates your printer has received the print data successfully. -
Page 110: Removing The T-Shirt From The Platen
4. Printing Directly from Applications 4-7. Removing the T-shirt from the Platen (1) Hold the shirt slightly to allow are to get between the shirt and the platen. (2) Hold both shoulders of the T-shirt, and then pull it out straight from the Platen. Hold the T-shirt by the printed area on your side, which is easier to deal with the wet T-shirt safe. -
Page 111: Printing Ar3 Files
(2) Select [ Print ]on [ File ] menu of the application. Print dialog box appears. (3) Select “Brother GT-3 FileOutput " Printer Driver and click "Properties" or "Preferences" for Printer Driver settings. (See "4-3. Setting the Printer Driver Condition ".) - Page 112 5. Printing AR3 Files (4) Print with the application's print menu. Wait for a while until the following preview window appears. Click [ Save ] button. <Important!> Depending on the application, the image size, resolution and PC spec, it may take a few minutes to open the Preview window after clicking “OK”...
-
Page 113: Reading Ar3 Files Saved In A Usb Flash Drive
5. Printing AR3 Files 5-2. Reading AR3 Files Saved in a USB flash drive <Note> Use a USB flash drive: the capacity under 32 GB, FAT 32 formatted. Your printer can only read AR3 files from a USB flash drive. (1) Insert the USB flash drive into the Slot in front of the Operation Panel. -
Page 114: Sending Ar3 Files From Gt-3 File Viewer To Your Printer
5-3. Sending AR3 Files from GT-3 File Viewer to your Printer (1) Double-click the AR3 file directly or select the GT-3 File Viewer in your PC's [ All Program ] > [ Brother GT-3 Tools] and click [ Browse… ] to open the AR3 file. - Page 115 5. Printing AR3 Files (3) When the White data is included, you can simulate the print by changing the background color. Click [ Change ] button and select the color. When [ Show White Image ] is checked, White data under the Color data is indicated.
- Page 116 5. Printing AR3 Files Simulation with the brown background (R=128, G=64, B=64) (4) Select the print data of the Present Layer so that you can check the individual image of the print data when the print data have multiple loading/unloading of the Platen. [ Total ] shows the preview of all combined print data.
-
Page 117: Maintenance
Keep the grease out of the reach of children. When replacing parts and installing optional accessories, be sure to use only genuine Brother parts. Brother will not be held responsible for any accidents or problems resulting from the use of non-genuine parts. -
Page 118: Replacing Consumables
6. Maintenance 6-1. Replacing Consumables This section describes how to replace the consumables and the maintenance of the printer. 6-1-1. Replacing the Ink Cartridge The ink indicator on the Display flashes when the Ink Cartridge is getting low. Prepare the new Ink Cartridge (option*), and replace it when “Empty XXXX (color)”... - Page 119 Confirm the color of the ink cartridge. Loading a wrong color causes serious damage to print quality, and could damage to the Print Heads. If you have installed a wrong color, immediately contact Brother or your dealer for a service call.
-
Page 120: Replacing The Wiper Cleaner And Cleaning The Caps / Wipers
6. Maintenance 6-1-2. Replacing the Wiper Cleaner and Cleaning the Caps / Wipers The Wiper Cleaner needs to be replaced regularly. Keep the Print Head Cap and Wiper Blade clean when replacing the Wiper Cleaner. If not, the waste ink may drop on a T-shirt in printing or mis-firing may not be easily improved. - Page 121 6. Maintenance (6) Pick the plastic bag on your right hand with your left hand, and wrap the Wiper Cleaner with the plastic bag. 0060Y (7) Remove the wrapped Wiper Cleaner carefully, not to drop waste ink and dispose of in accordance with local regulations.
- Page 122 6. Maintenance (10) Use the one side of wet Clean Stick to clean the front side of the Wiper Blade. (11) Use the other side of the wet Clean Stick to clean the rear of the Wiper Blade. Do not wipe the White / Color with the same Clean Stick.
-
Page 123: Replacing Flushing Plate Sponge And Flushing Plate Felt
6. Maintenance 6-1-3. Replacing Flushing Plate Sponge and Flushing Plate Felt After replacing the Wiper Cleaner, replace the Flushing Plate Sponge and Flushing Plate Felt. Remove the Flushing Plate from the printer by lifting up the right side slightly and pull up to the right direction. (2) Remove the used Flushing Plate Sponge and Flushing Plate Felt from the Flushing Plate and remove the waste ink inside. - Page 124 6. Maintenance (3) Pick up the edge of the used Fan Filter mounted in the Filter Cover, and remove the Fan Filter from the Filter and dispose of it in accordance with local regulations. Cover. Put it in the plastic bag Filter Cover Fan Filter 0069Y...
-
Page 125: Replacing The Roller Felts
6. Maintenance 6-1-5. Replacing the Roller Felts (1) Unscrew two screws and remove the Felt Support. Felt Support Felt Felt 0071Y (2) Remove the used Felt. (3) Apply the new Felt to the Felt Support. Pay attention not to give damage to the Felt Support. (4) Position the edge of the Felt Support "A"... -
Page 126: Cleaning The Encoder Strip
6. Maintenance 6-1-7. Cleaning the Encoder Strip There must be some dust and mist covering the Encoder Strip to cause reading error when some error occurs during the printing operation. Clean the Encoder Strip with the attached tool. (1) Prepare the Encoder Cleaner and ethanol of 95% or higher purity. (2) Select [ Maintenance ] of the menu and press OK Button. - Page 127 6. Maintenance (8) Apply ethanol to the Felt fully, app. 2 ml, of the Encoder Cleaner. Ethanol 0073Y <Note> Use ethanol of 95% or higher purity. (9) Push the position [A] shown below with your finger to give space between the felts. 0074Y (10) Put the Encoder to the Encoder Strip so that the Encoder Strip should run between the felts straightly, and the bottom part of the felt should touch the inside of the Encoder Cover.
-
Page 128: Replacing The Cmyk Filter
6. Maintenance (12) Move the Carriage slowly to the leftmost position by hand. <Note> Ink may stain the Platen and other places while moving the Carriage, the bottom surface may be wet and dirty with ink. (13) Wipe the Encoder Cleaner two or three times from the rightmost position to the left, by following the former steps (10) and (11), where the Encoder Cleaner did not reach in step 11. - Page 129 6. Maintenance (1) Turn OFF the printer, and open the Front Cover with both hands until it is locked with the stopper. (2) Put on the gloves. Cover the Print Heads and the Carriage with a soft and clean cloth so that the ink may not make them dirty as well as some parts may not drop inside the printer.
- Page 130 6. Maintenance (5) Prepare the new Filter. Insert the Filter to the upper tube and rotate the two joints (upper and the bottom of the Filter) by 30-45 degrees. <Note> Confirm the connection; there may be cause loose (slow) ink introduction or missing nozzles. Rotate the top and the bottom of the Filter.
-
Page 131: Regular Maintenance
6. Maintenance 6-2. Regular Maintenance Do not leave the White ink inside the printer. White pigment precipitates and may cause serious damage to your printer. This section describes how to maintain the White Ink. Execute the following menu to keep your printer and print result in good conditions. -
Page 132: White Tube Cleaning (Once A Week)
6. Maintenance 6-2-3. White Tube Cleaning (once a week) This menu washes away the pigments inside the Tubes and Print Heads. When you execute this menu all-in-one time, GT-381 for four Tubes, GT-361 for two Tubes, you can retrieve the White Ink before Tube Cleaning. It takes time but you can save the cost. - Page 133 6. Maintenance (5) Throw away the Maintenance Solution from the bottle. (6) Fill the Maintenance Solution into the bottle for Tube Cleaning. Pay attention not to put dust inside the cleaned bottle. <Note> Keep the 250 ml of Maintenance Solution inside the bottle to execute Tube Cleaning for one print head.
- Page 134 6. Maintenance (7) [ Close Air-in Cap ] is indicated. Confirm that the Air-in Cap is capped (closed) and press OK Button. The pump starts turning to load the Maintenance Solution. 0193Y (8) After 30 seconds, when the peep sounds ring, the message [ Open Air-in Cap ] is indicated on the Control Panel.
-
Page 135: Waste Ink Disposal
6. Maintenance Loading White Ink after Tube Cleaning (1) Load the White Ink with full of Maintenance Solution in the Tube, the step (9) in the previous page. Insert the White Ink Cartridge and select [ Maintenance ] > [ Load White ] from the menu and press OK. (2) Select [ All Whites ] or one from W1-W4 and press OK. -
Page 136: Replacing The Platen Sheet
The Platen Sheet gets dirty in operation. Please replace the Platen Sheet to avoid making smudges on a T-shirt. To help align a T-shirt, you can print a grid on the Platen Sheet. It is in [ All Program ] > [ Brother GT-3 Tools ] >... -
Page 137: Required Maintenance For The Long Storage
Capping Cartridges*. Solution. <Note> The menu [ GT-341 mode ] is for GT-381/GT-361 with no White Print Heads mounted. If you select this menu ・ with White Print Heads mounted, the White Print Heads will surely get damaged by no maintenance. - Page 138 ・ The menu [ GT-341 mode ] is for GT-381/GT-361 with no White Print Heads mounted. If you select this menu with White Print Heads mounted, the White Print Heads will surely get damaged by no maintenance.
- Page 139 6. Maintenance B. In case you do not run the printer at all: Preparation before storage (1) Execute White Tube Cleaning by referring to "6-2-3. White Tube Cleaning (Once a week)". Select [ All Whites ] and wash away the pigments inside the Tubes and Print Heads. Insert Capping Cartridge (option) to the Ink Cartridge Slots with full of Maintenance Solution.
- Page 140 6. Maintenance Color Side Pour 7 and 8 drops of Wash Liquid to the caps, referring to the steps 4 to 6 in the Preparation before storage above. Restart the White Ink printing Reinstall the White Ink by referring the steps in “C. Restart after 2 weeks’ storage” in this chapter. C.
-
Page 141: Troubleshooting
7. Troubleshooting 7. Troubleshooting CAUTION Ensure there is adequate space left for safe working. The Platen moves forward while operating and it may be injured. Do not handle the platen while printing. If your hand gets caught between the platen or the T-shirt tray and the covers, it may be injured. -
Page 142: Solving Printer Problems
7. Troubleshooting 7-1. Solving Printer Problems Use the table below to help solve printer problems. Problem Cause Solution Cannot send print data from You have selected the wrong Confirm the selected printer, and select the the PC. printer. correct one. USB cable not connected Disconnect and re-connect the USB 2.0 cable Your PC and OS do not... - Page 143 ARP files are saved. GT-3 cannot print GT-541/GT-782 print data. Make AR3 print data with Brother GT-3 File Output printer driver. That USB flash drive does Use a USB flash drive that is FAT32 formatted not match the specification.
-
Page 144: Solving Print Quality Problems
7. Troubleshooting 7-2. Solving Print Quality Problems Use the table below to solve print quality problems. Problem Cause Solution Print is faded. The graphic applications’ See “4-2 Setting the Applications’ Print settings are not appropriate. Condition" and modify the artwork. Maybe CYMK mode is being used for data. - Page 145 7. Troubleshooting Problem Cause Solution The outlines of printed image The Platen height may be Adjust the Platen height to make the clearance are not clear, or texts and wrong with a too large gap. between the Clearance Sensor and the surface outlines are printed doubled.
-
Page 146: Procedure For Solving The Print Quality Problems
7. Troubleshooting 7-2-1. Procedure for Solving the Print Quality Problems Follow the procedure (Step 1 to 7) below until the print quality problem is solved. <Note> The following steps are shown with CMYK Print Heads and do the same in case of White Print Heads. Step 1: Confirm the amount of remaining Ink in the Ink Cartridge and execute Normal Cleaning. - Page 147 Make sure to execute Powerful (or Initial) Cleaning after Nozzle Cleaning. If the problem is not solved, go to the next step. Step 6: Contact Brother Customer Service or your dealer. Please tell your service how the issue has started, the present conditions, the troubleshooting that you have done, etc.
-
Page 148: Cleaning The Print Heads
7. Troubleshooting 7-2-2. Cleaning the Print Heads Your printer automatically cleans its Print Heads every 24 prints (you can change the frequency; see “7-2-5. Changing the Auto Cleaning Setting”), or when your printer has not been used for more than two hours. The auto-cleaning starts when you press the Print Button in these situations. - Page 149 7. Troubleshooting (3) Place a sheet of paper (A4 or letter size) at the right corner of the Platen as shown below. Use adhesive tape to make the paper flat. You can use a T-shirt instead of paper. Paper of A4/ Letter size 0081Y (4) Select [ Test Print ] with the Up/Down Button from the menu and then press the OK Button.
- Page 150 7. Troubleshooting White: Like CMYK shown in the previous page, the Print Heads of W1 W2 (GT-381: one in W1, two in W2) have the problem. The Print Heads need to be cleaned (better to execute [ All Whites] , see “7-2-2. Cleaning the Print Heads”).
-
Page 151: Changing The Print Direction
7. Troubleshooting 7-2-4. Changing the Print Direction When there are large gaps between the Print Heads and printed medium, or when printing on very high absorbent material, horizontal stripes and color graining can appear on the printed image. You can solve this problem using one-way "Uni-Directional"... -
Page 152: Cleaning The Print Head Nozzles
7. Troubleshooting 7-2-6. Cleaning the Print Head Nozzles Use the Nozzle Cleaning Kit to clean the Head Nozzles (in the red square in the photo below). <Note> Pay careful attention in cleaning the clean Print Head Nozzles, which are both delicate and expensive. The Print Head Nozzle should be cleaned only when it is needed as follows in “7-2-1. - Page 153 7. Troubleshooting (7) Wet the surface (nozzle plate) of the Print Head with Wash Liquid. Then rub softly the nozzle plate to remove ink and debris (clogged ink) from the nozzle plate until the nozzle plate is clean. Use a soft, clean and lint-free cloth to loosen and remove the dirty ink and debris from the Clean Applicator to keep its surface clean and wet again with Wash Liquid.
-
Page 154: Replacing The Print Head
7. Troubleshooting 7-2-7. Replacing the Print Head The print heads can be replaced the following steps. Please make contact to your dealer or Brother for further information. <Important!> ・ Print Heads are delicate and easy to damage, please handle with care. - Page 155 7. Troubleshooting (3) Rotate the Tube Connector (the white part over the Print Head) by 90 degrees (left photo), lift it straight up slowly and remove the Tube from the Print Head (right photo), and insert the Fitting that you removed in the step 2 of the previous page.
- Page 156 7. Troubleshooting (12) Remove the silicone tubes that are attached the screws under the Carriage PCB (left), and remove the holes of the cover (right), and remove the plastic cover. (13) Pull out the black tabs at the both edges of Flat Cable of the Print Head to the front side of the printer, and remove the Flat Cable (the following example: Magenta).
- Page 157 7. Troubleshooting (15) Lean the Print Head backward to the inside of the Carriage (left), hold the Knob and pull up the Print Head and remove it from the printer (right). Keep the surface of the Print Head (Nozzles) safe, do not touch to other parts or the Print Head may be seriously damaged.
- Page 158 7. Troubleshooting (18) Rotate the Lever to fix the Print Head. (19) Remove the protection film. (20) Remove the Fitting that inserted in the step (3), connect the Tube to the Print Head and fix the Tube by rotating the Tube Connector by 90 degrees. (21) Take off the gloves and connect the Flat Cable to the Carriage PCB.
- Page 159 (32) If the quality is OK go on to the next section "7-2-8. Adjustment after the Print Head has been replaced" to complete the adjustment after the Print Head replacement. If you still see the problem in print quality, contact your Brother dealer for assistance. GT-3 Series...
- Page 160 7. Troubleshooting White Print Head: <Important!> White Print Heads are in the backside, the opposite side of CMYK Print Heads, confirm the operation by looking form the left side of the printer. Pay attention to the surface of the Print Head (Nozzles) not to hit the other parts in removing / mounting or the Print Head may be seriously damaged.
- Page 161 7. Troubleshooting (8) The Carriage moves to the position of the Flushing Plate. Follow the indication of the Display and turn OFF the printer. (9) Open the Front Cover with both hands until it is locked with the stopper. (10) Take off the gloves and touch some metallic part to dissipate static electricity (e.g. Covers). Better to put on the Wrist Strap.
- Page 162 (24) If the quality is OK go on to the next section "7-2-8. Adjustment after the Print Head has been replaced" to complete the adjustment after the Print Head replacement. If you still see the problem in print quality, contact your Brother dealer for assistance. GT-3 Series...
-
Page 163: Adjustment After The Print Head Has Been Replaced
Platen and a dark-colored T-shirt (better to be pretreated). (3) Execute [ GT-3 Maintenance ] in [ Brother GT-3 GT-Tools ]. (4) Select [ Firing Adjustment ] and click [ Next ]. Follow the steps indicated in the dialog. After adjustment, select [ White/Color Alignment ] to confirm the alignment. -
Page 164: Adjusting The Cr Speed
7. Troubleshooting 7-2-9. Adjusting the CR Speed Execute this menu after you clean the Carriage Shaft, or you are asked from the technical support. See "6-1-6. Cleaning the inside of the printer and restart". (1) Press either one of the Up / Down / Back / OK Button to enter the Menu. (2) Select [ Printer Setting ] >... -
Page 165: Adjusting The Flushing Volume
7. Troubleshooting 7-2-11. Adjusting the Flushing Volume Flushing is very important to keep the print quality. The initial setting is decided on the assumption that the printer works under the environment of 45 % humidity. Use a humidifier to avoid the Print Heads from clogging with dried ink as well as increase the volume of Flushing ink. -
Page 166: Adjusting The Amount Of White Ink In Daily Cleaning White
7. Troubleshooting 7-2-12. Adjusting the amount of White Ink in Daily Cleaning White The function [ Daily Cleaning White ] is very important to print white. The necessary volume of wasting White Ink depends how the printer is used. You can save the White Ink when you use GT-3 every day, and you've confirmed that the whiteness of the White Ink is stable in your production, then decrease the volume. -
Page 167: Copy Log File To Usb Flash Drive
7. Troubleshooting 7-2-13. Copy Log file to USB flash drive You may be asked from the technical support to get the log data of the GT-3 for troubleshooting. Insert the USB flash diver to save the log data into the file (*.zlg or *.log). (1) Insert the USB flash drive into the Slot in front of the Operation Panel. -
Page 168: Solving Application Problems
7. Troubleshooting 7-3. Solving Application Problems See also the pages of each application software in “4. Printing Directly from Applications”. Problem Cause Solution image sent from Adobe The Print In Adobe Illustrator 10 follow the instruction below, and Illustrator 10 is printed 90 degree Setup or then try to send the print data again: rotated. -
Page 169: Error Messages
7-4. Error Messages Here is a complete list of error messages that GT-3 shows. Make contact to your dealer or Brother when mark ** is in Solution, with the information of Error Code No and the message on the Display. - Page 170 7. Troubleshooting Error Message Meaning Solution code Exchange Maintenance 1200 Needs to exchange the Exchange the Maintenance Parts and clean the Parts Maintenance Parts and to clean inside of the printer. See "6-1. Replacing Exchange Maintenance the printer. Consumables". 1201 Parts The Fan to exhaust ink mist is 1210...
- Page 171 GT-3 malfunctions in improper environment. You can print if no error is 3013 indicated. 3014 Confirm that the Machine Mode is GT-341 by PC Data Error (with GT-341 received the print data Printer Driver. GT-341 cannot receive the print 3100 White) with White print data included.
- Page 172 Press OK Button to recover. Check the network 4500 Machine Error Cannot start the Network Interface and contact your Network Administrator. Contact your dealer or Brother with mechanical damage. Press OK Button to recover. Assign the proper IP Detects Illegal IP address and/or 4501 Machine Error address and Subnet mask with GT-3 Maintenance Subnet mask.
- Page 173 5230 makes strong noise. Move GT-3 from that device. Communication error between Machine Error Main PCB and Maintenance Unit Contact your dealer or Brother when the issue was 5231 not solve after you rebooted GT-3. 5232 5233 Update firmware again from the beginning if you Maintenance PCB Ver.
- Page 174 Move GT-3 from that device. Communication error between 5412 Machine Error Main PCB and Maintenance Unit Contact your dealer or Brother when the issue was not solve after you rebooted GT-3. 5413 5414 5421 Failure of moving Pump in the...
- Page 175 Encoder Strip" and "6-1-6. Cleaning the inside of 6100 Adjust CR Error) the printer and restart". Contact your dealer or Brother if the cleaning has no effect. Check whether the media is jamming in the 6101 Machine Error Carriage move did not complete.
- Page 176 Machine Error (Moving error: too close to move) Make contact to your dealer or Brother when some error code which is not in the list above is indicated on the Display, or the solutions indicated on the list have no effort.
-
Page 177: Specifications
8. Specifications 8. Specifications 8-1. Mechanical Specification Dimensions 1370 (W) ×1045 (D) × 660 (H) mm (53.9 × 41.1 × 26.0 inch ) Weight Approx. 111 Kg (245 lb) (GT-3 including Platen) Maximum print area 355.6 mm×406.4 mm (14 x 16 inches) Print Resolution 1200 dpi x 1200 dpi, 600 dpi x 600 dpi Power source... - Page 178 * Please note that the contents of this manual may differ slightly from the actual product purchased as a result of product improvements. http://www.brother.com/ 1-5, Kitajizoyama, Noda-cho, Kariya 448-0803, Japan. GT-3 Series © 2013 Brother Industries, Ltd. All Rights Reserved. SB3151-201 E This is the original instructions. 2013.05. Z (3)