Audiovox VODEXL10 A Owner's Manual
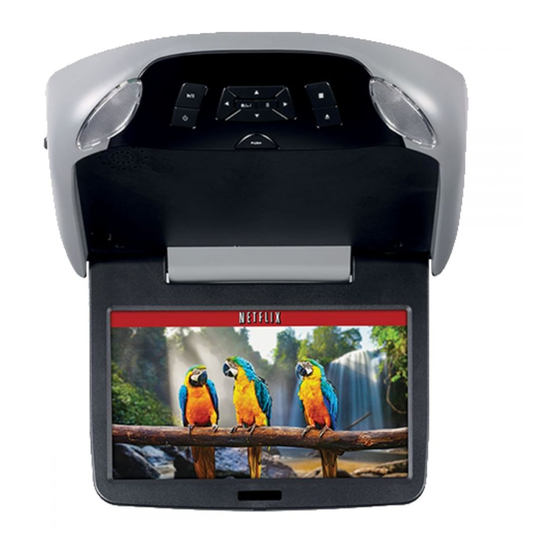
10.1" overhead led backlit lcd monitor with dvd player
Hide thumbs
Also See for VODEXL10 A:
- Installation manual (59 pages) ,
- Owner's manual (36 pages) ,
- Installation manual (24 pages)
Table of Contents
Advertisement
Quick Links
Download this manual
See also:
Installation Manual
Advertisement
Table of Contents

Related Manuals for Audiovox VODEXL10 A


Summary of Contents for Audiovox VODEXL10 A
- Page 1 10 A VODEXL 10.1" OVERHEAD LED BACKLIT LCD MONITOR WITH DVD PLAYER PUSH OWNER'S MANUAL ®...
-
Page 2: Table Of Contents
TABLE OF CONTENTS FCC Statement ..................3 TV TYPE ....................22 Important Notice ................. 4 PASSWORD ................... 23 Warnings ....................4 DDFAULT-RESTORE ................23 Congratulations ................... 5 LANGUAGE SETUP ................24 Safety Precaution ................5 OSD LANGUAGE ................. 24 Features ....................5 AUDIO LANG .................. -
Page 3: Fcc Statement
FCC Statement This device complies with Part 15 of the FCC Rules. Operation is subject to the following two conditions: (1) This device may not cause harmful interference, and (2) this device must accept any interference received, including interference that may cause undesired operation. This equipment has been tested and found to comply with the limits for a Class B digital device, pursuant to Part 15 of the FCC Rules. -
Page 4: Important Notice
If you have any questions regarding wire routing in a vehicle, please contact Audiovox Technical Support at 1-800-225-6074. -
Page 5: Congratulations
• 10.1” TFT (Thin Film Transistor) Active Matrix LCD (Liquid Crystal Congratulations on your purchase of the AUDIOVOX VODEXL10 A DVD Display) Monitor Player with drop-down video / monitor. The VODEXL10 A has been designed to give you and your family many years of video entertainment • LED Backlighting in the mobile environment. -
Page 6: Controls And Indicators Diagram (Front View)
CONTROLS AND INDICATORS DIAGRAM (FRONT VIEW) 4. HOME/MENU Select Button This button is used to display and select options on the system menu. 2 3 4 5 6 7 Press and hold for 3 seconds to access the System Menu. 5. -
Page 7: Controls And Indicators Diagram (Side Views)
CONTROLS AND INDICATORS DIAGRAM (SIDE VIEWS) 1. DVD Disc Insertion Slot For loading and removing discs. When a disc is inserted, the unit will automatically turn ON and switch to DVD source. Insert a disc with label side facing up. Note: The disc slot indicator is red when a disc is inserted and green when the disc slot is empty. -
Page 8: Remote Control Operation
REMOTE CONTROL OPERATION REMOTE CONTROL FUNCTIONS Initial Use When purchased, the remote control has a battery installed with a Pull Tab to prevent battery discharge. Remove the Pull Tab before attempting to use the remote control. CR2025 Battery Replacement 1. Remove the battery holder. 2. - Page 9 Function control is available on the unit and the Remote Control. ** Function not available in this model. 1. POWER* Press this button to turn the unit ON and OFF. 2. SOURCE* Press to display the Source OSD for DVD, USB, HDMI 1, HDMI 2, Media, AV, AUX, DTV and Game. 3.
- Page 10 10. SYSTEM MENU Allows the user to access the system menu. Press the t or u cursor buttons to select PICTURE, WFMM (FM Modulator) and SETTING. 11. CURSOR (pqt u) Use the cursor buttons to access menu selections on the screen. 12.
- Page 11 18. NUMBERS Allows the user to enter the numbers 0-9 for selection of the tracks, titles, chapters or password setting. 19. ZOOM Press this button to enlarge the picture when playing a DVD disc. Press repeatedly to change the zoom from Zoom 2, Zoom 3, Zoom 4, Zoom 1/2, Zoom 1/3, Zoom 1/4, and Zoom OFF.
- Page 12 24. PIX ( Picture Select )** No function on this model. 25. VOLUME DOWN (-) or UP (+)** No function on this model. 26. MUTE Press this button to mute the audio for the wireless FM Modulator, IR headphones and audio output. Pressing the button again restores the audio to the previously set level.
-
Page 13: Turning The Unit On Or Off
TURNING THE UNIT ON OR OFF 1. Push in the Screen Release button to unlock the LCD screen. The screen will drop down slightly. 2. Pivot the screen downward until a comfortable viewing angle is reached. The hinge friction will hold the screen in position while the system is in use. 3. -
Page 14: Source Menu
SOURCE MENU The VODEXL10 A System is capable of accessing nine source inputs. To select or change a source, press the source, S, button on the front panel or the SRC button on the remote control. The source OSD will appear on the screen as shown in the figure below. Use the p q t or u cursor buttons on the front panel or the p q t or u cursor buttons on the remote control to highlight a source. - Page 15 MEDIA The Media source allows for the user to connect an Apple device (e.g. iPod, iPhone, iPad) to the VODEXL10 A System to play audio and video content. A special Apple adapter is required for this connection. See your Apple or electronics dealer for the specific adapter required. Connect the adapter to the Apple device, and connect the Audio, Video, and USB connectors into the VODEXL10 A System.
-
Page 16: System Menu Settings And Adjustments
SYSTEM MENU SETTINGS AND ADJUSTMENTS The System Menu contains features and options that let the user customize the system. For example, the user can change the Picture, FM Modulator, OSD language, source default, screen mode display, and the monitor mode. Using the System Menu Press the SYSTEM MENU button on the remote control. -
Page 17: Wfmm (Fm Modulator)
WFMM (FM MODULATOR) The FM Modulator allows the user to listen to audio through the vehicle’s radio. - Turns the wireless FM Modulator on if audio playback through your vehicle’s radio is preferred. - Turns the wireless FM Modulator off. FREQUENCY - Allows the user to select the wireless FM Modulator frequency. -
Page 18: Settings
SETTINGS PICTURE WFMM SETTING DEFAULT DVD DEFAULT DVD This allows the user to set the system default source to DVD on or off. If source default SCREEN MODE 16:9 is set to ON, every time the unit is turned off then on, the unit will power up MONITOR MODE and automatically switch the source to DVD. -
Page 19: Monitor Mode
MONITOR MODE MONITOR MODE SETTINGS The VODEXL10 System has an option that allows the user to select from two IR transmit and receive codes (M1 or M2). This feature can be used when using two VODEXL10 systems in the same installation or if the vehicle has RSA (Rear Seat Audio) that uses an “A” channel headset. The VODEXL10 system comes factory set to M1. -
Page 20: Ir Transmitter
IR TRANSMITTER PICTURE WFMM SETTING This allows the user to turn the IR Transmitter ON or OFF. The IR Transmitter DEFAULT DVD must be set to ON for the wireless headphones to be operational. SCREEN MODE 16:9 1. Press the System Menu button. 2. -
Page 21: Settings And Adjustments
SETTINGS AND ADJUSTMENTS The Setup Menu contains features and options that let you customize your DVD player. For example, you can set screen display or a language for the on- screen display or prevent DVD playback of certain DVD disc. (for example PG-13 or R Rated) for children. Using the Setup Menu Press the SETUP button on the remote. -
Page 22: Screen Saver
SETTINGS AND ADJUSTMENTS(CONTINUED) SCREEN SAVER SYSTEM SETUP This option allows the operator to set the Screen Saver mode. TV SYSTEM SCREEN SAVER ON -Screen saver will appear TV TYPE OFF -Screen saver will not appear PASSWORD RATING Note: The DVD player will enter Screen Saver mode if the unit is inactive for DEFAULT approximately 2 Minutes TV TYPE... -
Page 23: Password
SETTINGS AND ADJUSTMENTS(CONTINUED) SYSTEM SETUP TV SYSTEM PASSWORD SCREEN SAVER TV TYPE The Default Password is 3308. This password is always accepted even after PASSWORD a new password has been entered. To avoid the possibility of others using the RATING DEFAULT default password to set the parental level and change the password, record this default password in another area and delete it from this manual. -
Page 24: Language Setup
SETTINGS AND ADJUSTMENTS(CONTINUED) LANGUAGE SETUP OSD LANGUAGE LANGUAGE SETU P The OSD LANGUAGE setup option page allows the user to select the OSD LANGUAGE ENGLISH language for the OSD. The user can either select ENGLISH, FRENCH, AUDIO LANG FRE NCH SPANISH, GERMAN or ITALIAN for the OSD language. -
Page 25: Playing Devices
PLAYING DEVICES Media Play Mode Selection The Media Mode support to the following formats: Audio – Audio data format (MP3, WMA) Photo – Photo data format (JPEG) Video – Video data format (MPEG I, II). PLAYING USB MEMORY DEVICES The system will detect the insertion of a USB device automatically if no disc is loaded. The system only auto detects the first media inserted (USB drive);... -
Page 26: Playing Mp3 Discs
Playing MP3 Discs MP3 is a format for storing digital audio. An audio CD-quality song can be compressed into the MP3 format with very little loss of quality, while taking up much less space. CD-R discs that have been encoded in MP3 format can be played on your DVD player. The DVD player plays songs in the order they were burned on to the disc. -
Page 27: Dvd Basics
DVD BASICS To get the optimum use out of the DVD Player, make sure this section is read completely. DVD Region Code The DVD player is preset to a region code at the factory depending on where the DVD player is sold. A DVD from a different region cannot be played in this unit and the unit will display "WRONG REGION”. -
Page 28: Overhead Dome Lights
Types of Discs the DVD System will play • DVD* disc - DVD discs that contain video. • Audio disc - Audio CDs that contain musical or sound content only • MP3 disc - A disc that contains audio files (for example, a CD-R with downloaded MP3 files). -
Page 29: Accessories
WIRELESS HEADPHONES The VODEXL10 A includes a built-in infrared transmitter for use with the supplied wireless headphones. The headphone volume is adjusted using the controls on each headset. Any number of wireless headphones may be used but they must be used within a line of sight from the transmitter, as infrared transmissions, like visible light, travel only in a straight line. -
Page 30: Hdmi/Mhl And Usb Port Information
For Apple products, go to the Apple Store or enter the following link into Note: Go to www.audiovoxproducts.com/overheads/audiovox/ for more your web browser to find the adapter required for your device. information on available adapters. -
Page 31: Troubleshooting
TROUBLESHOOTING Problem Solution IR remote is inoperative. • Verify that the batteries in the remote are fresh. • Verify that the remote sensor eye is not obstructed. • If the monitor is set to M1, press the M1 button on the remote control. If the monitor is set to M2, press the M2 button on the remote control. - Page 32 Problem Solution Picture is distorted. • The disc might be damaged, try another disc. • It is normal for some distortion to appear during forward or reverse scan. No forward or reverse scan. • Some discs have sections that prohibit rapid scanning or title and chapter skip. • If you try to skip through the warning information and credits at the beginning of a movie, you won’t be able to.
-
Page 33: Replacement Parts
REPLACEMENT PARTS SPECIFICATIONS LCD Backlighting Remote Control 136-5326 Resolution 1024 (RGB) x 600 Wireless Headphones 136-5301 Pixels 1,843,200 MVGP1 Game Module 136-5319 Operation Temperature 32 ~131º F (0 ~ 55º C) Game Controller P1 136-5320 Storage Temperature -4 ~ 158º F (-20 ~ 70º C) Game Controller P2 136-5321 Back Light Life... -
Page 34: Warranty
36 MONTH LIMITED WARRANTY Applies to Audiovox Mobile Video Products VOXX ELECTRONICS CORP. (the Company) warrants to the original retail purchaser of this product that should this product (excluding game controllers) under normal use and conditions, be proven defective in material or workmanship within 36 months from the date of original purchase, such defect(s) will be repaired or replaced with reconditioned product (at the Company's option) without charge for parts and repair labor. -
Page 35: Notes
NOTES... - Page 36 www.voxxelectronics.com © 2014 VOXX ELECTRONICS CORP., 150 Marcus Blvd. Hauppauge, NY 11788 128-9392...