
Related Manuals for Samsung DVD-HR710


Summary of Contents for Samsung DVD-HR710
- Page 1 Instruction Manual DVD-HR710 DVD-HR721 www.samsung.com AK68-00903E-01 English Downloaded From DvDPlayer-Manual.com Samsung Manuals...
-
Page 2: Warning
This product satisfies CE regulations when shielded cables and connectors are used to connect the unit to other equipment. To prevent electromagnetic interference with electric appliances, such as radios and televisions, use shielded cables and connectors for connections. 2 - English Downloaded From DvDPlayer-Manual.com Samsung Manuals... -
Page 3: Precaution
• Do not apply a strong shock to the HDD & DVD RECORDER. • Do not place the HDD & DVD RECORDER in a location subject to mechanical vibrations or in an unstable location. English - 3 Downloaded From DvDPlayer-Manual.com Samsung Manuals... -
Page 4: Disc Handling
• Do not use record cleaning sprays or antistatic. Also, do not use volatile chemicals, such as benzene or thinner. • Do not apply labels or stickers to discs. (Do not 4 - English Downloaded From DvDPlayer-Manual.com Samsung Manuals... -
Page 5: Disc Copy
• This unit can play back DVD-R discs recorded and Copy Once Title (Deletes the Title in the Not supported finalised with a Samsung DVD video recorder. It may HDD after copying) not be able to play some DVD-R discs depending on... -
Page 6: Disc Format
Rates), from 32 Kbps to 320 Kbps, the sound may cut in out. • Playable bit-rate range is from 56 Kbps to 320 Kbps. • The unit can handle a maximum of 1,500 files and 1,000 sub folders under a folder 6 - English Downloaded From DvDPlayer-Manual.com Samsung Manuals... - Page 7 DVD video format, it may also not be playable. Disc compatibility • High Speed Recording discs can be used in this unit. • Not all brands of discs will be compatible with this unit. English - 7 Downloaded From DvDPlayer-Manual.com Samsung Manuals...
-
Page 8: Table Of Contents
AV output jacks ......23 Playing the Title List..........52 8 - English Downloaded From DvDPlayer-Manual.com Samsung Manuals... - Page 9 Advanced Editing (Playlist) .........101 Creating a Playlist ............101 Playing Entries in the Playlist ........102 Renaming a Playlist Entry ..........103 Editing a Scene for the Playlist........104 Deleting a Playlist Entry from the Playlist ....108 English - 9 Downloaded From DvDPlayer-Manual.com Samsung Manuals...
-
Page 10: General Features
Selectable Recording Mode You can set your HDD & DVD RECORDER to one of four different recording speeds, each varying in recording quality and length. EP (6Hr or 8Hr) mode yields the most 10 - English Downloaded From DvDPlayer-Manual.com Samsung Manuals... -
Page 11: Before Reading The User's Manual
All rights reserved; No part or whole of this user’s User’s Manual manual may be reproduced or copied without the prior written permission of Samsung Electronics Co. Make sure to check the following terms before reading the user manual. How to use the Icons that will be used in manual HDD &... - Page 12 HDD & DVD RECORDER. You cannot mode. edit or record on the disc once it has been finalised. The chapter’s length (interval between chapters) varies according to the recording mode. 12 - English Downloaded From DvDPlayer-Manual.com Samsung Manuals...
-
Page 13: Unpacking
Check if remote sensor is blocked by obstacles. • Check if there is any fluorescent lighting nearby. Dispose of batteries according to local environmental regulations. Do not put them in the household trash. English - 13 Downloaded From DvDPlayer-Manual.com Samsung Manuals... - Page 14 The functions listed above will not necessarily RADIOMARELLI work on all televisions. If you encounter 45, 46 NOTE problems, operate the television directly. SABA 57, 72, 73, 74, 75 SALORA SANYO 41, 42, 43, 44, 48 SCHNEIDER 14 - English Downloaded From DvDPlayer-Manual.com Samsung Manuals...
-
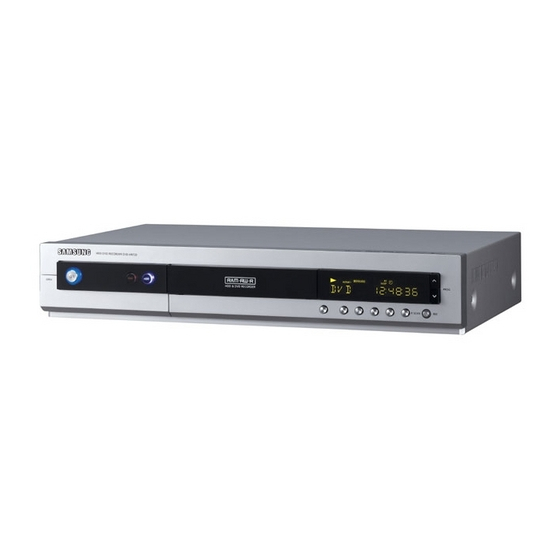
Page 15: Description
4. Lights when a -R/RW/RAM disc is loaded. 2. Lights in the record mode. 5. Playing time/clock/current status indicator. 3. Lights to indicate the timer record mode. 6. Lights in the progressive scan mode. English - 15 Downloaded From DvDPlayer-Manual.com Samsung Manuals... -
Page 16: Rear Panel
Connects the input of external equipment using a Video cable. The Antenna connection does not pass the output signal of the DVD. To watch NOTE DVD/HDD playback your TV, you must connect audio/video or Scart cables. 16 - English Downloaded From DvDPlayer-Manual.com Samsung Manuals... -
Page 17: Tour Of The Remote Control
Use this to enter the View Recording list/disc menu. Use this to set the desired Recording time and picture 12. MENU Button quality. (XP/SP/LP/EP) Brings up the HDD & DVD RECORDER’s setup menu. English - 17 Downloaded From DvDPlayer-Manual.com Samsung Manuals... -
Page 18: Connecting & Setting Up
Other type of connecting the Video output cable . .20 Other type of connecting the Audio output cable . .22 Connecting to AV 3 IN, DV input jack ..24 18 - English Downloaded From DvDPlayer-Manual.com Samsung Manuals... -
Page 19: Connecting The Hdd & Dvd Recorder
RECORDER, even when the HDD & DVD control, then “TV” appear on Front LED display (or turn off HDD & DVD RECORDER). RECORDER is turned off. Then you can watch programmes received through RF cable. English - 19 Downloaded From DvDPlayer-Manual.com Samsung Manuals... -
Page 20: Antenna + Hdd & Dvd Recorder + External Decoder Box + Tv
3. Connect the AV2 connector to a SCART AV connector on decoder box. 4. To watch or record PAY-TV Canal Plus programmes, set your HDD & DVD RECORDER to receive the channels using the on-screen display.(Refer to page 30) 20 - English Downloaded From DvDPlayer-Manual.com Samsung Manuals... -
Page 21: Case 1 : Connecting To A Video (Composite) Output Jack
AUDIO OUT jacks on HDD & DVD RECORDER and AUDIO IN jacks on TV (or AV amplifier). and AUDIO IN jacks on TV (or AV amplifier). (See pages 22~23) (See pages 22~23) yellow yellow English - 21 Downloaded From DvDPlayer-Manual.com Samsung Manuals... -
Page 22: Case 3 : Component Video Output Jacks
DVD RECORDER must be connected to the exact corresponding component input jacks on your TV. Progressive setting is only available when the Video Out is set to Component. (See pages 41~43) 22 - English Downloaded From DvDPlayer-Manual.com Samsung Manuals... -
Page 23: Case 2 : Connecting To A Stereo Amplifier With Av Output Jacks
To enjoy Dolby Digital, MPEG2 or DTS sound, you will need to set up the audio settings. (See page 39) white white Rear(L) Rear(R) Front(L) Front(R) speaker speaker Front(L) Front(R) Subwoofer Centre English - 23 Downloaded From DvDPlayer-Manual.com Samsung Manuals... -
Page 24: Connecting To Av 3 In, Dv Input Jack
Camcorder yellow white AV 3 in selection will be automatically done. If the input is not selected NOTE automatically, use INPUT button to select proper input. Copy protected content cannot be recorded. 24 - English Downloaded From DvDPlayer-Manual.com Samsung Manuals... -
Page 25: System Setup
Canceling the Progressive scan ....43 Setting up the Parental Control ....44 English - 25 Downloaded From DvDPlayer-Manual.com Samsung Manuals... -
Page 26: Plug & Auto Setup
OK button. If you do not want to do auto Auto setup will be started. clock setting, press CANCEL or MENU button. Check antenna and TV cable connection. Auto channel scan completed successfully. Press the [OK] button to auto clock set. 26 - English Downloaded From DvDPlayer-Manual.com Samsung Manuals... -
Page 27: Setting The Clock
5 seconds or more during power off with no disc inserted. Title Time Date Auto Clock Music 12 : 00 01 / JAN SAT 2005 Photo Programme Setup 0~9 NUMBER SELECT RETURN EXIT English - 27 Downloaded From DvDPlayer-Manual.com Samsung Manuals... -
Page 28: Presetting Channels With The Auto Setup Function
Press the …† buttons to select Install, then press the OK or √ button. Install √ √ Title Auto Setup √ √ Manual Setup Music Photo Programme Setup MOVE SELECT RETURN EXIT 28 - English Downloaded From DvDPlayer-Manual.com Samsung Manuals... - Page 29 P(Portugal) GR(Greece) D(Deutschland) E(Spain) HU(Hungary) Press the OK button. If you want to exit, press the MENU button. Auto Setup Title Please wait. Music Scanning... Photo Stop Programme Setup SELECT RETURN EXIT English - 29 Downloaded From DvDPlayer-Manual.com Samsung Manuals...
-
Page 30: Presetting Channels With The Manual Setup Function
- - - - - - - - - - - - - - - - - - - - - - - - - - - - MOVE SELECT RETURN EXIT 30 - English Downloaded From DvDPlayer-Manual.com Samsung Manuals... -
Page 31: Setting Up The Language Options
Language √ √ Title Audio : Original Subtitle : Automatic √ √ Music √ √ Disc Menu : English √ √ On-Screen menu : English Photo Programme Setup MOVE SELECT RETURN EXIT English - 31 Downloaded From DvDPlayer-Manual.com Samsung Manuals... -
Page 32: Auto Power Off Setting
: 6 Hour 6 Hour √ √ Front Display : Auto Dim Photo √ √ Chapter Creator : Off √ √ NICAM : On Programme √ √ DivX(R) Registration Setup MOVE SELECT RETURN EXIT 32 - English Downloaded From DvDPlayer-Manual.com Samsung Manuals... -
Page 33: Cm Skip Time Setting
CM Skip releases Repeat (including √ √ NICAM : On Programme √ √ DivX(R) Registration Repeat A-B, Chapter, and Title). Setup MOVE SELECT RETURN EXIT CM Skip may not operate with some DVD-Video discs. English - 33 Downloaded From DvDPlayer-Manual.com Samsung Manuals... -
Page 34: Ep Mode Time Setting
: 6 Hour √ √ Front Display : Auto Dim Photo √ √ Chapter Creator : Off √ √ NICAM : On Programme DivX(R) Registration √ √ Setup MOVE SELECT RETURN EXIT 34 - English Downloaded From DvDPlayer-Manual.com Samsung Manuals... -
Page 35: Setting Up The Front Display Options
: 6 Hour √ √ Front Display : Auto Dim Photo √ √ Chapter Creator : Off √ √ NICAM : On Programme √ √ DivX(R) Registration Setup MOVE SELECT RETURN EXIT English - 35 Downloaded From DvDPlayer-Manual.com Samsung Manuals... -
Page 36: Automatic Chapter Creator
• A new chapter is created according to the selected recording mode. A chapter will be about 5 minutes long in XP and SP, and about 15 minutes long in LP and EP mode. 36 - English Downloaded From DvDPlayer-Manual.com Samsung Manuals... -
Page 37: Setting Up Nicam Options
: 6 Hour Front Display : Auto Dim √ √ Photo √ √ Chapter Creator : Off √ √ NICAM : On Programme √ √ DivX(R) Registration Setup MOVE SELECT RETURN EXIT English - 37 Downloaded From DvDPlayer-Manual.com Samsung Manuals... -
Page 38: Divx(R) Registration
Press the …† buttons to select the desired item, then press the OK or √ button. Press the RETURN or œ button to return to the previous menu. NOTE Press the MENU button to exit the menu. 38 - English Downloaded From DvDPlayer-Manual.com Samsung Manuals... -
Page 39: Digital Output
2. Off : You can enjoy the movie with the standard Dynamic Range. English - 39 Downloaded From DvDPlayer-Manual.com Samsung Manuals... -
Page 40: Setting Up The Video Display Options
3. 16:9 Wide : You can view the full 16:9 picture 3D Noise Reduction : Off Music : Component √ √ Video Output on your widescreen TV. Photo Programme Setup MOVE SELECT RETURN EXIT 40 - English Downloaded From DvDPlayer-Manual.com Samsung Manuals... -
Page 41: Setting Up Video Output Options
Language AV1 Scart √ √ Audio Composite Photo √ √ Video AV2 Scart Composite √ √ Parental Control Programme √ √ Install Composite Video out Setup S-Video out MOVE SELECT RETURN EXIT English - 41 Downloaded From DvDPlayer-Manual.com Samsung Manuals... -
Page 42: Setting Up The Progressive Scan
The message “Please, set your TV to Progressive input. To deactivate, press [STOP] key.” will appear. Press the OK button. Please, set your TV to Progressive input, To deactivate, press [STOP] key. 42 - English Downloaded From DvDPlayer-Manual.com Samsung Manuals... -
Page 43: Canceling The Progressive Scan
To deactivate, press [STOP] key.” will appear. Press the OK button. Please, set your TV to Interlace input, To deactivate, press [STOP] key. The message “Video Output Mode Interlace Scan” will appear. Video Output Mode Interlace Scan English - 43 Downloaded From DvDPlayer-Manual.com Samsung Manuals... -
Page 44: Setting Up The Parental Control
Programme If you forgot your password Setup 0~9 NUMBER SELECT RETURN EXIT Remove the disc. Press and hold the SEARCH/SKIP ( ) button on the front panel for 5 seconds or more. 44 - English Downloaded From DvDPlayer-Manual.com Samsung Manuals... -
Page 45: Setting The Rating Level
Photo use only. Programme Setup 0~9 NUMBER SELECT RETURN EXIT Enter your password again using the number buttons on the remote control. See page 44 if you forgot your password. NOTE English - 45 Downloaded From DvDPlayer-Manual.com Samsung Manuals... -
Page 46: Playback
Appr o x. 138 (LP: Long Pl a yback) AUDIO + VIDEO HR721 Approx. 205 or Approx. 272 Select Media................65 (EP:Extended) Playing an Audio CD/MP3..........65 Viewing a Picture ..............72 Playing an MPEG4 .............75 46 - English Downloaded From DvDPlayer-Manual.com Samsung Manuals... -
Page 47: Playing A Disc
You must only insert one DVD disc at a time. Inserting two or more discs will not allow playback and may cause damage to the HDD & DVD RECORDER. English - 47 English - 47 Downloaded From DvDPlayer-Manual.com Samsung Manuals... -
Page 48: Using The Disc Menu & Title Menu
Since only the information necessary for playing a desired scene is included in a playlist, even if that playlist is deleted, the original recording will not be deleted. (only VR mode) 48 - English Downloaded From DvDPlayer-Manual.com Samsung Manuals... -
Page 49: Slow Motion Play/Step Motion Play
The speed marked in this function may be different from the actual playback speed. NOTE Slow motion operates only in the forward direction on MPEG4 discs. English - 49 Downloaded From DvDPlayer-Manual.com Samsung Manuals... -
Page 50: About Anykey
… … † † Press the buttons to select Search, then √ √ press the OK or button. Title 1/10 00:01:45 Time MOVE CHANGE DVD-Video Title 1/10 Chapter 1/40 Time 00:01:45 MOVE CHANGE 50 - English Downloaded From DvDPlayer-Manual.com Samsung Manuals... - Page 51 MOVE CHANGE … … † † Press the buttons to select Time. Enter the time in the sequence of hours, minutes, and seconds using the number buttons, then press the OK button. English - 51 Downloaded From DvDPlayer-Manual.com Samsung Manuals...
-
Page 52: Playing The Title List
Not Protected • 01/JAN/2005 (SAT) 12:00 press the OK or √ button twice. To stop title play, press the STOP( ) button. To return the title list screen, press the TITLE LIST button. 52 - English Downloaded From DvDPlayer-Manual.com Samsung Manuals... -
Page 53: Navigation Menu
Setup scene, then press the OK or PLAY ( ) button. MOVE SELECT RETURN EXIT • Press the …† buttons to select Title, press the OK or √ button twice. then English - 53 Downloaded From DvDPlayer-Manual.com Samsung Manuals... - Page 54 … … † † œ œ √ √ Press the buttons to select desired scene, then press the OK or PLAY ( ) button. Scene Navigation will not operate if a selected title does not have Markers. NOTE 54 - English Downloaded From DvDPlayer-Manual.com Samsung Manuals...
- Page 55 1 minute. NOTE The Navigation function may not work on a disc that has not been recorded by this device. An edited title may not display the exact search time. English - 55 Downloaded From DvDPlayer-Manual.com Samsung Manuals...
-
Page 56: Using Markers
Disc Protection, Markers cannot be set or deleted, only playback is available. • Press the …† buttons to select Marker, then press the OK or √ √ button. 56 - English Downloaded From DvDPlayer-Manual.com Samsung Manuals... -
Page 57: Clearing A Marker
3 seconds returns to the beginning of the previous marker. √ √ PLAY MOVE CANCEL RETURN • If you press the SKIP ( ) button, it moves to the next marker. English - 57 Downloaded From DvDPlayer-Manual.com Samsung Manuals... -
Page 58: Using The Bookmarks
Audio NOTE √ √ Subtitle √ √ Angle √ √ Repeat Zoom √ √ Select Media • Press the …† buttons to select Bookmark, then press the OK or √ √ button. 58 - English Downloaded From DvDPlayer-Manual.com Samsung Manuals... -
Page 59: Clearing A Bookmark
) button to start playing - - - - - - - -- Bookmark from the selected scene. √ √ PLAY MOVE CANCEL RETURN Press the CANCEL button to delete the selected bookmark. English - 59 Downloaded From DvDPlayer-Manual.com Samsung Manuals... -
Page 60: Selecting The Subtitle Language
• To make the screen disappear, press the CANCEL or RETURN button. The subtitle display may be different depending on the disc type. NOTE Some discs allow you to select the language for the disc menu only. 60 - English Downloaded From DvDPlayer-Manual.com Samsung Manuals... -
Page 61: Selecting The Soundtracks & Audio Channels
Press the … … † † buttons to select the desired soundtracks or audio channel. Also, press the AUDIO button repeatedly to select the desired soundtracks or audio channel. • To make the screen disappear, then press the CANCEL or RETURN button. English - 61 Downloaded From DvDPlayer-Manual.com Samsung Manuals... -
Page 62: Changing The Camera Angle
OK or √ √ button. This function is disc-dependent, and may not work on all DVDs. NOTE This function does not work when a DVD has not been recorded with a multi- camera angle system. 62 - English Downloaded From DvDPlayer-Manual.com Samsung Manuals... - Page 63 Repeat Chapter you want to play repeatedly, then press the OK or √ √ button. HDD/DVD-RAM/-RW(VR mode), unfinalised DVD-R and unfinalised DVD- NOTE RW (V mode) discs will do not repeat a chapter. English - 63 Downloaded From DvDPlayer-Manual.com Samsung Manuals...
-
Page 64: Zooming-In
When recording is done in the EP mode, the Audio CDs(CD-DA), MP3 discs and Zoom function will not be supported except MPEG4 discs do not support the Repeat NOTE when the recording has been done in V A-B function. mode. 64 - English Downloaded From DvDPlayer-Manual.com Samsung Manuals... -
Page 65: Select Media
3. Display available buttons. 4. This shows the operating state of a disc and a playback time corresponding to a portion that is currently played. 5. Displays the track list (song list). English - 65 Downloaded From DvDPlayer-Manual.com Samsung Manuals... -
Page 66: Playing An Mp3 Disc
If a disc contains a mix of MP3 and JPEG 9. ANYKEY button: The ANYKEY menu is displayed. files, you need to select Music for MP3 (Play Mode, Go To Playlist or New Playlist). files or Photo for JPEG files. 66 - English Downloaded From DvDPlayer-Manual.com Samsung Manuals... -
Page 67: Buttons On The Remote Control
) button: Stops a track(song). 7. PLAY ( ) button: Plays a track(song) or pauses playback. 8. ANYKEY button: The ANYKEY menu is displayed. (Copy, Play Mode, Go To Playlist, New Playlist or Select Media). English - 67 Downloaded From DvDPlayer-Manual.com Samsung Manuals... - Page 68 TRACK 7 TRACK 3 CDDA TRACK 4 TRACK 4 CDDA plays a disc’s tracks in random order. TRACK 5 CDDA TRACK 6 CDDA TRACK 7 CDDA 1/1 Page 1/3 Page MOVE RETURN EXIT 68 - English Downloaded From DvDPlayer-Manual.com Samsung Manuals...
- Page 69 Playlist, then press the OK button. A new Playlist will be created. … … † † Press the buttons to select the desired playlist folder, then press the OK button. The selected tracks are played automatically. English - 69 Downloaded From DvDPlayer-Manual.com Samsung Manuals...
- Page 70 Playlist 2 Do you want to delete? 1/1 Page MOVE SELECT RETURN EXIT œ œ √ √ Press the buttons to select Yes, then press the OK button. The selected Playlist is deleted. 70 - English Downloaded From DvDPlayer-Manual.com Samsung Manuals...
- Page 71 Go To Playlist 1/1 Page 1/3 Page MOVE SELECT RETURN EXIT … … † † Press the buttons to select the Go To Playlist, then press the OK button. Playlist will be edited. English - 71 Downloaded From DvDPlayer-Manual.com Samsung Manuals...
-
Page 72: Viewing A Picture
JPEG files, the MP3 or JPEG screen NOTE appears after the disc is loaded. If a disc contains a mix of MP3 and JPEG files, you need to select Music for MP3 files or Photo for JPEG files. 72 - English Downloaded From DvDPlayer-Manual.com Samsung Manuals... -
Page 73: Slide Show
Fast 1/2 Page MOVE SELECT RETURN EXIT … … † † Press the buttons to select the slide show √ √ speed, then press the OK or button. The slide show starts. English - 73 Downloaded From DvDPlayer-Manual.com Samsung Manuals... - Page 74 Rotate Off, then √ √ press the OK or button. … … † † Press the buttons to select Zoom Off, then √ √ press the OK or button. 74 - English Downloaded From DvDPlayer-Manual.com Samsung Manuals...
-
Page 75: Playing An Mpeg4
DIVX MPEG4 01/01 703.4MB 1/1 Page MOVE SELECT RETURN EXIT … … † † Press the buttons to select the avi file (DivX), then press the OK or PLAY ( ) button. English - 75 Downloaded From DvDPlayer-Manual.com Samsung Manuals... - Page 76 English and modern Greek If the subtitle language is displayed in broken fonts, change DivX Subtitle to the NOTE appropriate region. If is still does not work, the format is not supported. 76 - English Downloaded From DvDPlayer-Manual.com Samsung Manuals...
-
Page 77: Recording
This HDD & DVD RECORDER can record on the Recording methods. following discs. DVD-RAM DVD-RW DVD-R •DVD-RWs and DVD-RAMs are rewritable. •DVD-Rs are non-rewritable Compatibility between Samsung and Other Company’s Recorder Disc Types Recording Recording Device Finalising Additional Recording format in Samsung Recorder Samsung Recordable DVD-RAM... -
Page 78: Recording Formats
Recording time may vary according to • This mode allows multiple editing functions (such as specific conditions. deletion of the whole title, partial deletion of a title, etc.) NOTE • Various editing options using a created Playlist. 78 - English Downloaded From DvDPlayer-Manual.com Samsung Manuals... -
Page 79: Recording The Current Tv Programme You Are Watching
) or number buttons to select contents of the disc are copied to other media, the ID will be absent or wrong and the data will not be decryptable. the current programme you want to record. English - 79 Downloaded From DvDPlayer-Manual.com Samsung Manuals... - Page 80 Press the STOP ( ) button to stop or finish a recording in progress. • When using DVD-RAM/-RW/-R discs, the message “Updating the information of disc. Please wait for a moment” is displayed. 80 - English Downloaded From DvDPlayer-Manual.com Samsung Manuals...
-
Page 81: Recording From External Equipment
Press the REC MODE button repeatedly, (or press the REC MODE button, then press the …† buttons) to select the recording speed (quality). © SP © LP © EP © XP Record Mode SP 031:39 English - 81 Downloaded From DvDPlayer-Manual.com Samsung Manuals... -
Page 82: Copying From A Camcorder
) button to stop or finish a recording in progress. Record Mode SP 031:39 • When using DVD-RAM/-RW/-R discs, the message “Updating the information of disc. Please wait for a moment” is displayed. 82 - English Downloaded From DvDPlayer-Manual.com Samsung Manuals... -
Page 83: Making A One Touch Recording (Otr)
© 0:30 © 1:00 © ... 8:00 © Off Name, Title, Created Time and Recording Time. Recording Info Name 01/JAN/2005 12:00 PR Recording Title Created Time 01/JAN/2005 12:00 Recording Time 00:13:27 01/JAN/2005 (SAT) 12:00 English - 83 Downloaded From DvDPlayer-Manual.com Samsung Manuals... -
Page 84: Chasing Play
Title List Title Length 008 18/JAN/2005 02:15A 00:10:21 009 19/JAN/2005 14:15A 00:40:03 010 20/JAN/2005 16:05A 00:40:15 011 25/JAN/2005 17:00A 00:30:16 012 RECORDING... 00:00:00 RECORDING... 19/JAN/2005 12:15 V-Mode Compatibility 2/2Page MOVE SELECT RETURN EXIT 84 - English Downloaded From DvDPlayer-Manual.com Samsung Manuals... -
Page 85: Simultaneous Recording And Playback
Press the … … † † / SKIP ( ) buttons to select the title you want to play OK or PLAY ( ) button. Selected title list will be played back. √ √ Play English - 85 Downloaded From DvDPlayer-Manual.com Samsung Manuals... -
Page 86: Making A Timer Recording
Press the OK or √ button to select Timer Record. Timer Record List Current Time 12:00 Source Date Start Mode VPS/PDC Add a list Available Time 29:10 SP MOVE SELECT RETURN EXIT 86 - English Downloaded From DvDPlayer-Manual.com Samsung Manuals... - Page 87 It means that HDD disk has no space to record. TITLE • : To label the title name, select the title and then press the OK button. Title renaming screen appears. See page 96 for the registration. English - 87 Downloaded From DvDPlayer-Manual.com Samsung Manuals...
-
Page 88: Flexible Recording (For Timer Recording Only)
14 : 00 PR 07 15 JAN 14 : 10 14 : 30 01 JAN 15 : 10 15 : 30 Add a list Available Time 29:10 SP MOVE SELECT RETURN EXIT 88 - English Downloaded From DvDPlayer-Manual.com Samsung Manuals... -
Page 89: Deleting A Timer Record List
14 : 00 PR 07 15 JAN 14 : 10 14 : 30 01 JAN 15 : 10 15 : 30 Add a list Available Time 29:10 SP MOVE SELECT RETURN EXIT English - 89 Downloaded From DvDPlayer-Manual.com Samsung Manuals... -
Page 90: Go To History List
29:10 SP Add a list MOVE SELECT RETURN EXIT Available Time 29:10 SP Press the MENU button after finishing the operation. MOVE SELECT RETURN EXIT The Timer Record List screen will disappear. 90 - English Downloaded From DvDPlayer-Manual.com Samsung Manuals... - Page 91 PR 07 15 JAN 14 : 10 14 : 30 AV2 01 JAN 15 : 10 15 : 30 Info Delete List Clear Go To Timer Rec List MOVE SELECT RETURN EXIT English - 91 Downloaded From DvDPlayer-Manual.com Samsung Manuals...
- Page 92 PR 02 01 JAN 12 : 00 14 : 00 PR 07 15 JAN 14 : 10 14 : 30 Do you want to delete a history list? AV2 01 JAN 15 : 10 15 : 30 MOVE SELECT RETURN EXIT 92 - English Downloaded From DvDPlayer-Manual.com Samsung Manuals...
-
Page 93: Editing
Copying MP3 or JPEG Files from a Disc to HDD . . .117 Disc Manager ......119 English - 93 Downloaded From DvDPlayer-Manual.com Samsung Manuals... -
Page 94: Basic Editing (Title List)
19/JAN/2005 12:15AV3 Sports(A1) √ √ Navigation 19/JAN/2005 12:15 18/JAN/2005 12:15 √ √ Select Media V-Mode Compatibility V-Mode Compatibility 1/1 Page 1/1 Page Disc Manager MOVE SELECT RETURN EXIT MOVE SELECT RETURN EXIT 94 - English Downloaded From DvDPlayer-Manual.com Samsung Manuals... -
Page 95: Locking (Protecting) A Title
Delete 004 25/JAN/2005 12:15A 00:50:16 √ √ Edit √ √ Playlist 19/JAN/2005 12:15AV3 √ √ Navigation 19/JAN/2005 12:15 Select Media √ √ V-Mode Compatibility 1/1 Page Disc Manager MOVE SELECT RETURN EXIT English - 95 Downloaded From DvDPlayer-Manual.com Samsung Manuals... -
Page 96: Deleting A Title
19/JAN/2005 12:15 003 25/JAN/2005 12:15A 00:50:16 √ √ Select Media V-Mode Compatibility 1/1 Page Disc Manager 19/JAN/2005 12:15 AV3 MOVE SELECT RETURN EXIT 19/JAN/2005 12:15 V-Mode Compatibility 1/1 Page MOVE SELECT RETURN EXIT 96 - English Downloaded From DvDPlayer-Manual.com Samsung Manuals... -
Page 97: Splitting A Section Of A Title (Split)
Delete 004 25/JAN/2005 12:15A 00:50:16 √ √ Edit √ √ Playlist 19/JAN/2005 12:15AV3 Navigation √ √ 19/JAN/2005 12:15 √ √ Select Media V-Mode Compatibility 1/1 Page Disc Manager MOVE SELECT RETURN EXIT English - 97 Downloaded From DvDPlayer-Manual.com Samsung Manuals... - Page 98 SELECT RETURN EXIT ➂ 00:00:00 00:05:21 ➁ 00:05:21 Select Split Return MOVE SELECT RETURN EXIT x First split interval ➁ Current playtime ➂ Start time of the second split and its screen 98 - English Downloaded From DvDPlayer-Manual.com Samsung Manuals...
-
Page 99: Deleting A Section Of A Title (Partial Delete)
Select Media V-Mode Compatibility 1/1 Page Disc Manager MOVE SELECT RETURN EXIT • When using DVD-RAM/-RW(VR) disc, you can select Partial Delete directly by pressing the ANYKEY button. (Then go to step 5) English - 99 Downloaded From DvDPlayer-Manual.com Samsung Manuals... - Page 100 “End point cannot be marked earlier than start point”. The section cannot be deleted when it includes a still picture. Press the MENU button after the operation has finished. The Title List screen will disappear. 100 - English Downloaded From DvDPlayer-Manual.com Samsung Manuals...
-
Page 101: Advanced Editing (Playlist)
Navigation Go To Playlist 19/JAN/2005 12:15 Select Media √ √ End window. V-Mode Compatibility 1/1 Page Disc Manager • The yellow-coloured selection bar moves to the MOVE SELECT RETURN EXIT Make item. English - 101 Downloaded From DvDPlayer-Manual.com Samsung Manuals... -
Page 102: Playing Entries In The Playlist
Press the …† buttons to select the playlist you want to play, then press the OK or PLAY ( button. Press the STOP ( ) button to stop playing. The screen returns to the Playlist screen. 102 - English Downloaded From DvDPlayer-Manual.com Samsung Manuals... -
Page 103: Renaming A Playlist Entry
002 19/JAN/2005 12:15A 00:40:03 003 22/JAN/2005 12:15A 00:20:15 Rename 004 25/JAN/2005 12:15A 00:50:16 Copy Delete 16/JAN/2005 12:15AV3 Edit Playlist 16/JAN/2005 12:15 Go To Titlelist 7 Scenes 1/1 Page Disc Manager MOVE SELECT RETURN EXIT English - 103 Downloaded From DvDPlayer-Manual.com Samsung Manuals... -
Page 104: Editing A Scene For The Playlist
Copy Delete 16/JAN/2005 12:15AV3 • To stop scene play, press the STOP ( ) button. Edit Playlist 16/JAN/2005 12:15 Go To Titlelist 7 Scenes 1/1 Page Disc Manager MOVE SELECT RETURN EXIT 104 - English Downloaded From DvDPlayer-Manual.com Samsung Manuals... - Page 105 The image and starting point time is displayed • on the Start window. Select the starting or ending point of the • section you want to modify using the playback related buttons (PLAY( ) , SEARCH ( English - 105 Downloaded From DvDPlayer-Manual.com Samsung Manuals...
- Page 106 Depending on the kind of disc, the • A yellow selection window is displayed on the displayed screen may have a slight scene to be moved. difference. 106 - English Downloaded From DvDPlayer-Manual.com Samsung Manuals...
- Page 107 The image and starting point time is displayed • on the Start window. Select the starting or ending point of the • section you want to modify using the playback related buttons (PLAY( ) , SKIP ( English - 107 Downloaded From DvDPlayer-Manual.com Samsung Manuals...
-
Page 108: Deleting A Playlist Entry From The Playlist
002 19/JAN/2005 12:15A 00:40:03 003 22/JAN/2005 12:15A 00:20:15 Rename 004 25/JAN/2005 12:15A 00:50:16 Copy Delete 16/JAN/2005 12:15AV3 Edit Playlist 16/JAN/2005 12:15 Go to Titlelist 7 Scenes 1/1 Page Disc Manager MOVE SELECT RETURN EXIT 108 - English Downloaded From DvDPlayer-Manual.com Samsung Manuals... -
Page 109: Copying From Hdd To Dvd
Once "Copy Once programme" has been recorded on the DVD disc, this title cannot be copied to HDD anymore. But "Copy Once programme" has been recorded on the HDD, this title can be copied to DVD-RW(VR mode) or DVD-RAM. English - 109 Downloaded From DvDPlayer-Manual.com Samsung Manuals... - Page 110 COPY button on the remote control. You can go to copy screen. • During Playback, you can also copy the title by pressing the COPY button. 110 - English Downloaded From DvDPlayer-Manual.com Samsung Manuals...
- Page 111 High speed copy : This means that you can transfer without having to worry about NOTE the quality getting worse with each copy ‘generation’. It also means that copying can be carried out at the maximum speed possible. English - 111 Downloaded From DvDPlayer-Manual.com Samsung Manuals...
-
Page 112: Changing The Record Mode
To move to other pages, press the SKIP ( buttons. SKIP( ) : previous page of title list SKIP( ) : next page of title list 112 - English Downloaded From DvDPlayer-Manual.com Samsung Manuals... - Page 113 If copy list contains at least one title that cannot be copied at high speed, it performs NOTE step 9 described on page 111. Otherwise, it performs the step 9 described on page 111. English - 113 Downloaded From DvDPlayer-Manual.com Samsung Manuals...
-
Page 114: Deleting An Undesired Title From The Copy List
Length LP © HS 19/JAN/2005 13:15A 00:15:21 Start LP © HS 20/JAN/2005 15:15A 00:30:21 Rec. Mode Add a list [DVD] Available 04:00:16 4.48 GB Total 00:45:42 1.30 GB MOVE SELECT RETURN EXIT 114 - English Downloaded From DvDPlayer-Manual.com Samsung Manuals... -
Page 115: Selecting Record Mode Of Each Title From The Copy List
Repeat steps 9~11 to select a title to change its record mode. Rest of the copying process can be performed as described in pages 109 to 111. English - 115 Downloaded From DvDPlayer-Manual.com Samsung Manuals... -
Page 116: Copying From Dvd To Hdd
• During Playback, you can also copy the title by pressing the COPY button. OK or √ Press the buttons to select Start, then press the OK button. If you want to stop copy, press CANCEL key. 116 - English Downloaded From DvDPlayer-Manual.com Samsung Manuals... -
Page 117: Copying Mp3 Or Jpeg Files
Record mode cannot be changed when you copy a title from DVD to HDD. Contents Copy Specifications DVD © Contents Recorded Video Title Supported Copy Protected Title Not supported Copy Once Title Not supported English - 117 Downloaded From DvDPlayer-Manual.com Samsung Manuals... -
Page 118: Folder Copy
Disc Type : HDD Straight from the heart.mp3 Free space : 2939 MB Run to you.mp3 Total file number : 1/16 MUSIC Heaven.mp3 Copying File Name : Flower.mp3 This Love.mp3 43 % 1/3 Page CANCEL 118 - English Downloaded From DvDPlayer-Manual.com Samsung Manuals... -
Page 119: Disc Manager
Disc Manager DVD-RAM(VR) Disc Name Used Space 00 : 01 : 43 02 : 09 SP Available Space Disc Protection Info Not Protected Rename Protection Delete All Format MOVE SELECT RETURN EXIT English - 119 Downloaded From DvDPlayer-Manual.com Samsung Manuals... -
Page 120: Disc Protection
MOVE SELECT RETURN EXIT NOTE Depending on the kind of disc, the displayed screen may be different. Press the œ √ buttons to select On, then press the OK button. 120 - English Downloaded From DvDPlayer-Manual.com Samsung Manuals... -
Page 121: Formatting A Disc
• You will be prompted with the confirmation message “Do you want to format this disc?”. • If you select Yes, you will be prompted with the confirmation message “All data will be deleted. Do you want to continue?”. English - 121 Downloaded From DvDPlayer-Manual.com Samsung Manuals... -
Page 122: Delete All Title Lists/Music Lists/Photo Lists
If there is a title containing a still picture, however, that function will not operate. If you want to delete a protected entry, disable Protect for it on the Lock item. 122 - English Downloaded From DvDPlayer-Manual.com Samsung Manuals... -
Page 123: Delete All Title Lists
00 : 11 : 56 Do you want to delete all title lists? 00 : 11 : 56 SP Available Space Disc Protection Info Not Protected Rename Protection Delete All Format MOVE SELECT RETURN EXIT English - 123 Downloaded From DvDPlayer-Manual.com Samsung Manuals... -
Page 124: Finalising A Disc
Used Space Available Space 01 : 29 SP Do you want to finalise disc? Disc Protection Info Not Protected Current Rec. Mode VR-Mode Rename Protection Delete All Finalise Format MOVE SELECT RETURN EXIT 124 - English Downloaded From DvDPlayer-Manual.com Samsung Manuals... -
Page 125: Unfinalising A Disc (V/Vr Mode)
Used Space 00 : 00 : 00 Available Space 00 : 00 SP Disc will be unfinalised. Do you want to continue? Current Rec. Mode DVD-V unfinalise Format MOVE SELECT RETURN EXIT English - 125 Downloaded From DvDPlayer-Manual.com Samsung Manuals... -
Page 126: Reference
Troubleshooting Reference If your product malfunctions, go through the checkpoints below before contacting a Samsung authorised service centre. Power The input is displayed for a while when the power is turned on. The HDD & DVD RECORDER Checkpoint 1 requires some time to initialize and the input will be displayed for approx. - Page 127 Checkpoint 2 on page 5 to check if copying is not work properly. supported. Cannot change the aspect ratio. The aspect ratio is fixed for DVD Checkpoint 1 discs. (See pages 40~41) English - 127 Downloaded From DvDPlayer-Manual.com Samsung Manuals...
-
Page 128: Timer Recording
Check whether the disc is inserted correctly with the label facing up. No audio output. Check whether you have selected Checkpoint 1 the correct digital output options in the Audio Output Options menu. (See pages 38~39) 128 - English Downloaded From DvDPlayer-Manual.com Samsung Manuals... -
Page 129: Remote Control Unit
Is it possible to change a subtitle and an audio signal on a recorded disc? A recorded disc is played with only Checkpoint 1 the subtitle and the audio signal which were selected during recording. English - 129 Downloaded From DvDPlayer-Manual.com Samsung Manuals... -
Page 130: Specifications
For DVD discs, audio signals recorded at 96kHz sampling frequency are converted into and output at 48kHz. Disc Type AUDIO CD(CD-DA) Analog Audio Output 48 / 96kHz 44,1kHz Digital Audio Output 48kHz 44,1kHz 130 - English Downloaded From DvDPlayer-Manual.com Samsung Manuals... - Page 131 SAMSUNG me thn agorav authv ı thı suskeuhv ı . opoiadhv p ote zhmiv a proev r cetai ex autouv . .. To proiov n autov thı SAMSUNG eiv n ai egguhmev n o gia 5. H egguv h sh authv den kaluv p tei kamiv a apov tiı...
- Page 132 Contact SAMSUNG WORLD WIDE If you have any questions or comments relating to Samsung products, please contact the SAMSUNG customer care centre. ¤ 1-800-SAMSUNG (7267864) / www.samsung.com Correct Disposal of This Product (Waste Electrical & Electronic Equipment) (Applicable in the European Union and other European countries with separate collection systems) This marking shown on the product or its literature, indicates that it should not be disposed with other household wastes at the end of its working life.