Table of Contents
Advertisement
Advertisement
Table of Contents

Related Manuals for Olympus IS-50


Summary of Contents for Olympus IS-50
- Page 1 INSTRUCTIONS MODE D'EMPLOI BEDIENUNGSANLEITUNG INSTRUCCIONES...
-
Page 2: Table Of Contents
VOLTAGE CIRCUIT. IF THE INTERNAL PARTS OF THE CAMERA ARE EXPOSED DUE TO DROPPING OR DAMAGE, REMOVE THE BATTERIES IMMEDIATELY TO PREVENT FURTHER USAGE. IN CASE OF MALFUNCTION, CONSULT YOUR NEAREST OLYMPUS DEALER OR OLYMPUS SERVICE CENTER. Symbols used in this manual:... -
Page 3: Names Of Parts Camera Body
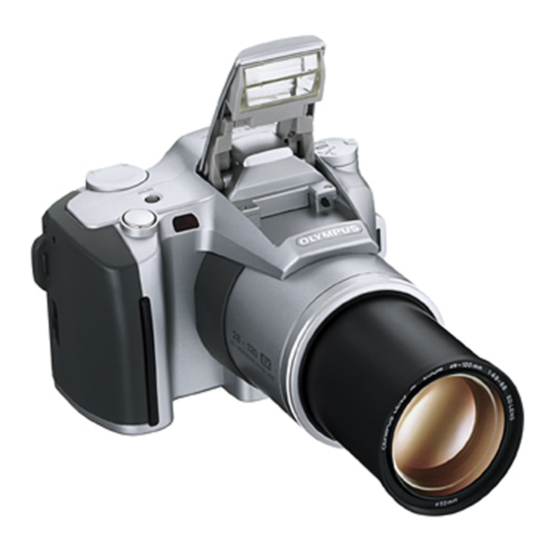
NAMES OF PARTS — Camera Body Zoom button SPOT button Shutter release button Selftimer indicator/ remote control sensor Lens Always try to keep this clean. Dirt and stains can result in pictures that are unclear and out-of-focus. Wipe off any dirt or stains with a soft cloth. Viewfinder Diopter adjustment dial LCD panel... -
Page 4: Using The Strap
NAMES OF PARTS — Viewfinder Display y Autofocus frame u Spot frame i Flash o Autofocus indicator p Exposure compensation (overexposure/underexposure) USING THE STRAP Attach the strap as shown. Secure the strap with the clasp. DIOPTER ADJUSTMENT LOADING AND CHECKING THE BATTERIES Use two 3 V lithium batteries (CR123A or DL123A). -
Page 5: Loading The Film
LOADING THE FILM Insert the film cartridge. Shutter curtain Be careful not to touch the shutter curtain. Slide the back cover release upward to open the back cover. Correct Place the film between the positioning guides (A), aligning the film leader in the direction of the arrow. -
Page 6: Focus Lock
TAKING PICTURES — Focus Lock If you want to position your main subject outside the center of the frame, follow the procedure below (focus lock). Autofocus frame Position the autofocus frame on Reframe your subject while your subject and press the keeping the shutter release shutter release button halfway. -
Page 7: Auto Flash
FLASH PHOTOGRAPHY — Auto Flash The flash automatically fires in the selected exposure mode when required (in the dark, with backlighting, or under fluorescent lighting). lights in the viewfinder when the shutter release button is pressed halfway, the flash will fire. Flash working range (with color negative film) Wide angle (W) Telephoto (T) -
Page 8: Exposure Modes
EXPOSURE MODES — 1. Direct Mode Select Buttons To make it easier to take clear, properly illuminated photographs under a variety of conditions, four exposure modes optimized for the most common shooting conditions are available. How to select the exposure mode Press the Direct Mode Select button that best suits the shooting conditions or desired effect. -
Page 9: Night Scene
1. Direct Mode Select Buttons Night Scene Use this mode to shoot a night scene without artificially illuminating the subject. In this mode, you can shoot clear pictures at night without over- illuminating the subject and blackening out the background. When shooting subjects against a nighttime background, combine this mode with the flash. -
Page 10: Exposure Compensation
2. Exposure Mode Button Long Time [L.T.] This mode is ideal for capturing pictures of fireworks and other bright lights at night. You can select the shutter speed from 1-sec. to 60-sec. The aperture is fixed at F8. Press the exposure mode button enter the Long Time mode (“L.T.”). -
Page 11: Spot Metering
While keeping the exposure compensation button shift lever compensation value. The exposure compensation value is displayed on the LCD panel only when the exposure compensation button is pressed. When the shutter release button is pressed halfway, viewfinder. To cancel the Exposure Compensation mode, set the exposure compensation value back to ±. -
Page 12: Selftimer
SELFTIMER [ ]/ REMOTE CONTROL [ As you press the selftimer/ remote control/ macro button, the mode changes as follows: macro When in the Selftimer mode Secure the camera on a tripod or other support. Compose your shot in the viewfinder. Press the shutter release button halfway (the focus and exposure are locked at this time). -
Page 13: Correcting The Date And Time
CORRECTING THE DATE AND TIME Be sure to correct the date and time after the batteries have been inserted or replaced. To set the “year” indicator: Keep the MODE button pressed until the “year” indicator starts blinking. Press the SET button to adjust the “year” indicator. -
Page 14: Care And Storage
28 mm ~ 120 mm zoom lens. 35 mm standard DX-coded film (24 x 36 mm). Olympus lens (filter available, 52 mm filter diameter), 28 mm~ 120 mm, F4.9 ~ 6.8, 15 elements in 10 groups (4-gourp zoom construction), 1 ED lens included. -
Page 15: Accessories (Optional)
Remote control(Optional): Infrared remote control unit with 3-sec. delay. Flash: Built-in IVP (Intelligent Variable-Power) flash system with Super FP Activation. Manually flipped up. Recycling time — Approx. 0.2 ~ 4 sec. (at normal temperature). Flash working range — 0.6 m ~ 3.7 m (2.0 ~ 12.1ft) at wide angle and 0.9 m ~ 4.2 m (3.0 ~ 13.8ft) at telephoto with ISO 100 color negative film;...