Table of Contents
Advertisement
Model No. 30602.0
Serial No.
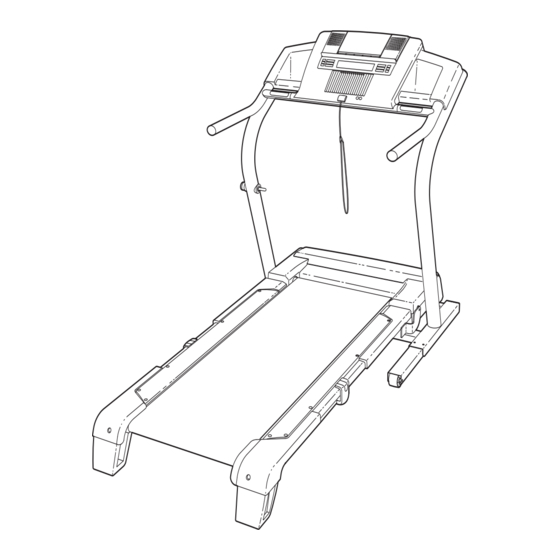
Find the serial number in the location
shown below. Write the serial number
in the space above for reference.
Serial Number
Decal
QUESTIONS?
As a manufacturer, we are com-
mitted to providing complete
customer satisfaction. If you
have questions, or if parts are
damaged or missing, PLEASE
CONTACT OUR CUSTOMER
SERVICE DEPARTMENT
DIRECTLY.
CALL TOLL-FREE:
1-888-936-4266
Mon.–Fri., 8:00 until 17:00 EST
(excluding holidays)
OR E-MAIL US:
customerservice@iconcanada.ca
CAUTION
Read all precautions and instruc-
tions in this manual before using
this equipment. Save this manual
for future reference.
USER'S MANUAL
Visit our website at
www.proform.com
Visit our website at
www.healthrider.com
Visit our website at
www.nordictrack.com
Visit our website at
Advertisement
Table of Contents

Related Manuals for NordicTrack ViewPoint 2800 30602.0


Summary of Contents for NordicTrack ViewPoint 2800 30602.0
- Page 1 Read all precautions and instruc- tions in this manual before using this equipment. Save this manual for future reference. USER'S MANUAL Visit our website at www.proform.com Visit our website at www.healthrider.com Visit our website at www.nordictrack.com Visit our website at...
-
Page 2: Table Of Contents
HOW TO FOLD AND MOVE THE TREADMILL ........ -
Page 3: Important Precautions
2. Use the treadmill only as described. 3. Place the treadmill on a level surface, with at least eight feet of clearance behind it and two feet on each side. Do not place the treadmill on any surface that blocks air openings. - Page 4 21. Do not change the incline of the treadmill by placing objects under the treadmill. 22. When folding or moving the treadmill, make sure that the frame is held securely by the pin on the latch knob. 23. When using iFIT programs, an electronic “chirping”...
- Page 5 SAVE THESE INSTRUCTIONS The decals shown here have been placed on the treadmill. If a decal is missing or illegible, call the toll-free telephone number on the front cover of this manual and order a free replacement decal.
-
Page 6: Before You Begin
BEFORE YOU BEGIN Thank you for selecting the revolutionary NordicTrack C2800 treadmill. The C2800 treadmill offers an impres- sive selection of features designed to make your work- outs at home more enjoyable and effective. And when you’re not exercising, the unique C2800 treadmill can be folded up, requiring less than half the floor space of other treadmills. -
Page 7: Assembly
This is a normal condition and does not affect treadmill performance. If there is lubricant on top of the walking belt, simply wipe off the lubricant with a soft cloth and a mild, non-abrasive cleaner. - Page 8 2. Attach the four Base Pads (81) (only three are shown) to the base of the Uprights (85) with four 1” Tek Screws (82) and four Plastic Spacers (101). Note: One replacement Base Pad may be included. Use the Base Pad to replace any Base Pad that becomes worn.
- Page 9 Next, insert the pin into the Latch Insert, and tighten the knob back onto the pin. 7. Place the treadmill in the storage position (see HOW TO FOLD AND MOVE THE TREADMILL on page 32). Hold the cylinder end of the Shock (114) near the bracket in the center of the crossbar on the Frame (55).
- Page 10 9. Make sure that all parts are properly tightened before you use the treadmill. Keep the included allen wrench in a secure place; the allen wrench is used to adjust the walking belt (see page 35). To protect the floor or carpet from damage, place a mat under the treadmill.
- Page 11 Before the personal television can be used, you must connect an antenna, a 75 ohm CATV cable, or a VCR to the 75 ohm antenna terminal on the treadmill frame. Note: No antenna, cable, or adapter is included. HOW TO CONNECT AN ANTENNA Indoor Antenna 1.
- Page 12 If you purchase the optional chest pulse sensor (see page 31), follow the steps below to install the re- ceiver included with the chest pulse sensor. 1. Make sure that the power cord is unplugged. Remove the indicated Screws (99) and the two Console Screws (32) from the Console Base (98).
-
Page 13: Operation And Adjustment
Failure to use a properly functioning surge suppressor could result in damage to the control system of the treadmill. If the control system is damaged, the walking belt may change speed, accelerate, or stop unexpect- edly, which may result in a fall and serious injury. - Page 14 Walk programs, four Jog programs, and four Run programs. Each program automatically con- trols the speed and incline of the treadmill as it guides you through an effective workout. You can even create Custom programs and save them for future use. The...
-
Page 15: How To Turn On Power
ET29611 (NTLXXXXX.0) mill. The first time the treadmill is used, observe the alignment of the walking belt, and center the walking belt if necessary (see page 35). HOW TO USE THE MAIN MENU The console’s main menu allows you to view informa-... - Page 16 Enter button. The console also features a “demo mode” that can be used while the treadmill is displayed in a store. While the demo mode is selected, the power cord can be plugged in, the key can be removed from the console, and the display and the television will remain on.
- Page 17 Select a display mode and monitor your progress with the display and the intensity level bar. As you walk or run on the treadmill, the display can show the following workout information: • The elapsed time.
- Page 18 When you are finished exercising, remove the key. Step onto the foot rails, press the Stop button, and adjust the incline of the treadmill to the lowest set- ting. The incline must be at the lowest setting when the treadmill is folded to the storage posi- tion or the treadmill will become damaged.
- Page 19 If a different incline setting is programmed, the incline setting will ap- pear at the top of the display for a moment. When the first segment ends, the treadmill will automati- cally adjust to the speed and incline settings for the second segment.
- Page 20 When you are finished exercising, remove the key from the console. When the program ends, make sure that the in- cline of the treadmill is at the lowest setting. Next, remove the key from the console and put it in a safe place.
- Page 21 HOW TO USE A CUSTOM PROGRAM Insert the key into the console. See HOW TO TURN ON THE POWER on page Use the main menu to enter or change settings if desired. See HOW TO USE THE MAIN MENU on page 15. Select a Custom program.
- Page 22 Each time the speed or incline changes, the...
- Page 23 Speed or Incline buttons; however, when the console compares your heart rate to the current target heart rate setting, the speed or incline of the treadmill may automatically change. To stop the program at any time, press the Stop button.
- Page 24 HOW TO CONNECT THE TREADMILL TO USE IFIT PROGRAMS To use iFIT MP3 or CD programs, the treadmill must be connected to your MP3 player, CD player, portable stereo, home stereo, or computer. See pages 24 and 25 for connecting instructions. To use iFIT programs directly from our Web site, the treadmill must be con- nected to your computer.
- Page 25 HOW TO CONNECT YOUR HOME STEREO Note: If your stereo has an unused LINE OUT jack, see instruction A below. If the LINE OUT jack is being used, see instruction B. A. Plug one end of a long 3.5 mm to RCA stereo audio cable (available at electronics stores) into the input jack on the console.
- Page 26 To use an iFIT MP3, CD, or video program, the tread- mill must be connected to your MP3 player, CD player, or VCR. See HOW TO CONNECT THE TREADMILL TO USE IFIT PROGRAMS on pages 24 to 26. To pur- chase and download iFIT MP3 programs, go to www.iFIT.com.
- Page 27 Stop button or remove the key and go to step 1 on page 26. Note: If the speed and/or incline of the treadmill does not change when a “chirp” is heard: • Make sure that the iFIT logo appears in the display and that the display is not paused.
- Page 28 Our Web site at www.iFIT.com allows you to access programs directly from the internet. To use a program from our Web site, the treadmill must be connected to your home computer. See HOW TO CONNECT YOUR COMPUTER on page 25. In addition, you must have an internet connection and an internet service provider.
- Page 29 HOW TO OPERATE THE PERSONAL TELEVISION IMPORTANT: Before operating the television, you must connect an antenna, a 75 ohm CATV cable, or a VCR to the 75 ohm antenna terminal on the tread- mill. See page 11 for instructions. Follow the steps below to operate the television. Insert the key into the console.
- Page 30 HOW TO USE THE INFORMATION MODE The console features an information mode that allows you to view treadmill usage information, select a sys- tem of measurement for the console, and turn on and turn off the demo mode. The information mode also al- lows you to adjust the settings of the television and to save channels into the television’s memory.
- Page 31 HOW TO ADJUST THE CUSHIONING SYSTEM The treadmill features a cushioning system that re- duces the impact as you walk or run on the treadmill. To increase the firmness of the walking platform, step off the treadmill and slide the cushion adjusters toward the front of the treadmill.
-
Page 32: How To Fold And Move The Treadmill
2. Move your right hand to the position shown and hold the treadmill firmly. Using your left hand, pull the latch knob to the left and hold it. Raise the treadmill until the pin on the latch knob is in line with the latch catch. Then, carefully release the latch knob. - Page 33 HOW TO LOWER THE TREADMILL FOR USE 1. Hold the upper end of the treadmill with your right hand as shown. Using your left hand, pull the latch knob to the left and hold it. Pivot the treadmill down until the frame is past the pin on the latch knob.
-
Page 34: Troubleshooting
TROUBLESHOOTING Most treadmill problems can be solved by following the steps below. Find the symptom that applies, and follow the steps listed. If further assistance is needed, see the front cover of this manual. PROBLEM: The power does not turn on SOLUTION: a. - Page 35 1/2 of a turn. Be careful not to overtighten the walking belt. Plug in the power cord, insert the key, and run the treadmill for a few minutes. Repeat until the walking belt is centered. b. If the walking belt slips when walked on, first remove the key and UNPLUG THE POWER CORD.
- Page 36 • Blue Screen—If the treadmill is located in the fringe area of a television station where the signal is weak, the picture may be of poor quality or a blue screen may appear. If the signal is weak, it may be necessary to install an external antenna to improve the picture.
-
Page 37: Conditioning Guidelines
For maximum fat burning, adjust the speed and incline of the treadmill until your heart rate is near the middle number in your training zone. Aerobic Exercise If your goal is to strengthen your cardiovascular sys- tem, your exercise must be “aerobic.”... -
Page 38: Part List
PART LIST—Model No. 30602.0 To locate the parts listed below, see the EXPLODED DRAWING attached in the center of this manual. Key No. Qty. Description Left Foot Rail Foot Rail Screw Cushion Adjustor Adjustor Guide Rear Platform Screw Latch Warning Decal 3/4”... - Page 39 Key No. Qty. Description Key/Clip 1/4” Nut Console Extension Leg Nut Wheel Spacer Shock Clip Roller Bracket Screw Frame Ground Wire Rear Roller Bracket Small Foot Rail Screw 1/4” Washer Key No. Qty. Description Shock TV Cable 12” Blue Wire, 2F 8”...
- Page 40 EXPLODED DRAWING—Model No. 30602.0 R0806A...
-
Page 41: Exploded Drawing
EXPLODED DRAWING—Model No. 30602.0 R0806A... -
Page 42: Ordering Replacement Parts
• the MODEL NUMBER of the product (30602.0) • the NAME of the product (NordicTrack C2800 treadmill) • the SERIAL NUMBER of the product (see the front cover of this manual) • the KEY NUMBER and DESCRIPTION of the part(s) (see the PART LIST on pages 38 and 39 and the EXPLODED DRAWING attached in the center of this manual) ICON Health &...