Miele TX3587 Operating And Installation Instructions
Built-in
Hide thumbs
Also See for TX3587:
- Operating and installation instructions (180 pages) ,
- Operating and installation instructions (44 pages) ,
- Operating and installation instructions (52 pages)
Table of Contents
Advertisement
Quick Links
Advertisement
Table of Contents

Related Manuals for Miele TX3587


Summary of Contents for Miele TX3587
- Page 1 Operating and installation instructions Built-in coffee machine To avoid the risk of accidents or damage to the appliance it is essential to read these instructions before it is installed and used for the first time. en – GB M.-Nr. 10 213 550...
-
Page 2: Packaging Material / Disposal Of Old Machine
Packaging material / Disposal of old machine Disposal of the packing Disposing of your old machine material Electrical and electronic machines often contain valuable materials. They also The packaging is designed to protect contain materials which, if handled or the machine from damage during disposed of incorrectly, could be transportation. -
Page 3: Table Of Contents
Contents Packaging material / Disposal of old machine ........... 2 Warning and Safety instructions ................6 Guide to the machine ..................16 Controls and display .................... 18 Accessories ......................19 Using for the first time..................20 Before using for the first time................. 20 Switching on for the first time ................ - Page 4 Contents Profiles ........................40 Opening a profile....................40 Creating a profile....................40 Selecting a profile ..................... 41 Changing the name................... 41 Deleting a profile ....................41 Changing a profile..................... 42 Settings ......................... 43 Opening the Settings menu ................... 43 Changing and saving settings................43 Possible setting options..................
- Page 5 Contents Rinsing the machine ....................65 Rinsing the milk pipework..................65 Cleaning the milk pipework..................66 Degreasing the brew unit ..................68 Descaling the machine ..................69 Problem solving guide ..................73 Messages in the display ..................73 Unusual performance of the coffee machine............76 Unsatisfactory results ....................
-
Page 6: Warning And Safety Instructions
They contain important notes on installation, safety, use and maintenance. Miele cannot be held liable for damage caused by non- compliance with these instructions. Keep these instructions in a safe place and pass them on to any... - Page 7 Warning and Safety instructions Correct application This coffee machine is intended for use in domestic households and similar working and residential environments. Examples of a working or residential environment include – shops, offices and other working environments, – small businesses, showrooms etc., –...
- Page 8 Warning and Safety instructions Safety with children Caution! Danger of burning and scalding on the dispensing spouts. Children's skin is far more sensitive to high temperatures than that of adults. Ensure children do not touch hot surfaces of the coffee machine or place parts of their body under the dispensing spouts.
-
Page 9: Technical Safety
Warning and Safety instructions Technical safety Installation and repairs may only be carried out by a Miele authorised service technician. Installation, repairs and other work by unqualified persons can cause considerable danger to users. A damaged coffee machine could be dangerous. Before building in the machine, check it for any externally visible damage. - Page 10 Ensure the coffee machine has cooled down completely before closing the furniture door. Repairs may only be carried out by a Miele authorised service technician. Repairs by unqualified persons can cause considerable danger to the user.
- Page 11 Warning and Safety instructions Only use genuine original Miele accessories with this machine. Using spare parts or accessories from other manufacturers will invalidate the guarantee, and Miele cannot accept liability.
-
Page 12: Correct Use
Warning and Safety instructions Correct use The spouts present a danger of burning or scalding. The liquids and steam dispensed are very hot. Please note: – Keep well away from the area underneath the spouts when hot liquids and steam are being dispensed. –... - Page 13 Sugar will damage the coffee machine. Only add ground coffee or the Miele cleaning tablets for degreasing the brew unit to the ground coffee chute. Do not use any caramelised ready ground coffee. The sugar in the coffee will stick to and block the brew unit of the coffee machine.
- Page 14 Descale the coffee machine regularly depending on the water hardness level in your area. Descale the machine more frequently in areas with very hard water. Miele cannot be held liable for damage arising from insufficient descaling, the use of incorrect descaling agent or the use of descaling agent which is not of the appropriate concentration.
- Page 15 Warning and Safety instructions For machines with stainless steel surfaces: Do not use sticky notes, transparent adhesive tape, masking tape or other types of adhesive on stainless steel surfaces. These damage the surface, causing it to lose its dirt repellent protective coating.
-
Page 16: Guide To The Machine
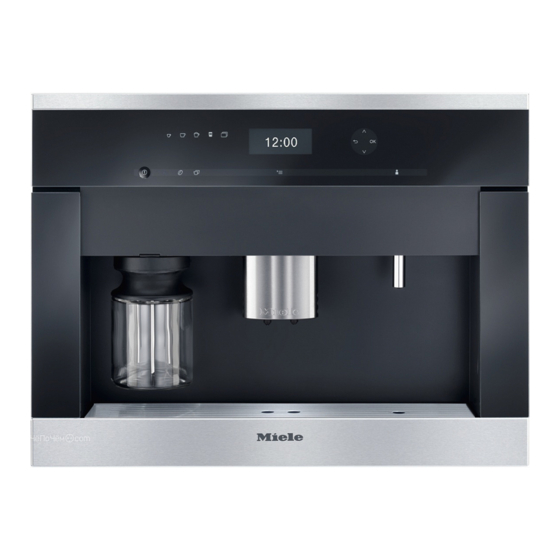
Guide to the machine Exterior view a On/Off sensor b Controls and display c Handle d Hot water spout e Drip tray cover f Height-adjustable central spout with lighting g Milk flask and lid... -
Page 17: Interior View
Guide to the machine Interior view h Ground coffee chute cover i Brew unit j Ground coffee chute k Slide control to select fineness of ground coffee l Coffee bean container m Water container n Drip tray with grid o Waste container p Drip catcher q Central spout connector r Maintenance panel... -
Page 18: Controls And Display
Settings for checking or altering action or status coffee preparation e Back l Optical interface For returning to the previous menu, (for Miele service technician use only) cancelling unwanted actions f Arrow sensors For displaying further options and highlighting a selection... -
Page 19: Accessories
Accessories These products and other useful – Angled connector for milk accessories can be ordered via the pipework internet, from Miele (see back cover for Replacement part contact details) or from your Miele Optional accessories dealer. Miele accessories and cleaning and conditioning products are available for your coffee machine. -
Page 20: Using For The First Time
The setting is now saved. prompted to set the following: – Language and country – Date – Time – Display (Time of day display) Touch the On/Off sensor . The welcome message Miele - will appear in the display Willkommen briefly. -
Page 21: Water Hardness
Using for the first time Display Water hardness You can choose from the following The water hardness level indicates how options: much calcium is dissolved in the water. The higher the calcium content, the – : The time and date are always harder the water, and the harder the visible in the display when the water, the more often the coffee... - Page 22 Using for the first time Measuring the water hardness level You can determine the water hardness yourself using the enclosed test strip. Alternatively, your local water authority will be able to tell you the hardness of water in your area. ...
-
Page 23: Operation
You are in the drinks menu when the To exit the current menu, touch . display shows: Miele Select drink To make a drink, touch one of the drinks sensors. You can find more drinks in the Further ... -
Page 24: Filling The Water Container
Filling the water container Change the water every day to prevent a build-up of bacteria. Only use cold, fresh tap water to fill the water container. Hot or warm water or other liquids can damage the coffee machine. Do not use mineral water. Mineral water will cause serious limescale deposits to build up in your machine ... -
Page 25: Filling The Coffee Bean Container
Filling the coffee bean container Fill the coffee bean container with Tip: You can use a nut or seed grinder roasted coffee or espresso beans if you to grind green coffee beans. These want to use freshly ground coffee types of grinder generally have a beans for each cup of espresso or rotating stainless steel blade. -
Page 26: Switching On And Off
Switching on and off Switching on Switching off When the coffee machine is switched Touch the On/Off sensor . on, it heats up and rinses the pipework. If coffee has been dispensed, the This not only cleans the pipework, but coffee machine will rinse the coffee also warms it before coffee is prepared. -
Page 27: Adjusting The Central Spout To The Correct Cup Height
Adjusting the central spout to the correct cup height You can adjust the central spout to suit the height of the cup you are using so that the coffee or espresso will not cool down as quickly and the crema will have a better consistency. -
Page 28: Making Drinks
Making drinks Making a coffee The spouts present a danger of burning or scalding. The liquids and steam dispensed are very hot. Keep well away from the area underneath the spouts when hot liquids and steam are being dispensed. Do not touch hot components. -
Page 29: Making Two Portions
Making drinks Making two portions Cancelling preparation You can dispense two portions of Drink preparation can be cancelled espresso or coffee at once either into while is showing in the display. Stop one cup or two separate cups. Touch OK. To fill two cups at the same time: When making two portions at once touching the OK sensor once will only... -
Page 30: Dispensing Several Cups Of Coffee One After The Other - Coffee Pot
Making drinks Dispensing several cups of cup of decaffeinated coffee, for example, even though the coffee bean coffee one after the other - container is filled with roasted coffee Coffee pot beans. You can make several cups of coffee The coffee machine will recognise one after the other automatically with automatically that ready ground coffee function (max. - Page 31 Making drinks Open the front of the coffee machine. Making coffee with ground coffee If you want to make a drink with ground coffee: Select with the arrow sensors . Touch OK. You can now select which type of drink you would like to make with ground coffee.
-
Page 32: Drinks With Milk
Making drinks Drinks with milk Notes on the milk flask Milk is not cooled in the milk flask. Danger of burning and scalding Therefore, place the milk flask in the on the central spout. refrigerator if you are not going to use The liquids and steam dispensed are milk for a while. -
Page 33: Dispensing Hot Water
Making drinks Dispensing hot water Danger of burning and scalding on the hot water spout. The water dispensed is very hot. Please note that the water dispensed is not hot enough for making tea. Place a suitable container underneath the hot water spout. -
Page 34: Making Drinks Using A Profile
You can only achieve good quality milk froth with milk which is cold (< 10 °C). The small milk flask lid is available to order from your Miele Dealer, Miele or via the internet at www.miele- shop.com. -
Page 35: Coffee The Way You Like It
Coffee the way you like it To set the coffee machine up for the To avoid damaging the grinder, type of coffee you are using, you can please note the following: Only adjust the grinder one setting at – change the grinder setting, a time. -
Page 36: Displaying And Changing The Parameters Of A Drink
Coffee the way you like it Displaying and changing the The setting is now saved. parameters of a drink Tip: If the coffee is too strong for you or it tastes bitter, try a different type of Touch . bean. -
Page 37: Brewing Temperature
Coffee the way you like it Brewing temperature Pre-brewing the coffee The ideal brewing temperature will When the pre-brewing function is depend on switched on, the freshly ground coffee is first moistened with a little hot water. – the type of coffee being used, Then the remaining water is forced –... -
Page 38: Portion Size
Portion size The flavour of the coffee produced Changing the portion size depends not just on the type of coffee while making a drink used, but also on the amount of water You can change and save the portion used. You can programme the amount size for Espresso , Coffee , of water to suit the size of your cups Cappuccino ... - Page 39 Portion size Changing the portion sizes in Changing the portion size for different profiles the Parameters menu You can set the portion size for You can only change the portion sizes individual drinks for each profile. for Long coffee, Caffè Latte, hot milk and milk froth via the ...
-
Page 40: Profiles
Profiles In addition to the Miele profile, you can Creating a profile enter individual profiles to cater for Select with the arrow Create profile different tastes and preferences. sensors and touch OK. In each profile you can adjust the... -
Page 41: Selecting A Profile
This selection is only possible if a profile has been allocated in addition profile has been allocated in addition to the Miele standard profile. to the Miele standard profile. Touch the arrow sensors until Touch the arrow sensors until is highlighted. -
Page 42: Changing A Profile
Profiles Changing a profile You can programme the coffee machine so that it changes back to the Miele profile automatically after each drink has been dispensed, so that the Miele profile is always active when the machine is switched on or so that it retains the most recently selected profile. -
Page 43: Settings
Settings Opening the Settings menu Changing and saving settings Touch . Touch . You can now check or make alterations Select the setting you wish to change to settings. with the arrow sensors and touch OK. Options which are currently selected will have a tick ... -
Page 44: Possible Setting Options
Settings Possible setting options The factory default for each option has a * next to it. Option Available settings * English and other languages Language deutsch Country Time Show – Night dimming Clock format – 12 h 24 h Date Timer Timer 1... - Page 45 Settings Option Available settings Info Number of drinks – Total no. of portions Espresso Coffee Long coffee Cappuccino Latte macchiato Caffè latte Milk froth Hot milk Hot water No. of uses until appliance needs descaling: No.of uses until brew unit needs degreasing: System lock ...
-
Page 46: Language
Settings Language Clock format The options are: You can select the language (and country variant of that language) for all – 24-hour display ( 24 h display text. – 12-hour display ( 12 h Tip: If you select the wrong language by mistake, you can find the Setting the time "Language"... - Page 47 Settings Selecting a timer Switch off after The options are: timer function is Switch off after only available in Timer 1. – Timer 1: Switch on at Switch off at Switch off after If none of the sensors have been –...
-
Page 48: Eco Mode
Settings Activating and deactivating the timer Eco mode If you have selected Night dimming Eco mode is an energy-saving mode. for the time display: The steam system does not heat up when is activated for the Switch on at until a coffee drink or steam for hot timer, the ... -
Page 49: Lighting
Settings Lighting Info (display information) You have the following options: In the option, the number of Info portions made for each individual drink – You can set the brightness when the can be displayed. machine is switched on. You can also see whether more than –... -
Page 50: Locking The Coffee Machine (System Lock )
Settings Locking the coffee machine Water hardness (System lock ) Please see "Using for the first time" for information about water hardness. You can lock the coffee machine to prevent it being used without your Display brightness knowledge, by children, for example. Change the display brightness using Activating and deactivating the the arrow sensors . -
Page 51: Factory Default
Settings Factory default Demo mode (Showroom programme) You can reset the settings back to the ones which were set when the coffee Do not activate this setting for machine was delivered - the factory domestic use! default settings. The coffee machine can be The number of drinks and the appliance demonstrated in the showroom using status (No. -
Page 52: Cleaning And Care
Cleaning and care Clean the coffee machine regularly to avoid a build-up of bacteria. Quick guide Recommended frequency What do I have to clean / maintain? Every day the milk flask and lid (at the end of the day) the water container the waste container the drip tray and the drip tray cover... -
Page 53: Cleaning By Hand Or In The Dishwasher
Cleaning and care Cleaning by hand or in the Danger of burning and scalding dishwasher on hot components or by hot liquids. Always allow the coffee machine to The following must be cleaned by hand cool down before cleaning it. only: Caution: Water in the drip tray can –... - Page 54 Cleaning and care All surfaces are susceptible to scratching. Scratches on glass surfaces could even cause a breakage. Contact with unsuitable cleaning agents can discolour the surfaces. Wipe up any spillages or splashes of descaling agent immediately. To avoid damaging the surfaces of your coffee machine, do not use: –...
-
Page 55: Drip Tray
Cleaning and care Drip tray Danger of burning. If the rinsing process has just finished, wait a while before removing the drip tray as the water used for rinsing will run out of the coffee spouts. Clean the drip tray every day to prevent unpleasant odours and ... -
Page 56: Drip Tray Cover
Cleaning and care Drip tray cover Water container Remove the drip tray cover. Change the water every day to prevent a build-up of bacteria. The drip tray cover can be cleaned in the dishwasher, or by hand using hot Make sure that the valve, the water and a little washing-up liquid. -
Page 57: Waste Container
Cleaning and care Waste container Central spout After a certain period of time a reminder With the exception of the stainless steel to empty the waste container will cover, all parts of the central spout appear in the display. The waste should be cleaned in the dishwasher at container must be cleaned when this least once a week. - Page 58 Cleaning and care Hold the unit at the sides and pull it forwards to release it. Tip: Place the dispensing unit vertically in the upper basket of the dishwasher. Place the connecting pieces and the dispensers in the cutlery tray. ...
-
Page 59: Maintenance Of The Milk Valve
Cleaning and care Reassemble the dispensing unit in Maintenance of the milk valve the reverse order. Make sure that The milk valve should be cleaned once upper connecting piece clicks into a week to ensure good quality milk position. -
Page 60: Milk Flask And Lid
Cleaning and care Milk flask and lid Dismantling the milk flask lid and cleaning it with the cleaning brush Soiling can cause a fault in the Milk fat deposits can collect in the milk machine. flask lid. These will cause the milk to It is important to keep the neck and sputter when milk froth is being made. -
Page 61: Coffee Bean Container
Cleaning and care Coffee bean container Take the coffee bean container out of the machine and then push the lid back to remove it. Clean the coffee bean container and the lid by hand using hot water and a little washing-up liquid and then dry them both thoroughly. -
Page 62: Interior And Machine Front
Cleaning and care Interior and machine front Central spout connector First take out all removable parts and The part which connects the brew unit then clean the interior and the and the central spout is located on the machine front with a mild solution of inside of the machine front. -
Page 63: Brew Unit
Cleaning and care Brew unit If you cannot remove the brew unit or can only do so with difficulty, the brew Removing and cleaning the brew unit unit is not in the correct position (See by hand "Problem solving guide"). Clean the brew unit by hand only After taking the brew unit out of the using warm water. -
Page 64: Maintenance Programmes
Cleaning and care To replace the brew unit: Maintenance programmes Proceed in the reverse order: push The coffee machine has the following the brew unit back into the coffee maintenance programmes: machine, making sure it goes in – Rinse the machine straight. -
Page 65: Rinsing The Machine
Cleaning and care Rinsing the machine Rinsing the milk pipework You can rinse the milk pipework Milk residue can clog up the milk manually. pipework. If you have made a drink with milk, the coffee machine will rinse the After a coffee has been dispensed, the milk pipework automatically after a few machine is rinsed before it switches minutes. -
Page 66: Cleaning The Milk Pipework
Cleaning and care Cleaning the milk pipework Carrying out the milk pipework cleaning process The milk pipework must be cleaned at least once a week. The cleaning process cannot be The coffee machine will prompt you at cancelled once it has started. The the correct time. - Page 67 Miele coffee machines and prevents subsequent damage. The milk pipework cleaning agent is available to order from Miele or via the internet at www.miele-shop.com. Add one sachet of the milk pipework cleaning agent to the water container.
-
Page 68: Degreasing The Brew Unit
We recommend using Miele cleaning tablets to clean the brew unit. These have been specially developed for use with Miele coffee machines and prevent subsequent damage. Miele cleaning tablets can be ordered from Miele or www.miele-shop.com. -
Page 69: Descaling The Machine
Descaling the machine The coffee machine prompts you when Warning. When descaling the it needs to be descaled. No. of uses until machine, cover delicate surfaces will appear appliance needs descaling: 50 and natural flooring to prevent in the display. The remaining number of damage from splashes of descaling drinks that can be made before solution. - Page 70 concentration. appears symbol and place in the appliance in the display, proceed as follows. Miele descaling tablets are available to order from Miele or via the internet at www.miele-shop.com.
- Page 71 Descaling the machine You will need 2 descaling tablets. Carrying out descaling Replace the water container in the coffee machine and close the front. Follow the further instructions given in the display. When Rinse the water container and fill with fresh tap water up to the ...
- Page 72 Descaling the machine Descaling when not prompted by a message Touch . Select and touch OK. Maintenance Select Descale the appliance The descaling process cannot be cancelled once it has started. The process has to be completed through to the end.
-
Page 73: Problem Solving Guide
Follow the instructions which appear in the display to remedy the problem. If after this, the fault message appears in the display again, contact Miele. Problem Cause and remedy F1, F2, F3, F4, There is an internal fault. - Page 74 Problem solving guide Problem Cause and remedy F73 or The brew unit cannot be positioned correctly, or it is dirty and the ground coffee cannot be processed. Check the brew unit Check whether you can remove the brew unit (see "Cleaning and care - Brew unit").
- Page 75 Problem solving guide Problem Cause and remedy There is too much ready ground coffee in the ground Too much ground coffee coffee chute. If more than one level spoon of ground coffee is added to the coffee chute, the brew unit cannot process the coffee.
-
Page 76: Unusual Performance Of The Coffee Machine
Switch the coffee machine off at the wall socket and unplug it. Contact a qualified electrician or Miele. The lighting remains off The lighting has been switched off. after the coffee ... - Page 77 Problem solving guide Problem Cause and remedy The coffee machine The system lock has been activated. does not switch itself You need to deactivate the system lock (see on, although the Switch "Settings - System lock"). setting has been on at A day of the week has not been selected.
- Page 78 Problem solving guide Problem Cause and remedy The drip tray is not positioned correctly in the Empty the drip tray appears in the display, machine. even though the drip Push the drip tray in as far as it will go. tray has been emptied.
- Page 79 Problem solving guide Problem Cause and remedy The machine front is The cap on the central spout connector has either not difficult to open and been lubricated or is not lubricated sufficiently. close. Check the silicone cap for damage. If necessary, replace it with the extra cap supplied.
- Page 80 Problem solving guide Problem Cause and remedy The descaling process The descaling process cannot be stopped once the was started by mistake. "OK" sensor has been touched. Descaling must be continued through to completion. This is a safety precaution to make sure the machine is descaled correctly.
-
Page 81: Unsatisfactory Results
The coffee bean container has become empty during makes a louder noise the grinding process. than usual. Fill the container with fresh beans. There may be stones in amongst the coffee beans. Switch the coffee machine off immediately. Call Miele. - Page 82 Problem solving guide Problem Cause and remedy The coffee flows too The coffee is too coarsely ground. quickly into the cup. Set the grinder to a finer setting (see "Setting the coffee grinder"). The coffee trickles too The coffee is too finely ground. slowly into the cup.
-
Page 83: Problems When Heating Up Or Frothing Milk
Problem solving guide Problems when heating up or frothing milk Problem Cause and remedy The milk sputters when The milk temperature is too high. Good milk froth can it is dispensed. Hissing only be achieved when cold milk (< 10 °C) is used. noises can be heard ... -
Page 84: Replacing The Angled Connector
Problem solving guide Replacing the angled connector If instead of being frothed the milk is only being heated up, check the following first: – Is the milk in the milk flask cold (< 10 ° C)? – Have the central spout and the milk flask lid been cleaned carefully? ... - Page 85 Problem solving guide Push the tubes onto the angled connector and fit it in the coffee machine. Make sure that the cross- piece on the angled connector is facing downwards. Re-insert the air intake tube into opening . ...
-
Page 86: After Sales / Guarantee
– Miele. purchase. However, you must activate your cover by calling 0330 160 6640 or Contact details for Miele are given at registering online at www.miele.co.uk. the end of this booklet. N.B. A call-out fee will be charged for service visits... -
Page 87: Saving Energy
Saving energy If the settings of the following functions are altered from the factory default, energy consumption will increase: – Eco mode – Lighting – Time of day display – Timer... -
Page 88: Electrical Connection
Electrical connection All electrical work should be carried out The coffee machine must not be used by a suitably qualified and competent with so-called energy saving devices person only, in strict accordance with either. These reduce the amount of current national and local safety energy supplied to the machine causing regulations (BS 7671 in the UK). -
Page 89: Installation
The machine is designed to be built into a tall unit. It can also be combined with other Miele built-in appliances. If the coffee machine is to be built in above another appliance, there must be a full-width, closed shelf between them (except when it is combined with a suitable Miele built-in plate or food warming drawer). -
Page 90: Ventilation
Installation Ventilation – A ventilation gap of at least 40 mm depth must be allowed for behind the Condensate can damage the coffee machine for air to circulate. machine or the housing unit. – The ventilation cross-sections in the The ventilation gaps given must be plinth, housing unit and below the observed. -
Page 91: Building In The Coffee Machine
Check the height of the coffee with a sealing strip you should fit a machine to make sure that it is sitting Miele sealing strip to the machine centrally in the niche and that it is before installing it. This is fitted from level. -
Page 92: Adjusting The Hinges
Installation Four M5 socket screws are supplied for Adjusting the hinges aligning and securing the machine in its If the machine front becomes difficult to niche. open or close after installation, you can adjust the hinges to realign it (TX 20): ... - Page 95 Citywest Business Campus, Dublin 24 Dubai Tel: (01) 461 07 10, Fax: (01) 461 07 97 Tel: +971-4-341 84 44 E-Mail: info@miele.ie, Internet: www.miele.ie Fax: +971-4-341 88 52 Manufacturer: Miele & Cie. KG E-Mail: info@miele.ae Carl-Miele-Straße 29, 33332 Gütersloh, Germany Internet: www.miele.ae...
- Page 96 CVA 6401 en – GB M.-Nr. 10 213 550 / 01...