Linksys WUSB11 ver. 2.6 User Manual
Wireless usb network adapter instant wireless series
Hide thumbs
Also See for WUSB11 ver. 2.6:
- Quick installation manual (89 pages) ,
- User manual (52 pages) ,
- Specifications (2 pages)
Table of Contents
Advertisement
Quick Links
Download this manual
See also:
User Manual
Advertisement
Table of Contents

Related Manuals for Linksys WUSB11 ver. 2.6


Summary of Contents for Linksys WUSB11 ver. 2.6
- Page 1 Instant Wireless ® Series Wireless USB Network Adapter Use this guide to install: WUSB11 ver. 2.6 User Guide...
- Page 2 COPYRIGHT & TRADEMARKS Specifications are subject to change without notice. Copyright © 2003 Linksys, All Rights Reserved. Instant Wireless, Linksys, and the Linksys logo are registered trademarks of Linksys Group, Inc. Microsoft, Windows, and the Windows logo are registered trademarks of Microsoft Corporation.
-
Page 3: Table Of Contents
INDUSTRY CANADA (CANADA) This Class B digital apparatus complies with Canadian IC-03. Cet appareil numérique de la classe B est conforme à la norme NMB-003 du Canada. The use of this device in a system operating either partially or completely outdoors may require the user to obtain a license for the system according to the Canadian regulations. -
Page 4: Chapter 1: Introduction
Appendix A: Troubleshooting Common Problems and Solutions Frequently Asked Questions Appendix B: Glossary Appendix C: Specifications Environmental Appendix D: Warranty Information Appendix E: Contact Information Instant Wireless Series Wireless USB Network Adapter ® Chapter 1: Introduction The Wireless USB Network Adapter Put the “mobile”... -
Page 5: Chapter 2: Planning Your Wireless Network
Chapter 2: Planning Your Wireless Network Network Topology A wireless local area network (WLAN) is exactly like a regular local area net- work (LAN), except that each computer in the WLAN uses a wireless device to connect to the network. Computers in a WLAN share the same frequency channel and SSID, which is an identification name for wireless devices. -
Page 6: Chapter 3: Getting To Know The Wireless Usb Network Adapter
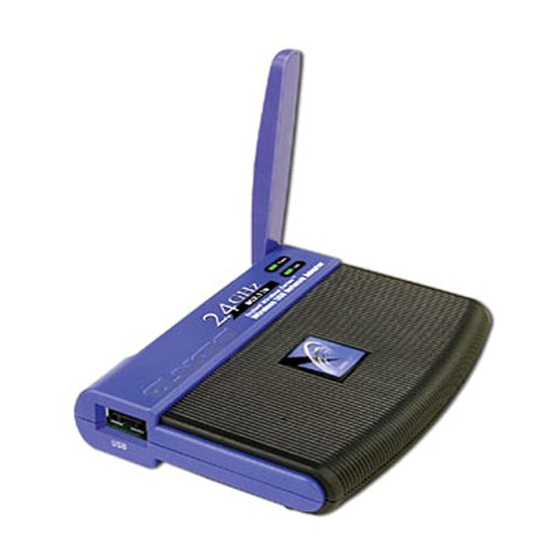
Chapter 3: Getting to Know the Wireless USB Network Adapter The Wireless USB Network Adapter’s Port and LEDs Figure 3-1 Port The Adapter’s USB port is located on the side of the Adapter. You will attach the included USB cable to this port. The other end of the cable will connect to your PC’s USB port. -
Page 7: Instructions For Windows 98Se, Me, And 2000
On the Welcome screen, you have the following choices: • Install - Click the Install button to begin the software installation process. • User Guide - Click the User Guide button to open the PDF file of this User Guide. •... - Page 8 4. If you chose Infrastructure Mode, go to Step 5 now. If you chose Ad-Hoc Mode, select the correct operating channel for your network. The channel you choose should match the channel set on the other devices in your wire- less network.
-
Page 9: Chapter 5: Hardware Installation
Chapter 5: Hardware Installation Important for Windows 98SE, Me, and 2000 users: You must run the Setup Wizard to install the software before installing the hardware. Important for Windows XP users: You must install the Adapter’s hardware before installing the software. Connecting the Adapter 1. - Page 10 1. Attach the separate adhesive strip of vel- cro to the wall that you will be mounting the Adapter. 2. To attach the Wall Mount to the Adapter, slide the Wall Mount into the grooves on the back panel of the Adapter, as shown in Steps A, B, and C.
-
Page 11: Chapter 6: Driver Installation And Configuration For Windows Xp
Chapter 6: Driver Installation and Configuration for Windows XP Overview After connecting the Adapter to your computer, you will install the driver and configure the Adapter. Important for Windows XP users: Do NOT run the Wireless USB Network Adapter Setup Wizard. If the Setup Wizard runs automatical- ly after the Setup CD-ROM has been inserted, click the Exit button. -
Page 12: Windows Xp Wireless Zero Configuration
Windows XP Wireless Zero Configuration Note for Windows XP users: Windows XP has a built-in configura- tion tool. Use Windows XP Wireless Zero Configuration (in the sys- tem tray at the bottom of your screen) to configure the Adapter. 1. After installing the Adapter, the Windows XP Wireless Zero Configuration icon will appear in your comput-... -
Page 13: Chapter 7: Using The Wlan Monitor For Windows 98Se, Me, And 2000
Chapter 7: Using the WLA N Monitor for Windows 98SE, Me, and 2000 Overview Use the WLAN Monitor to check the link information, search for available wireless networks, or create profiles that hold different configuration settings. Important for Windows XP users: Windows XP has a built-in configuration tool. -
Page 14: Site Survey
Figure 7-4 Wireless Network Status Status - The status of the wireless network connection. SSID - The SSID of the wireless network. Network Mode - The wireless mode currently in use. Transfer Rate - The data transfer rate of the current connection. Channel - The channel to which the wireless network devices are set. -
Page 15: Profiles
Connect - To connect to one of the networks on the list, select the wireless net- work, and click the Connect button. If the wireless network has WEP encryp- tion enabled, you will see the screen shown in Figure 7-6. Figure 7-6 In the WEP drop-down box, select the type of WEP encryption used by the wireless network: 64-bit / 10 hex. -
Page 16: Creating A New Profile
Import - Click the Import button to import a profile that has been saved in another location. Select the appropriate file, and click the Open button. Figure 7-8 Export - Select the profile you want to save in a different location, and click the Export button. - Page 17 3. The Network Setting screen will appear next. If your network has a DHCP server, click the radio button next to Obtain an IP address automatically (DHCP). Click the Next button to continue, or click the Cancel button to return to the Profiles screen. If your network does not have a DHCP server, click the radio button next to Specify the IP Address.
- Page 18 5. If you chose Infrastructure Mode, then proceed to step 6. If you chose Ad- Hoc Mode, then the Wireless Channels screen will now appear. Select the channel at which the network broadcasts its wireless signal. Then click the Next button to continue or the Back button to return to the previous screen. Figure 7-14 Channel - From the drop-down box, select the appropriate channel that cor- responds with your network settings.
-
Page 19: Appendix A: Troubleshooting
7. The Confirm New Settings screen will appear next shown the new settings. To save the new settings, click the Yes button. To edit the new settings, click the Back button. Figure 7-16 8. The Congratulations screen will appear next. Click Activate new settings now to implement the new settings immediately and return to the Link Information screen. - Page 20 Can I play computer games with other members of the wireless network? Yes, as long as the game supports multiple players over a LAN (local area net- work). Refer to the game’s user guide for more information. What is the IEEE 802.11b standard? It is one of the IEEE standards for wireless networks.
-
Page 21: Appendix B: Glossary
mission, statistical techniques embedded in the radio can recover the original data without the need for retransmission. To an unintended receiver, DSSS appears as low power wideband noise and is rejected (ignored) by most nar- rowband receivers. Would the information be intercepted while transmitting on air? WLAN features two-fold protection in security. - Page 22 DHCP supports static addresses for computers containing Web servers that need a permanent IP address. DNS - The domain name system (DNS) is the way that Internet domain name are located and translated into Internet Protocol (IP) addresses. A domain name is a meaningful and easy-to-remember “handle”...
- Page 23 Roaming - In an infrastructure mode wireless network, this refers to the abili- ty to move out of one access point's range and into another and transparently reassociate and reauthenticate to the new access point. This reassociation and reauthentication should occur without user intervention and ideally without interruption to network connectivity.
-
Page 24: Appendix C: Specifications
Appendix C: Specifications Standards IEEE 802.11b, USB 1.1 Channels 11 Channels (USA, Canada) 13 Channels (Europe) 14 Channels (Japan) Port One USB Type B Transmit Power 19 dBm (typical) Receive Sensitivity -85 dBm (typical) Modulation CCK, DQPSK, DBPSK Network Protocols TCP/IP, IPX/SPX, NetBEUI LEDs Power, Link... -
Page 25: Appendix D: Warranty Information
Appendix D: Warranty Information BE SURE TO HAVE YOUR PROOF OF PURCHASE AND A BARCODE FROM THE PRODUCT’S PACKAGING ON HAND WHEN CALLING. RETURN REQUESTS CANNOT BE PROCESSED WITHOUT PROOF OF PURCHASE. IN NO EVENT SHALL LINKSYS’ LIABILITY EXCEED THE PRICE PAID FOR THE PRODUCT FROM DIRECT, INDIRECT, SPECIAL, INCIDEN- TAL, OR CONSEQUENTIAL DAMAGES RESULTING FROM THE USE OF THE PRODUCT, ITS ACCOMPANYING SOFTWARE, OR ITS DOCU-... - Page 26 http://www.linksys.com © Copyright 2003 Linksys, All Rights Reserved.