
Related Manuals for Whistler WS1080


Summary of Contents for Whistler WS1080
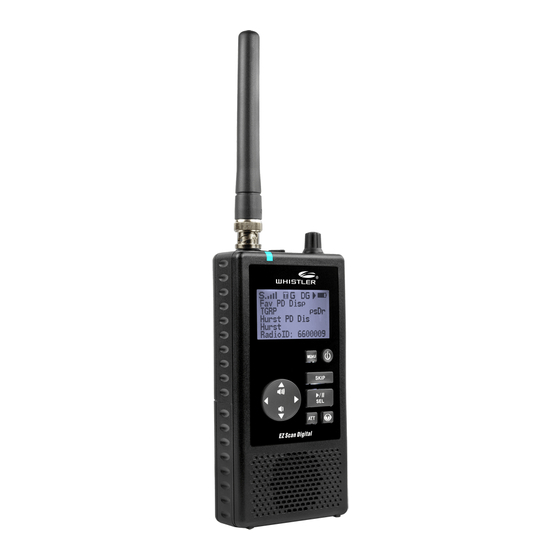
- Page 1 WS1080/WS1088 User Guide EZ SCAN DIGITAL HANDHELD RADIO SCANNER All Hazards NOAA’s National Weather Service ®...
-
Page 2: Table Of Contents
Contents Introduction..............4 What is Object Oriented Scanning?.......4 Features................5 Package Contents............5 Scanning Legally...............6 FCC Statement..............7 Setup.................8 Antenna................8 Headphones and Speakers..........9 Batteries................10 External Power..............11 Swivel Belt Clip..............11 Understanding the Keypad...........12 Turning On and Set Squelch........13 Set Bandplan and Clock..........14 Program Methods............15 Setting Location.............16 Power Up Password............18 Understanding the Display..........18 psDr Indicators...............20... - Page 3 Contents Internal Clock/Calendar..........45 Monitoring and Scanning..........45 Frequency or Talkgroups..........45 Active Scanlists...............45 Enable / Disable Scanlists..........46 Lock Out Objects............46 Skip Transmission............46 Rename Scanlists............47 Set Priority Objects............47 Scanlists and Scan Sets..........47 Searching................48 Using Spectrum Sweeper..........48 Perform a Service Search..........49 Perform a Limit Search..........49 To Save Found Frequencies..........49 Search Settings...............50 Spectrum Sweeper Settings..........50...
-
Page 4: Introduction
Introduction Scanning technology has changed dramatically over the years. The WS1080 / WS1088 scanner with Object Oriented User Interface is designed to help the hobbyist build a collection of channels to scan: • Start small and expand • Organize channels and talkgroups •... -
Page 5: Features
Features • Functional keypad and backlit LCD display • USA/Canada Radio Reference database on SD Card • Quick Location based Programming (City, Zip, County) • Detects and masks encrypted voice audio • Decodes Radio ID/Talkgroup ID data • Upgradeable CPU Firmware, DSP Firmware and Database Library •... -
Page 6: Scanning Legally
Scanning Legally Your scanner covers frequencies used by many different groups including police and fire departments, ambulance services, government agencies, private companies, amateur radio services, military operations, pager services, and wireline (telephone and telegraph) service providers. It is legal to listen to almost every transmission your scanner can receive. -
Page 7: Fcc Statement
FCC Statement This equipment has been tested and found to comply with the limits for a scanning receiver, pursuant to Part 15 of the FCC Rules. These limits are designed to provide reasonable protection against harmful interference in a residential installation. This equipment generates, uses and can radiate radio frequency energy and, if not installed and used in accordance with the instructions, may cause harmful interference to radio... -
Page 8: Setup
Setup Antenna To connect the included antenna: 1. Align the slots around the antenna’s connector with the tabs on the antenna jack. 2. Press the antenna down over the jack and turn the antenna’s base clockwise until it locks into place. -
Page 9: Headphones And Speakers
WARNING: Outdoor antennas must be properly grounded to prevent static buildup and lightning damage. Article 810 of the National Electrical Code, ANSI/NFPA 70, provides information about proper grounding of the antenna mast, connection of coaxial cable to an lightning arrestor, size of grounding conductors, location of the lightning arrestor and connection of grounding conductors to grounding electrodes. -
Page 10: Batteries
Batteries A low battery warning sounds every 30 seconds (default setting) when the batteries are low. 1. Be sure to turn the scanner off! 2. Slide open the battery compartment cover. Battery Type Selector 3. Set the Battery Type Selector: •... -
Page 11: External Power
External Power Always turn the scanner off before connecting or disconnecting power sources. Use the supplied USB cable to connect the scanner to a USB power source (not included). Some USB power adapters can interfere with the scanner's reception. Using an incompatible USB cable may damage your scanner. -
Page 12: Understanding The Keypad
Understanding the Keypad Your scanner features an easy-to understand backlit keypad. WS1080 WS1088 POWER – press and hold for one second to turn on and off. Press briefly to confirm the backlight level. MENU – provides access to additional functions related... -
Page 13: Turning On And Set Squelch
/II/SEL – controls the Scan, Pause, and Playback modes, and is used in menus to select, enable, or disable options. Four Way Push button Pad – , keys are used for navigation while browsing objects and menus. Alphanumeric Keypad (WS1088) – quick data entry of frequencies, talkgroup ID and labels. -
Page 14: Set Bandplan And Clock
Setting Bandplan and Clock When you first power up your scanner it will prompt you to set the bandplan, date and time. Press the or key to select the USA or Canada bandplan, then press /II/SEL. -Bandplan- -Bandplan- Canada ... -
Page 15: Program Methods
Program Methods There are two methods to program your scanner. To get started quickly, you can use “Set Location.” The set location method stores objects in your area automatically and puts them in Scanlists 151 and higher. These Scanlists are already named, “Multi Dispatch,” “Law Tac,”... -
Page 16: Setting Location
Setting Location Your scanner can select services to scan based on your location. Press MENU and scroll to “Set Location” and press the key. You can specify your location by City, County or ZIP Code. Scroll to the desired method and press the key. - Page 17 To select Custom Types, press the key. Scroll through the list of Services and press the /II/SEL key to select Services you wish to import. A check mark appears next to each selected Service. Services: SEL = Toggle Multi Dispatch Law Dispatch ...
-
Page 18: Power Up Password
Power up Password Set a user defined power-on password to restrict access to the radio. 1. Press MENU. 2. Scroll to Set Password and press . 3. Use the arrows to set the password. 4. Use the /II/SEL key to accept the updated settings, or the MENU key to exit without saving changes. - Page 19 Individual Object displays are shown when the scanner is monitoring activity on an enabled Object. The LCD includes a row of icons at the top that provides information about the status of the scanner while monitoring an Object. The amount of information displayed is configured using the Simple Display option in the Global Settings menu.
-
Page 20: "Psdr" Indicators
County Police TGRP psDR Police North Public Safety Radio ID: 18249 Display showing reception of a trunking talkgroup with Simple Display set to “on” and Show Radio ID enabled. There are many combinations of data that can be shown on the Object display using the Show options in the Global Settings menu. -
Page 21: Display Icons
Display Icons A row of icons at the top of the display provides status information about the scanner. These icons are defined as follows: S Squelch circuit (or “gate”) is open G When present, the attenuator is set for Global mode A When present, the attenuator is active GA When present, Global attenuator is on, and the... -
Page 22: Ez Scan Library
EZ Scan Library Your scanner comes with an installed Micro SD card that contains the entire USA/Canadian Radio Reference database as well as the EZ Scan software. NOTE: Make a copy of the EZ Scan software files in case the SD card is lost or damaged. To remove the Micro SD card from the scanner: WARNING: To prevent corrupted data on the Micro SD Card, always turn the scanner off using the front panel... -
Page 23: Maximum Card Size
For reference, below is the directory structure for the Micro SD Card. You may wish to make a copy of the CDAT folder on your computer as a backup. The CDAT folder contains your EZ Scan programming. Modifying these directories or their contents outside of the scanner or the EZ Scan software is not recommended, and may cause the scanner to malfunction. -
Page 24: Installing Ez Scan Software
Installing EZ Scan Software A method for programming a new scanner is using the supplied USB cable and the included software. Also www.RadioReference.com provides a range of resources to help improve your overall scanning experience. EZ Scan easy-to-use software helps you: •... -
Page 25: Preferred Programming From Library
Preferred Programming - from Library 1. From the Main Menu, select Browse Library. 2. Select Country. 3. Select first letter of State/Province. 4. Select State/Province. 5. Select Counties/Cites. 6. Select first letter of County. 7. Select County. 8. Select Data Type NOTE: Police/Fire and Emergency services will be in “Categories”... -
Page 26: Backup Into The First V-Scanner Folder
Backup into the First V-Scanner Folder PC Objects can be backed up to the first available V-Scanner folder from the Set Location menu (See V-Scanner II section for a discussion of Folders). We recommend you back up your data to guard against accidental changes or deletions. -
Page 27: Library Structure
Library Structure Each state contains three data types: • Agencies – Statewide conventional frequencies • Counties/Cities – County or independent city • Systems – Statewide trunked systems, control frequencies (sites) and talkgroups. Each county contains three data types: • Agencies – Local conventional frequencies •... -
Page 28: Standard Text Entry Method
Standard Text Entry Method Your scanner features a high-contrast, backlit alphanumeric display that provides constant feedback about what the radio is doing while scanning and monitoring your “Scannable Objects”. To get the most out of your scanner and this display, you will want to name your objects as you program them into the radio. - Page 29 The character set and corresponding entry codes are provided below for reference. Pressing Fn to toggle the shift lock status will produce lower case characters for letters, and a second set of punctuation marks for special characters. For brevity, lower case letters are not shown in the table below.
-
Page 30: Creating Your First New Objects
Creating Your First New Ojects- Object Edit When you enter Program Menu, the scanner will provide the following Programming Menu options and is ready for you to enter the first Objects into the memory: Global Settings Edit System Add System Add Conv Freq When an Object is displayed, press SEL or MENU to customize your Object and Set Scanlist. -
Page 31: Essential Trunking Talkgroup Parameters
Essential Trunking Talkgroup parameters As a standalone object, a TRGP object is really no more complicated than a CONV object. The trunking system (TSYS) that the TGRP is a member of must be specified. Each talkgroup has a digital “address” on the trunking system, which is called the talkgroup ID, and this must be provided. -
Page 32: Adding A New Trunking System (Tsys)
Adding a New Trunk System From the Program Menu, Select Add System, Select System type. < Motorola > < EDACS > < LTR > <P25> Press SEL will enter the -Add System- menu. Scroll to Edit Sites, Press SEL to enter –Edit Sites- menu. -
Page 33: Adding The First Talkgroup
Adding the First Talk Group to a New Trunk System Under Main Menu, Program Menu, Edit System: Scroll the display if necessary to select the system where you will add the new talkgroup. Press Select. Scroll the display by pressing the down arrow until you get to Add Talkgroup and press Select. - Page 34 7 1 P 6 3 O 5 3 L 4 3 I 2 3 C 3 2 E . <space> 3 1 D 4 3 I 7 4 S 7 1 P 2 1 A 8 1 T 2 3 C 4 2 H Press SEL to store the name, then press SEL to store the TGRP as a new object.
-
Page 35: Talkgroup Object (Tgrp)
• Wildcard Private Call: will monitor all private call radio traffic on the desired trunked radio system (in the TGID field, and set the Type field to Private) • Private Call with ID: will only monitor private call radio traffic on the specified TGID (enter the desired Radio ID in the TGID field, and set the Type field to Private) NOTE: For now, just let your new objects go to the... -
Page 36: Editing Objects Manually
CTCSS or DCS code. Subsequent transmissions must have matching CTCSS or DCS squelch codes to be monitored by the WS1080/WS1088. SQ Exclude Turns Squelch Exclude on or off. Allows certain CTCSS/DCS codes to be excluded. - Page 37 Audio Boost Increases audio level when channel becomes active. Alarm An alarm sounds when activity is found for a frequency or talkgroup. Press or to select an alarm sound. Light Press or to select the desired light options: Leave –...
-
Page 38: Alert Led Setting
Alert LED Settings Note: The EZ Scan PC application allows you to group objects (such as all Keller Fire Department) and edit the color to red. Even add an alert tone to differentiate Keller Fire from Hurst Fire. The following instructions show you how to edit color of an individual object from the keypad. - Page 39 On Solid - Single Color These settings will illuminate the LED with a single color, solid, no flashing when the Object is receiving traffic. Flash Pattern On Time Off Time LED Enable Checked LED Flash Unchecked Color Count Color 1 FF0000 (red) Color 2 Color 3...
- Page 40 Highway Department 1 - Strobe Effect These settings produce a rapid yellow pulsing strobe effect. Flash Pattern A8A8A8A8 On Time Off Time LED Enable Checked LED Flash Checked Color Count Color 1 FFFF00 (yellow) Color 2 Color 3 Color 4 Highway Department 2 - Strobe Effect These settings produce a rapid yellow and white strobe effect.
- Page 41 Police Department 2 - Strobe Effect The settings produce a rapid blue continuous strobe effect. Flash Pattern AAAAAAAA On Time Off Time LED Enable Checked LED Flash Checked Color Count Color 1 0000FF (blue) Color 2 Color 3 Color 4 Police Department 3 - Strobe Effect These settings produce an alternating blue/red strobe effect.
- Page 42 Fire/EMS 2 - Strobe Effect These settings produce a rapid red/white strobe effect. Flash Pattern AAAAAAAA On Time Off Time LED Enable Checked LED Flash Checked Color Count Color 1 0000FF (blue) Color 2 FF0000 (red) Color 3 Color 4 Christmas Tree - Flasher Effect Just for fun.
-
Page 43: Recording/Playback
Recording and Playback Your scanner features a powerful audio recording system that captures transmissions that occur on selected Objects to the Micro SD card using the high quality, industry standard .AU audio file format. For example, a 2GB Micro SD card with a very large scanning configuration (e.g., 500 MB) still leaves room for over 50 hours of recording time and thousands of recorded transmissions! Here are just a few of the... -
Page 44: If Output
3. While playing a file, the and keys set the playback volume, and the or keys move backward and forward in the file being played in five second increments. The SKIP key ends playback of the current file. 4. -
Page 45: Internal Clock/Calendar
Internal Clock/Calendar Your scanner includes a real time clock/calendar that is used to correctly date and time stamp recorded audio files. The first time you power on your scanner, you will be prompted to set the time and date. If batteries are allowed to fully discharge, or if they are removed from the scanner for more than a few minutes, the date and time will need to be set again. -
Page 46: Enable / Disable Scanlists
To enable or disable Scanlists: (WS1080) 1. Select Scanlists from the main menu, and then press . 2. Press SEL to enable a Scanlist. A checkmark ( ) indicates an active Scanlist. A square () indicates a disabled Scanlist. 3. Press or MENU to return to Main Menu. -
Page 47: Rename Scanlists
Scanlist and Scan Sets Scan Sets are an exciting new feature with the WS1080 / WS1088. There are 20 Scan Sets that work in conjunction with Scanlists to provide additional scan object selection capability and flexibility. Each Scan Set contains a list of all 200 normal Scanlists plus the special Skywarn®... -
Page 48: Searching
NOTE: When you start a scan, the first thing the scanner does is check to see what Scan set(s) is (are) enabled. It finds Scan set 01 on by default. Next it checks to see what Scanlists are permitted in Scan set 01 and it finds that every scanlist is checked (all are allowed). -
Page 49: Perform A Service Search
To perform a Service Search: 1. In the main menu, select Search, and press to enter to the search menu. 2. Select Service Search and press . 3. Scroll through the available services, select a service, and press to start the search. 4. -
Page 50: Search Settings
Search Settings To change search settings, press MENU while the search is active. Spectrum Sweeper Settings • Atten – Attenuation. On or Off. • Zeromatic – On or off. • Delay –How long scanner waits after a transmission before resuming. •... -
Page 51: Saving Found Ctcss Or Dcs Codes
Saving Found CTCSS, DCS or NAC CODES When importing objects from the Library, squelch codes are automatically imported. If this information is missing, your scanner can quickly identify these codes during a search, if present. When a channel includes a CTCSS, DCS or NAC code, the code appears on the ... -
Page 52: Weather Monitoring
Weather Monitoring A weather alert tone includes a digitally-encoded SAME (Specific Area Message Encoding) signal, FIPS (Federal Information Processing Standard) code, and an event code. Before you can use SAME Stand by Mode, you must program at least one FIPS code. Unless you are near a county boarder, enter only the FIPS code for your county. -
Page 53: Entering Same Location And Event Codes
Entering SAME Location and Event Codes The following steps are used to create a SAME entry that provides all weather alerts for a given location. Press the WX key twice to enter Weather mode. Use the or keys on the 4-way push button pad to scroll to the desired SAME code entry. -
Page 54: Same Standby Modes
Scroll to the Lockout: field. Note that Lockout is currently set to off. Lockout is a special purpose parameter that can be used to lock out individual event or area codes. We recommend that you leave Lockout set to off for general purpose weather alerting. When you have finished editing your SAME entry, press the SEL key to store the data, then press the SEL key to save all SAME changes and return to the Weather... -
Page 55: Weather Priority
To activate Weather Priority: 1. Press to begin scanning for weather frequencies. When scanner stops on the strongest NOAA channel, press MENU. 2. Select Priority and press or to select the channel. Be aware that normal scanner audio will be regularly interrupted when the scanner jumps away to check for a weather alert. -
Page 56: Using V-Scanner Storage
Using V Scanner Storage V-Scanner II Storage System -Scanner II (VS-II) system provides you with a way to store multiple configurations on your scanner. VS-II configurations are created, managed and copied to the SD Card using the EZ Scan software. You can load stored VS-II configurations by selecting the V-Scanner option from the Main Menu, then scrolling to the desired VS-II configuration using the... - Page 57 • Search Dg AGC – Applies Digital AGC to found digital transmissions. • G AGC Mode – Enables Global AGC. • G AGC On – Activates Global AGC. • Scan Sets Opt - Turns on Scan Set Feature. • Sounds – Sets EZ Scan beeps and alert sounds. •...
- Page 58 • CONV Radio ID – Displays the Radio ID for P25 conventional calls. Simple Display must be unchecked. • PC/IF CCDump – Streams ASCII Control Channel Dump data over the USB interface for trunking control channels. To file – Stores ASCII Control Channel Dump data to the SD card.
-
Page 59: Using Ez Scan Software To Update Scanner
Using EZ Scan Software to Update the Scanner 1. Turn off the Scanner. 2. Connect the scanner to your computer using the USB cable supplied. The computer should recognize the scanner’s Micro SD card as a new drive. If an auto run screen appears, close it. 3. -
Page 60: Maintenance
Maintenance Keep the scanner dry; if it gets wet, wipe it dry immediately. Use and store the scanner only in normal temperature environments. Handle the scanner carefully; do not drop it. Keep the scanner away from dust and dirt, andwipe it witha damp cloth occasionally to keep it looking new. -
Page 61: Troubleshooting/Error Messages
Troubleshooting/Error Messages For detailed troubleshooting/error messages, please visit the FAQ section of our website at www.whistlergroup.com or call toll free 866-923-8719. Should you experience difficulty, please refer to the following troubleshooting guide for assistance. Poor or no reception • Weak signals from distant stations. Reposition for best reception. - Page 62 “Init SD Card” appears when the scanner is turned • The MicroSD Card is not properly formatted. Use the PC Application to reformat the card. • The MicroSD Card may not be inserted fully. Press the MicroSD Card into the slot until a click is heard and the card is fully inserted in the slot.
-
Page 64: Library Copyright Notice
Library Copyright Notice The data contained in EZ Scan’s library is provided by special arrangement with Radio Reference and is Copyright ©2014 RadioReference.com, LLC who retains sole ownership of the database. We ask that you respect this copyright by adhering to the following guidelines: The library data is intended for your personal use only in conjunction with programming and using your EZ... -
Page 65: Specifications
Specifications Receiving modes ......AM, FM, FM-MOT (Motorola), LTR (EF Johnson), CTCSS, DCS, NAC on P25, EDACS wide/narrow (GE/Ericsson/HARRIS), P25-Phase I, X2-TDMA, P25-Phase II Receiving system....Triple conversion PLL super heterodyne WX frequencies..162.400, 162.425, 162.450, 162.475, 162.500, 162.525, 162.550 MHz Display........Full dot matrix bitmap LCD (132x65 dots) Sensitivity......(FM 12 dB SINAD unless otherwise noted) VHF Low.....................0.2 μV VHF Aircraft (AM)..................0.4 μV... -
Page 66: Frequency Coverage
Frequency Coverage 25.000-26.960 MHz........(in 10 kHz steps/AM) 26.965-27.405 MHz........(in 10 kHz steps/AM) 27.410-29.505 MHz........(in 5 kHz steps/AM) 29.510-29.700 MHz........(in 5 kHz steps/FM) 29.710-49.830 MHz........(in 10 kHz steps/FM) 49.835-54.000 MHz........(in 5 kHz steps/FM) 108.000-136.9916 MHz......(in 8.33 kHz steps/AM) 137.000-137.995 MHz........(in 5 kHz steps/FM) 138.000-143.9875 MHz......(in 12.5 kHz steps/AM) 144.000-147.995 MHz........(in 5 kHz steps/FM) 148.000-150.7875 MHz......(in 12.5 kHz steps/FM) -
Page 67: Consumer Warranty
All express or implied warranties for this product are limited to one (1) year. Whistler is not liable for damages arising from the use, misuse, or operation of this product including but not limited to loss of time,... -
Page 68: Service Under Warranty
Due to the specialized equipment necessary for testing Whistler products, there are no authorized service centers other than Whistler. When returning a unit for service under warranty, please follow these instructions: 1. Ship the unit in the original carton or in a suitable... -
Page 69: Service Out-Of-Warranty
VISA or American Express. Personal checks are not accepted. In the event repairs cannot be covered by the minimum service fee, you will be contacted by a Whistler technical service specialist who will outline options available to you. IMPORTANT: When returning your unit for service, be certain to include a daytime telephone number and an email address (if applicable). - Page 70 Toll Free (800) 531-0004 TEL (479) 273-6012 FX (479) 273-2927 www.whistlergroup.com CUSTOMER RETURN CENTER 1412 South 1st St. Rogers, AR 72756 Customer Service Tel (866) 923-8719 Email: info@whistlergroup.com For US Patent info visit: www.whistlergroup.com/pat P/N 581004a 12D15 ©2015 The Whistler Group, Inc.