Table of Contents
Advertisement
Advertisement
Table of Contents

Related Manuals for Whistler WS1010


Summary of Contents for Whistler WS1010
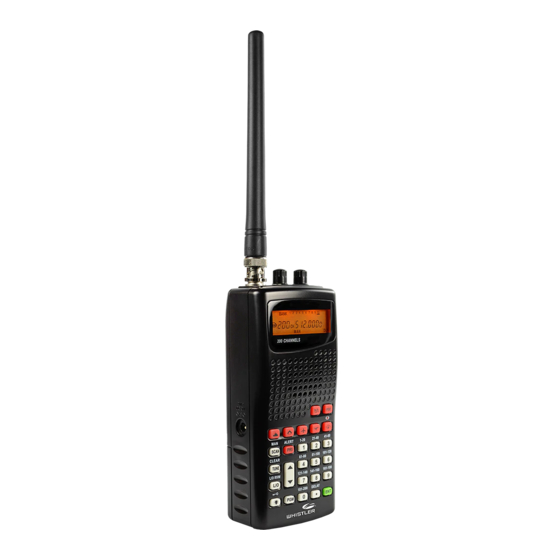
- Page 1 WS1010 200 Channel VHF/Air/UHF Handheld Radio Scanner OWNER’S MANUAL...
-
Page 2: Table Of Contents
TABLE OF CONTENTS Package Contents ............. 3 Scanning Legally ............3 Features ..............4 Scanner Basics ............5 Setup ................. 6 Connecting the Antenna ..........6 Connecting a Speaker or Headphones ......7 Powering Your Scanner .............8 Turning on the Scanner ..........10 Turning Off the Key Tone ..........10 Understanding the Keypad ..........11 Understanding the Display ..........12... -
Page 3: Package Contents
INTRODUCTION WELCOME Thank you for choosing a Whistler product. We are dedicated to providing products that represent both quality and value. Please read the user manual carefully before using this product. If you have additional questions, please visit the FAQ page on our website at www.whistlergroup.com or call toll free 800-531-0004,... -
Page 4: Features
Check the laws in your area. We encourage responsible, legal scanner use. Features Your new WS1010 Handheld Scanner lets you scan conventional transmissions, and is preprogrammed with search banks for convenience. By pressing a one touch search key, you can quickly search those... -
Page 5: Scanner Basics
Frequencies A frequency is the waveband of the transmitting signal (expressed in kHz or MHz). Your WS1010 receives a range of analog frequencies; the best resource for your local frequencies is www.radioreference.com. -
Page 6: Setup
CONNECTING ANTENNA Channels Channels are storage areas for frequencies saved in your scanner’s memory. Each saved frequency is assigned a channel. Banks A bank is a storage area for a group of channels. Your scanner provides 10 banks (1 to 10) that can each store up to 20 channels, for a total of 200 channels. -
Page 7: Connecting A Speaker Or Headphones
CONNECTING ACCESSORIES Connecting a Speaker or Headphones You can plug an amplified speaker or headphones (not supplied) with Çinch (3.5 mm) mini-plug into the HEADPHONE jack on the top of the scanner. This automatically disconnects the internal speaker. Note: Use an amplified speaker with this scanner. Non- amplified speakers do not provide sufficient volume for comfortable listening. -
Page 8: Powering Your Scanner
POWERING SCANNER Using the Belt Clip You can use the belt clip attached to the back of the scanner for hands-free carrying when you are on the go. Slide the belt clip over your belt or waistband. To remove the belt clip, gently lift up the retaining catch at the top of the belt clip from the back of radio and slide the clip upward. - Page 9 POWERING SCANNER 3. Place the battery holder into the battery compartment and replace the cover. Warning: Never install non-rechargeable batteries in the rechargeable yellow battery holder. Non-rechargeable batteries can get hot or explode if you try to recharge them. Cautions: •...
-
Page 10: Turning On The Scanner
TURNING ON SCANNER Turning on the Scanner 1. Turn the SQUELCH all the way down before you turn on the scanner. 2. Turn the VOLUME knob to turn ON the radio. A welcome message appears. After about 3 seconds, adjust VOLUME to a comfortable level. 3. -
Page 11: Understanding The Keypad
KEYPAD Understanding the Keypad – Spectrum Sweeper. PSE (Pause) – Stop and restart a search or tune. – Search the preprogrammed marine bank. – Search the preprogrammed fire/police bank. FD/PD – Search the preprogrammed aircraft bank. – Search the preprogrammed amateur radio bank. –... -
Page 12: Understanding The Display
DISPLAY Understanding the Display Row 1 – Spectrum Sweeper search is active. BANK – Appears with numbers (1-10) to indicate the scan bank. The bar under the bank number shows banks that are turned on for scanning. - Keypad locked. Row 2 WX –... -
Page 13: Display Messages
DISPLAY Display Messages ALL CH L-out – All channels locked out during scan or marine band search. b X Ch-FULL – All displayed bank channels are full. b X StorE – Frequency programmed into displayed bank’s channel. CLOnE – Clone mode. -dUPL- –... -
Page 14: Configuring Your Scanner
CONFIGURING SCANNER Preprogrammed Frequencies Your scanner includes 153 preprogrammed frequencies, which you can load into Channels 1 to 153. For a list of these frequencies, see “Preprogrammed Frequency List” on page 26. To load the preprogrammed frequencies: 1. Turn off the scanner and then turn it on again. 2. -
Page 15: Programming With A Computer
4. SEndInG appears at the host scanner. To exit clone mode after the data transfer is complete, remove the cable. No ConnEct appears if you try to connect to another model scanner. The WS1010 does not clone with other scanner models. -
Page 16: Searching For Frequencies
SERVICE SEARCH Searching for Frequencies During a tune search, the scanner tunes up or down starting from a frequency you specify. 1. Press TUNE. The display alternates between PSE and –t–. 2. If you want to change the starting frequency, enter a new frequency and press ENT. -
Page 17: Storing Found Frequencies
STORING FREQUENCIES Storing Found Frequencies You can save frequencies in channel-storage banks. 1. Press ENT when you find a frequency. The bank number and StorE appear. 2. To change banks, enter the new bank number. 3. Press ENT. The channel and frequency flash twice. -
Page 18: Scanning & Monitoring
SCANNING & MONITORING Scanning and Monitoring Press SCAN/MAN until SCAN appears to continuously scan through all channels with stored frequencies. If the scanner finds an active frequency, it pauses until the transmission ends. Press or to change the scanning direction. -
Page 19: Using The Priority Channel
SPECTRUM SWEEPER Using the Priority Channel The priority feature sets the scanner to check one channel every two seconds while scanning. You can program one frequency into the priority channel. 1. Press PGM. 2. Press PRI/ALERT. PCH and (or the previously 000.000 stored frequency) appear. -
Page 20: Locking Out Channels
LOCKING OUT Locking Out Channels You can increase the scanning or search speed by locking out channels or frequencies that have a continuous transmission, such as control channels, weather channels, or birdie frequencies. Press L/O when the scanner stops on a channel or frequency while scanning or searching. -
Page 21: Clearing A Stored Channel
CLEARING STORED CHANNEL Unlocking All Service Bank Frequencies 1. Hold down L/O L/O RV W for about two seconds during a Service Bank search. L-r appears. 2. While holding down TUNE/CLEAR, press L/O RV W. FLo ALL–CL appears for about two seconds. -
Page 22: Weather Features
WEATHER FEATURES Weather Features The NOAA and your local weather reporting agency broadcast local forecast and regional weather information on one or more channels allocated for use by weather reporting agencies. Your scanner is an extremely sensitive high-quality receiver on the weather frequencies. However, the included antenna is optimized for general purpose scanning. - Page 23 SAME STANDBY MODE SAME Standby Mode In SAME Standby mode, your scanner monitors weather channels for SAME alerts for up to seven areas you specify by entering the FIPS codes. To program your scanner for SAME Standby mode: 1. Press 2.
-
Page 24: Skywarn
SKYWARN Testing the Weather Alert and Beep Tone 1. To test the weather alert, press and hold ENT for more than 2 seconds while F [1-7] CH StAndby appears on the display. The display indicates the type of message, and the scanner sounds an alert or series of beeps. -
Page 25: Additional Information
ADDITIONAL INFORMATION Additional Information Care Your scanner is not waterproof. Do not expose it to rain, moisture, or extremely high humidity. If the scanner gets wet, wipe it dry immediately. Use and store the scanner only in normal temperature environments. Handle the scanner carefully; do not drop it. -
Page 26: Preprogrammed Frequency List
PREPROGRAMMED FREQUENCY LIST Channel Frequency(MHz) Bank 1 Bank 3 1........40.5000 41 ......154.3250 2........52.5250 42 ......154.3400 3........ 121.5000 43 ......154.3550 4........122.0000 44 ......154.3700 5........122.2000 45......154.3850 6........ 122.7000 46 ......154.4000 7........ 122.7500 47 ......154.4150 8........122.8000 48 ......154.4300 9........ - Page 27 PREPROGRAMMED FREQUENCY LIST Bank 5 Bank 7 81 ......415.7000 121 ......462.5750 82......446.0000 122 ......462.5875 83 ......450.8000 123 ......462.6000 84 ......454.0000 124 ......462.6125 85......460.0250 125 ......462.6250 86 ......460.0500 126 ......462.6375 87 ......460.0750 127 ......462.6500 88 ......
-
Page 28: Service Banks
SERVICE BANKS Service Banks The scanner is preprogrammed with the frequencies allocated to marine, fire/police, aircraft, ham radio broadcast and weather services. This is handy for quickly finding active frequencies instead of searching through an entire bank (see “Service Bank Search” on page 16). Fire/Police Group 1 Frequency Range (MHz) ..........Step (kHz) - Page 29 SERVICE BANKS Marine Channel ............Frequency (MHz) 01 ..................156.0500 05 ..................156.2500 06 ..................156.3000 07 ..................156.3500 08 ..................156.4000 09 ..................156.4500 10 ..................156.5000 11 ..................156.5500 12 ..................156.6000 13 ..................156.6500 14 ..................156.7000 15 ..................156.7500 16 ..................156.8000 17 ..................156.8500 18 ..................156.9000 19 ..................156.9500 20..............157.0000 / 161.6000 21 ..................
-
Page 30: Specifications
SPECIFICATIONS Specifications Frequency Coverage 29-54 MHz ..........(5 kHz steps)/FM 108-136.9875 MHz .........(12.5 kHz steps)/AM 137-144 MHz .......... (12.5 kHz steps)/FM 144-148 MHz ..........(5 kHz steps)/FM 148-150.8 MHz ........(12.5 kHz steps)/FM 150.8-162 MHz ...........(5 kHz steps)/FM 162-174 MHz .......... (12.5 kHz steps)/FM 380-512 MHz ......... -
Page 31: Fcc Notice
FCC NOTICE FCC Notice This equipment has been tested and found to comply with the limits for a scanning receiver, pursuant to Part 15 of the FCC Rules. These limits are designed to provide reasonable protection against harmful interference in a residential installation. This equipment generates, uses and can radiate radio frequency energy and, if not installed and used in accordance with the instructions, may cause harmful... -
Page 32: Limited Warranty
There are no express warranties covering this product other than those set forth in this warranty. All express or implied warranties for this product are limited to one (1) year. Whistler is not liable for damages arising from the use, misuse, or operation of this... - Page 33 • The unit has been misused, abused, modified, installed improperly, or had its housing removed. The minimum out of warranty service fee for your Whistler Scanner is $50.00 (U.S.). If you require out of warranty service, please return your unit as outlined in the section “Service Under Warranty”...
-
Page 34: Customer Service
WARRANTY In the event repairs cannot be covered by the minimum service fee, you will be contacted by a Whistler technical service specialist who will outline options available to you. IMPORTANT: When returning your unit for service, be certain to include a daytime telephone number and an email address (if applicable). - Page 35 Bentonville, AR 72712 Toll Free (800) 531-0004 TEL (479) 273-6012 FX (479) 273-2927 www.whistlergroup.com CUSTOMER RETURN CENTER 1412 South 1st St. Rogers, AR 72756 Customer Service Tel (866) 923-8719 Email: info@whistlergroup.com P/N 581000a 06C14 © 2014 The Whistler Group, Inc.