Table of Contents
Advertisement
Quick Links
Advertisement
Table of Contents

Related Manuals for AvMap Geosat 6 Series


Summary of Contents for AvMap Geosat 6 Series
- Page 1 User Manual Corresponding to Software Version 1.10.xx Geosat 6 series...
- Page 2 Dear Customer, Congratulation for choosing an AvMap Satellite Navigator. AvMap GPS systems are made in Italy since 1994. Your journey, Our Technology...
-
Page 3: Table Of Contents
Index I. How to use the Manual 2.1.2 FAQ’s I.I Updating the software and downloading new 2.2 The Map manuals 2.2.1 Explore the map II. Warning 2.3 Setting a destination II.I Advices for a good use of the navigator 2.3.1 Search Options II.II Battery Disposal 2.3.2 Inserting an address as destination II. - Page 4 2.4.3 Choosing the route options 2.7.2.3 Setting the favourite POI categories 2.4.4 Adding Via Points 2.7.2.4 I User POI 2.4.5 Changing the Via Points sequence 2.7.2.5 Setting the speed traps alarm 2.4.6 Simulating mode 2.7.3 Address book 2.5 Advanced planning 2.7.3.1 Address book 2.5.1 Viewing the Turn List 2.7.3.2 Creating a new contact...
- Page 5 2.8.6 Settings 2.10.2 iPod® Control menu 2.9 Hands free calls with Bluetooth® 2.10.3 Listening to a Playlist 2.9.1 Setting the Bluetooth® communication 2.10.4 Browsing songs by author 2.9.2 Receiving calls 2.10.5 Song player page 2.9.3 Private calls 2.10.6 Reproduction settings 2.9.4 Adjusting the volume of the speaker 2.11 Alcohol Test 2.9.5 Dialling a telephone number...
- Page 6 2.14.2.1 Display options 5. Updates 2.14.3 Map Preferences 5.1 Checking your software version 2.14.3.1 Setting the navigation data 5.2 Registering your product 2.14.4 Setting contacts alarms 5.3 Downloading the software updates 2.14.4.1 Setting the speed alarm 5.4 Installing the software updates 5.5 Updating the Map 3.
-
Page 7: I. How To Use The Manual
This User Manual is updated to the is published. You can download the addendum from Software version 1.10.xx released in www.avmap.it: entering the Support section, click on February 2009 for the AvMap Geosat 6 Downloads then select yo ur product; in the list of the available documents choose the one corresponding satellite navigators. -
Page 8: Ii. Warning
This is due to the continuous changes in the street •The Manufacturer and the distribution chain network. Some areas have a better coverage than disclaim any liability deriving from an improper use others. 8 - AvMap... -
Page 9: Ii.i Advices For A Good Use Of The Navigator
In proximity of round about or big 3.Make sure that the navigator is correctly attached crossings drive carefully as the vocal instructions to the bracket before driving. AvMap - 9... -
Page 10: Ii.ii Battery Disposal
WEEE product as domestic waste; some substances contained in 8.Only AvMap branded SD cards are compatible with AvMap satellite navigators. No other SD can be electronic equipment can used. damage the environment and harm human health if misused or if they are not disposed of in the II.II Battery Disposal... -
Page 11: Ii. Iii Maintenance
•Do not use oil based products to clean the LCD surface. AvMap - 11... -
Page 12: Iii. Device Description And First Use
• OTG Cable* • iPod cable* • External TV antenna* Serial Port • User manual USB (master/slave) • In-car installation guide* Audio output Power supply * Only for some models (with CA power supply cable) Power key Speakers 12 - AvMap... - Page 13 Please insert the antenna carefully as shown in the illustration, not to damage the connector. * Only for some models Reset SD Slot Main Switch ON –OFF SIM Card slot* Sensor for automatic brightness control AvMap - 13...
-
Page 14: Iii.iii Installation With Suction Cup Holder
Do NOT plug the cable in the audio output! 3. Move the navigator’s main switch from OFF to the ON position using a pen (see picture). Socket for car power cable (with cigarette lighter plug) 14 - AvMap... -
Page 15: Iii.iv Installation With The In-Car
For the in-car integrated models please read the in- car installation quick guide included in the box. The suction cup holder and the car charger are also provided with the in-car integrated models. When used with the suction cup holder, some functions AvMap - 15... -
Page 16: Main Menu
From the main menu you can choose among several functions: • Satellite Navigator • Music and Video Player • Picture viewer* • Digital TV* To access to the navigation software, touch the Satellite Navigation button. *Only for some models. 16 - AvMap... -
Page 17: Satellite Navigation
Viceversa, the map can be opened in any moment touching the Map button in the lower left corner of the Navigation Menu. The Navigation Menu consists of a fixed menu which can be scrolled with the arrow buttons, and a fixed part with AvMap - 17... -
Page 18: Help Mode
• Volume and Brightness: it opens the volume and Close. brightness control. 2.1.2 FAQ’s • Help: it allows getting hints on how to use the buttons (par 2.1.1). The F.A.Q. section gives you detailed instructions on how to use the most common navigation functions. 18 - AvMap... - Page 19 To open the FAQ section press the FAQ button in the navigation menu. You will find three wizards on how to: • Plan a Trip • Start a Simulation • Plan next stop The FAQ can be updated with free software updates. AvMap - 19...
-
Page 20: The Map
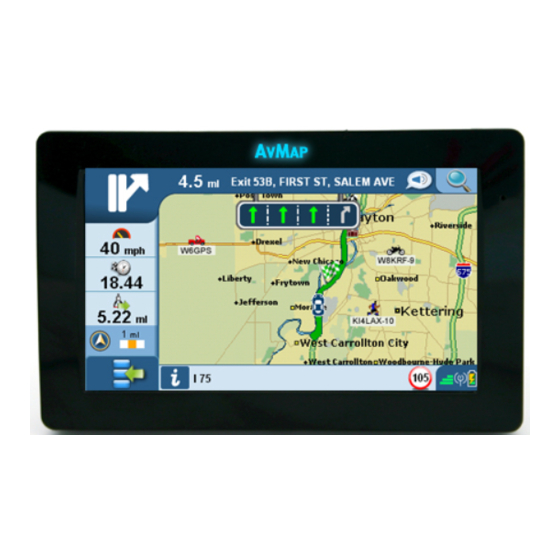
Satellite Navigator 2.2 The Map When there is no active navigation, the map appears as follows: Zoom Scale and Compass Touch to open the Status icons: GPS signal Navigation Menu and Battery Info on current position 20 - AvMap... - Page 21 Navigation data: touch to choose the data you wish to display. The data displayed by default are: time to go, distance to go and speed. Name of the street you are travelling along AvMap - 21...
-
Page 22: Explore The Map
If you select a street, the info bar will show the name, and the entire street (corresponding to that name) will be highlighted in green. To get more info on the selected point, ouch the info bar and the full info page will open. 22 - AvMap... -
Page 23: Setting A Destination
• Once you have inserted the name, touch the OK • Drive me home: to set the home address as button destination • Repeat the operation for each field AvMap - 23... -
Page 24: Choosing The Destination Among The Pois
POIs for you to load into your device (par. 2.7.2.4). To search for a POI: • Open the Navigation Menu • Press Where to Go • Select POI On the new menu select the research option between: • Near my position 24 - AvMap... -
Page 25: Poi Categories
Touch the Go button to • Dynamic POIs start the navigation or the More Option button, or go back to the POI list. If you choose the Near a city option, you AvMap - 25... -
Page 26: Choosing The Destination Among Your Favourite Pois
2.7.3.2). A contact can be set 2.3.4 Choosing the destination among as destination. To access the list: your Favourite POIs • Open the Navigation Menu The search among the Favourite POI is very simple, • Select Where to Go 26 - AvMap... - Page 27 The orange icon associated to a contact, indicates that it has been assigned a GPS position, a telephone number or both. In case you forget where you saved a contact, you can always carry out a name search. AvMap - 27...
-
Page 28: More Options For Navigation
2.3.6 More Options for navigation Once you have selected the destination, (a contact, an address or a POI), you can navigate straight to it or access the page More Options, that allows you to choose how to use the selected location. 28 - AvMap... -
Page 29: Record Your Track On The Map
The Lane Assistant helps you in multiple lanes streets To have a detailed information on your GPS position where the sole manoeuvre instruction could not be (while navigating or not), you can consult the page enough. In these cases it is important to know in AvMap - 29... - Page 30 • Press the Navigation MENU button • Select ‘My Position’ The page will display the precise address of the GPS position and the geographical coordinates Latitude- Longitude. From this page you can also search useful POI close to your current position. 30 - AvMap...
- Page 31 OK (the green button) you can see the suggested result (i.e. If you have inserted LON the navigator will suggest LONDON). When the auto completing function is off, you can insert just a part of the name then touch OK to see all the possible results (i.e. all the city names starting with LON). AvMap - 31...
-
Page 32: Planning And Modifying A Route
• Invert route to set a destination now?” • Edit Via Points: to modify the via points sequence • Press Yes, the Where to Go Page will open. and set detours. • Repeat the procedure to enter the destination. 32 - AvMap... -
Page 33: Choosing The Route Options
• Route preferences: to set the criteria for route calculation. 2.4.3 Choosing the route options The Route Options menu allows setting the best calculation according to your own needs. From the Route Functions menu touch the Route Options AvMap - 33... - Page 34 • Toll roads • Highways • With fewer turns: with this option, the software • U turns calculates the route with fewer manoeuvres, as • Pedestrian roads 34 - AvMap...
- Page 35 Satellite Navigator • Ferry routes • Built-up areas • Unpaved roads Bear in mind that you are choosing what to avoid in the route. So if you select: Toll roads, then the route calculation will avoid toll roads. AvMap - 35...
-
Page 36: Adding Via Points
Once you have added all the via points, you can always change its sequence. 2.4.5 Changing the Via Points sequence • Open the Navigation Menu • Select Route Functions • Select Edit Via Points 36 - AvMap... -
Page 37: Simulating Mode
HERE, or you can see it speeded up x2,x4,x8 times. During the simulation you can consult the itinerary with the list of roads and the list of manoeuvres. (Par.2.5.1). To start a simulation: • Plan a route from point A to B as explained in the previous paragraphs. AvMap - 37... - Page 38 To stop the simulation, open the same page and press the Off button. In the Simulation Settings page, you can choose the simulation speed among: • Real Time • Speeded up x 2 • Speeded up x 4 • Speeded up x 8 38 - AvMap...
-
Page 39: Advanced Planning
To open the list of streets along the route, open the Navigation Menu, select Route Functions and then select Detour. You can select one street and choose to avoid it by pressing Detour. The Navigator will recalculate the AvMap - 39... -
Page 40: Blocking A Road
To unblock it: •In the navigation menu, touch Settings •Touch Route Preferences •Open the list of blocked roads •Select the desired road to unblock it. 40 - AvMap... -
Page 41: Route Overview
Three orange icons indicate the kind of street that you will encounter along the route: • Total Km to cover on major roads • Total Km to be cover on toll roads • Total Km to be cover on unpaved roads AvMap - 41... -
Page 42: Planning Next Stop
To access the route planner: • Open Navigation Menu • Select Route Functions • Select Plan next stop You will be able to search the position where you will be within a certain distance or a certain time frame 42 - AvMap... - Page 43 • On the Start Navigation page press Set as Via Point. Shall you, for instance want to find a restaurant within two hours: • Select the option When • Set the time and select the Restaurants option. • The software will calculate you position using the AvMap - 43...
- Page 44 It is also advisable to personalize the average speed, to get a personalized result. have entered. Average speed settings can always be personalised from Settings Menu (see par 2.14.1). 44 - AvMap...
-
Page 45: Trip Computer
The graphs draw in real time the situation for each trip segment. The trip segment is indented as the itinerary between one stop and another. The white line represents the real time situation; the green line represents the average value in that segment. AvMap - 45... - Page 46 It includes: • Maximum speed and average speed • Maximum altitude and average altitude • Total time • Total distance • Total stop time (the sum of stops) 46 - AvMap...
-
Page 47: Managing Personal Data
• Open the Navigation menu • Select Route Functions • Select Save Route A virtual keyboard will appear: edit the name of the route and press OK. The route is added to the list of saved routes AvMap - 47... -
Page 48: Modifying Or Using A Saved Route
GPS position, the software will calculate the route from your current position to the saved starting point then heading to the final destination. Once you are navigating on the saved route, you can always modify it. The 48 - AvMap... -
Page 49: Points Of Interest
POI categories All you need to do is to download the special software available from the AvMap site www.avmap.it and then for instance Gas stations, restaurants, ATMs, etc. consult specialized sites such as (e.g. www.poigps.com). -
Page 50: I User Poi
You can download new POIs such as speed cameras, shops, restaurants, etc. You must first register your device on the www.avmap.it web site under the Support / Register section, in order to be able to download the Geosat update application (Chap. 5) •... - Page 51 POI transfer icon. This application allows you to select the files to transfer into your navigator. • A window will show the user POI already loaded in the navigator. • Select the “+” icon to add a new file. AvMap - 51...
-
Page 52: Setting The Speed Traps Alarm
At this point beside the name of the POI group you will see an orange icon of a bell indicating the POI group has been alarmed and an icon of a magnifying glass indicating that the POI belonging to this group are visible 52 - AvMap... -
Page 53: Address Book
You can also enter a point by entering latitude and have done all the modifications select Accept. A new longitude, either by selecting it from the POIs or by page with be displayed with the option navigate to AvMap - 53... -
Page 54: Creating Or Modifying A Folder
• Set an approaching alarm on the contacts of the file. 4.Choose the alarm • Delete the file you created. 5.Use the arrow to scroll to the second page and set the alarm range After finishing the modifications, select Accept and 6.Touch Accept 54 - AvMap... -
Page 55: Setting Home Address
When you buy a map update, you just have to substitute the old SD card with the new one preloaded with the new software and new maps. In order not to lose you personal contacts, you will need to copy these contacts on the new SD card. AvMap - 55... - Page 56 6.Open PC resources and explore Geosat 6 ad a removable disc. 7.Paste the folder named ‘Geosat 6’ previously saved on your PC, on the new memory card. 8.After this operation you need to download a software update (Chap. 5) 56 - AvMap...
-
Page 57: Tracks
In this menu you can view the saved tracks each one with its color and with the indication of the length in KM. You can decide to hide or to show the track on the map. Read par 2.3.7 on how to record a track. AvMap - 57... - Page 58 • Quick saving: the navigator saves all the new contacts in a predefined folder with a predefined name so you can save them quickly and then you can go back later to rename them and organize them. 58 - AvMap...
-
Page 59: Gsm Phone
•At this point you can make only emergency calls on fees. Some networks may have restrictions on (touching the Call button). To use the other phone the use of some services. AvMap - 59... -
Page 60: Making A Call
• POI, if you want to look for a phone number among Points of interest • Home, if you want to call the number set as home. • Recent Calls, to look for a number among the list of the 60 - AvMap... -
Page 61: Sending Sms
CAPITAL, use the buttons on the right: “A” for the Capital keyboard or “a” to go back to the small keyboard. •Once the text has been completed, touch enter. •Insert the recipient’s number by touching the Send to AvMap - 61... -
Page 62: Incoming Sms And Calls
In both cases, the SMS is saved in the the map showing the caller number (and name if it is saved in the phone book) you can decide whether incoming SMS folder, so you can read it anytime. 62 - AvMap... -
Page 63: Call Register
Phone menu. Here you can find: •All Calls: •Missed calls •Outgoing calls •Incoming calls Each list can be cleared, by entering the list, and touch Delete All. To delete the entire register, touch Cleat Register in the Call Register menu. AvMap - 63... -
Page 64: Settings
•Set the volume for the ring tone, by touching Audio options. •Copy the phone book from the SIM card to the navigator’s memory, by touching copy from SIM. •Change the PIN number. Touch Change PIN then digit the 64 - AvMap... - Page 65 Satellite Navigator current PIN and then the new PIN. You will have to insert again the new PIN to confirm it. •Set your Home phone number. AvMap - 65...
-
Page 66: Hands Free Calls With Bluetooth
Geosat 6 is equipped with a powerful speaker and microphone so that you can listen and talk without to search for Bluetooth devices on the surroundings. the need of headphones. The names of the found devices will appear in the list on the side. 66 - AvMap... -
Page 67: Receiving Calls
(the name of your mobile phone), and touch the Connect button. 6.Now the message of pairing request from AvMap Geosat 6 will appear on your mobile phone insert the PIN code: 0000. The communication is now active and the devices are paired. - Page 68 Call options page you can open the keyboard, disconnect the call from the navigator, or Hang up the call. In the status bar (lower right corner) one icon indicates the status of the Bluetooth communication and of the call. 68 - AvMap...
-
Page 69: Private Calls
2.9.4 Adjusting the volume of the speaker While the calls in progress, you can ad just the volume of the speaker. 1. Press the Main MENU key on the side Keyboard 2. Touch the Mobile Phone button to open the Mobile Phone page AvMap - 69... -
Page 70: Dialling A Telephone Number
Geosat 6 are saved in the memory. OK to hang up. During the phone call it is possible to To redial the last number: open the call options page. 1. Press the Main MENU key on the side Keyboard 70 - AvMap... -
Page 71: Calling Home
3. Touch the Call Home button. The call will start and the window will close to go back to the map view. If the Home number has not been set, then a window will open asking to digit the number. AvMap - 71... -
Page 72: Calling A Point Of Interest
5. In the full info page touch the green telephone 2.9.11 Calls register icon to call the selected Point of interest. As in a mobile phone, the last 15 calls dialled and received on Geosat 6 are saved in the memory. To 72 - AvMap... -
Page 73: Automatic Answer
You can set the automatic answer to a hands free Bluetooth call after few seconds, so that you can answer without even touching Geosat 6 display. 1. Press the Main MENU key on the side Keyboard 2. Touch the Mobile Phone button to open the Mobile AvMap - 73... - Page 74 Satellite Navigator Phone page 3. Touch the Phone settings button 4. Touch the Auto Respond button The Auto respond page will open. You can here set the time frame (seconds) after which the automatic answer is activated. 74 - AvMap...
-
Page 75: Ipod® Control
Play list button in the iPod® Control menu. Select you can control your iPod® directly from the display one Play list to see the list of songs. Touch on one song to play the play list. of the navigator, even during the navigation. AvMap - 75... -
Page 76: Browsing Songs By Author
• Number of the song playing in the play list (e.g. 4 of 34). • Time length of the song. • Time remaining to the end of the song. • Title, author and album. • Reproduction mode (shuffle, repeat, etc.). In the lower bar you can: 76 - AvMap... -
Page 77: Reproduction Settings
• Repeat all: the entire play list is repeated. • Repeat one: repeats the song selected. • Shuffle: plays the songs randomly. The selected reproduction type will be shown with an icon on the song Player Page. AvMap - 77... - Page 78 Satellite Navigator 78 - AvMap...
-
Page 79: Alcohol Test
Once the calibration is performed, touch Make the Law. AvMap declines liability for the improper use Alcohol test. Follow the instructions and blow in the or erroneous use of this accessory function. - Page 80 3.Body temperatures vary, affecting test results. 4.Smoking may affect the results 5.Taking two consecutive tests without waiting may affect the result, as the sensor needs the time to clean itself, wait at least 2 minutes. 80 - AvMap...
- Page 81 6.Taking the test just after drinking affects the result as the alcohol in the breath is not coming form the lungs, but straight from the mouth. These warnings apply for this alcohol test as well as the pre-testers used by the police. AvMap - 81...
-
Page 82: Unit Status
On the GPS page the satellites and a series of data such as altitude, current position, ground speed, movement direction, hour and date are displayed. Press Reset to restart the GPS antenna and Data Display to view the data page. 82 - AvMap... -
Page 83: System Info
Geosat 6. 2.14 Settings Select settings from the navigation menu to set your preferences: • User Preferences • Device Preferences • Route Preferences • Map Preferences • Alarms • Delete recent • Default Settings AvMap - 83... -
Page 84: User Preferences
Geosat 6 provides turn-by-turn vocal instructions. You can choose between pre-recorded human voices or instructions read by a vocal synthesis technology (Text- to-Speech). The advantage of the Text-to-Speech system is that it allows the navigator to ‘read out loud’ beside the 84 - AvMap... -
Page 85: Setting The Time Zone
GMT). This clock is extremely precise but you need to set the time zone and the Day Light Saving 2.14.2 Device Preferences (summer) or solar time (winter). Through the Device Settings menu you can set the AvMap - 85... -
Page 86: Display Options
In the second page you can set the Night vision. The night vision changes the colour palette to allow an easier consultation in absence of light. If you select Auto, then the switch between day vision and night vision will be 86 - AvMap... -
Page 87: Map Preferences
• Choose the map vision: 2D or 3D • Set the Automatic Zoom • Set the display of the icons on the map • Set the Data boxes ( the type of data displayed during the navigation) AvMap - 87... -
Page 88: Setting The Navigation Data
4.Press Accept to close the window and get back to the map. You can choose between: • Altitude • Driving time • Average speed • Maximum speed • Trip Distance • Total distance • Via stop duration 88 - AvMap... -
Page 89: Setting Contacts Alarms
HERE data). During the navigation, the speed limit the acoustic alarm: will be shown (when present in the HERE data) with the corresponding sign in the information bar, next Open the Navigation Menu to the street name. Select Settings Touch Alarms AvMap - 89... - Page 90 It is possible to customize the limit for each type of road. In the User Preference menu, touch Customised speed, then act on the arrows to adjust the speed limits for Highways, major roads and street network. Touch Accept to confirm. 90 - AvMap...
-
Page 91: Multimedia Player
Geosat 6 can play multimedia files store in a SD memory card. ATTENTION: do not remove the AvMap SD card from the navigator while you are in the satellite navigation mode. In order to safely remove the SD card, exit from the satellite navigation software touching the Exit button in the upper left corner of the Navigation Menu. - Page 92 The lower bar will show the name of the file. To open the picture viewer touch the corresponding button in the device main menu. 92 - AvMap...
-
Page 93: Digital Tv
4.1 Channel Scan Open the TV application by touching the TV button in the main menu. The software will automatically make a quick scan. In order to be sure to get all the available AvMap - 93... -
Page 94: Choosing A Channel And Watching It
TV full screen, will be opened; you can also scroll the list form here, touch on the movie image. To go back to the control to see the full info pages of other channels. To go back 94 - AvMap... -
Page 95: Channel's Programming
This is useful as a parental control if you want to prevent your children to watch a specific channel. To set the lock: 1.Select a channel. 2. Touch Lock Channel AvMap - 95... -
Page 96: General Setup
To open the General Setup page touch the Settings menu then touch the General Setup Tab. Here is possible to change the language of the software and choose different types of display modes. Touch Apply to save the changes. 96 - AvMap... -
Page 97: Multi Language
Language button (the one with the flags). Scroll with the arrows the available languages for audio and or subtitles. Touch Apply to confirm the changes or X to go back to the TV without changing the language. AvMap - 97... -
Page 98: Updates
1. Visit the Support section of www.avmap.it 2. Select Register Now you need to visit www.avmap.it to check 3. Fill the form and click on submit... whether there is a more recent software release. 4. You will receive via email a Login name and a 1. -
Page 99: Downloading The Software Updates
Updates 5.3 Downloading the software updates 5.4 Installing the software updates 1. Enter the Support area of the www.avmap.it web 1. Disconnect the navigator fro the power supply cable. site, then select Download and FAQ. WARNING: do not feed the navigator when connecting 2. -
Page 100: Updating The Map
ITALY, followed by a number V.x. (a instructions. progressive number) Now you need to visit www.avmap.it to check whether Attention: to make sure that the device will work correctly, carefully follow the instructions at the there is a more recent Map available. -
Page 101: Available Maps
/ Western Europe / Italy / Italy Plus / Greece & Turkey / Iberian AvMap does not guarantee that recent changes in Peninsula / France / Brazil / Malaysia / Russia the street network are immediately corrected in the HERE maps 5.7 Why to update the Maps... -
Page 102: Trouble Shooting
1. Read all the Trouble Shooting chapter of this manual. 4. You can also write an email to info@avmap.it, or fax to 0039 0585 649603 specifying name, surname, 2. If you have not found the answer to you problem address, telephone number, email, model of navigator in this manual, then visit www.avmap.it and consult... - Page 103 DO NOT plug the car charger ATTENTION: DO NOT plug the AC/DC power supply in the audio output of the cable to the serial port (upper socket): it may navigator! compromise the functioning of the GPS antenna. AvMap - 103...
- Page 104 DO NOT plug the car charger in the audio output of • If the red led on the cigarette lighter plug is on, the navigator! but the navigator still does not turn on, Reset it. To reset, press with the point of a pen the Reset 104 - AvMap...
- Page 105 • If the navigator won’t turn on at this point, then • Make sure the navigator is correctly positioned in contact the AvMap customer care the suction cup holder, so that it can “’see’ the sky. • Make sure there are not obstacles for the Gps The navigator gives back this messages reception.
- Page 106 The red led on the cigarette lighter plug must be on. The backlit AvMap Please make sure you have selected the right product logo should start flashing. Power on the navigator model when choosing for the software update, if not pressing the Power Key on the right side.
- Page 107 I have damaged the SD card goes in stand-by, if you choose the Medium level, Remember that only AvMap SD memory cards are you will have a longer battery life. If you select compatible with AvMap navigators. No other memory...
- Page 108 So in case the SD has been damaged, please contact b. Make sure that the SD is correctly inserted in the AvMap customer support to restore the content and navigator get again the license, or to send the SD back for c.
- Page 109 3. Touch User Preferences authorization code request 4. Touch Voice Options, then touch the green arrows • Insert the code: 000 to open the second page 5. Select External speakers • Make sure also that the software is updated. (par.5) AvMap - 109...
- Page 110 Push the Card until it gets function is not available. blocked in the slot. It should not come out more than the edge of the navigator. 110 - AvMap...
- Page 111 GSM SIM “BIS” which means a twin of your card with the same telephone number, so you can keep one in your mobile phone and one in Geosat 6 in order to use it for hand free calls in your car. AvMap - 111...
-
Page 112: A - Setting The First Destination: Flux Diagram
Appendix A – Setting the first destination: flux diagram 112 - AvMap... -
Page 113: B - Preloaded Poi Categories
Bridge and tunnel Yacht basin Public place Music Centre Entry point Scenic/panoramic view Night Life Highway exit Emergency Tourist attraction Opera Ferry terminal Emergency medical service View Recreational Area Lighthouse Fire station Water mill Recreational terrain Main railway station AvMap - 113... - Page 114 Car dealer Rocks Unspecified Frontier crossing Shop Terrain Government Building Shopping centre Services Government Office Vehicle equipment provider Prison Bank Car repair Lodging Sport facilities Camping site Golf course Convention centre Hotel/Motel Car race track Elective district 114 - AvMap...
-
Page 115: C: Map Legend
They can have one or more lanes. The special icons that can be displayed or hided. width provides indications on the number of lanes and on the degree of importance. The blue arrows show the direction of one-ways. AvMap - 115... -
Page 116: Analytic Index
Post Code Battery Power Bluetooth Reset Route Brightness Built-up areas Route overview Calling Route Preferences Contacts Satellite GPS fix Save route Highway Simulation Home Software update iPod Speed Language Time Mobile Phone Toll roads Multimedia Player Trip Computer 116 - AvMap... - Page 117 Turn on Unpaved roads Volume Walkways AvMap - 117...
-
Page 118: Technical Specifications
• iPod control software (function available if the navigator is used holder to the iPod dock station) with car kits for the integration in the car dashboard, equipped Product Code: P1ME121DCI / P1ME120DCI with iPod input). Model Name: Geosat 6 118 - AvMap... - Page 119 Model Name: Geosat 6 Phone TV • Built-in GSM Phone Car models: Peugeot 207 Energie Sport • Built-in Digital TV • Built-in Alcohol test (Breath Analyzer) • Farmnavigator software • Built-in GSM Phone • Built-in Digital TV AvMap - 119...
- Page 120 www.geosat6.com MAG6UAM0AE011 ÑMAG6UAM0AE0113Ó...