dbx DriveRack User Manual
Complete equalization & loudspeaker control system
Hide thumbs
Also See for DriveRack:
- User manual (52 pages) ,
- Monitor application manual (32 pages) ,
- User manual (49 pages)

Related Manuals for dbx DriveRack


Summary of Contents for dbx DriveRack
-
Page 1: User Manual
® Complete Equalization & Loudspeaker Control System Featuring Custom Tunings User Manual... -
Page 2: Important Safety Instructions
IMPORTANT SAFETY INSTRUCTIONS WARNING FOR YOUR PROTECTION C A U T I O N PLEASE READ THE FOLLOWING: R I S K O F E L E C T R I C S H O C K KEEP THESE INSTRUCTIONS D O N O T O P E N A T T E N T I O N : R I S Q U E D E C H O C E L E C T R I Q U E - N E P A S O U V R I R... -
Page 3: Declaration Of Conformity
Sandy, Utah 84070, USA • this device may not cause harmful inter- Date: April 19,2002 ference, and European Contact: Your local dbx Sales and Service Office or • this device must accept any interference Harman Music Group 8760 South Sandy Parkway... -
Page 4: Table Of Contents
™ DriveRack Table of Contents Introduction Section 5 - Application Guide 0.1 Defining the DriveRack™ PA ......ii 5.1 2X6 Crossover..........30 0.2 Service Contact Info........iii 5.2 2X5 Crossover..........31 0.3 Warranty............iv 5.3 2X4 Crossover..........32 5.4 2X3 Crossover..........33 Section 1 - Getting Started Appendix 1.1 Rear Panel ............2... - Page 5 ™ DriveRack INTRODUCTION INTRO CUSTOMER SERVICE INFO Defining the DriveRack WARRANTY INFO ®...
-
Page 6: Defining The Driverack™ Pa
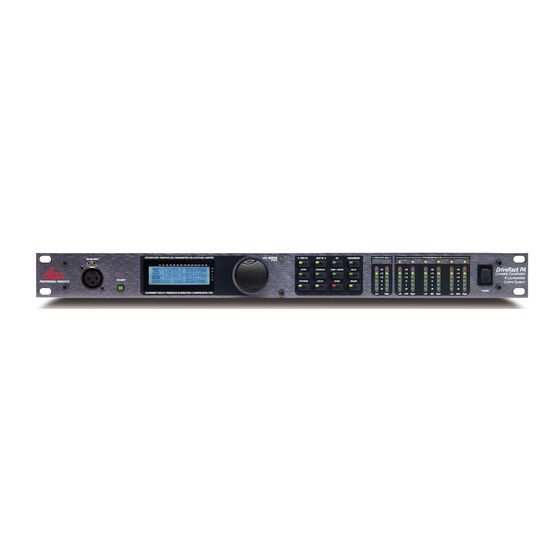
0.1 Defining the DriveRack™ PA The dbx DriveRack™ PA is the most effective way to manage all aspects of Loudspeaker man- agement for Public Address system applications. The DriveRack PA essentially becomes the only device that you will need between the mixer and the power amps. The following are just some of the features of the DriveRack™... -
Page 7: Service Contact Info
After expiration of the warranty, a reasonable charge will be made for parts, labor, and packing if you choose to use the factory service facility. In all cases, you are responsible for transportation charges to the factory. dbx will pay return shipping if the unit is still under war- ranty. -
Page 8: Warranty
In no event shall dbx or its dealers be liable for special or con- sequential damages or from any delay in the performance of this warranty due to causes beyond their control. - Page 9 Section 1 ™ DriveRack Getting Started ®...
-
Page 10: Section 1 - Getting Started
Pressing the RTA MIC input button will engage the front panel RTA input XLR connector. Data Wheel The Data wheel of the DriveRack™ PA is used to scroll through the program menu, load pro- grams, select parameters and edit parameter values. -
Page 11: Quick Start
Getting Started LCD Display The backlit LCD display of the DriveRack™ PA provides the user with all of the vital process- ing information of the DriveRack™ PA including: signal routing, effect block editing and Wizard Setup functions. The display will also notify the user if any internal clipping is taking place within the unit. - Page 12 RTA microphone to the front-panel XLR input, and press the RTA input button. • IMPORTANT- It is imperative that the power amps are turned off prior to cycling power to the Driverack™ PA. Always make sure that your power amps are the last item turned on and the first turned off.
- Page 13 CLIP. Data Wheel - The data wheel is used to scroll through the program menu of the DriveRack™ PA. The Data Wheel is also used to perform edit- ing functions to effects and utility menu features. Button Array - Operational editing is done using this 12 button array.
- Page 14 • Rotate the <DATA> wheel to select the amplifier manufacturer’s specified amplifier sensitivity setting. Once set, press the <NEXT PG> button, and you will now be given the option of optimizing your amp levels with the DriveRack PA. The page will appear something like this: High Amp Level...
- Page 15 • You will now rotate the <DATA> wheel to match the same setting as your amplifier of choice. Note that based on your amp selection, the DriveRack™ PA will initially display the recommended setting of that particular amp for obtaining maximum headroom.
- Page 16 Regardless, the display will appear something like this: Auto EQ • At this point, the DriveRack™ PA will automatically EQ the room. If you are using indepen- dent left and right graphic EQs, you will auto EQ each side independently. If you are using a stereo-linked EQ, both sides will be EQ’d simultaneously.
- Page 17 Q=29) Music High (Ultra Narrow notch filter, Bandwidth = 1/80 octave and Q=116). To guarantee that feedback is suppressed at lower frequencies, the AFS may place wider notch filters at these lower frequencies (below 700 Hz). Once the desired fixed ® DriveRack™ PA User Manual...
- Page 18 L L L L L L • To return to program mode, simply press the <PROGRAM> or <NEXT PG> button. For more information regarding feedback elimination, please see the AFS parameters of the Detailed parameters section. ® DriveRack™ PA User Manual...
-
Page 19: Section 2 - Editing Functions
Section 2 ™ DriveRack Editing Functions EDITING FUNCTIONS ®... -
Page 20: Basic Navigation Modes
3. Data Wheel - The Data Wheel is used to move through the pro- gram menu of the DriveRack™ PA. The Data wheel is also used to change the values of the selected parameter by simply rotating the wheel. Pressing the Data wheel will toggle between the available parameters on any selected page of the currently selected effect module. -
Page 21: Navigating The Eq Section (Geq/Peq)
24-36Hz Level - 24-36Hz Subharmonics % 0-100 36-56Hz Level - 36-56Hz The NEXT and PREV buttons scroll through the pages of selected module. Successive presses of the Data wheel will select effect parameters within the currently selected page. ® DriveRack™ PA User Manual... -
Page 22: Navigating The Crossover Section
Lift After - 0-60 Number of Fixed filters 0-12 The NEXT and PREV buttons scroll through Successive presses of the Data wheel will select the pages of selected module. effect parameters within the currently selected page. ® DriveRack™ PA User Manual... -
Page 23: Navigating The Comp/Limiter Section
Length - Delay Time - Course, Fine Units - Seconds,Feet,Meters The NEXT and PREV buttons scroll through the pages of selected module. Successive presses of the Data wheel will select effect parameters within the currently selected page. ® DriveRack™ PA User Manual... -
Page 24: Navigating The Utility Section
Select Type - Mixer Gain Adjust- Fixed Filter Setup down prompt Fixed Filters Low, Med, High mode Done- - 0-12 Successive presses of the Data wheel will select effect parameters within the currently selected page. ® DriveRack™ PA User Manual... - Page 25 Section 3 ™ DriveRack SOFTWARE OPERATING FUNCTIONS ®...
-
Page 26: Driverack Pa
Selecting Programs: The quickest way to get up and running with the DriveRack™ PA is to use any one of the fac- tory programs that are available in the box. When you reach the factory program, a FACT icon will appear above the factory program name. - Page 27 Once you are satisfied with the changes that have been made to a factory or user pro- gram, the DriveRack™ allows you to save these changes as a custom USER program by pressing the <STORE> button, and the display will appear as follows:...
- Page 28 The DriveRack™ PA will store 25 user programs in addition to the 25 factory programs. Note: Factory programs cannot be over-written. When storing changes to a Factory pro- gram, you must replace an existing User program.
-
Page 29: Section 4 - Detailed Parameters
Section 4 ™ DriveRack PARAMETERS DETAILED PARAMETERS ®... -
Page 30: Pre-Crossover Graphic Eq
Flatten/Restore This parameter either flattens the GEQ or restores the GEQ to the last setting before flattening. The DriveRack unit allows you to leave the EQ edit window and return without losing the edit- ed EQ settings. Frequency (F) 31.5Hz to 16.0kHz This parameter allows you to select any one the 28 available frequencies. - Page 31 This feature removes unnecessary filters from the spectrum to increase sonic quality. If the feedback is still there (after the filter is removed), it will catch it and notch it out the same. ® DriveRack™ PA User Manual...
-
Page 32: Subharmonic Synthesizer
The DriveRack™ PA Crossover can be configured as a 2x3, 4, 5, or 6. Appendix A.5 illustrates each of the available crossovers. -
Page 33: Post-Crossover Parametric Eq
Mono signal is fed to both the Left and Right of the Low band output. 4.5 Post-CROSSOVER PEQ In addition to the pre-crossover EQ options within the signal path, the DriveRack™ PA also offers a 2 or 3-band parametric EQ after the crossover section. The parameters for the post- crossover EQ are as follows and are user adjustable. -
Page 34: Compressor/Limiter
Detailed Parameters 4.6 Compressor/Limiter The DriveRack™ PA also offers Compression and Limiter modules. The Compressor is a full bandwidth Stereo Compressor located prior to the Crossover. The Compressor is the perfect tool for tightening uneven signal sources such as vocals and guitars. The Limiters are located on each stereo output channel and have been strategically placed for speaker and amplifier pro- tection. -
Page 35: Speaker Alignment Delay
4.7 Alignment Delay The DriveRack™ PA offers alignment delay to use for compensating signal delay that occurs due to internal speaker components such as horns, speakers and subwoofers within speaker cabi- nets. - Page 36 ™ DriveRack Section 4 Section 4 Detailed Parameters USER NOTES ® DriveRack™ PA User Manual...
-
Page 37: Section 5 - Application Guide
Section 5 ™ DriveRack APPLICATION GUIDE ®... -
Page 38: 2X6 Crossover
This Application guide section is provided to offer suggested installation applications of the DriveRack™ PA that will allow you to optimize peak performance of the units. Note that the 25 included application programs represent the extensive flexibility of the DriveRack™ units. -
Page 39: 2X5 Crossover
Connect the outputs from the mixer to the inputs of the DriveRack™. 2. Connect the outputs of the DriveRack™ PA and run to the selected speaker amplifier. 3. Make sure that the mixer and power amps are turned off prior to powering up the DriveRack™... -
Page 40: 2X4 Crossover
Connect the outputs from the mixer to the inputs of the DriveRack™. 2. Connect the outputs of the DriveRack™ PA and run to the selected speaker amplifier. 3. Make sure that the mixer and power amps are turned off prior to powering up the DriveRack™... -
Page 41: 2X3 Crossover
Connect the outputs from the mixer to the inputs of the DriveRack™. 2. Connect the outputs of the DriveRack™ PA and run to the selected speaker amplifier. 3. Make sure that the mixer and power amps are turned off prior to powering up the DriveRack™... - Page 42 ™ DriveRack Section 5 Application Guide USER NOTES ® DriveRack™ PA User Manual...
-
Page 43: Appendix
Appendix ™ DriveRack ®... -
Page 44: Factory Reset
A.1 Factory Reset In the event that a reset is required, the DriveRack™ PA offers you the option of performing a “Soft” or “Hard” reset. The Soft Reset resets all operating parameters except user programs. The Hard Reset Procedure will reset all program- mable information back to the factory defaults. -
Page 45: Specifications
Alignment Delay: 10ms per channel (60ms total) A/D Performance: Type: dbx Type IV conversion system Dynamic Range: >107 dB unweighted, >110 dB A-weighted Type IV dynamic range: 123 dB with transient material, A-weighted, 22kHz BW 121 dB with transient material, unweighted, 22kHz BW 115... -
Page 46: Crossover Diagrams
Graphic EQ. With the rest of your system properly adjusted, the Auto EQ can compensate for room resonance and adjust to suit personal taste without large excur- sions in the Graphic EQ bands. A.5 Crossover Diagrams L Mono 2X3(2-band) 2X4(2-band) L Mono 2X5 (3-band) 2X6 (3-band) ® DriveRack™ PA User Manual... -
Page 47: Block Diagram
Alignment Delay Peak Stop Limiter Peak Stop Limiter Peak Stop Limiter 3-Band PEQ 2-Band PEQ 2-Band PEQ Crossover Section - (2X3, 4,5,6) Stereo Compressor SubHarmonic Synth AFS Notch Filters Stereo/Mono Micr Pre amp Pink Noise ® DriveRack™ PA User Manual... -
Page 48: Prog List/Speaker Tunings/Amp Tunings
37) JBL MPro MP255S 38) JBL EON SUB G2 39) JBL SndFactr SF22SP 40) EAW FRz FR250Z 41) Yamaha SW118iv 42) Yamaha SW215iv 43) EV Elim iS 44) Cerwin-Vega SUB 18B 45) Cerwin-Vega SUB 15 46) Custom ® DriveRack™ PA User Manual... -
Page 49: System Setup And Gain Structure
In the DriveRack PA we have included a Wizard setup tool to help in system setup. If you use the Wizard to set up your DriveRack PA it will auto- matically set the limiters for some amplifier selections. If your amplifiers are not available in the Wizard, you should choose the Custom setting. - Page 50 You can now use the output limiters in the DriveRack PA to protect the amplifier from clipping no matter what you do at the con- sole. With the amplifiers clipping, now go to the Limiter page of the DriveRack PA and turn the limiter for each output band on.
- Page 51 ® 8760 South Sandy Parkway • Sandy, Utah 84070 Phone: (801) 568-7660 • Fax (801) 568-7662 Int’l Fax: (801) 568-7583 E-mail us at: customer@dbxpro.com or visit us on the web at: www.dbxpro.com A Harman International Company 18-1790-A...