Table of Contents
Advertisement
Quick Links
Advertisement
Table of Contents

Related Manuals for NEC 920


Summary of Contents for NEC 920
- Page 1 TalkTime Max™ 920 Owner’s Manual...
- Page 2 BE COLLECTED, RECYCLED OR DISPOSED OF IN AN ENVIRONMENTALLY SOUND MANNER. Battery Recommendations: The NEC TalkTime MAX™ 920 cellular phone you have purchased was designed to deliver quality performance and provide you with years of use. In order to maintain optimum performance, NEC recommends that only NEC Authentic Accessories™...
- Page 3 IMPORTANT READ THIS INFORMATION BEFORE USING YOUR HAND-HELD PORTABLE CELLULAR TELEPHONE First introduced in 1984, the hand-held portable cellular telephone is one of the most exciting and innovative electronic products ever developed. With it you can stay in contact with your office, your home, emergency services, and others.
- Page 4 If your phone has an extendable antenna, extend it fully. Some models allow you to place a call with the antenna retracted. However, your phone operates more efficiently with the antenna fully extended. Hold the phone as you would any other telephone. While speaking directly into the mouthpiece, position the antenna up and over your shoulder.
- Page 5 RF energy may affect improperly installed or inadequately shielded electronic operating and entertainment systems in motor vehicles. Check with the manufacturer or its representative to determine if these systems are adequately shielded from external RF energy. You should also check with the manufacturer of any equipment that has been added to your vehicle.
- Page 6 Research sponsored by the Wireless Technology Research, LLC (“WTR”), indicates that some wireless telephones cause interference with pacemakers. Accordingly, NEC America endorses the following recommendations issued by the WTR: Wireless phones should be kept at a safe distance from a pacemaker.
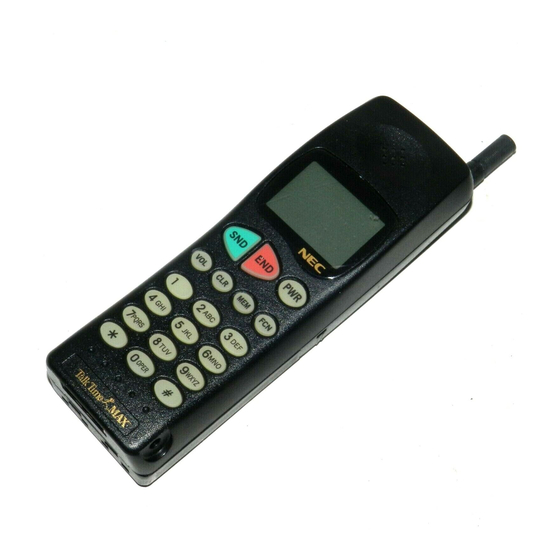
- Page 7 CONTROLS AND FEATURES Volume Key Microphone Battery Locking Catch Rechargeable Battery Pack Battery Charging Jack External Connector Antenna Earpiece Receiver Liquid Crystal Display Call Control Keys Function Keys Dialing Indicators Symbol Keys/ Scroll Keys Sounder/Speaker Battery Charging Contacts...
-
Page 8: Table Of Contents
DTMF Tone Mute Low Battery Alarm Error Tone Self Diagnostic Check NAM Programming Temporary Lock Code Set One-Touch Dialing Hands-Free Caller Line Identification Voice Messaging Service Voice Mail Message Indication Limited Warranty Troubleshooting Technical Information Care and Maintenance NEC Service Support... -
Page 9: Getting Started
The battery pack is a sealed unit with no serviceable parts inside. Do not attempt to open the case. WARNING: Use only NEC approved batteries, antennas, and chargers. The use of any other types will invalidate any approval or warranty applying to the telephone. -
Page 10: The Battery Charge Indicator
THE BATTERY CHARGE INDICATOR The Battery Charge Indicator can be accessed by pressing [FCN] [8] keys after power has been applied to the phone. The display screen indicates the battery charge level ranging from [o] to [oooo]. [o] representing low battery and [oooo] representing full battery. -
Page 11: Display Indicators
DISPLAY INDICATORS 8 8 8 8 8 8 8 8 8 8 8 8 8 8 8 8 IN USE NOSVC ROAM-B (Power-Up Display) Received Signal Strength Indicator o o o o IN USE NOSVC “NO SVC” shows until automatic lock-in with Carrier Service. -
Page 12: Quick Reference Guide
QUICK REFERENCE GUIDE ___________________The Memory___________________ Store a phone Press [FCN][MEM]. number Desired memory location by number.(01,02,14 etc.) Press [MEM] to store if occupied. Speed Dialing Press [MEM] and memory location number. Press SND. Scan through Press [MEM] + 0 + 1, # or memory _______________List of Menu Functions______________ TOTAL TIME... -
Page 13: Operation Of The Phone
OPERATION OF THE PHONE 1) Press the PWR key and hold it for at least 2 seconds. The phone will carry out a short self-test sequence, then briefly display an all “8” pattern. 2) When the RSSI Indicator appears on the display, the phone is ready for use. -
Page 14: Receiving A Call
6) When you have finished the call, press END. If the message NO SVC appears, you are outside the cellular service area. If lock indicators (FL)(PL) appear on the display, your phone has been electronically LOCKED (see Locking the Phone). You can still make emergency calls when the phone is locked. -
Page 15: Last Number Redial
LAST NUMBER REDIAL The last number dialed can be redialed automatically without re-entering it. (The number can still be retrieved even if the phone has been switched off and back on.) 1) With the display clear, press SND. 2) The number you last called will momentarily appear on the display and is automatically redialed. -
Page 16: Storing Information
STORING INFORMATION 1) Key in the phone number. 2) Press FCN + MEM. S t o r E 3) Press in Memory Location number (01,02,12, etc.). 4) The number will automatically be stored in the memory location selected. Note: If the memory location you have selected is already occupied, an alarm tone will sound, the display will flash and the contents of the memory location will be displayed. -
Page 17: Displaying "Hidden" Numbers
DISPLAYING “HIDDEN” NUMBERS The phone can display up to 16 digits (dashes count as digits). If you key in more than 16, the first digits will disappear off the side of the display. If you want to check these hidden digits, press and hold FCN and they will appear on the display. -
Page 18: Scratchpad
SCRATCHPAD Digits can be entered during a conversation and will stay on the display after the call. If you wish to keep the scratchpad use the FCN + MEM function to store the scratchpad information. Note: DTMF tones will be sent out over the voice channel unless the phone is first muted. - Page 19 FULL LOCK When the phone is fully locked, only emergency calls (911) can be made, but any call can be received. Storing to the memory is also prevented. 1) Press FCN + #. The display will read: E n t E r C d 2) Enter 4-digit lock code.
-
Page 20: Length Of Your Calls
PARTIAL LOCK 1) Press FCN + . The display will read: E n t E r C d 2) Enter 4-digit lock code. If you key in the correct code, PL (Partial Lock) will appear on the right side of the display. If the key is incorrect, the display will go back to the standby mode. -
Page 21: Resetting The Call Timers
RESETTING THE CALL TIMERS Each NAM has a Total Time Counter. The Total Time of all incoming and outgoing calls are registered by these counters. SINGLE - NAM o To View Total Time: Press FCN + 1. t o t A l - t 0 0 3 - 2 9 Hours DUAL - NAM... -
Page 22: Backlighting
BACKLIGHTING The phone keypad and display are illuminated to make them easier to read. The backlights come on when you press any key, and go off 10 seconds after your last key press. To turn them on again, simply press another key. SETTING THE RINGING VOLUME The ringing tone sounds when there’s an incoming call. -
Page 23: Pause Dialing
2) Press 6. P - 2 2 1 4 2 3 4 - 4 5 6 7 3) Press CLR. Phone will re-initialize on the NAM selected. PAUSE DIALING PAUSES - FCN + 9 . This function creates pauses while sending out DTMF signaling tones during conversation mode. - Page 24 Note: The ESN for your phone is located in the battery compartment of the phone, and is comprised of the first 8 digits preceded by NEC’s company code of 189. To Select the Roaming Mode: 1) Press FCN + 5.
-
Page 25: Sid Management
Standard This allows the phone to first search for a free channel in the Home system. If the phone cannot find a free channel, it searches the other system. S y S - S E L S t A n d A r d The ROAM indicator is displayed when the phone is using a system other than your home system. -
Page 26: Mute
1) Press FCN + 4. t o n E S t A n d A r D 2) Press 4 to change. t o n E L o n 9 MUTE The Mute function operates only when the phone is in the conversation mode. -
Page 27: Low Battery Alarm
FULL MUTE: 1) Press and hold FCN + 3. This switches off both the microphone and earpiece or speaker. MUTE o o o o IN USE 2) Press FCN + 3. This switches the microphone and speaker back on. o o o o IN USE LOW BATTERY ALARM The Low Battery Alarm warns the user when the battery... -
Page 28: Temporary Lock Code Set
TEMPORARY LOCK CODE SET This function allows the user to program any 3-digit temporary lock code to lock or unlock the phone without revealing the personal 4-digit lock code. Note: The 3-digit temporary code cannot be the same as the first three digits of your personal lock code. 1) Press FCN + 0. -
Page 29: Hands-Free
2) Press 3 to switch On or Off. 3) Press CLR to return to standby. HANDS-FREE This function operates only when phone is installed in the Simple Hands-Free Adapter and you are in conversation mode. FCN + VOL turns the Hands-Free function On or Off. With Hands-Free mode On and the phone in the conversation mode, the display shows: o o o o... -
Page 30: Voice Messaging Service
VOICE MESSAGING SERVICE Cellular Digital Messaging Service (CDMS), if available through the cellular service provider in the area, is a voice message service for the cellular customer. When a cellular customer turns off or does not answer the cellular phone, or when the customer is currently on a call, CDMS answers the incoming call. -
Page 31: Limited Warranty
1. What Products May Be Covered By This Limited Warranty? The following products (the "Products" or the "Product") purchased through an NEC America, Inc. (NECAM), Wireless Communications Division Authorized Dealer (the "Dealer") in the United States on or after January 1, 1997, may be covered by this warranty: [TALKTIME MAX™... - Page 32 6. What Is Not Covered By This Warranty? This warranty does not extend to: (i) Products which have been subjected to misuse, acci- dent, physical damage, improper installation, abnormal operation or handling, neglect, inundation, fire, water, or other liquid intrusion, or; (ii) Products which have been damaged due to repair, altered, or modified by anyone other than an authorized service warranty component-level representative of...
-
Page 33: Troubleshooting
7. How Do You Get Warranty Service? If Your Product requires warranty service, it must be returned to an NEC Authorized Service Center along with a descrip- tion of the Product malfunction or difficulty. You are required to substantiate warranty status with a dated proof of pur- chase (as explained in item #3), inclusive of Product's serial number (if applicable). -
Page 34: Technical Information
TECHNICAL INFORMATION Dimensions 147.32x50.8x27.94mm (5.8"x2.0"x1.1") Weight 7.8 ounces Transmitting Power 0.6 W max. ERP Operating Voltage 4.8V(int. battery) Frequency Band 824.040 - 848.970 MHz (TX) 869.040 - 893.970 MHz (RX) Standard Battery Capacity 1000 mAh Number of Channels Memory Locations Memory Capacity 32 digits memory locations 1-24 CARE AND MAINTENANCE... -
Page 35: Nec Service Support
NEC SERVICE SUPPORT NEC's Service Support group is ready to assist you with any additional information that you may need in the operation and integration of your NEC Cellular Telephone and NEC Authentic Accessories. Service Support can be obtained by... - Page 36 Alphabetical Index Topic Page Topic Aircraft Locking Use on Full Alarm Partial Battery Temporary Alert Call Memory Antenna Deleting Care Editing Replacement Hidden Digits Locking Battery Recalling Alarm Scanning Charging Scratchpad Indicator Speed Dial Installing Storing Recharging Menu Removing Functions Backlighting Mute Mute...
- Page 37 NEC TalkTime MAX™ 920 Manual OPERATION SUMMARY _________________________________________ NOTES: o [X][X] = Memory Address 01 to 24. [X] = Memory Address 1 to 9. KEY OPERATION TERMS: o Press = Press Key firmly. o Press(Hold) = Press and hold down key.
- Page 38 NEC TalkTime MAX™ 920 Manual OPERATION SUMMARY _________________________________________ Store Number From Scratchpad: o Key-in Number During Conversation. Press [FCN+MEM]+[Memory Location]. Recalling Stored Numbers: For Direct Recall o Press [MEM] + [Memory Location]. For Scanning All Locations. Press [MEM] # or .