Philips QS6161 Instruction Manual
Hide thumbs
Also See for QS6161:
- User manual (226 pages) ,
- User manual (182 pages) ,
- User manual (182 pages)
Table of Contents
Advertisement
Available languages
Available languages
Quick Links
Download this manual
See also:
User Manual
Advertisement
Table of Contents

Related Manuals for Philips QS6161


Summary of Contents for Philips QS6161
- Page 1 フィリップス スタイルシェーバー QS6161 取 扱 説 明 書 品 番 保 証 書は、 この取 扱 説 明 書 QS6141 の最終 ページについており 保証書付 ますので販売店で記入を受 けてください。...
- Page 2 フィリップス スタイルシェーバーをお買い上げいただき、 まこと にありがとうございます。 長い間ご愛用いただくために、 ご使用前に この取扱説明書をよくお読みのうえ、 正しくお使いください。 また、 お読みになった後は、 お使いになる方がいつでも見られる ところに必ず保管してください。 商品のご確認 商品をご確認ください。 ヒゲコーム ディテールコーム ※ のみ QS6161 本体 充電アダプタ ( HQ8505 ) 充電アダプタ ( HQ850 ) ※ 用 ※ 用 QS6161 QS6141 保護キャ ップ 充電スタン ド クリーニングブラシ ソフ トポーチ ※...
-
Page 3: は じ め に 商品のご確認 1
■品番別 付属品一覧 お買い上げの商品によって付属品が異なります。 該当する品番を下記の一覧よりお選びいただき、 付属品をご確認ください。 品番 QS6161 QS6141 付属品 ● ● 保護キャ ップ ● ● クリーニングブラシ ● ー ソフ トポーチ ● ● 充電スタン ド 充電アダプタ ● ー ( HQ8505 ) 充電アダプタ ー ● ( HQ850 ) ● ● ヒゲコーム ●... - Page 4 お買い上げのお客様へ 初めてご使用になる際は、 ご使用前に充電してください。...
-
Page 5: Table Of Contents
目 次 ● は じ め に 商品のご確認 ・ 目次 必ずお守りください ・ 各部の名称 ・ 充電の仕方 ● ご 使 用 方 法 基本的な使い方 トリミングの仕方 ~ シェービングの仕方 ・ お手入れ方法 ・ 刃の交換 ・ 保管の仕方 ● 廃棄について シェーバーを廃棄するとき ● 困 っ た と き 故障かな?と思ったら ●... - Page 6 安 全 上 の ご 注 意 必ずお守り ●ここに示した注意事項は、 安全に関する重要 ください な内容ですので、 必ず守ってください。 ●誤った取扱いをしたときに想定される内容を 「警告」 と 「注意」 とに区分けしています。 ○絵表示について 記号は、 「 危険、 警告、 注意」 を示します。 図の中や近くに具体的な注意内容を示します。 警告 人が死亡または重傷を負う可能性が想定される内容。 人が傷害を負う可能性及び物的損害のみの発生が想 注意 定される内容。 ・ 記号は、 してはいけない 「禁止」 を示します。 図の中や近くに具 ○絵表示の例 体的な禁止内容 (左図の場合は分解禁止) を示します。 ・...
-
Page 7: 必ずお守りください 5
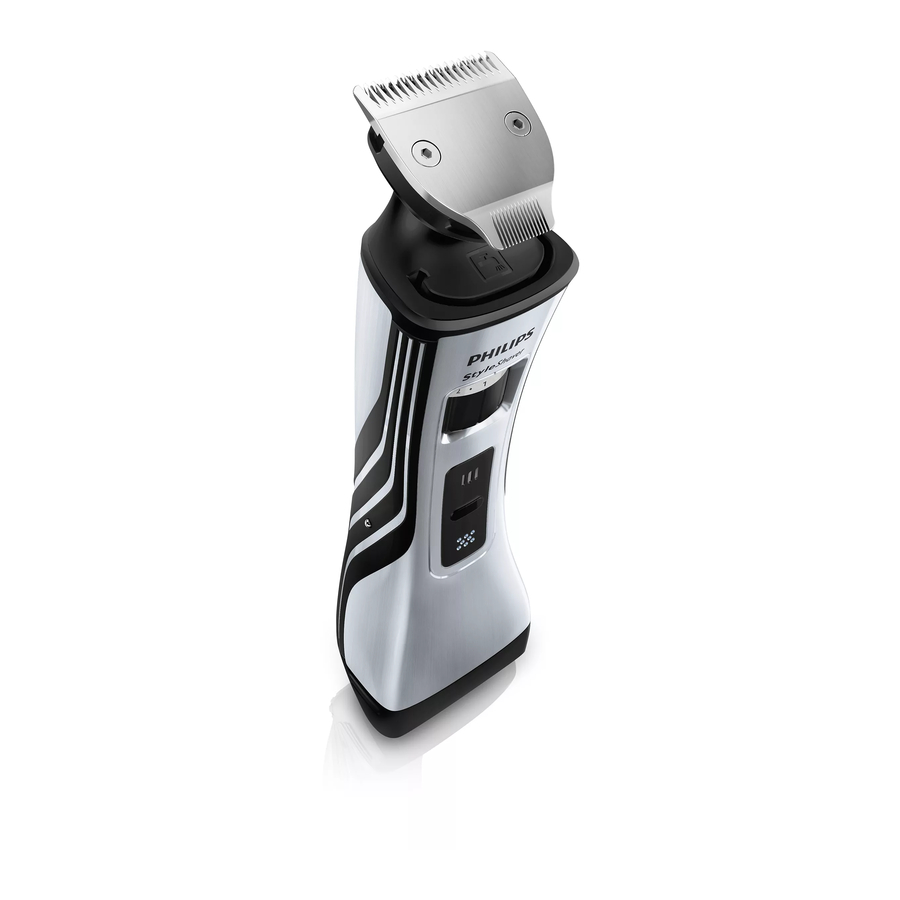
注 意 ● 充電アダプタの電源プラグ部を抜 ● 刃は強く押さえない。 破損して皮膚 くときは、 電源コード部を持たずに を傷つけることがあります。 必ず先端の電源プラグ部を持って 引き抜く。 感電やショートして発火 ● 刃が破損または故障した場合は、 本 することがあります。 製品を使用しないでください。 ケガ の原因になります。 交換の際には必 ずフィリップス社製の同型部品とお ● 充電時以外は、 充電アダプタをコンセ ン トから抜く。 ケガややけど、 絶縁劣化 取り替えください。 による感電・漏電・火災の原因となり ます。 ● 電源コネクタ受部にピンやごみを付 着させない。 感電・ショー ト・発火の 原因になります。 使 用 上 の ご 注 意 本製品はヒゲ (あごヒゲ、 口ヒゲ、 もみあげなど) の長さを整えたり、 シェービングするため のものです。... - Page 8 各部の名称 本体 トリマー ( ) 32mm リバーシブル トリマー トリマー ( ) 15mm コネクタ部 長さ設定調整リング リバーシブル トリマー 電源スイッチ トラベルロック表示 ※ のみ QS6161 シェーバー 電源スイッチ 網刃 充電表示ランプ シェーバー...
-
Page 9: 各部の名称 7
コーム▶ ・ 充電スタン ド▶ P.11 電源コネクタ 受部 ヒゲコーム ディテールコーム 折りたたみ時 ※ のみ QS6161 充電スタン ド 充電アダプタ▶ 充電アダプタ ( HQ8505 ) 充電アダプタ ( HQ850 ) ※ 用 QS6161 ※ 用 QS6141 電源コネクタ部 電源プラグ部 電源コネクタ部 電源プラグ部 ソフ トポーチ 保護キャ ップ クリーニングブラシ ▶... -
Page 10: 充電の仕方
お客様による充電池の交換はできません。 充電の仕方 QS6161: この商品は通常約 時間充電です。 QS6141: この商品は通常約 時間充電です。 QS6161/QS6141: 満充電で約 分使用できます。 充電専用タイプ 初めてお使いになるときや、 長い間ご使用にならなかったときは、 充電しないと使用できませ ん。 ご使用前に充電してください。 海外 ( ~ 240V ) でのご使用も可能です。 ただし、 コンセ ン トの形状や電圧など現地で充分お確かめのうえご使用ください。 ※ 本製品はリチウムイオン電池を使用していますが、 ご使用の都度充電をしても充電池の寿命には影 響ありません。 充電表示ランプがオレンジ色に点滅し ご家庭のコンセン トに電源プラグ部を たら、 充電が少なくなっています (残り 差し込みます。 の使用時間は約 分です) ので、 本製... -
Page 11: ご 使 用 方 法 基本的な使い方
スタイルシェーバーは、 ヒゲ (あごヒゲ、 口 基本的な使い方 ヒゲ、 もみあげ) の長さを整えたり、 シェー ビングすることができます。 リバーシブル ● トリミングする時 トリマー ヒゲの長さを整える時はリバーシブルトリマー を使用します。 トリミングの仕方▶ P.11 ~ [持ち方] リバーシブルトリマーが 上にくるようにしてスタ イ ルシェー バーを持 ち、 コームまたはトリマーを 皮膚にあてます。 [電源スイッチの ON/OFF ] 電源スイッチ 動作していない状態でリバーシブル トリマー電源 スイッチを 回押すと 、 もう 回押すと に なります。... - Page 12 ) の設定から始められることをおすすめ します。 ヒゲコームを使った トリミングの仕方 リ バーシブル ト リ マー リバーシブル ト リ マー が上に、 シ ェーバーが 電源スイ ッチを押し、 下にくるようにして 電源を入れます。 スタイルシェーバー ※ のみ :電源 QS6161 スイッチが点灯し、 リ を持ちます。 バーシブル トリマー が作動していること コームをガイ ド溝に を示します。 カチッと音がするま で差し込みます。 ヒゲの流れに逆らう ように動かします。 カチッ...
- Page 13 本製品は防水加工をしており、 浴室でも使用できますが、 水や液体の中に 警告 浸けないでください (故障の原因となります) 。 ●ほこりなどで肌が汚れている場合、 ふきとってからご使用ください。 ● ご使用の前に刃の破れや変形がないか確認してください (刃に破れや変形があると肌を傷 つける原因になります) 。 ● ヒゲの長さを整えたり、 ヒゲ剃り以外の目的 (頭髪など) には使用しないでください。 ●肌が乾いた状態でご使用ください。 ●リバーシブル トリマーにはシェービングフォーム、 ジェル、 石けん等はお使いいただけません。 ディテールコームを使った トリミングの仕方 ( のみ) QS6161 ディテールコームは、 細かな部分のヒゲの 長さをより簡単に調整することができます。 刃の前面をコームが覆っていないためヒゲ が見えやすく、 細かな部分までしっかり刃が 届きます。 ディテールコームのセッ トの仕方・長さ設定の方法は、 ヒゲコームの場合と同様です。 (コームのセッ トの仕方・長さ設定の方法は をご参照ください)...
-
Page 14: トリミングの仕方 11
上面図 背面側 (前方) 正面側 リバーシブルトリマー電源スイッチを リバーシブルトリマー電源スイッチを 押し、 電源を入れます。 押し、 電源を入れます。 ※ のみ : 電源 ※ のみ : 電源 QS6161 QS6161 スイッチが点灯し、 リ スイッチが点灯し、 リ バーシブル トリマー バーシブル トリマー が作動していること が作動していること を示します。 を示します。 リバーシブル トリマーを トリマ ー ( ) を 下... - Page 15 ゲの流れに逆らうよう を持ちます。 にして動かします。 シェーバー電源スイッ シェ ー ビ ン グ 後 は、 チを押し、 電源を入れ シェーバー電源スイッ ます。 チを再度押し、 電源を 切ります。 ※ QS6161 のみ : 電源スイ ッ チが点灯し、 シェーバー が作動していることを示 します。 ポイン ト ●刃が皮膚にぴったり触れるようにしてください。 ● リバーシブル トリマーを作動中にシェーバーの電源を入れることができます。 その場合リバーシブ ル トリマーの電源はすぐに切れます。 押しつけ防止機能 ( のみ)...
-
Page 16: シェービングの仕方 14
シェ ー ビ ン グ 後 は、 を持ちます。 シェーバー電源スイッ チを再度押し、 電源を 切ります。 シェーバーの網刃部分を水で濡らし、 肌の上でなめらかに動くようにします。 ご使用の都度シェーバーをきれいに洗 います ( 「お手入れ方法」 ) 。 シェーバー電源スイッ チを押し、 電源を入れ [重要] ます。 ※ のみ : 電源スイ ッ QS6161 チが点灯し、 シェーバー シェービング後は、 シェービングフォームや が作動していることを示 シェービングジェルがしっかりと洗い流さ します。 れているかを確認してください。 お手入れ が不十分な場合、 臭いが出るばかりでな く、 故障の原因にもなります。... - Page 17 本製品はご使用のたびに掃除をして ください。 お手入れ方法 ※ リバーシブル トリマー コネクタ部は少な くとも カ月に 回は掃除をしてください。 ※ 本製品に潤滑剤を使う必要はありません。 リバーシブル トリマーのお手入れ 本 体 の 電 源を切り リバ ー シ ブ ルトリ ます。 マーを水で洗い流し ます。 コームをスライ ドさ せ、 本体から取り外 します。 リバーシブル トリマー コネクタ部のお手入れ 本 体 の 電 源を切り クリーニングブラシ...
-
Page 18: お手入れ方法 16
シェーバーについてはなるべく使用の都度クリーニングブラシで掃除をして ください。 水洗いによるお手入れ方法 ※洗剤は使用しないでください。 ※ ぬるま湯 ( ℃前後) でのお手入れをおすすめします。 臭いのもととなる皮脂や汗などが取れやすくなり ます。 ただし、 熱湯はお止めください。 故障の原因となります。 ※ お手入れ中にシェーバーの底から水が漏れてくる場合がありますが、 これは正常な状態です。 電子部品は すべてシェーバー内部の密閉された部分に内蔵されているので、 危険はありません。 ●お手入れの際は、 スイッチを にしてから水洗いしてください。 注意 ●本体は水洗いできますが、 水中に浸けないでください。 シェーバーのお手入れ ※シェービングフォーム等を使ったウェ ッ トシェービング後のお手入れ方法です。 本体の電源を切ります。 シェーバー電源スイッチを押し、 電源 を入れます。 ※ モーターの動きがシェーバーの内部をお手入 れするのを助けます。 シェービングフォー ムやヒゲクズがと れ る ま で、 シェ ー バーを手で動かし... - Page 19 替刃は網刃 ・ 内刃 ・保護キャ ップのセッ トと なります。 セッ トでの交換を行ってください。 刃の交換 網刃 内刃 保護キャ ップ 替刃品番 QS6101 部品の取り替え 刃が破損した場合や切れ味が落ちた場合は、 フィリ ップス製品取扱店または小泉成器部品センター で取扱いしているフィ リ ップス社製の同型部品をご注文していただき、 交換してください。 シェーバー [網刃] シェーバーを引っ張 新しい網刃をシェー カチッ り本体から取り外し バーにカチッ と音が ます。 するまで押し込 み ます。 シェーバーから網刃 シェーバーをカチッ を取り外します。 と音がするまで本 体...
-
Page 20: 刃の交換 18
充電スタン ドは折りたたんで持ち運んだり 保管することができます。 充電スタン ドを折りたたむ シェーバーに保護キャップを取り付け 充電スタンドの底をスタイルシェー ます。 バーを立てかけるスタン ドの方に向け て折りたたみます。 カチッ トラベルロック機能 ( のみ) QS6161 本製品には、 移動中の誤作動を防止する トラベルロック機能が搭載されています。 トラベルロック機能を作動させるには、 リバーシ ブルトリマー電源スイッチ、 シェーバー電源ス イッチ、 または両方を最低 秒押したままの状態 にし、 トラベルロック表示を 回点滅させます。 ※ トラベルロック機能は、 トラベルロック表示が点灯 した時のみ作動します。 トラベルロック機能を解除するには、 リバーシブ ル トリマー電源スイッチ、 シェーバー電源スイッ チ、 または両方を最低... -
Page 21: 廃棄について シェーバーを廃棄するとき
シェーバーを ※お客様による充電池の 廃棄するとき 修理交換はできません。 リチウムイオン電池のリサイクルについて このシェーバーはリチウムイオン電池を使用しています。 リチウムイオン電池はリサイクル可能な貴重な資源です。 ご使用済みの製品の廃棄に際しては、 リチウムイオン電池を 取り出し、 各自治体の処理方法に従い、 リサイクル協力店に お持ちください。 ●製品を廃棄するとき以外は、 絶対に本体を分解しないでください。 注意 ●本体内部の金具は鋭いので、 ご注意ください。 充電池の取り外し方 スイッチを にして、 完全に動作しなくなるまで充電池を放電させてから、 行ってください。 シェーバー (図❶) ドライバーをバッ と 内 刃 ( 図 ❷ ) を クパネルの下に入 本体から取り外し れ、 パネ ルを取り ます。 外します。... -
Page 22: 困 っ た と き 故障かな?と思ったら
) QS6101 ▶シェーバーに長いヒゲがからまっていませんか? ・ 「お手入れ方法」 の項をお読みください。 充電しても使用時間が極端に短い ▶シェーバーが完全に止まるまで作動させてからもう一度充電してください。 それでも改善されないときは、 充電池の寿命です。 スイッチを押しても作動しない ▶充電はしましたか? は約 時間、 は約 時間以上、 充電してください。 QS6161 QS6141 ▶ 刃が動かなくなるほど汚れているか、 刃にキズがあるか、 または刃が破損していま せんか? シェーバーをお手入れするか、 刃を交換してください。 充電できない ▶充電アダプタの電源プラグ部はコンセン トにきちんと差し込まれていますか? 充電スタン ドの電源コネクタ受部に充電アダプタのコー ドがきちんと差し込まれていますか ? 確認してください。 ▶充電アダプタの電源コー ドが断線していませんか? 新しい充電アダプタをお買い求めください。 ・ 用アダプタ品番: QS6161 HQ8505 ・... - Page 23 ENGLISH QS6161,QS6141 QS6161 only QS6161 only QS6161 only...
- Page 24 ENGLISH Introduction Congratulations on your purchase and welcome to Philips! To fully benefi t from the support that Philips offers, register your product at www.philips. com/welcome. General description (Fig. 1) Trimming head Regular trimming side (32 mm) Precision trimming side (15 mm)
- Page 25 ENGLISH The adapter contains a transformer. Do not cut off the adapter to replace it with another plug, as this causes a hazardous situation. This appliance can be used by children aged from 8 years and above and persons with reduced physical, sensory or mental capabilities or lack of experience and knowledge if they have been given supervision or instruction concerning use...
-
Page 26: Compliance With Standards
This Philips appliance complies with all applicable standards and regulations regarding exposure to electromagnetic fi elds. Charging QS6161 only: Charging normally takes approx. 1 hour. QS6141 only: Charging normally takes approx. 4 hours. When the appliance is fully charged, it has an operating time of 75 minutes. - Page 27 ENGLISH Insert the small plug into the charging stand. Note: The small plug is easiest to insert when the charging stand is folded. Unfold the charging stand (‘click’). Put the adapter in the wall socket. Put the appliance in the charging stand. , The battery status indicator starts to fl...
- Page 28 ENGLISH Trimming with comb The trimming combs allow you to trim to different lengths. Start at the highest setting to acquire practice with this appliance. See the table below for an overview of the hair length settings and the corresponding hair lengths. Setting Hair length after trimming 1 mm - 3/64 inch...
- Page 29 - The line above the hair length setting selector shows which setting you have selected. Press the trimming head on/off button once to switch on the trimming head. QS6161 only: The on/off button lights up to indicate that the trimming head is operating.
- Page 30 ENGLISH To trim the hair, move the trimming comb through the hair slowly. Tips Always make sure that the tips of the trimming comb points in the direction in which you move the appliance. Make sure that the fl at part of the trimming comb is always in full contact with the skin to obtain an even hair length result.
- Page 31 ENGLISH Press the trimming head on/off button to switch on the trimming head. Hold the appliance with the trimming head pointing upwards and make downward strokes with the regular side of the trimming head. Using the precision side of the trimming head The precision trimming head is only half as wide as the regular trimming head.
- Page 32 If you do this, the trimming head is switched off immediately. Your skin may need 2 or 3 weeks to get accustomed to the Philips shaving system. Wet shaving Apply some water to your skin. Apply shaving foam or shaving gel to your skin.
- Page 33 ENGLISH Press the shaving head on/off button once to switch on the shaving head. QS6161 only: The on/off button lights up to indicate that the shaving head is operating. Place the shaving head on the skin and move the appliance against the direction of hair growth while you press it lightly.
- Page 34 ENGLISH Press the shaving head on/off button once to switch on the shaving head. QS6161 only: The on/off button lights up to indicate that the shaving head is operating. Place the shaving head on the skin and move the appliance against the direction of hair growth while you press it lightly.
- Page 35 ENGLISH Only clean the appliance and the adapter with the cleaning brush supplied. Note: The trimming head and shaving head do not need any lubrication. Cleaning the trimming head Switch off the appliance. Pull the comb off the trimming head. Clean the trimming head under the tap.
- Page 36 ENGLISH Clean the inside of the trimming head with the cleaning brush. After cleaning, put the trimming head back onto the appliance. Quick cleaning of the shaving head after wet shaving or shaving with shaving foam Cup your hand under a running tap and fi ll it with water.
- Page 37 ENGLISH Pull the shaving head off the appliance. Note: The shaving head is fragile. Handle it carefully. Replace the shaving head if it is damaged. Rinse the shaving head with lukewarm water. Do not clean the shaving head with the cleaning brush, as this may cause damage.
- Page 38 To fold the charging stand: fold the base of the charging stand against the appliance holder. Put the protection cap on the shaving unit. Travel lock (QS6161 only) The appliance has an integrated travel lock which prevents the appliance from accidentally being switched on during travel.
- Page 39 If you have trouble removing the battery, you can also take the appliance to a Philips service centre. The staff of this centre will remove the battery for you and will dispose of it in an environmentally safe way.
-
Page 40: 英 文 解 説 Guidance In English 22
Now you see a printed-circuit board. Break the battery from the printed-circuit board. Be careful, the battery strips are very sharp. Guarantee and support If you need information or support, please visit www.philips.com/support or read the separate worldwide guarantee leafl et. -
Page 41: 保 証 保証とアフターサービス
●本製品の保証は海外においても有効です。 ( 同シリーズ製品の取り扱いがある国に限ります) ● 日本国以外のフィ リ ップスサービス部門においても保証期間内及び保証期間の経過後の アフターサービスを受けることができますが、 この場合多少日数を要することもあります。 ● 海外にてアフターサービスを受けられる場合は、 現地のフィ リ ップスサービス部門に お問い合わせください。 尚、 お困りの点がございましたら下記までご連絡ください。 Philips Consumer Lifestyle Service Department P.O.Box 20100 9200 CA DRACHTEN The Netherlands Fax:+31 51 259 2785 【お客様の個人情報のお取り扱いについて】 ● お受けしましたお客様の個人情報は、 株式会社フィリ ップスエレク トロニクスジャパンのホー ムページ... -
Page 42: 仕様/お客様情報センター
ご使用の時、 このような症状はありませんか? ●本体にさわると時々電気を感じる。 ●こげくさい臭いがする。 ●電源コー ド部を動かすと通電したり、 しなかったりする。 ●その他の異常、 故障がある。 このような症状の時は、 故障や事故防止のため、 スイッチを切り、 充 電アダプタをコンセン トから外して、 必ず販売店にご相談ください。 仕 様 品 番 QS6161 QS6141 電 源 方 式 充電式 (専用充電アダプタ使用) 消 費 電 力 定 格 電 圧 ( ) AC100-240V 50/60Hz 本 ... -
Page 43: 無料修理規定
○ 5 保証書の提示がない場合。 ○ 6 保証書にお買い上げ年月日、 お客様名、 販売店名の記入のない場合、 或は字句を書き 換えられた場合。 ※保証書は、 本書に明示した条件のもとにおいて無料修理をお約束するもの です。 従って保証書を発行している者 (保証責任者) 、 及びそれ以外の事業者 に対するお客様の法律上の権利を制限するものではありません。 保証期間経過後の修理についてご不明の場合は、 お買い上げの販売店または 小泉成器修理センターにお問い合わせください。 ※保証期間経過後の修理・補修用性能部品の保有期間について詳しくは取扱 説明書の保証とアフターサービスの項目をご覧ください。 ※お客様にご記入いただいた個人情報 (保証書の控え) は保証期間内のサービス 活動及びその後の安全点検活動のために利用させていただく場合がございま す。 ご了承ください。 また個人情報は、 株式会社フィリ ップスエレク トロニクス ジャパンのホームページ に掲載されている 「お http://www.philips.co.jp/ 客様の個人情報の取り扱いについての当社の方針」 に基づき適切に管理い たします。... - Page 44 大阪市住之江区南港中 丁目 番 号 559-0033 ★ 部品に関するお問い合わせ ナビダイヤルにかからない時は 小泉成器部品センター ( ) TEL 06 6613 3211 〒 大阪市住之江区南港中 丁目 番 号 ナビダイヤル (全国共通) 559-0033 0570 2222 ( ) 受付時間:平日 : ~ : (土・日・祝日・夏期休暇・年末年始を除く) 4222.002.8423.1 この印刷物は再生紙を使用しております。 ©2014 Philips Electronics Japan, Ltd.