Table of Contents
Advertisement
Advertisement
Table of Contents

Related Manuals for Murray 11052x92D


Summary of Contents for Murray 11052x92D
- Page 1 Model 11052x92D F–031305L...
- Page 2 MURRAY, INC. Two Year Limited Warranty Murray, Inc. warrants to the original purchaser that this unit shall be free from defects in ma- terial and workmanship under normal use and service for a period of Two (2) Years from the date of purchase; however, this warranty does not cover engines, accessories (such as...
-
Page 3: Owner's Information
OWNER’S INFORMATION This instruction book is written for a person with some mechanical ability. Like most service books, not all the steps are described. Steps on how to loosen or tighten fasteners are steps anyone can follow with some mechanical ability. Read and follow these instructions before you use the unit. Know your product: If you understand the unit and how the unit operates, you will get the best performance. -
Page 4: Safety Rules
S Never remove the fuel tank cap or add fuel to a running or hot engine. S Never store fuel or cultivator with fuel in the tank inside a building where fumes may reach an open flame. Operating Safety S Never allow children or young teenagers to operate the cultivator. - Page 5 F–031305L SAFETY RULES S Never store the cultivator with fuel in the fuel tank inside a building where ignition sources are present such as water and space heaters, clothes dryers, and the like.
-
Page 6: International Symbols
INTERNATIONAL SYMBOLS IMPORTANT: Many of the following symbols are located on your unit or on literature sup- plied with the product. Before you operate the unit, learn and understand the purpose for each symbol. Slow Choke OFF Half Choke Full Choke WARNING Thrown Objects. - Page 7 1. Remove the parts bag from the carton. 2. Remove the handles from the carton. 3. Remove the packing material positioned around the unit. 4. Lift the cultivator out of the carton and place on a hard level surface. 5. Remove the packing material from the tines.
- Page 8 3. Insert the right lower handle into the mounting channel (see Figure 3). Make sure the flat end at the top of the handle is facing inward. 4. Mount a spacer on each screw. Push the screws through the tine shield, the lower handle, and half way through the engine casing (see Figure 4).
- Page 9 Check carton. Make sure no loose parts remain in the carton. All fasteners have been properly tight- ened. As you learn how to use the cultivator, pay extra attention to the following important items: nn Fuel tank is filled with a fresh, clean, fuel mixture.
-
Page 10: Operation
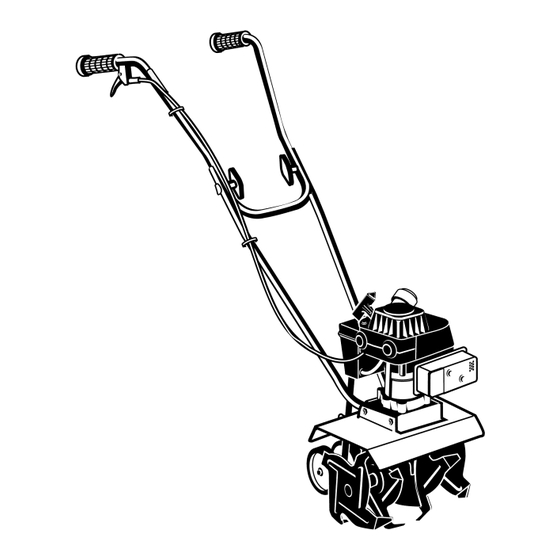
KNOW YOUR CULTIVATOR READ THE OWNER’S MANUAL AND ALL SAFETY RULES BEFORE YOU OPERATE the cultivator. To familiarize yourself with the location of the controls, compare the illustrations with your cultivator. Save this manual for future reference. Throttle Control Lever... - Page 11 6. Lowering the depth stake will slow the cultivator and make it till deeper. Raising the depth bar will allow it to move faster and till more shallow. See “How To Set The Depth Stake or Depth Rod”.
-
Page 12: Before Starting The Engine
Let the engine cool for several minutes. How To Mix The Fuel Mixture The two cycle engine, used on this cultivator, requires a mixture of gasoline and oil for lu- brication of the bearings and other moving parts. -
Page 13: How To Start The Engine
HOW TO START THE ENGINE Before you start the engine, make sure that you have read and understand all the in- structions on the preceding pages. 1. Fill the fuel tank to 1/2 inch below the bottom of the fill neck. Reinstall the fuel tank cap securely. -
Page 14: Cultivating Tips
Heavy soil (4 inch depth or greater) Remove the depth stake and work the tines down with a back and forth motion to at least a depth of 4 inches. Slowly pull the cultivator backward allowing the soil to feed forward over the tines. -
Page 15: Customer Responsibilities
√ √ √ GENERAL RECOMMENDATIONS The warranty on this cultivator does not cov- er items that have been subjected to opera- tor abuse or negligence. To receive full value from the warranty, the operator must main- tain the cultivator as instructed in this manual. - Page 16 LUBRICATION Every 25 hours and/or at the beginning of each season, make sure the gear box is filled with lubricant (see Figure 9). Tubes of gear lubricant are available from most auto- motive supply stores. Use portable tool grease such as Lubriplate 630AA (Product No.
-
Page 17: Spark Plug
SPARK PLUG Check the spark plug every 25 hours. Re- place the spark plug if the electrodes are pitted or burned or if the porcelain is cracked. 1. Make sure the spark plug is clean. Clean the spark plug by carefully scrap- ing the electrodes (do not sand blast or use a wire brush). -
Page 18: Service And Adjustment
All four tines are different and cannot be in- terchanged. The tines must be correctly installed or the cultivator will not function properly. To till around plants or in small areas, the outside tines can be removed to reduce the tilling width to approximately 7 inches. -
Page 19: How To Adjust The Carburetor
If the tines turn with the throttle control is released, adjust the engine idle speed as follows. 10. Have someone tilt the cultivator back on its depth stake so that the tines are off the ground. 11. Start the engine. - Page 20 Gasoline fumes can cause an explosion or a fire. When the cultivator is put in storage for thirty days or more, follow the steps below to make sure the cultivator is in good condition the following season.
-
Page 21: Troubleshooting Chart
TROUBLE SHOOTING CHART TROUBLE Engine difficult to start Engine runs erratically Engine runs erratically Engine will not run at full Engine will not run at full speed Engine speed does not increase properly Engine smokes excessively Tines continue to rotate when throttle control is released Tines will not turn... - Page 22 REF. THROTTLE MOUNT SCREW 2.0HP Engine 56694 Flat washer 335350 Rotor 120380 Washer F–031305L REF. UPPER HANDLES REF. LOWER HANDLES REF. TINE SHIELD –– 001x90 Screw 319306 Cable, Throttle F–031305L Instruction Manual 323392C...
- Page 23 F–031305L 1901017 Transmission 339390E701 Bracket, Depth Rod 180024 Screw, 1/4–20x1.25 782585 Nut, 1/4–20 318848C...
- Page 24 490 56158 Washer, Felt * Includes Key Nos. 484, 485 and four Key Nos 482. F–031305L MODEL 11052x92D 491 56157E701 Tine Assy. Inner LH 492 56155E701 Tine Assy. Outer LH 493 56156E701 Tine Assy. Inner RH 494 56154E701 Tine Assy. Outer RH...
- Page 25 F–031305L 331176 Z Wheel Support Assy. 56123 Clevis Pin 31x4 Hair Pin 338307 Tire & Rim 73664 Push On Nut 323396B...
- Page 26 942 783000 Formed Washer 943 120393 Flat washer 944 1901018 T Knob * Includes Key No. 950 + Includes Key No. 949 F–031305L MODEL 11052x92D 946 56778 947 426635 948 712267 949 305828 950 48x4030 319375C Hand Grip Screw 10–16x1.5...
- Page 27 NOTES F–031305L...
-
Page 28: How To Order Repair Parts
HOW TO ORDER REPAIR PARTS F–031305L...