Table of Contents
Advertisement
Quick Links
Download this manual
See also:
Field Engineering Manual
Advertisement
Table of Contents

Related Manuals for Muratec F-315


Summary of Contents for Muratec F-315
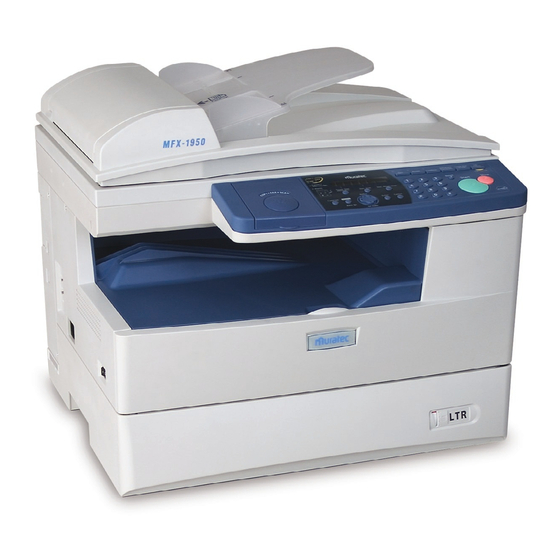
- Page 1 MFX-1950 / F-315 Plain-paper digital Fax/Copier/Printer/Scanner User’s Guide Please read this guide before operating this machine. After you finish reading this guide, keep it handy for easy reference.
-
Page 2: Safety Information
Explains the installing and operations of printer and scanner drivers. This PDF manual is included on the GDI Printer/Scanner Driver CD supplied with your machine. This manual and any updates to it can be found online at www.muratec.com Go to the “Support” section of this site, then click on “Manuals”. - Page 3 & I ayout nstaLLatIon ettInG started uto dIaLer endInG faxes eceIvInG faxes sInG the code box feature pecIaL features estrIctInG achIne ser settInGs eport & t aIntenance roubLeshootInG ppendIx and opyInG ccess & L Ists ndex...
-
Page 4: Table Of Contents
How to read this manual ...i Regulatory information ...ii United States of America ...ii Canada ...iii Limited warranty ... v Precautions ...vii Installing the machine ...vii Caution labels and indicators ...viii Transporting the machine ... ix Consumables ... ix Routine Maintenance ... x Ventilation ... - Page 5 Adding or editing a one-touch number ...3-4 Quick one-touch registration...3-5 Erasing a one-touch number ...3-5 How to dial using a one-touch key ...3-6 Speed-dial numbers ...3-7 Adding or editing a speed-dial number ...3-7 Erasing a speed-dial number ...3-7 How to dial using a speed-dial number ...3-8 Call group dialing ...3-9 Entering or changing a call group ...3-9 Erasing a call group ...3-10...
- Page 6 Setting the number of rings ...5-6 Print settings ...5-6 Advanced receiving functions ...5-8 Block junk fax ...5-9 Receive polling ...5-11 Fax forwarding ...5-12 Separator page ...5-14 Chapter 6 Using F-code box features ...6-1 F-code: an introduction ...6-2 Creating or modifying an F-code box ...6-2 Printing a list of F-code boxes ...6-7 Printing a list of documents stored in your F-code boxes ...6-7 Erasing an empty F-code box ...6-7...
- Page 7 Storing fax documents using a macro key ...8-7 Viewing counters ...8-8 Chapter 9 Security features ...9-1 Security features ...9-2 Passcode protection ...9-2 Security reception ...9-3 Masking the PIN ...9-5 Using department codes ...9-8 Turning department code protection ON and OFF ...9-8 Entering a department code ...9-8 Erasing a department code ...9-9 Turning the department code setting on and off ...9-9...
- Page 8 LCD error messages ...12-14 “Check Message” printouts...12-17 Error code ...12-18 Machine errors ...12-20 Faxing errors ...12-20 Copying errors...12-21 PC printing errors [CD] ...12-21 Scanner errors [CD] ...12-21 Print quality problems ...12-22 If you cannot solve the problem ...12-24 Appendix & Index ... AI-1 Specifications ...AI-2 General ...AI-2 Fax ...AI-3...
-
Page 9: How To Read This Manual
How to read this manual Symbols In this manual, the following symbols are used with the items where important operational and safety information must be observed. For safe operation, please carefully read the “Safety Information” sup- plied with this product. Describes warnings to protect yourself and others from serious or potentially fatal injury if you handle the machine incorrectly. -
Page 10: Regulatory Information
Customer information United States of America The MFX-1950/F-315 hereafter referred to as “product”, complies with Part 68 of the FCC rules and the requirements adopted by the ACTA. On the rear panel of the product is a label that contains, among other information, a product identifier in the format US: DKUFA23B004C (for MFX-1950/F-315). -
Page 11: Canada
NOTICE: The Ringer Equivalence Number (REN) for this terminal equipment is 0.9 (for MFX- 1950/F-315). The REN assigned to each terminal equipment provides an indication of the maximum number of terminals allowed to be connected to a telephone interface. The... -
Page 12: Energy Star
MMR, it is especially effective when transmitting halftone (grayscale) image document. Trademarks Muratec, the Muratec logo and all Muratec product names contained here in are trademarks of Murata Machinery, Ltd. and Muratec America, Inc. QuadAccess is trademarks of Muratec America, Inc. -
Page 13: Limited Warranty
1. This warranty will be honored only on presentation of the original dated autho- rized Muratec bill of sale or Muratec dealer bill of sale or sales slip to an authorized Muratec service representative or service center. For the name of your authorized service center, contact Muratec (from the United States, call 1-469-429-3350;... - Page 14 4. Muratec will not be required to make adjustments, repairs or replacements if the prod- uct is installed or used at a location deemed by Muratec to be hazardous to health or safety, or if Muratec is not provided with free and reasonable access to the product and a telephone during service availability hours, or if the product location is not acces- sible by an authorized Muratec service vehicle.
-
Page 15: Precautions
Precautions Besides the “Safety Information” supplied with this product, please observe the following instructions. Installing the machine • Do not let any object obstruct or plug the ventilation holes of this product. Accumu- lated heat inside the product could result in a malfunction. IMPORTANT •... -
Page 16: Caution Labels And Indicators
Caution labels and indicators The caution labels and indicators are attached to the machine as shown below, to avoid any serious injury. The fuser unit and the area around it inside the machine are extremely hot. To avoid getting burned, DO NOT TOUCH. •... -
Page 17: Transporting The Machine
Otherwise, the machine may move in an unexpected direction, poten- tially causing injury. • If you need to transport the machine over a long distance, consult your Muratec dealer. Consumables • Do not burn toner cartridges. Exposure to an open flame can cause the toner cartridge to burn or explode, causing serious injury. -
Page 18: Routine Maintenance
Routine Maintenance • Do not burn toner cartridges. Exposure to an open flame can cause the toner cartridge to burn or explode, causing serious injury. • The fuser unit and the area around it inside the machine are extremely hot when oper- ating. -
Page 19: Product Recycling And Disposal
Product Recycling and Disposal This product contains mercury in the fluorescent lamp in the scanner (< 5mg). Disposal of mercury may be regulated due to environmental considerations. For disposal or recycling information, please contact your local authorities. For California, USA only This Perchlorate warning applies only to primary CR (Manganese Dioxide) Lithium coin cells. - Page 20 This page intentionally left blank.
-
Page 21: Layout & Installation
Layout & Installation Packing contents ... 1-2 Machine layout ... 1-3 Control panel overview ... 1-4 Setting up the machine ... 1-7 Unlocking the mirror carriage ... 1-7 Attaching the document tray ... 1-7 Making connections ... 1-8 Installing the drum and toner cartridges ... 1-9 Plug in and power up ... -
Page 22: Packing Contents
NOTE: • The appearance of the AC power cord and telephone line cable vary according to countries. • The toner cartridge supplied with your machine is starter toner cartridge, which yield is shorter than regular toner cartridge. You can purchase regular, full-yield toner cartridge from your Muratec dealer. & I ayout nstaLLatIon... -
Page 23: Machine Layout
Machine layout The following illustration uses the MFX-1950. All illustrations used in this manual are of the MFX- 1950 unless otherwise noted. Automatic Document document feeder guides (ADF) Control panel Paper cassette 2nd paper cassette (Option) Front cover Paper level Indicator Telephone Connectors... -
Page 24: Control Panel Overview
Also, if you press this key while the machine is scanning, the machine will allow for the scanning of additional documents. once the current set has been completed. Paper Size (F-315 model) Selects the paper you want to use for copying. - Page 25 Stop Stops the machine’s operation. However, to stop a fax transmission, press <Job Confirm. /Fax Can- cel>. documents. * The document glass is available only for the MFX-1950 MFX-1950 F-315 Report Monitor Pause /Dial Opt. ayout or Legal size docu- or Legal size &...
- Page 26 Macro keys Programming the macro keys can reduce a multi-step operation into a one-touch executable. (See “Macro keys” on page 8-4 for more information.) One-Touch keys Instantly dials a pre-registered fax or phone number. & I ayout nstaLLatIon...
-
Page 27: Setting Up The Machine
Setting up the machine Unlocking the mirror carriage IMPORTANT: Do not turn the power on until after you have unlocked the scanner unit. Doing so could damage the machine. NOTE: This procedure is required only for MFX-1950. Slide the scanner unit lock switch to the unlock position as shown below. After you have unlocked the scanner unit, turn the transport mode off. -
Page 28: Making Connections
Making connections Telephone line connection Attach the supplied ferrite core to the telephone line cable as illustrated below. Plug the telephone line cable into the LINE jack and the other end to the wall jack. Telephone wall jack If you want to use your machine for receiving both faxes and voice calls, connect the optional handset or an external telephone to your machine. -
Page 29: Installing The Drum And Toner Cartridges
Installing the drum and toner cartridges Pull the release lever to open the side cover. Open the front cover. Turn the toner cartridge locking lever to the left (unlock position). Unpack the drum cartridge from its carton and slide it into the machine firmly until it locks into place. - Page 30 Unpack the starter toner cartridge from its carton. Then, holding the toner cartridge with both hands, gently shake it to distribute the toner evenly inside the cartridge. NOTE: Do not touch the roller of the toner cartridge. Slide the toner cartridge into the machine firmly until it locks into place. Turn the cartridge locking lever to the right until it locks into place.
-
Page 31: Plug In And Power Up
The scanner unit will move to home position and the machine will be ready to use. IMPORTANT: • The transport mode will not appear on the F-315. • If you must move the machine, turn this mode to on, then power off and lock the scanner unit by sliding the lock switch. -
Page 32: Loading Paper And Adjusting The Paper Size Setting
Press <Enter>. You will hear a dial tone. Press <t> or <u> to adjust the volume. Tel Mode Volume : Press <Advanced Functions> repeatedly to select “Monitor” and press <Enter> to hang up. For F-315, press <Monitor> to hang up. 1-12 L & I ayout nstaLLatIon >... -
Page 33: Initial Setup
Initial setup Clearing stored settings Before using your machine, clear the built-in user data. This ensures that the memory will hold only your settings. IMPORTANT: After specifying the initial settings, do not clear the memory again without an authorized technician’s advice. To clear the memory: Press <Menu>, <... -
Page 34: Specifying Initial Settings
Specifying initial settings If you press <Reset> during initial setup, your machine returns to standby mode. But it will keep the settings you saved by pressing <Enter> as described below. Switch to the fax mode by pressing < Language Press <Menu>, <9>, <Enter>. The machine will show the current language setting. -
Page 35: Dial Tone Detection
Opt.” is displayed, then press <Enter>. Repeat this procedure again to enter a “–” character on the LCD. For F-315 — Simply press <Pause /Dial Options> twice. • If you make a mistake, press <Cancel> to erase the digit on the left. -
Page 36: Eco Mode Setting
If you make a mistake, press <Cancel> to erase to the left. To change just one character, press <t> or <u> to move the cursor, press <Cancel> to erase it. Then re-enter the correct character. Press <Enter>. TTI 2 If you do not want to enter TTI 2, skip to step 23. Use the numeric keys to enter the name for TTI 2. -
Page 37: Using The Energy Save Mode
Energy Save Timing (001-240) Enter the time (in minutes) using the numeric keys. Press <Enter> to save the setting. The machine will show the current setting. Scanner Sleep: Press <q> or <p> to select “On” or “Off”, then press <Enter>. If you select “On”, go to step 35. -
Page 38: Installing Drivers [Cd]
Installing drivers [CD] To use your machine as a printer or a scanner, install the drivers on the supplied CD to your computer. For further information of installing, printer driver and scanner driver, see the manuals on the CD. 1-18 L &... -
Page 39: Getting Started
Operating tips ... 2-2 Switching the machine mode ... 2-2 Entering characters ... 2-2 Backup memory ... 2-3 Selecting a function ... 2-4 Function table ... 2-5 Document and paper handling ... 2-10 Document handling ... 2-10 Paper handling ... 2-12 Chapter Getting started... -
Page 40: Operating Tips
Operating tips Switching the machine mode To switch the machine mode, press < The mode light indicates what mode the machine is in. NOTE: You cannot switch the mode in any of the following cases: • When scanning a document. •... -
Page 41: Backup Memory
Upper and lower case characters Press <#> to toggle between upper and lower case. TTI1 “Upper” means the machine will enter only upper-case letters, similar to the “Caps Lock” button on your PC. “Lower” means the machine will enter only lower-case letters. Entering symbols You can also enter special characters or symbols. -
Page 42: Selecting A Function
Selecting a function To start setting a function, you must first press <Menu>. The two ways of selecting a function are described below. The procedures described in this manual are using short-cut operations. Short-cut operation with the numeric keys Press <Enter>, then press a three- or four-digit numbers to select the function. For example, “Press <Menu>, <2>, <1>, <0>, <1>, <Enter>”…... -
Page 43: Function Table
Report Soft key 1: Sort Copy Monitor Soft key 2: Bypass Pause /Dial Opt. Soft key 3: Combine Delayed F-315: Batch Tx Soft key 1: Report Select TTI Soft key 2: Monitor Select Line Soft key 3: Pause /Dial Options... -
Page 44: G Etting Started
Function menu Function menu Function menu level one level two level three 2. User 1. Machine 07. Primary Settings Settings Mode 08. Service Mode 09. Date & Time Sets the current date and time 10. Paper Source 11. Page Counter 2.Fax 01. - Page 45 Store the appropriate access number to — access the alternative telephone service provider. On/Off setting for E-mail gateway. Avail- able only for the MFX-1950/F-315 with optional network interface card. You can set the following for copying. • Primary document type Text, Photo&Text, Photo •...
- Page 46 Function menu Function menu Function menu level one level two level three 3. Other 3. Department 2. Enter Settings Code Dept. Code 3. Erase Dept. Code 4. Set Dept. Setting 5. Reset Dept.Count 4. F-Code Box 1. Set F-Code Box 2.
- Page 47 Function menu Function menu Function menu level one level two level three 5. Print 1. List Print 03. Fax Settings 04. Copy Settings 05. Journal 06. Commands List 07. One-Touch List 08. Speed-Dial List 09. Group List 10. Block Junk Dial List 11.
-
Page 48: Document And Paper Handling
Document and paper handling Document handling Be sure to read the following guidelines before you begin the sending, copying or scanning. Acceptable documents Single-sheet Size Max. 8.5 × 35.43 in.* (W × L) (216 × 900 mm)* Min. 4.72 × 3.94 in. (120 ×... -
Page 49: Scanning Area
Scanning area The scanned area is shown below. Fax : 0.1 in. (2.5 mm) Copy : 0 in. (0 mm) Fax : 0.08 in. (2.0 mm) Copy : 0 in. (0 mm) Loading documents in the ADF Insert the documents face up, top edge first. Adjust the document guides to the document size. -
Page 50: Paper Handling
Paper handling Acceptable paper sizes Paper cassette Paper type Plain paper (weight: 20–24 lbs.) Bypass tray Paper type Plain paper (weight: 20–24 lbs.) Envelopes Postcard Transparency • Custom-sized paper can be used for PC printing only. • A5-sized paper cannot use for PC printing, but A5 •... -
Page 51: Printable Area
Printable area The printable area is shown below. 0.12 in (3 mm) 0.12 in (3 mm) 0.12 in (3 mm) Loading paper into the paper cassettes NOTE: After you load paper into the paper cassettes, you need to set the paper size you loaded. - Page 52 NOTE: When setting paper longer than letter paper size, remove the guide stopper from the back of the end guide, and then replace and secure it on the groove in front of the end guide (the guide stopper will be under the paper). The guide stopper Load the paper into the cassette.
-
Page 53: Loading Paper Into The Bypass Tray
Loading paper into the bypass tray When you need to use a paper size that is not currently loaded in the paper cassette, or when you want to print on a envelope, transparency film or custom sized paper, use the bypass tray. -
Page 54: Setting Of The Paper Size
After loading paper into the bypass tray, you need to set the correct paper size by pressing <Bypass>. (For F-315, press <Advanced functions> repeatedly until “Bypass” is displayed on the LCD and then press <Enter>.) Bypass Tray Press <q> or <p> to select the paper size you want to use. -
Page 55: Autodialler
Autodialer basics ... 3-2 Autodialers ... 3-2 Call groups ... 3-2 Destination names and phone directory dialing ... 3-2 Special dialing characters ... 3-3 One-touch keys ... 3-4 Adding or editing a one-touch number ... 3-4 Quick one-touch registration ... 3-5 Erasing a one-touch number... -
Page 56: Autodialer Basics
Autodialer basics Your machine’s autodialer stores your most frequently called phone and fax numbers for instant recall. Autodialers There are two kinds of autodialer numbers. The difference between the two is how you dial them. Type One-touch key Speed-dial number Call groups Call groups are sets of fax numbers that make it easy to send the same fax message to several locations. -
Page 57: Special Dialing Characters
“/N” must be entered before the first of number. NOTE: For details on how to assign “Pause /Dial Opt.” to a soft key, see page 8-2. “Pause/Dial Opt.” is defaulted to a soft key in F-315. Keystroke Press <Advanced Functions>... -
Page 58: One-Touch Keys
One-touch keys Adding or editing a one-touch number Your machine can store up to 40 one-touch numbers using the keys marked 1 to 40. Press <Menu>, <1>, <1>, <1>, then <Enter>. The empty one-touch number will be shown. Select One-Touch 01:No Number Stored Press <q>... -
Page 59: Quick One-Touch Registration
Quick one-touch registration Make sure that the machine is in the fax standby mode. Fax Ready Jul 15 2009 Press an empty one-touch key you want to register. The machine will show: 01:Enter One-Touch Yes Enter To cancel this operation, press <Cancel>. To store the one-touch number, press <Enter>. -
Page 60: How To Dial Using A One-Touch Key
How to dial using a one-touch key One-touch fax dialing Switch to the fax mode by pressing < Place the document on the ADF or the document glass. When you use the document glass, select the document size by pressing <Doc. Size>. Adjust the document resolution and contrast. -
Page 61: Speed-Dial Numbers
Speed-dial numbers Adding or editing a speed-dial number Your machine can store up to 160 speed-dial numbers, each designated by a three-digit identifier codes (001 through 160.) Press <Menu>, <1>, <2>, <1>, then <Enter>. The empty speed-dial number will be shown. -
Page 62: How To Dial Using A Speed-Dial Number
How to dial using a speed-dial number MFX-1950 control panel Fax dialing via speed-dial Switch to the fax mode by pressing < Place the document on the ADF or the document glass. When you use the document glass, select the document size by pressing <Doc. Size>. Adjust the document resolution and contrast. -
Page 63: Call Group Dialing
Call group dialing If you frequently send the same fax message to several destinations, use call group dialing. Call groups can store many one-touch keys and speed-dial numbers, so you can broadcast the fax message by simply performing the group dialing operation. Entering or changing a call group Your machine can store up to 32 call groups. -
Page 64: Erasing A Call Group
Erasing a call group Press <Menu>, <1>, <3>, <2>, then <Enter>. Press <q> or <p> to select the call group you want to erase. You can also select the call group by directly entering the two-digit identifier code (01-32). Press <Enter> twice. If you want to exit without erasing, press <Cancel>. -
Page 65: Phone Directory Dialing
Phone directory dialing Phone directory dialing is similar to an electronic phone book. The phone directory sorts and displays numbers alphabetically according to their names, so you can access them with ease. How to dial using the phone directory MFX-1950 control panel For a fax call: Place the document in the ADF and adjust the document mode and contrast. -
Page 66: If The Call Fails
If the call fails If the call fails, what happens next depends upon the kind of call it was. If it was a fax call… …Your machine will automatically redial the number. It keeps trying until one of the following occurs: •... -
Page 67: Sending Faxes
Before sending ... 4-2 Document handling ... 4-2 Scanning resolution ... 4-2 Scanning contrast ... 4-2 Mixing the document resolution and contrast in multiple pages ... 4-2 Sending method ... 4-3 Memory overflow message ... 4-3 Sending a fax ... 4-4 Memory transmission ... -
Page 68: Before Sending
Before sending Document handling Before you begin please review the acceptable document sizes and proper loading meth- ods on pages 2-10 to 2-11. Scanning resolution • Normal is suitable for most text documents and simple drawings. • Fine is ideal for maps, moderately complicated drawings, floorplans or handwritten documents. -
Page 69: Sending Method
Notes for real time transmissions: • Only one destination can be dialed • The document glass *1 “Monitor” has already been assigned to a soft key on the F-315 as default. *2 The document glass is available only for the MFX-1950. Memory overflow message In normal memory transmission, if you have stored too much information in your machine’s memory, a “Memory Overflow”... -
Page 70: Sending A Fax
Sending a fax Memory transmission Sending a fax using the ADF Switch to the fax mode by pressing < Fax Ready Jul 15 2009 Place your document on the ADF. (See page 2-11 for details.) Adjust the scanning resolution and contrast. (See page 4-2.) Dial the fax number. -
Page 71: Sending A Fax Using The Document Glass
Sending a fax using the document glass The document glass is available only for the MFX-1950. Switch to the fax mode by pressing < Fax Ready Jul 15 2009 Place your document on the document glass. (See page 2-11 for details.) Press <Doc. -
Page 72: Real-Time Transmission (Non Memory Transmission)
If you assigned “Memory Tx” to a soft key (page 8-2), turn off the memory transmission by simply pressing that key. NOTE: “Monitor” is a default soft key on the F-315. Dial the fax number. • Use the numeric keys to dial the number. -
Page 73: Redialing
Redialing Automatic fax redialing When using memory transmission and the line is busy, your machine will automatically redial the number up to two times in one minute intervals. If the last redial attempt fails, your machine prints (and/or displays) an error messages. While in the Auto Redial mode, “AutoRedial”... -
Page 74: Reviewing Or Canceling Commands
Reviewing or canceling commands Your machine can store many “Jobs” in its memory. It also keeps track of each command by assigning it a command number, like “C01.” Delayed commands, redial attempts and current fax transmissions are all stored in your machine’s memory and given a command number. -
Page 75: Reviewing Or Canceling Parts Of A Broadcast
Reviewing or canceling parts of a broadcast You also can review or cancel certain numbers within a broadcast: Press <Job Confirm./Fax Cancel>, then <Enter>. Press <q> or <p> to scroll through currently stored broadcast commands. C01:Broadcast When the command you want to cancel is shown, skip to step 6. If you want to review individual numbers within this broadcast, go on to step 4 with- out pressing <Cancel>. -
Page 76: View Or Print The Results Of Fax Transactions
View or print the results of fax transactions You can view the results of the last 70 transactions. Press <Job Confirm./Fax Cancel> and <q> or <p> to select “Show History”. Show History Press <Enter>. The machine will show the last fax transaction. Tx001:ABC 07/15 13:30 ... -
Page 77: Advanced Fax Functions
Advanced fax functions The <Advanced Functions> key is for easy access to the following fax functions listed in the table. NOTE: • To shorten a frequent-use operation, assigning the function to a soft key is recom- mended. For how to do this, see page 8-2. •... -
Page 78: Broadcasting
Broadcasting The fastest way to fax one document to many recipients is to broadcast it. In an ordinary broadcast, you can send faxes as you normally would, except you just add more fax numbers. You can enter up to 230 numbers: •... -
Page 79: Delayed Transmission
Delayed transmission Setting up a delayed transmission Your machine can store up to 99 delayed commands, each of which you can program up to 31 days in advance. Your machine only remembers the day of the month that it is supposed to send a delayed transmission. -
Page 80: Batch Transmission
Batch transmission Batch transmission allows you to store multiple documents in an electronic “basket” throughout the day and then fax that entire basket to one location. To do this, just tell the machine when and where the transmission should go. When that date and time arrives, your machine will transmit each document in the batch box to the remote fax machine. -
Page 81: Storing A Document For Batch Transmission
To change a name, press <t> or <u> to move the cursor, press <Cancel> to erase the name. Then enter the name correctly. Press <Enter> to save the batch box information. To create or modify another batch box, repeat procedures from step 2. To exit, press <Reset>. -
Page 82: Erasing A Document Stored In A Batch Box
Erasing a document stored in a batch box: Press <Menu>, <4>, <2>, <3>, then <Enter>. Use the numeric key to enter the box number, then press <Enter>. Use the numeric key to enter the document’s file number. Press <Enter> to delete the document. If you want to quit the operation without erasing, press <Cancel>. -
Page 83: Selecting The Tti
Selecting the TTI Every fax page you send arrives at the receiving machine with a single line of text at the top of the page. This text lists your name, your fax number, date & time of transmission and page number as below. TTI information You can select the three types of TTI (your name) stored in the “Specifying initial settings”... -
Page 84: Polling Transmission
Polling transmission Polling transmission allows someone to retrieve a document stored in your machine’s memory. The stored document will be sent when the other party calls you. Storing a document for polling transmission Switch to the fax mode by pressing < If your machine is set for Tel Ready reception, change it to a reception mode other than Tel Ready. -
Page 85: Fax & Copy
Fax & Copy With the Fax & Copy feature turned on, your machine asks if you want to make a copy of a document each time it transmits. Setting the Fax & Copy function Press <Menu>, <2>, <1>, <0>, <6>, then <Enter>. –... -
Page 86: Cover Page
Cover page Your machine can store a cover page and send it at the beginning of each outgoing fax. Name Fax Number (Enter your message) (Enter your message) (Enter your message) Turning the cover page on Press <Menu>, <3>, <2>, <1>, then <Enter>. –... -
Page 87: Using Alternative Telephone Network Service Providers (Dial Prefix)
Press <Enter> to save it. Press <Reset> to exit and return to standby mode. NOTE: “Pause /Dial Opt.” has been assigned to soft key on the F-315 as default. Sending faxes with the Dial prefix feature To dial using the numeric keys Place the document on the ADF or document glass. -
Page 88: Sending Documents To An E-Mail Gateway (Fax Server)
Sending documents to an e-mail gateway (fax server) When this feature is activated, you can send documents to an e-mail gateway (fax server) by simply entering the fax number. The machine will automatically add a prefix and suffix to the fax number you have entered and send it to the e-mail gateway. NOTE: •... - Page 89 Sending faxes using an e-mail gateway Switch to the fax mode. Load the document. Make sure the e-mail gateway is “On”. NOTE: You can also set it “On” by pressing <Advance Functions> repeatedly. Specify the destination. Press <Start>. NOTE: • To cancel the transmission, press <Stop> while the machine is scanning a docu- ment.
- Page 90 This page intentionally left blank. 4-24 s endInG faxes...
-
Page 91: Receiving Faxes
Receiving a fax ... 5-2 Selecting the reception mode ... 5-2 Manual reception mode ... 5-2 Automatic reception mode ... 5-2 Answering calls manually ... 5-4 Switch between the automatic or manual reception mode ... 5-4 If the paper runs out during fax reception... 5-5 Settings for fax reception ... -
Page 92: Receiving A Fax
Receiving a fax Selecting the reception mode Press <Menu>, <9>, and then press <Enter> four times. The machine shows your current fax reception mode: Fax Ready Press <q> or <p> to select your desired reception mode. Your machine has five different reception modes: •... - Page 93 Fax/Tel Ready mode Use it if: • You want to use the same line for both fax and phone calls • You are using the machine as both a fax machine and a telephone , but its primary use will be for faxing. In this mode: Your machine receives faxes silently but also alerts you when a regular voice call comes in.
-
Page 94: Answering Calls Manually
Answering calls manually NOTE: • To answer a call manually, you must install an external phone to your machine. • Make sure the document is not set on the ADF. Receiving a call manually with an external phone In “Tel Ready” or “Tel/Fax Ready” mode, when the external phone rings, pick up handset: •... -
Page 95: If The Paper Runs Out During Fax Reception
If the paper runs out during fax reception When your machine runs completely out of paper, it beeps, the alarm light is lit, and the LCD shows the following message. Please Supply Paper Out-of-paper reception If your machine runs out of paper, it stores up to 250 fax receptions in its memory. This is called “out-of-paper reception.”... -
Page 96: Settings For Fax Reception
Settings for fax reception Setting the number of rings Default setting: Twice You can set how many times your machine will ring before answering a call. Press <Menu>, <2>, <2>, <0>, <3>, then <Enter>. # Of Rings (00-10) Use the numeric key to enter the number of rings you want. Press <Enter>... -
Page 97: Duplex Reception
Paper save function: •Half-page reception Half-page reception can conserve paper if some of the faxes you receive are half-page, “Memo-sized” messages. When activated, this feature tells the machine to combine two of these half-page receptions onto a single sheet. Half-page reception only combines half-page messages sent back-to-back during the same transmission. -
Page 98: Advanced Receiving Functions
Advanced receiving functions The <Advanced Functions> key is for easy access to the following fax functions listed in the table. NOTE: • To shorten a frequent-use operation, assigning the function to a soft key is recom- mended. For how to do this, see page 8-2. •... -
Page 99: Block Junk Fax
Block junk fax Your machine’s Block Junk Fax feature lets you bar the gates against unauthorized incoming faxes (“Junk fax”). But before you block junk fax, first understand how this feature works, to determine if it is right for you. There are four possible settings for Block Junk Fax: •... - Page 100 To change a specific digit, press <t> to move left or <u> to move right until the cursor is under the digit, then use the numeric key to enter the correct number. Press <Enter> to save the setting. If you do want to enter other number, repeat procedures from step 5. To exit, press <Reset>.
-
Page 101: Receive Polling
Receive polling Polling allows someone to fax a document to you without having to make the call or pay for it. There are two kinds of polling: • Regular polling — Your machine retrieves a document from a remote fax machine. •... -
Page 102: Fax Forwarding
Fax forwarding This feature tells the machine to forward the received document automatically to another fax machine. You can set the time period for the machine continue this process. NOTE: • Fax forwarding will not forward a polling reception and F-code reception docu- ments. - Page 103 You can activate or not activate the rules individually. To activate the rule, select “On”. To cancel the rule, select “Off”. Press <Enter>. The machine asks time period that the machine performs fax forwarding. 01:Enter Time **:**-- * Start transferring time Start transferring day Enter the day and time.
-
Page 104: Separator Page
Separator page The separator page function can separate each received document by inserting blank paper on the top of the received document. For example, if you use the colored paper for the separator page, it is easy to see the individual received document. Setting the Separator page Press <Menu>, <2>, <2>, <1>, <2>, then <Enter>. -
Page 105: Using F-Code Box Features
Chapter Using F-code box features F-code: an introduction ... 6-2 Creating or modifying an F-code box ... 6-2 Printing a list of F-code boxes ... 6-7 Printing a list of documents stored in your F-code boxes ... 6-7 Erasing an empty F-code box... 6-7 Storing a document in a bulletin box for polling ... -
Page 106: F-Code: An Introduction
F-code: an introduction The ITU-T, the United Nations agency that standardizes international telecommunica- tions, has created a fax industry standard for using subaddressing and password-based communication. With subaddressing, your machine can send secure transmissions, polling documents, and even perform relay broadcast initiations regardless of manufacturer. One name for the subaddressing is F-code, and that’s what we will call it in these instructions and on your machine’s LCD. - Page 107 Creating or modifying an F-code box: NOTE: If you want to change an existing F-code box type, you first must erase the old box, then create a new one. Press <Menu>, <3>, <4>, <1>, then <Enter>. Select F-Code Box 01:No Number Stored Press <q>...
- Page 108 Use the numeric keys to enter the ITU-T-compatible password for this box. This pass- word can be up to 20 characters in length and include any combination of numbers and the < * > and <#> characters (but no other non-numerical characters). To change a number, press <t>...
- Page 109 Press <q> or <p> to select “On” or “Off”, then press <Enter>. Go on to the next one. • Erase Tx Doc — Determines whether to erase a document from the box after it is sent to a polling request. Erase Tx Doc.
- Page 110 If you setup a Security box: The machine asks how long it should store documents in the F-code security box. F-Code Doc Hold Time (00-31) Use the numeric keys to enter a two-digit number indicating how many days (01–31), you want your machine to keep received documents in this security box. Your machine can store incoming documents in security boxes (up to 30 documents) as long as 31 days, after which it automatically erases the documents.
-
Page 111: Printing A List Of F-Code Boxes
Printing a list of F-code boxes To print a list of your F-code boxes, press <Menu>, <5>, <1>, <1>, <3>, then <Enter>. Printing a list of documents stored in your F-code boxes To print a list of documents stored in F-code boxes, press <Menu>, <5>, <1>, <1>, <4>, then <Enter>. -
Page 112: Storing A Document In A Bulletin Box For Polling
Storing a document in a bulletin box for polling Each bulletin box can hold up to 30 documents. Switch to the fax mode by pressing < Place a document on the ADF or document glass and make any necessary adjust- ments. -
Page 113: Printing A Document Stored In A Bulletin Box
Printing a document stored in a bulletin box Switch to the fax mode by pressing < Press <Menu>, <4>, <3>, <2>, then <Enter>. Select F-Code Box 01:Bulletin box 1 Press <q> or <p> to select the bulletin box. Then press <Enter>. 01:F-Code Document Enter I.D. -
Page 114: Printing A Document Received In The Security Box
Printing a document received in the security box When your machine receives a document via ITU-T subaddressing to an F-code security box, your machine prints a message to let you know. The message lists: (1) the F-code box number that received the document, (2) the Box name, (3) the remote machine’s name (if any), and (4) the file numbers stored in the F- code box. -
Page 115: Sending A Document Using A Subaddress And Password
Sending a document using a subaddress and password Switch to the fax mode by pressing < Place the document on the ADF or document glass. Adjust the document mode and contrast if necessary. Press <Advanced Functions> until “F-Code Tx” appears on the LCD then press <Enter>. -
Page 116: Polling A Document Using A Subaddress And Password
Polling a document using a subaddress and password Switch to the fax mode by pressing < Press <Advanced Functions> until “F-Code Polling” appears on the LCD then press <Enter>. F-Code Polling – or – Press the “F-Code Polling” soft key. Enter Sub-Address Use the numeric keys to enter the appropriate ITU-T subaddress. -
Page 117: Copying
Before copying ... 7-2 Document and paper handling ... 7-2 Changing your machine to the copy mode ... 7-2 Display in the copy standby mode ... 7-2 Memory overflow message ... 7-2 Making copies ... 7-3 Making copies using the ADF ... 7-3 Making copies using the document glass ... -
Page 118: Before Copying
Before copying Document and paper handling Before you begin making copies, please read the information mentioned on pages 2-10 to 2-16. Changing your machine to the copy mode Press the < copy Display in the copy standby mode Press < copy (For MFX-1950, the copy mode is the default standby mode.) When the machine is in the copy mode, the machine shows:... -
Page 119: Making Copies
Making copies Making copies using the ADF Switch the machine to copy mode by pressing < Copy Ready Auto Place your document face up on the ADF and adjust the document guides to the docu- ment size. As needed, set the copy settings including the document type and scanning contrast, number of copies, zoom ratio and sort setting. -
Page 120: Basic Copy Settings
Basic copy settings Selecting the document type • “Text” — Select this when copying letters. • “Photo&Text” — Select this when copying documents containing photographs or draw- ings with letters. • “Photo” — Select this when copying photographs or drawings. To select the document type: Press “Doc. -
Page 121: Number Of Copies
For MFX-1950 — Press <Sort>. The light above the <Sort> key will illuminate, which means the sorting copy is turned on. For F-315 — Press <Advanced Functions> once and press <Enter>. And turn on “Sort Copy” using the cursor key and press <Enter>. -
Page 122: Selecting The Document Size
Also, you can select the paper source manually by pressing <Paper Size /Next Doc.>. The LCD toggles the paper size in the 1st cassette, in the 2nd cassette (if installed) and on the bypass tray. Copy Ready Auto Legl If the bypass tray is empty, the machine shows “None” for the paper size of the bypass tray. -
Page 123: Advanced Copy Functions
Energy Save Online Mode switch *1 Appears only for the MFX-1950. *2 For details of PC printing, refer to the PDF manual on the GDI Printer/Scanner Driver CD supplied with the machine. For F-315 Advanced function Sort Copy Combine Zoom Bypass... -
Page 124: Combine
For MFX-1950 — Press <Combine>. The light above the <Combine> key will illumi- nate, which means the combine key is turned on. For F-315 — Press <Advanced Functions> repeatedly until “Combine” appears, then press <Enter>. And turn on “Combine” using the cursor key and press <Enter>. -
Page 125: Duplex Copy
Duplex copy This feature allows you to copy two one-sided documents onto double-sided sheet. This feature is available only for the MFX-1950. Document orientation on the ADF or document glass* NOTE: • When using the ADF, enlargement copy is not available. •... - Page 126 Duplex copying of a one-sided document Make sure the machine is in the copy mode. Place your document on the ADF face up or on the document glass face down. Press <Advanced Functions> until “Duplex Copy” appears and press <Enter>. Choose one of the following and press <Enter>.
-
Page 127: Copy Resolution
Copy resolution Both machines offer the highest copy quality available. However, this feature also requires more memory than with normal copy resolution. If you try to copy several pages at a time, memory overflow may occur. Make sure the machine is in the copy mode. Place your document in ADF face up, or on the document glass face down. - Page 128 This page intentionally left blank. 7-12 c opyInG...
-
Page 129: Special Features
Soft keys ... 8-2 Functions you can assign to a soft key ... 8-2 Programming a soft key ... 8-3 Macro keys ... 8-4 Steps you can program into a macro key ... 8-4 Creating or modifying a macro ... 8-5 Erasing a macro key ... -
Page 130: Soft Keys
However, in some cases, depending on the function, the light will not illumi- nate. (See table below.) The default setting for soft keys differs between MFX-1950 and F-315. Functions you can assign to a soft key The following table lists the functions you can assign to the soft key. -
Page 131: Programming A Soft Key
Used to set the paper size on the bypass tray. Used to set the duplex copy. Displays total printed and scanned pages. Switches to the energy save mode immediately. Cancels PC printing. Switches the machine’s mode. MFX-1950 F-315 Report Monitor Pause /Dial Opt. /Enter Light indi-... -
Page 132: Macro Keys
Macro keys If you perform the same operation repeatedly, you can automate the operation using a macro. A macro is a series of the several steps that you group together as a single com- mand to accomplish the operation automatically. A macro key faithfully records up to 60 steps. -
Page 133: Creating Or Modifying A Macro
Creating or modifying a macro Press <Macro Program>. 1.Set Macro Press <Enter>. Select Macro Key M1:No Command Stored Press the macro key you want to create or modify. Then press <Enter>. If you are creating a new macro, skip to next step. If you are modifying a macro already stored, the following two displays will appear. -
Page 134: Erasing A Macro Key
Enter the macro name by using the numeric keys. (If necessary, review “Entering characters” page 2-2) It can be store up to 130 characters. Press <Enter> to finish. NOTE: To print a list of macro keys, press <Menu>, <5>, <1>, <1>, <8>, then <Enter>. Erasing a macro key Press <Macro Program>... -
Page 135: Fax Dialing Using A Macro Key
Fax dialing using a macro key To dial a fax number using a macro key: Set the document. Press the macro key in which you have stored the fax communication command. Press <Start>, if you have not registered “Start” in the macro key. Your machine will perform the operation now, or at whatever time you programmed. -
Page 136: Viewing Counters
Viewing counters You can view the following counters. Total Print Copy Fax/List PC Print Total Scan Copy PC Scan Press <Menu>, <2>, <1>, <1>, <1>, <Enter>. • Press <q> or <p> to toggle between the total printed and scanned pages. TotalPrint:100000000 •... -
Page 137: Security Features
Security features ... 9-2 Passcode protection ... 9-2 Security reception... 9-3 Masking the PIN ... 9-5 Using department codes ... 9-8 Turning department code protection ON and OFF ... 9-8 Entering a department code ... 9-8 Erasing a department code ... 9-9 Turning the department code setting on and off ... -
Page 138: Passcode Protection
Security features Your machine has a number of security features to keep your private fax documents private, avoid unwanted outside communication and even protect against unauthorized use of your machine. These security features include: (1) Security reception, (2) PIN mask, (3) Block junk fax, and (4) Department codes. Passcode protection Your machine has a passcode protection system which must be turned on in order to use the security features listed below:... -
Page 139: Security Reception
Security reception Security reception tells your machine to keep all received faxes in memory (but not print them). You can print them out later at your convenience. For example, you could use this if you are concerned about workers reading documents intended for your eyes only. NOTE: For this feature to work, you must have activated the passcode protection as described in the left column. - Page 140 Press <Enter>. Security Press <q> or <p> to select “On”. Press <Enter>. The security reception mode is activated. Turning security reception off and Printing the document stored in memory During security reception mode, an incoming fax goes directly into your machine’s memory and the memory receive light comes on.
-
Page 141: Masking The Pin
Masking the PIN To prevent unauthorized long-distance calls, some PBX (private branch exchanger) sys- tems require a PIN (personal identification number) entry when dialing a number. Your machine’s PIN mask feature helps you keep that PIN number private. With the PIN mask feature activated, you can dial a number plus a PIN, but the PIN will not appear in a journal, error message printout, delayed command list or a TCR (transmit confirmation report). -
Page 142: Press Start
Use the numeric keys to enter the four-digit protection passcode and press <Enter>. 01:PIN Number Use the numeric keys to enter the PIN and press <Enter>. When you finish, press <Reset>. NOTE: While in Mode 1, any autodialer numbers you use must include the PIN. This also applies to autodialer numbers used with batch transmission. - Page 143 Performing a batch transmission while using the PIN mask NOTE: The following instructions presume you are familiar with how to set and use both your machine’s autodialer and the batch transmission feature. If you need to review, see pages 3-1 to 3-12 for more on the autodialer and/or pages 4-14 to 4-16 for more on batch transmission.
-
Page 144: Using Department Codes
Using department codes When the department code setting is activated, the machine reminds each user to enter the department code before sending a document or making copies. With this feature, the fax transaction time and the copy charge can be managed by department. After this setting is turned on, assign a specific code to each user/department and tell them to enter these department codes before sending faxes or making copies. -
Page 145: Erasing A Department Code
Press <Enter>. 01:Name Use the numeric keys to enter the one-touch key name. The name can hold up to 20 characters. (Regarding how to enter characters, see “Entering characters” on page 2-2.) To change the name, press <t> or <u> to move the cursor, press <Cancel> to erase the name. -
Page 146: Fax Charge Setting
Press <Enter>. Copy Department :Off Press <q> or <p> to select “On” or “Off” for copy department management. Press <Enter> to save the setting. To exit and return to the standby mode, press <Reset>. Fax charge setting You can manage the print charge for each fax reception. To enter the charge per page: Press <Menu>, <2>, <2>, <1>, <5>, then <Enter>. -
Page 147: Sending A Fax Using A Department Code
Sending a fax using a department code For this operation to work, make sure: • The department code should be set on your machine. • You know the department code. Place your document on the ADF or document glass. (See page 2-11 for details.) Adjust the document resolution and contrast. -
Page 148: Printing The Department Code List
Printing the department code list The department code list includes the following information for each department code: • Department code • Department name • Total communication time (in hours, minutes and seconds; h:mm:ss) Counts the communication time up to 999:59:59 (999 hours:59 minutes:59 sec- onds). -
Page 149: Copy Protection
Copy protection Limit the use of your machine to only sending and receiving faxes — in other words, to activate copy protection: Press <Menu>, <2>, <3>, <4>, then <Enter>. Copy Protect Enter Passcode :**** Press <q> or <p> to select “On” or “Off”. Copy Protect ... - Page 150 This page intentionally left blank. 9-14 s ecurIty features...
-
Page 151: User Settings
Machine settings ... 10-2 Accessing the machine setting ... 10-2 Fax settings ... 10-4 Accessing the fax settings ... 10-4 Copy settings ... 10-6 Accessing the copy setting ... 10-6 Scanner settings ... 10-7 Accessing the scanner setting ... 10-7 Chapter User settings... -
Page 152: Machine Settings
Machine settings The machine settings allows you to customize various settings of your machine to match your needs. Accessing the machine setting Press <Menu>, <2>, <1>. [Program] 1 Machine Settings Press <Enter>. [Program] 01 Cassette Size Use <q> or <p> to search the item you want to set or change and press <Enter>. Change setting and press <Enter>. - Page 153 07. Primary Mode The machine returns to the primary mode when the standby status contin- ues for longer than 3 minutes after finishing the sending or printing jobs. With this setting, the machine always starts up in the primary mode. In default settings, the copy mode is set for the primary mode.
-
Page 154: Fax Settings
Fax settings The fax settings allows you to customize various fax settings to match your needs. Accessing the fax settings Press <Menu>, <2>, <2>. [Program] 2 Fax Settings Press <Enter>. [Program] 01 Scan Parameters Use <q> or <p> to search the item you want to set or change and press <Enter>. Change settings and press <Enter>. - Page 155 03. # Of Rings Sets the number of rings (00 to 10 rings ) before your machine answers. # Of Rings 04. Redial Sets the number of times (00 to 14 times) and interval (0 to 5 minutes) for automatic fax redialing. # Of Redials Redial Interval 05.
-
Page 156: Copy Settings
Copy settings The copy settings allows you to customize various copy settings to match your needs. Accessing the copy setting Press <Menu>, <2>, <3>. [Program] 3 Copy Settings Press <Enter>. [Program] 1 Scan Parameters Use <q> or <p> to search the item you want to set or change and press <Enter>. Change settings and press <Enter>. -
Page 157: Scanner Settings
7. Resolution Default setting for copy resolution. 600dpi 300dpi 8. Copy Charge Sets the per page copy charge from $00.00 to 99.99 (page 9-10). $00.00 Scanner settings The scanner settings allow you to customize various scanner functions to match your needs. Accessing the scanner setting Press <Menu>, <2>, <4>. - Page 158 This page intentionally left blank. 10-8 u ser settInGs...
-
Page 159: Report & Lists
Table of the lists and journal ... 11-2 Activity journal ... 11-4 Setting the activity journal ... 11-4 Printing an activity journal manually ... 11-4 Setting the printing order of the activity journal ... 11-5 Transmission Confirmation Report ... 11-5 Setting the transmission confirmation report ... -
Page 160: Table Of The Lists And Journal
Table of the lists and journal The following table lists the report and lists that your machine can print out. Name Function List Lists the functions available on your machine and the key- strokes needed to complete them. To print this list, press <Menu>, <5>, <1>, <0>, <1>, <Enter>. Machine Settings List Lists the current machine settings. - Page 161 Name F-Code Box List Lists each box’s identifier number, box name (if any), sub- address, password, box type and each box’s settings. To print this list, press <Menu>, <5>, <1>, <1>, <3>, <Enter>. F-Code Doc. List Lists the each box’s identifier number, box name (if any), box type and each file number (or document number) that is stored.
-
Page 162: Activity Journal
Activity journal Just as a checkbook records your daily financial transactions, your machine keeps an activity journal which records the 100 most recent fax transactions. The activity journal lists the following information for each transaction: • Assigned number, starting each day at 001 •... -
Page 163: Setting The Printing Order Of The Activity Journal
Press <q> or <p> until the setting you want appears and press <Enter>. NOTE: You can change the present setting to the opposite for only one transmission by the following procedure. • Press <Report>. (F-315 only) — or — • Press <Advanced Functions> repeatedly until “Report” appears, then press <Enter>. -
Page 164: Stored Document List
Stored document list Your machine can print a list of documents stored in memory. It will tell you how much memory each document is using. The list includes: • Type — The type of the document, such as “Batch box”. •... -
Page 165: Maintenance & Problem Solving
Maintenance & Problem solving Maintenance ... 12-2 Cleaning tips ... 12-2 Cleaning the scanning area ... 12-2 Cleaning the ADF rollers ... 12-3 Cleaning the drum charge wire and the print head ... 12-3 Replace the toner cartridge... 12-4 Replacing the drum cartridge ... 12-6 Troubleshooting ... -
Page 166: Maintenance
Then wipe it with a clean, soft, dry, lint-free cloth until it is clean and dry. F-315 model Wipe the ADF glass with a clean, soft, lint-free cloth moistened with water. Then wipe it with a clean, soft, dry, lint-free cloth until it is clean and dry. -
Page 167: Cleaning The Adf Rollers
Cleaning the ADF rollers If you are having trouble with getting your documents to feed properly, try this proce- dure: Turn off the power and disconnect the power cable from the wall outlet. Open the ADF cover. Use a cloth moistened with a rubber roller cleaner to clean the face of the rollers. Rotate the rollers by hand to allow cleaning of the entire roller surface. -
Page 168: Replace The Toner Cartridge
Replace the toner cartridge When the toner runs out, your machine shows “Toner Empty” on the LCD and it cannot print any page until the toner cartridge is replaced to the new one. To replace the toner cartridge: Open the front cover. Turn the toner cartridge locking lever to the left (unlock position). - Page 169 Unpack the toner cartridge from its carton. Then, holding the toner cartridge with both hands, gently shake it to distribute the toner evenly inside the cartridge. NOTE: Do not touch the roller of the toner cartridge. Slide the toner cartridge into the machine firmly until it locks into place completely. Turn the cartridge locking lever to the right until it locks into place completely.
-
Page 170: Replacing The Drum Cartridge
Replacing the drum cartridge The drum cartridge yields approximately 20,000 pages. When the drum is near the end of life, the machine shows “Replace Drum Soon” on the LCD. You should obtain a replace- ment drum cartridge soon. When the machine shows “Replace Drum”, it cannot print until the drum cartridge is replaced. - Page 171 Reinstall the toner cartridge and turn the cartridge locking lever to the right until it locks into place completely. Close the front and side cover. & p aIntenance robLeM soLvInG 12-7...
-
Page 172: Troubleshooting
Troubleshooting Document jams Case 1: If a document jams in the ADF, the following message will be displayed. Open&Close ScanCover Reset Document Also, if a document jam occurs during a quick memory transmission or real time trans- mission, the following check message will be printed to tell you which page is jammed. Case 2: If a document jams while scanning into memory for sort copy or normal memory trans- mission, the machine will show:... - Page 173 Jammed in the input area Open the ADF cover. Gently remove the document from the ADF. If you cannot remove it, turn the release knob to remove the jammed document. Close the ADF cover, making sure both sides are snapped down securely. NOTE: •...
- Page 174 Close the platen and ADF covers. NOTE: • To prevent document jams, use the document glass for wrinkled or torn docu- ments. • The document glass is available only for the MFX-1950. Jammed in the exit area Open the platen cover. Gently pull the jammed document. If you are unsuccessful, open the ADF cover and turn the release knob to remove the jammed document.
-
Page 175: Paper Jams
Paper jams If a paper jam occurs, the following message will appear on the LCD. Open 1st Side Cover Please Remove Paper Follow these procedures to clear the paper jam. If a paper jam occurs during fax reception, the machine will store the received document into memory and print them automatically when you clear the paper jam. - Page 176 Jammed in the fuser area Jammed in the paper exit area If the jammed paper was partially fed and you cannot seize it easily: Open the paper cassette. After you pull it out completely, lift the front part of the cas- sette slightly up to release the cassette from the machine.
- Page 177 Close the side cover and insert the paper cassette. Lower the rear part of the cassette to align the rear edge to the slot of the machine, then insert it completely. & p aIntenance robLeM soLvInG 12-13...
-
Page 178: Lcd Error Messages
You tried to erase a batch box which contains at least one document. To erase a batch box, erase all the documents stored in the box. Drum Near End Your drum will need to be replaced soon. Please contact your Muratec dealer to purchase a new drum cartridge. Enter No. (00-32) You tried to enter a call group number that exceeds 32. - Page 179 Memory has overflowed during the fax reception. Press <Stop> to return the standby screen. Mirror Carriage Error The mirror carriage of your machine has become inoperable. Contact your Muratec dealer. Mirror Locked The transport mode is not turned off. Turn off the transport mode (page 1-11).
- Page 180 Press Stop Please Call Service The printer unit of your machine does not work. Contact your Muratec dealer. Please Replace Drum Your drum cartridge is not functioning. Your machine cannot print until it is replaced with a new drum cartridge.
-
Page 181: Check Message" Printouts
“Check Message” printouts When there is a problem with a fax call and your machine detects an error, it produces an error printout headed by the words “Check Message”. This printout lists the follow- ing information about the fax transaction: •... -
Page 182: Error Code
Error code Dialing errors D.0.3, The remote unit didn’t respond, the call couldn’t be completed or <Stop> was D.0.8 pressed during dialing. Re-try the call. If your machine repeats the message, call the remote fax unit’s operator and verify that unit is operating properly. D.0.2 The remote unit is busy. - Page 183 T.4.1 The telephone line disconnected during transmission because of excessive modem errors or because the remote unit ran out of paper. Try the call again. T.4.2 After transmission began, poor line conditions developed. Try the call again. T.4.4 Poor line conditions prevented transmission. Try the call again. T.5.1, ECM transmission failed (perhaps due to line noise).
-
Page 184: Machine Errors
Machine errors Symptom The LCD shows nothing, and the keys are not working. The machine is not activated when the power switch is turned on. The machine beeps and shows an error message. Documents jam frequently Paper Jams Frequently Faxing errors Symptom Cannot send Cannot stop transmission... -
Page 185: Copying Errors
Symptom Cannot scan a document • The TWAIN driver may not be installed properly. “Muratec Color TWAIN Scanner” • The TWAIN driver may not be installed properly. does not appear in the list of the available scanner device on your application software. -
Page 186: Print Quality Problems
(See page 12-3.) • The toner cartridge may be defective. Remove the toner cartridge and check it for damage. If the problem persists, contact Muratec dealer. • Contrast selected was too light. Select a darker contrast setting. • The toner cartridge may be out of toner, or the toner may be very low. - Page 187 Your machine normally cleans the transport roller automatically. If other solu- tions fail, please contact your Muratec dealer. Correctly position the document against the document scales. If you are using the ADF, correctly adjust the document guides for the size of the document.
-
Page 188: If You Cannot Solve The Problem
If you have a problem with your machine that you cannot solve with the information provided in this chapter, contact your local Muratec dealer or call the Muratec Customer Support Centre at (800) 347-3296 (from U. S. A. only ). -
Page 189: Appendix & Index
Appendix & Index Specifications ... AI-2 General... AI-2 Fax ... AI-3 Copy ... AI-3 Printer ... AI-3 Scanner ... AI-4 Consumable items ... AI-4 Index ... AI-5 Chapter... -
Page 190: Specifications
Specifications General Multitasking Scanning method Printing method Acceptable document size Document weight Printing paper size Power requirement Power consumption Environmental temperature 10 Relative humidity LCD (Liquid Crystal Display) 20 characters × 2 lines Image memory capacity Image memory backup time 8 MB: 72 hours* Weight ADF capacity Paper cassette capacity... -
Page 191: Fax
Approx. 3 seconds/page.* * Based on memory-to-memory transmission of ITU-T test document 1 to a Muratec fax machine. Your transmission times will vary, but your machine always will provide the fastest transmission speeds possible under ITU-T guidelines and phone-line conditions. -
Page 192: Scanner
Drum cartridge life Toner cartridge life Starter toner cartridge life Approx. 2,000 pages* *Based on 6% document coverage and letter-sized two-page interval printing. F-315 Drum cartridge life Toner cartridge life Starter toner cartridge life Approx. 3,000 pages* *Based on 4% document coverage and letter-sized two-page interval printing. -
Page 193: Index
Index Activity journal ... 11-4 Advanced functions copying ... 7-7 fax reception ... 5-8 fax sending ... 4-11 Auto Reset ... 10-7 Auto Reset Time ... 10-6 Batch transmission ... 4-14 Broadcasting ... 4-12 Call group dialing ... 3-9 Cassette size ... 10-2 Caution labels and indicators ... - Page 194 Loading paper in bypass tray ... 2-15 in cassette ... 2-13 Loading the documents ... 2-11 Machine setting ... 10-2 Macro keys ... 8-4 Memory overflow message ... 4-3, 7-2 Memory transmission ... 4-3, 10-5 sending using the ADF ... 4-4 sending using the document glass 4-5 Mixing document resolution and contrast ..
- Page 195 MEMO...
- Page 198 Muratec America, Inc. 3301 East Plano Parkway, Suite 100 Plano, Texas 75074 http://www.muratec.com 31981 92852 © 2009 MURATA MACHINERY, LTD. Part Number: DA7-92430-60 MAI Order Number: OMF315...