
Related Manuals for LEXIBOOK DJ021 series


Summary of Contents for LEXIBOOK DJ021 series
- Page 1 Appareil photo numérique Digital Camera MODE D’EMPLOI - INSTRUCTION MANUAL DJ021series DJ021IM1202_15May_V04.indb 1 16/05/2012 10:55 AM...
- Page 2 DJ021IM1202_15May_V04.indb 2 16/05/2012 10:55 AM...
-
Page 3: Contenu De L'emballage
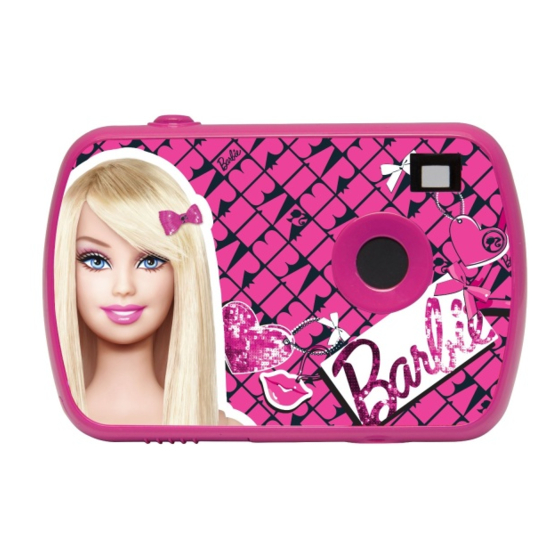
PRÉSENTATION DE VOTRE APPAREIL PHOTO 1. Attache pour dragonne 7. Bouton PLAYBACK 2. Déclencheur/bouton de confirmation 8. Écran LCD 3. Objectif 9. Douille de fixation du trépied (trépied non fourni) 4. Viseur optique 10. Compartiment des piles 5. Bouton POWER/MENU 11. - Page 4 « MAGIX Video easy SE » : logiciel d’édition de clips vidéo 1. Appuyez 1. Insérez le CD des logiciels (inclus) dans votre lecteur de CD-ROM. 2. Maintene 2. Dans le menu principal, commencez par installer le driver nécessaire en cliquant sur “Install Driver”, photo hors puis attendez la fin de la procédure d’installation.
-
Page 5: Naviguer Dans Le Menu
MISE EN MARCHE ET ARRÊT DE L’APPAREIL PHOTO 1. Appuyez sur le bouton POWER/MENU pour mettre l’appareil photo en marche. 2. Maintenez le bouton POWER/MENU enfoncé pendant quelques secondes pour mettre l’appareil stall Driver”, photo hors tension. Note : L’appareil photo s’éteindra automatiquement après 30 secondes d’inactivité. raction des NAVIGUER DANS LE MENU Une fois l’appareil mis en marche, appuyez sur POWER/MENU pour accéder à... - Page 6 4. Sélection SUPPRIMER VOS PHOTOS / VIDÉOS toutes les s Suppression photo par photo rouge appa Une fois l’appareil mis en marche, appuyez sur PLAYBACK pour afficher les photos/vidéos 5. Sauvega enregistrées dans la mémoire interne. Utilisez UP pour les faire défiler et sélectionner alors le nom celle(s) que vous souhaitez supprimer.
- Page 7 4. Sélectionnez la/les photo(s) et vidéo(s) que vous souhaitez sauvegarder. Cliquez sur l’icône pour toutes les sélectionner, ou cliquez directement sur la/les photo(s)/vidéo(s) de votre choix (un cadre rouge apparait alors autour de chaque photo/vidéo) si vous ne souhaitez pas toutes les sauvegarder. déos 5.
-
Page 8: Entretien Et Garantie
Aucune partie de ce mode d’emploi ne doit être reproduite sans le consentement écrit du fabricant. Référence : DJ021series Conçu et développé en Europe – Fabriqué en Chine © 2012 Lexibook® LEXIBOOK S.A, 2, avenue de Scandinavie, Ce produit n’est pas un jouet. -
Page 9: Getting To Know Your Camera
GETTING TO KNOW YOUR CAMERA 7. PLAYBACK Button 1. Strap hole 8. LCD display 2. Shutter/Set button 9. Tripod hole (tripod not included) 3. Camera lens 10. Battery compartment 4. Optical viewfinder 11. USB connector port 5. POWER/MENU button 6. UP button CONTENTS OF THE PACKAGING 1 x DJ021 digital camera / 1 x USB cable / 1 x Hand strap / 1 x CD-ROM / 1 x Instruction manual WARNING: All packaging materials, such as tape, plastic sheets, wire ties and tags are not part of... - Page 10 INSTALLING THE VIDEO SOFTWARE (Magix Video easy SE) 1. Insert the CD Software (included) into your CD-ROM drive. 1. Press th 2. In the main menu, first install the driver by clicking “Install Driver” and wait until the end of the 2.
-
Page 11: Navigating Within The Menu
TURNING THE CAMERA ON AND OFF 1. Press the POWER/MENU button to turn the camera on. f the 2. Press and hold the POWER/MENU button for a few seconds again to turn it off. Note : The camera will auto power off after 30 seconds of inactivity. NAVIGATING WITHIN THE MENU ions and Once the camera has been turned on, press POWER/MENU to get to its menu. -
Page 12: Selecting The Resolution
DELETING YOUR PHOTOS / VIDEOS Deleting photos/videos one by one Using « Du Once the camera has been turned on, press PLAYBACK to display the photos and videos stored in 1. Connect the camera’s built-in memory. Use UP to scroll them and select the one(s) you want to delete. Then 2. - Page 13 DOWNLOADING YOUR PHOTOS / VIDEOS Using « Dual Mode Camera » stored in 1. Connect the camera to a computer with the USB cable supplied. te. Then 2. On your desktop, open the folder “Dual Mode Camera”, and then double click “My Dsc”. e shutter 3.
-
Page 14: Webcam Mode
Reference: DJ021series 0808 100 3015 Designed and developed in Europe – Made in China http://www.lexibook.com © 2012 Lexibook® This product is not a toy. Environmental Protection Unwanted electrical appliances can be recycled and should not be discarded along with regular household waste! Please actively support the conservation of resources and help protect the environment by returning this appliance to a collection centre (if available). -
Page 15: Contenido Del Embalaje
FAMILIARÍCESE CON SU CÁMARA 1. Orificio para sujeción de la correa de transporte 7. Botón PLAYBACK 2. Botón obturador 8. Pantalla LCD 3. Lente de la cámara 9. Orificio para trípode (no incluido) 4. Visor óptico 10. Compartimento de las pilas 5. - Page 16 INSTALACIÓN DEL SOFTWARE PARA EDITAR VIDEOCLIPS (MAGIX Video easy SE) 1. Inserte el CD de software (incluido) en la unidad de CD-ROM de su ordenador. 1. Pulse el 2. En el menú principal, instale primero el controlador haciendo clic en “Install Driver” y espere hasta 2.
-
Page 17: Navegar Por El Menú
asy SE) ENCENDER Y APAGAR LA CÁMARA 1. Pulse el botón POWER/MENU para encender la cámara. ere hasta 2. Vuelva a mantener pulsado el botón POWER/MENU durante unos segundos para apagar la cámara. a que se Nota: La cámara se apagará automáticamente al cabo de 30 segundos si no detecta actividad alguna por parte del usuario. - Page 18 ELIMINAR FOTOS / VÍDEOS 5. Guarde l elija el nom Eliminar fotos y/o vídeos uno a uno Una vez encendida la cámara, pulse PLAYBACK para mostrar las fotos y vídeos almacenados en la Usar el «G memoria de la cámara. Use el botón UP para desplazarse por las fotos y vídeos y seleccione el(los) que desee eliminar.
- Page 19 5. Guarde la(s) foto(s) y/o vídeo(s) seleccionado(s) haciendo clic en el icono . A continuación, elija el nombre y la ruta de acceso de la carpeta donde va a guardar la(s) foto(s) y/o vídeo(s). ados en la Usar el «Gestor de fotos MAGIX» ne el(los) ar “Yes”...
-
Page 20: Mantenimiento Y Garantía
Referencia: DJ021series España Servicio atención al cliente: 902367933 Diseñado y desarrollado en Europa – Fabricado en China © 2012 Lexibook® http://www.lexibook.com Este producto no es un juguete. Advertencia para la protección del medio ambiente ¡Los aparatos eléctricos desechados son reciclables y no deben ser eliminados en la basura doméstica! Por ello pedimos que nos ayude a contribuir activamente en el ahorro de recursos... -
Page 21: Conteúdo Da Caixa
CONHECER A SUA CÂMARA 1. Orifício para a alça 7. Botão PLAYBACK 2. Obturador 8. Ecrã LCD 3. Lente da câmara 9. Orifício para o tripé (tripé não incluído) 4. Visor óptico 10. Compartimento das pilhas 5. Botão POWER/MENU 11. Porta de ligação USB 6. - Page 22 INSTALAR O SOFTWARE PARA EDITAR CLIPES DE VIDEO (MAGIX Video easy SE) 1. Insira o CD do Software (incluído) na sua unidade de CD-ROM. 1. Prima o 2. No menu principal, instale primeiro o controlador, clicando em “Install Driver” e espere até ao fim 2.
-
Page 23: Ligar E Desligar A Câmara
LIGAR E DESLIGAR A CÂMARA asy SE) 1. Prima o botão POWER/MENU para ligar a câmara. é ao fim 2. Prima e mantenha premido o botão POWER/MENU durante alguns segundos para a desligar. Nota: A câmara desliga-se automaticamente passados 30 segundos de inactividade. ão. - Page 24 Usar o “MA APAGAR FOTOS / VÍDEOS Quando tiv Apagar fotos e vídeos um a um para os vis Quando a câmara for ligada, prima PLAYBACK para visualizar as fotos e vídeos guardados na 1. Ligue a c memória incorporada da câmara. Use UP para os correr e escolha os que deseja apagar. Depois, 2.
- Page 25 Usar o “MAGIX Photo Manager” Quando tiver guardado as fotos e vídeos no seu computador, pode usar o “MAGIX Photo Manager” para os visualizar, numerar, imprimir, criar álbuns... s na 1. Ligue a câmara a um computador com o cabo USB fornecido. Depois, 2.
- Page 26 © 2012 Lexibook® Portugal AJ Aguiar – Comércio Geral, Lda. Avenida Principal, 4300 | 4535-013 Lourosa - Portugal T. +(351) 220 824 521 | lexibook@ajaguiar.com http://www.lexibook.com Este produto não é um brinquedo. Indicações para a protecção do meio ambiente Aparelhos eléctricos antigos são materiais que não pertencem ao lixo doméstico! Por isso pedimos para que nos apoie, contribuindo activamente na poupança de recursos e na...
-
Page 27: Contenuto Della Confezione
LIBRETTO DI ISTRUZIONI PER LA FOTOCAMERA DIGITALE 1. Foro per laccio 7. Tasto PLAYBACK 2. Otturatore 8. Display LCD 3. Obiettivo macchina fotografica 9. Foro cavalletto (cavalletto non in dotazione) 4. Mirino ottico 10. Vano batterie 5. Tasto POWER/MENU 11. Porta connettore USB 6. - Page 28 INSTALLAZIONE DEL SOFTWARE PER L’EDITING DI VIDEO CLIPS 1. Inserire il CD col software (incluso) nel drive del CD-ROM del computer. Una volta a 2. Dal menù principale, installare prima il driver cliccando su “Install Driver” e attendere la fine del selezionare processo di installazione.
- Page 29 NAVIGARE ALL’INTERNO DEL MENU Una volta accesa la fotocamera, premere POWER/MENU per entrare nel menù. Premere UP per ne del selezionare una delle funzioni del menù, poi premere l’otturatore per scorrere le varie opzioni della funzione selezionata e premere infine POWER/MENU ancora una volta per confermare la scelta. SCATTO DI FOTO / RIPRESE VIDEO schermo e Una volta accesa la fotocamera, premere POWER/MENU per entrare nel menù.
- Page 30 Pubblicare SELEZIONE DELLA RISOLUZIONE 1. Su «Mag 2. L’immag Una volta accesa la fotocamera, premere POWER/MENU per entrare nel menù. Selezionare la 3. Nella ba funzione “risoluzione” simbolizzata dall’icona . Premere il pulsante dell’otturatore per web» (Uplo media to Fl selezionare una delle due risoluzioni disponibili (risoluzione bassa o alta 4.
-
Page 31: Webcamera Mode
Pubblicare foto sui siti di reti sociali: 1. Su «Magix Photo Manager 10», seleziona la foto che desideri pubblicare su Facebook o Flickr. 2. L’immagine selezionata appare con una cornice arancione. re la 3. Nella barra dei menù, clicca sul foglio «Online» e seleziona «Carica file multimediali su altri servizi web»... - Page 32 Nota: Conservare il manuale di istruzioni in quanto contiene informazioni importanti. Riferimento: DJ021series Progettato e sviluppato in Europa – Fabbricato in Cina © 2012 Lexibook® http://www.lexibook.com Questo prodotto non è un giocattolo. Avvertenze per la tutela dell’ambiente Gli apparecchi elettrici vecchi sono materiali pregiati, non rientrano nei normali rifiuti domestici! Preghiamo quindi i gentili clienti di contribuire alla salvaguardia dell’ambiente e delle risorse e di...
- Page 33 ÜBERSICHT ÜBER DIE KAMERAELEMENTE 1. Haltebandöse 7. PLAYBACK-Taste 2. Auslöser 8. LC-Display 3. Kameralinse 9. Stativanschluss (Stativ nicht im Lieferumfang enthalten) 4. Optischer Sucher 10. Batteriefach 5. POWER/MENU-Taste 11. USB-Anschluss 6. UP-Taste VERPACKUNGSINHALT 1 x DJ021 Digitalkamera / 1 x USB-Kabel / 1 x Halteband / 1 x CD-ROM / 1 x Bedienungsanleitung WARNUNG: Alle Verpackungsmaterialien, wie Klebeband, Plastikfolie, Kabelbinder und Aufkleber gehören nicht zu dem Digitalkamera und müssen weggeworfen werden.
-
Page 34: Kamera Ein- Und Ausschalten
3. Klicken Sie im Hauptmenü auf „Install MAGIX Video easy SE“ und warten Sie während der durch die v Extrahierung. auf POWE 4. Wählen Sie die Sprache aus und klicken dann “OK”. 5. Das Fenster „MAGIX Video easy SE configuration“ erscheint. Folgen Sie den Anleitungen auf dem Bildschirm und klicken „Installieren“, um mit der Installierung zu beginnen. - Page 35 durch die verschiedenen Optionen der ausgewählten Funktion zu scrollen. Drücken Sie dann erneut auf POWER/MENU, um Ihre Auswahl zu Bestätigung. FOTOS / VIDEOS AUFNAHME n auf dem Nach Einschalten der Kamera drücken Sie auf POWER/MENU, um zu dem Menü zu gelangen. Wählen Sie die „...
- Page 36 4. Je nachd AUSWAHL DER AUFLÖSUNG Anleitungen Nach Einschalten der Kamera drücken Sie auf POWER/MENU, um in das Menü zu gelangen. Photos au Wählen Sie die mit einem Symbol dargestellte Funktion „ Auflösung “ aus. Wählen Sie mit 1. Wählen dem Auslöser eine der beiden verfügbaren Auflösungs-Optionen (niedrige Auflösung oder hohe veröffentlic...
- Page 37 4. Je nachdem, wie Sie weiter vorgehen möchten, folgen sie den entsprechenden Software- Anleitungen. Photos auf den Seiten sozialer Netzwerke veröffentlichen: Sie mit 1. Wählen Sie im „Magix Photo Manager 10“ das Foto, das Sie auf Facebook oder Flickr der hohe veröffentlichen möchten.
- Page 38 Verpackung gezeigten Produktdetails vor. Hinweis: Bitte bewahren Sie diese Bedienungsanleitung gut auf, sie enthält wichtige Information. Referenznummer: DJ021series Design und Entwicklung in Europa - Hergestellt in China © 2012 Lexibook® Deutschland & Österreich Service-Hotline: 01805 010931 (0.14€ TTC/Minute) E-Mail: savcomfr@lexibook.com www.lexibook.com...
-
Page 39: Uw Camera Leren Kennen
UW CAMERA LEREN KENNEN 1. Riemopening 7. PLAYBACK knop 2. Sluiterknop 8. LCD-display 3. Cameralens 9. Statiefgat (statief niet meegeleverd) 4. Optische beeldzoeker 10. Batterijvak 5. POWER/MENU knop 11. USB-aansluitpoort 6. UP knop INHOUD VAN DE VERPAKKING 1 x DJ021 digitale camera / 1 x USB-kabel / 1 x Handriem / 1 x CD-ROM / 1 x Gebruiksaanwijzing WAARSCHUWING: Al het verpakkingsmateriaal zoals plakband, plastic vellen, draadklemmen en labels die niet deel uitmaken van dit apparaat dienen weggegooid te worden. -
Page 40: De Software Installeren
DE SOFTWARE INSTALLEREN ‘MAGIX Video easy SE’: het bewerken van videobestanden Eenmaal d 1. Plaats de software-cd (meegeleverd) in uw CD-ROM drive. om een van 2. In het hoofdmenu, installeer eerst het stuurprogramma door op “Install Driver” te klikken en wacht opties van totdat het installatieproces voltooid is. - Page 41 BINNENIN HET MENU NAVIGEREN Eenmaal de camera is ingeschakeld, druk op POWER/MENU om het menu te openen. Druk op UP om een van de menufuncties te selecteren, druk vervolgens op de sluiterknop om de verschillende en wacht opties van de geselecteerde functie te doorlopen, en druk tenslotte nogmaals op POWER/MENU om uw keuze te bevestigen.
- Page 42 Alle foto’s/video’s wissen Met gebru Eenmaal de camera is ingeschakeld, druk op POWER/MENU om het menu te openen. Selecteer de Eenmaal u Manager” o “foto’s wissen” functie die met het pictogram wordt aangeduid. Druk op de sluiterknop, gebruik 1. Sluit de c UP om “Yes”...
- Page 43 Met gebruik van “MAGIX Photo Manager” ecteer de Eenmaal u uw foto(‘s) en video(‘s) op uw computer hebt opgeslagen, gebruik “MAGIX Photo Manager” om deze weer te geven, te nummeren, af te drukken of albums te maken… p, gebruik 1. Sluit de camera op een computer aan met gebruik van de meegeleverde USB-kabel. nop te 2.
- Page 44 Opmerking: Bewaar deze gebruiksaanwijzing, deze bevat belangrijke informatie. Referentie: DJ021series Ontworpen en ontwikkeld in Europa - Gemaakt in China © 2012 Lexibook® http://www.lexibook.com Dit product is geen speelgoed. Richtlijnen voor milieubescherming Gebruikte elektronische apparaten horen niet thuis in het huisafval ! Wij vragen u daarom een bijdrage aan de bescherming van ons milieu te leveren en dit apparaat op de voorziene verzamelplaatsen af te geven.