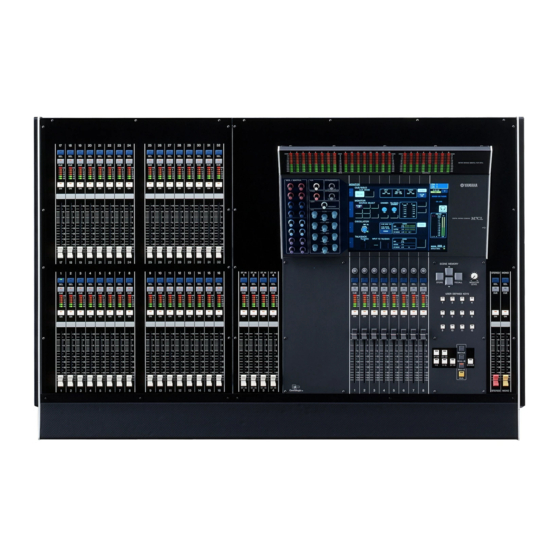
Yamaha M7CL-48 Quick Start Manual
Hide thumbs
Also See for M7CL-48:
- Quick start manual (16 pages) ,
- Service manual (375 pages) ,
- Owner's manual (312 pages)
Table of Contents
Advertisement
Quick Links
- 1 Quick Start Guide
- 2 A Quick Guide to the M7Cl Hardware Versions
- 3 Getting Sound from M7Cl-48Es and Sb168-Es in 2 Easy Stages
- 4 Accessing the Channel
- 5 Sends on Fader; an Easy Way of Mixing MIX Groups/Auxiliaries. (Monitor, Effect or Matrix Sends)
- 6 Patching, Routing Channels. How to Change a Patch
- 7 MIX Outputs; Selecting Aux/Sub Group, Pre/Post Fade, Send Point Etc
- 8 Matrix Outputs; Routing, Features
- Download this manual
M7CL Quick Start Guide Part 1
Quick Start Guide
A guide for people using M7CL Version 3 in the real world.
Part 1
An introductory guide to the M7CL group of consoles including features
included in Version 3 Firmware and the M7CL-48ES hardware.
These guides are for people about to use the
M7CL for the fi rst time, or for experienced
users requiring some tips and tricks for better
understanding of M7CL and its PC based
software partner the M7CL editor.
1
Advertisement
Table of Contents

Related Manuals for Yamaha M7CL-48


Summary of Contents for Yamaha M7CL-48
-
Page 1: Quick Start Guide
M7CL Quick Start Guide Part 1 Quick Start Guide A guide for people using M7CL Version 3 in the real world. Part 1 An introductory guide to the M7CL group of consoles including features included in Version 3 Firmware and the M7CL-48ES hardware. These guides are for people about to use the M7CL for the fi... -
Page 2: Table Of Contents
PC based software for remote control and setup; Studio Manager and M7CL Editor. M7CL-48ES users may also wish to look at Yamaha’s EtherSound Setup Guide. This explains the basic principals of designing an EtherSound network. -
Page 3: A Quick Guide To The M7Cl Hardware Versions
M7CL-48ES uses an innovative Auto Confi gure mode for easy setup in the standard confi guration. Note; Note; You can fi nd background information to EtherSound connectivity as a download from Yamaha’s www.yamahaproaudio.com Self Training area. Look for Networked Audio>> EtherSound Setup Guide. -
Page 4: M7Cl Related Hardware
M7CL related hardware M7CL-48 and M7CL-32 are “all in one box” digital mixers that require no setup and no additional units before use. They differ only in the number of available inputs. M7CL-48ES requires connection to external HA (Head Amps) before use and we recommend SB168-ES, but other EtherSound compatible HA are also possible like Yamaha AD8HR connected to NAI48-ES EtherSound interface. -
Page 5: Preparing The Console Before You Start
EQ to fl at, auxes to fl at, group routing de-selected, insert points switched off, etc. Look at and check upwards of 1000 knobs! Because M7CL can memorise its settings, Yamaha have provided a handy memorised scene (Scene000) where the console is set to zero ready to start at the touch of a button. -
Page 6: Getting Sound From M7Cl-48/32 In 10 Easy Steps
M7CL Quick Start Guide Part 1 Initialization To initialize the console power up whilst holding down the Scene [STORE] button. Keep holding the [STORE] button until the screen shows a pop-up with an invitation to Initialize all memories. After confi rming the initialization exit to the normal boot up sequence. -
Page 7: Getting Sound From M7Cl-48Es And Sb168-Es In 2 Easy Stages
#2 and dip 6 for ID#3. Set the AUTO CONFIGURE button to RING on the EXT-ES HA page in the RACK.) Stage 2. Get the sound out! Stage 1 Stage 2 The setup is complete. is to follow the Getting sound from M7CL-48/32 in 10 easy steps! (Page 6) -
Page 8: The Basics
M7CL Quick Start Guide Part 1 The Basics; Accessing the channel. M7CL is an all digital mixer designed to be as easy to use as an analogue mixer. Obviously the way mix parameters are changed is different to an analogue mixer but it needn’t be any more diffi cult. [SEL]Select Keys Navigation Keys A channel strip, with a fader, meter and buttons is present on the surface for all input channels all the time. -
Page 9: Changing The Channel Parameters. Ha Popup; +48V
M7CL Quick Start Guide Part 1 The Basics; Changing the channel parameters. HA popup; +48V. Once you have assigned channels either to an eight or single channel view you can begin to modify their param- eters. There is no need to enter menu systems for most basic parameters found on analogue consoles. From the single channel view you can see the effect of From the eight channel overview screen parameters changing any of the encoders to the left of the screen. -
Page 10: Channel Parameter Pop-Ups. From Overview
M7CL Quick Start Guide Part 1 The Basics; Channel parameter pop-ups. From Overview. From the eight channel view you can access all the channel parameter pop-ups and use the encoders below to make parameter changes. Just press the relevant area of the screen. PRESS Use the encoders below the screen to operate the highlighted knobs on the... -
Page 11: Channel Parameter Pop-Ups. From Single Channel View
M7CL Quick Start Guide Part 1 The Basics; Channel parameter pop-ups. From Single Channel View. From the single channel view you can access all the channel parameter pop-ups and use the encoders below to make parameter changes. Just press the relevant area of the screen. Note;... -
Page 12: Sends On Fader; An Easy Way Of Mixing Mix Groups/Auxiliaries. (Monitor, Effect Or Matrix Sends)
Auxiliaries can be adjusted by the encoders to the side or below the screen but for effi cient monitor mixing a third option is provided; SENDS ON FADER. (Like fader fl ip on other Yamaha digital mixers, but the master is not assigned to an encoder). -
Page 13: Channel Parameter Pop-Ups. The Att/Hpf/Eq Pop-Up In Detail
M7CL Quick Start Guide Part 1 Channel parameter pop-ups. The ATT/HPF/EQ pop-up in detail. The EQ encoders on the selected channel panel will always operate the EQ of the selected channel. However the ATT/HPF/EQ pop-up gives visual feedback about the changes being made and is also required to make some other changes like shelf/bell or LPF. -
Page 14: Naming Channels
M7CL Quick Start Guide Part 1 Naming Channels. Input channel faders are named using tape and pen in the “analog” way. All channels have an electronic name and icon that will appear on the screen when the channel is assigned to the Centralogic™ screen. Tip;... -
Page 15: Patching, Routing Channels. How To Change A Patch
Patching, routing channels. How to change a patch. If, for example you have connected a CD player to inputs 47 and 48 on your console (M7CL-48/32) or SB168-ES stage box (M7CL-48ES), the audio will appear in channels 47 and 48. However you may prefer to have this appear in Channel 1 and 2. -
Page 16: Patching, Routing Channels. The Default Patch, Scene 000
There is an assignable “soft patch” between the sockets and the channels. This permits great fl exibility but must be used with great care to avoid confusion. In M7CL-48/32 the default Scene 000 has all the mono inputs routed one to one. -
Page 17: Mix Outputs; Selecting Aux/Sub Group, Pre/Post Fade, Send Point Etc
M7CL Quick Start Guide Part 1 Mix outputs; selecting aux/sub group, pre/post fade, send point etc. There are 16 mix bus outputs available in addition to the matrix, master and monitor outputs. The mix buses can be confi gured as variable auxes or fi xed sub-groups. In M7CL-32/48 all outputs share the 16 XLR Omni outs, AES/EBU out and MY card slot outs. -
Page 18: Matrix Outputs; Routing, Features
M7CL has 8 matrix outputs. These are fed by all channels, inputs and outputs. So it is a 75 x 8 ways matrix in M7CL-48/ES and 59 x 8 ways in M7CL-32. The matrix masters are assigned to the Centralogic™ area by pressing the grey [MATRIX] navigation key. -
Page 19: Trouble Shooting Ideas
Where are the output delays? They are outport delays, found in the OUTPUT PORT pop-up via the SETUP page. Where can I fi nd out more information? You can download the M7CL and Editor manuals from; http://www.yamaha.co.jp/manual/english/result.php?div_code=pa&model=M7CL&cat_code=&div_code=pa...