Pentax AF160FC Operating Manual
Hide thumbs
Also See for AF160FC:
- Operating manual (45 pages) ,
- User manual (44 pages) ,
- Manual (44 pages)
Table of Contents
Advertisement
Quick Links
Advertisement
Table of Contents

Related Manuals for Pentax AF160FC


Summary of Contents for Pentax AF160FC
- Page 1 オートマクロストロボ Auto Macro Flash 使用説明書 OPERATING MANUAL...
-
Page 2: Introduction
Thank you for purchasing the PENTAX Auto Macro Flash このたびは、ペンタックス・オートマクロストロボ AF160FC AF160FC. をお買い上げいただき、誠にありがとうございます。 The AF160FC is a flash system for taking close-up photos of AF160FC は近接撮影用に用意されたストロボシステムで、小 small subjects using a flash to eliminate shadows, allowing you さな被写体の無影撮影など、手軽にお楽しみいただけます。本 to really enjoy photography. This operating manual is intended 書は主に... -
Page 3: For The Safe Use Of Your Flash Unit
FOR THE SAFE USE OF YOUR FLASH UNIT ストロボを安全にお使いいただくために Although we have carefully produced this flash unit for safe この製品の安全性については十分注意を払っておりますが、3 operation, please be sure to especially follow warnings and ページにある下記マークの内容については特に注意をしてお cautions given on page 3. 使いください。 WARNING 警告 This symbol indicates that violating this item could cause このマークの内容を守らなかった場合、... - Page 4 Warning 警告 The flash contains electronic circuits that operate at ストロボを分解しないでください。 ストロボ内部には高 high voltages. Do not attempt to disassemble the flash 電圧部があり、感電の危険があります。 unit yourself, as there is danger of an electric shock. 落下などにより、 ストロボ内部が露出したときは、 絶対 If internal parts of the flash unit become exposed due to に露出部分に手をふれないでください。...
-
Page 5: Precautions For Your Flash Unit
他社製カメラを本製品に使用されたことによる事故、故障 Do not attach any accessories having either fewer or などにつきましては保証いたしかねます。 different electrical contacts (layout other than PENTAX standard) for the hot shoe or grip. Otherwise, some 高性能を保つため、1~2年毎に定期点検をしてください。 functions may not work properly. - Page 6 We will not be held responsible for any accidents or ゴミや泥・砂・ホコリ・水・有害ガス・塩分などがストロ damage, etc. caused by using this product with cameras ボの中に入らないようにご注意ください。故障の原因にな and accessories made by other companies. ります。雨や水滴などが付いたときは、よく拭いて乾かし てください。 Periodic checks are recommended every 1 to 2 years in order to maintain high performance. If the unit has not 長期間使用しないときは、電池を取り出しておいてくださ...
-
Page 7: Table Of Contents
Contents Introduction ..................1 Taking pictures in manual flash mode..........28 FOR THE SAFE USE OF YOUR FLASH UNIT........2 ISO sensitivity and guide numbers ............28 About exposure values ................28 Precautions for Your Flash Unit............4 Conditions of the subject change exposure values........29 Overview of the operating manual ............ - Page 8 目 次 はじめに ..................... 1 マニュアルストロボモードで撮影する ..........28 ストロボを安全にお使いいただくために ........... 2 ISO感度とガイドナンバー................ 28 露出倍数について ..................28 取り扱い上の注意 ................4 被写体条件で露出値は変わります ............29 本書の構成..................9 モードダイヤルでストロボの発光量を補正する ........29 同梱品一覧..................10 撮影手順....................29 ケースの使いかた ................11 その他の機能 各部の名称(コントローラー) ............12 各部の名称(発光部ユニット) ............13 発光部切り替えスイッチの使いかた..........
-
Page 10: Overview Of The Operating Manual
Overview of the operating manual 本書の構成 The operating manual includes the following chapters. 本書は、次の章で構成されています。 1 Getting ready ––––––––––––––––––––––––––––––––––– 1 準備する ––––––––––––––––––––––––––––––––––––––– This chapter explains about getting ready to take pictures after you purchase お買い上げ後、本機を使った撮影のための準備について説明しています。 the flash unit. 撮影をはじめる前に必ずお読みになり、操作を行ってください。 Be sure to read this chapter before you start taking pictures or operating the flash unit. 2 撮影する... -
Page 11: Packing List
Packing list 同梱品一覧 Make sure that everything on the list is in the package. Contact 箱の中身を確認してください。不足しているもの、破損してい the retailer where you purchased the flash unit if anything is るものがある場合はお買い上げいただいた販売店にご連絡く missing or damaged. ださい。 1 Macro flash (controller and flash head) 1 本体(コントローラー、発光部ユニット) 2 Adapter ring (4 types: 49 mm, 52 mm, 58 mm, and 67 mm) 2 アダプターリング(4点:49mm、52mm、58mm、67mm)... -
Page 12: Using The Case
Using the case ケースの使いかた Macro Adapter マクロアダプター Controller コントローラー部 Adapter Rings アダプターリング AA Batteries (Optional) Flash Head 単3形電池 (別売) 発光部ユニット... -
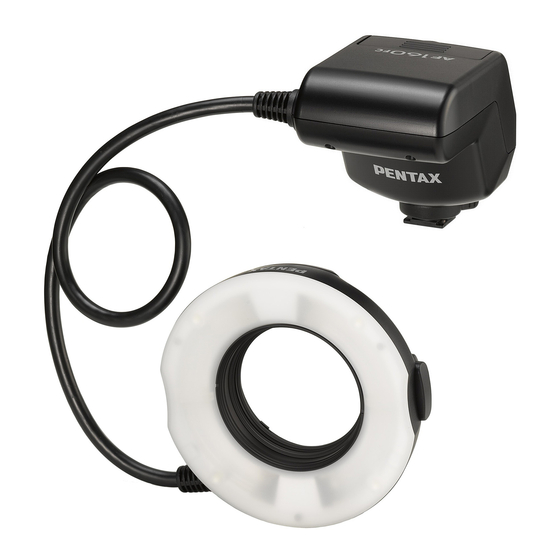
Page 13: Names Of Parts (Controller)
Names of parts (Controller) 1 Battery chamber cover 2 Mode dial: Selects the flash mode. (P.23) 3 Power switch (P.17) 4 Flash shoe 5 Flash signal contacts 6 READY lamp/TEST button (P.17) Lights when charging is finished. Press to test the flash. 7 MODELING button (P.31) Turns the modeling light on the flash head on and off. -
Page 14: Names Of Parts (Flash Head)
Names of parts (Flash head) 1 Flash head output switch (P.30) 2 Release button (P.22) 3 Mounting tabs (4 positions) 4 Modeling light (LED) 5 Flash lamps 各部の名称(発光部ユニット) 1 発光部切り替えスイッチ(P.30) 2 着脱ボタン(P.22) 3 取り付け爪(4ヶ所) 4 モデリングライト(LED) 5 発光部... -
Page 15: Getting Ready
1 Getting ready 1 準備する Inserting the Batteries 電池の入れ方 Slide the battery chamber cover as shown in the figure and 図のように電池ぶたをスライドさせて取り外します。 remove it. 単3形電池を4本、+-の表記に合わせて下から順番に入れ Insert the above four AA batteries sequentially from lower ます。 one making sure the plus/minus markings +, - match the 入れ終わったら手順1と反対の手順で電池ぶたを閉じます。... -
Page 16: About Battery Types
About battery types 電池の種類について Compatible batteries 使える電池 Use four of the same type of battery. 同じ種類のものを4本使用します。 • AA alkaline batteries (LR6) • 単3形アルカリ電池(LR6) • AA lithium batteries (FR6) • 単3形リチウム電池(FR6) • AA Nickel-Metal Hydride (Ni-MH) batteries • 単3形ニッケル水素電池(Ni-MH) Non-compatible batteries 使えない電池... - Page 17 • If you discharge the flash unit repeatedly when using lithium だけなくなることがあります。この場合、しばらく時間をお batteries, the batteries will overheat and activate a safety いて電池の温度が下がると、 問題なく使用できるようになり circuit that temporarily disables the flash unit. If this occurs, ます。 wait until the batteries cool down before using the flash unit •...
-
Page 18: Charge Check And Test Flash
Charge check and test flash 充電確認とテスト発光 Insert the batteries and then do a test flash. 電池をセットしたら、テスト発光を行います。 How to check the charge (A:) 充電確認のしかた (A:) Insert the batteries and then turn on the power. 電池をセットした状態で、電源スイッチをONにする。 The READY lamp will light up when the flash is charged. READYランプが点灯すれば充電完了です。... -
Page 19: How To Mount The Macro Flash Unit
How to mount the macro flash unit マクロストロボの取り付けかた Attach the lens you are going to use before mounting the macro あらかじめ、 カメラに使用するレンズを装着しておいてくださ flash. い。 There are three steps for mounting the flash unit. 取り付け方法は大きく3つのステップに分かれます。 1 Attach the controller to the camera. 1 コントローラーをカメラ本体に取り付ける... - Page 20 Turn the locking lever of the controller away from [FIX コントローラーの締め付けノブを[FIX ]と反対方向に回 Loosen it so the flash shoe mounts easily. します。 Slide the flash shoe of the controller into the camera's hot シューブラケットが挿入しやすいように緩めます。 flash shoe from the back of the camera. コントローラーのシューブラケットをカメラのホット...
-
Page 21: Attach The Adapter To The Lens That Is On The Camera
Attach the adapter to the lens that is on the camera. カメラに装着されたレンズにアダプターを取り付ける Types of adapters アダプターの種類 The adapters that can be used vary depending on the type of レンズの種類によって、使用するアダプターが異なります。タ lens. There are two types of adapters provided. イプ別に2種類のアダプターがあります。 • A: Adapter ring: Attaches to the filter mounting thread on the •... - Page 22 This section explains how to mount these types of adapters. アダプターの種類別に取り付けかたを説明します。 Mounting procedure 取り付けかた A: Adapter ring A:アダプターリング Screw the adapter ring that is the same size as the lens onto レンズの前枠にレンズの口径に合ったアダプターリングを the front thread of the lens. ねじ込んで取り付けます。 B: Macro adapter B:マクロアダプター...
-
Page 23: Attach The Flash Head To The Adapter
Attach the flash head to the adapter アダプターに発光部ユニットを取り付ける Press the release buttons on the flash head to insert the four 発光部ユニットの左右にある着脱ボタンを押しながら、 アダプ mounting tabs (circled in the above diagram) on the inside of the ターリング(A)、マクロアダプター(B)の側面にある溝に、 flash head correctly into the groove on the adapter ring (A) or 発光部ユニットの内側にある4箇所の取り付け爪(上図の円で... -
Page 24: Taking Pictures
2 Taking pictures 2 撮影する The flash unit has two modes for adjusting the amount of light このストロボの発光モードには、 発光量を自動で調整するオー produced by the flash: An automatic mode and a manual mode. トストロボモードと、 発光量を手動で調整するマニュアルスト ロボモードの2種類があります。 Mode dial functions モードダイヤルについて Use the mode dial to set the output of the flash. The mode dial has seven positions. -
Page 25: Taking Pictures In Auto Flash Mode
Taking pictures in auto flash mode オートストロボモードで撮影する Auto flash modes オートストロボモードの種類 The AF160FC has two auto flash modes. The flash unit AF160FCは、 2種類のオートストロボ撮影モードを持っていま communicates with the camera and automatically selects a す。使用するカメラと通信を行い、自動的に動作モードを切り mode. 替えます。 P-TTL auto A pre-flash is discharged before a picture is taken so P-TTLオート... -
Page 26: Auto Flash Operations For Various Cameras
Auto flash operations for various cameras カメラ別のオートストロボ動作モードについて The following table shows the compatibility for when a camera 次の表はオートストロボモード( 「AUTO」 「+0.5」 「-0.5」 「-1」 ) is set to auto flash mode ("AUTO", "+0.5", "-0.5", or "-1"). に設定した場合のカメラ別の対応表です。 Compatibility 対応 O : Compatible X : Not Compatible カメラの種類... -
Page 27: Procedure
Procedure 撮影手順 Set the camera to a mode other than manual. あらかじめ、 カメラのモードをマニュアル以外にセットしてく ださい。 Turn the flash on. Set the flash mode dial to "AUTO". ストロボの電源スイッチをONにする If the lens has an aperture ring, set it to A. ストロボのモードダイヤルを「AUTO」に合わせる * For DA, DA L and FAJ lenses, which do not have aperture 絞りリングがあるレンズではレンズの絞りをA位置にする... -
Page 28: Ttl Auto Flash Compatible Cameras
TTLオートストロボ対応カメラについて TTL auto flash compatible cameras ペンタックスデジタル一眼レフシリーズ以外でも、645N・ In addition to using PENTAX digital SLR cameras, you can use 645N Ⅱ・67 ⅡカメラはTTL オートストロボ撮影が可能です。 645N/II and 67II cameras to take pictures using the auto flash if (35 ミリ(フィルム)一眼レフカメラおよび初期型の645 カメ... -
Page 29: Taking Pictures In Manual Flash Mode
Taking pictures in manual flash mode マニュアルストロボモードで撮影する Effective when you want a specific flash output regardless of the 被写体条件にかかわらず、 一定の光量でストロボを発光させた subject conditions. Determine the flash output from the い場合に有効です。 露出は計算とテスト撮影から決定してくだ exposure and test pictures. さい。 You need to consider the exposure when taking pictures in マニュアルストロボモードでの撮影では、... -
Page 30: Conditions Of The Subject Change Exposure Values
Conditions of the subject change exposure values 被写体条件で露出値は変わります The exposure requirements change according to the condition 撮影対象と撮影時の条件により、必要な露出値は変わります。 of the lighting and the subject. Take test shots to determine the 実際にテスト撮影を行って、露出を決定してください。マニュ exposure. Taking test shots is essential to proper use of manual アル撮影モードではテスト撮影が欠かせません。... -
Page 31: Other Functions
3 Other functions 3 その他の機能 Using the flash head output switch 発光部切り替えスイッチの使いかた You can change the ratio of the amount of flash output from the 発光部ユニットにある発光部切り替えスイッチで、 発光部の左 left or right flash lamp by using the flash head output switch on 右の発光比率を変更できます。... -
Page 32: About The Modeling Light
Ratio of left and right 左右の発光比率 Switch position Notes スイッチ位置 備考 flash (left:right) (左:右で表示) Right does not do pre- 右はプリ発光も Left end 1:0 (only left flashes) 左端 1:0(左のみ発光) flash or main flash 本発光もしない Left center 左中 3:1 Uniform flash 均一発光 Center 1:1 中央... -
Page 33: Appendix
4 Appendix Auto flash guidelines and calculation methods Distance range guidelines for auto flash photography (Unit: m) F2.8 F5.6 0.50 - 5.7 0.35 - 4.0 0.25 - 2.8 0.18 - 2.0 0.13 - 1.4 0.10 - 1.0 0.10 - 0.71 0.10 - 0.50 0.10 - 0.35 0.71 - 8.0... -
Page 34: Manual Flash Guidelines And Calculation Methods
Manual flash guidelines and calculation methods Subject distance guideline Unit: m mode F2.8 F5.6 FULL 16.0 0.71 0.50 0.35 0.71 0.50 0.35 0.25 0.18 1/16 0.71 0.50 0.35 0.25 0.18 0.13 0.09 FULL 22.6 0.71 0.50 11.3 0.71 0.50 0.35 0.25 1/16 0.71... - Page 35 マニュアル撮影の目安表・計算方法 撮影距離目安表 単位:m mode F2.8 F5.6 FULL 16.0 0.71 0.50 0.35 0.71 0.50 0.35 0.25 0.18 1/16 0.71 0.50 0.35 0.25 0.18 0.13 0.09 FULL 22.6 0.71 0.50 11.3 0.71 0.50 0.35 0.25 1/16 0.71 0.50 0.35 0.25 0.18 0.13 FULL 32.0 0.71...
- Page 36 MEMO...
-
Page 37: Lenses With Compatibility Issues
Basically, a lens cannot be used if the front ring turns during focusing. For DA lenses + digital SLR cameras Front ring turns Description of problem smc PENTAX-DA 16-45mm F4 ED AL Vignetting occurs (from 16-24 mm) smc PENTAX-DA 18-55mm F3.5-5.6 AL Vignetting occurs (from 18-23 mm) smc PENTAX-DA 18-55mm F3.5-5.6 AL... - Page 38 ○ PENTAX-F 70-200mmF4-5.6 Focus mechanism is unstable 645 lens + 645NII cameras Description of problem smc PENTAX-FA645 45mmF2.8 Vignetting smc PENTAX-FA645 150-300mmF5.6 ED[IF] Vignetting smc PENTAX-A645 45mmF2.8 Vignetting smc PENTAX-A645 55mmF2.8 Slight vignetting 67 lens + 67II cameras Description of problem smc PENTAX67 75mmF2.8 AL...
- Page 39 使用に適さないレンズ 下表のレンズは付属のアダプターリングを使用して発光部ユニットを取り付け可能ですが、使用上の不具合を生じます。 原則として、ピント合わせ時に前枠が回転するレンズは使用できません。 DAレンズ+デジタル一眼レフカメラ 前枠が回転する 不具合内容 smc PENTAX-DA 16-45mm F4 ED AL - ケラレ発生(16-24mm付近まで) smc PENTAX-DA 18-55mm F3.5-5.6 AL - ケラレ発生(18-23mm付近まで) smc PENTAX-DA 18-55mm F3.5-5.6 AL Ⅱ - ケラレ発生(18-21mm付近まで) smc PENTAX-DA 40mm F2.8 Limited - 発光部ユニットとカメラが接触 smc PENTAX-DA 17-70mm F4 AL[IF] SDM -...
- Page 40 PENTAX-F 80-200mmF4.7-5.6 ○ PENTAX-F 28-80mmF3.5-4.5 ○ PENTAX-F 70-200mmF4-5.6 - ピント合わせ機構作動不安定 645レンズ+645NⅡカメラ 不具合内容 smc PENTAX-FA645 45mmF2.8 ケラレ発生 smc PENTAX-FA645 150-300mmF5.6 ED[IF] ケラレ発生 smc PENTAX-A645 45mmF2.8 ケラレ発生 smc PENTAX-A645 55mmF2.8 わずかにケラレ 67レンズ+67Ⅱカメラ 不具合内容 smc PENTAX67 75mmF2.8 AL ケラレ発生 smc PENTAX67 Macro 100mmF4+ライフサイズコンバーター...
-
Page 41: Specifications
Specifications 主な仕様 Type AF160FC AF160FC 型式 Cameras that Digital SLR series オート撮影対応 デジタル一眼レフカメラシリーズ support auto flash 645N, 645NII and 67II cameras カメラ 645N・645NⅡおよび67Ⅱカメラ Guide Number 16 (ISO100/m) 16(ISO100・m) ガイドナンバー Flash coverage 60 degrees vertically and horizontally 照射角度 上下左右60度 angle 光質... -
Page 42: Warranty Policy
• 使用上の誤り(使用説明書記載以外の誤操作等)により 生じた故障。 Procedure During 12-month Warranty Period • 当社の指定するサービス機関以外で行われた修理・改造・ Any PENTAX which proves defective during the 12-month warranty 分解による故障。 period should be returned to the dealer from whom you purchased • 火災・天災・地変等による故障。 the equipment or to the manufacturer. If there is no representative •... - Page 43 お、その際の運賃諸掛りにつきましてもお客様のご負担と representatives will apply. Shipping charges are to be borne by the させていただきます。 owner. If your PENTAX was purchased outside of the country 本製品の補修用性能部品は、 製造打ち切り後5年間を目安に where you wish to have it serviced during the warranty period, 保有しております。したがって本期間中は原則として修理...
- Page 44 For customers in the USA ペンタックスピックアップリペアサービス STATEMENT OF FCC COMPLIANCE This device complies with Part 15 of the FCC Rules. Operation is 全国(離島など、一部の地域を除く)どこからでも電話一本で subject to the following two conditions: (1) This device may not ペンタックス指定の宅配業者がお客様ご指定の日時・場所に梱 cause harmful interference, and (2) this device must accept any 包資材を持って不具合品を引き取りにお伺いし、専門修理ス...
- Page 45 Information for Users on Collection and Disposal of Old Equipment and Used Batteries 1. In the European Union 2. In other countries outside the EU These symbols on the products, packaging and/or These symbols are only valid in the European accompanying documents mean that used electrical Union.
- Page 46 お客様窓口のご案内 ペンタックスホームページアドレス http://www.pentax.jp/ [PENTAXイメージング・システム製品に関するお問い合わせ] お客様相談センター ナビダイヤル 0570-001313 (市内通話料でご利用いただけます。 ) 03-3960-3200(代) 携帯電話、PHS、IP 電話の方は、右記の電話番号をご利用ください。 〒174-8639 東京都板橋区前野町2-36-9 営業時間 9:00 ~18:00 (土・日・祝日および弊社休業日を除く) [ショールーム・写真展・修理受付] ペンタックスフォーラム 03-3348-2941(代) 〒163-0690 東京都新宿区西新宿1-25-1 新宿センタービルMB (中地下1 階) 営業時間 10: 30 ~ 18:30 休業日毎週火曜日、年末年始およびビル点検日 HOYA株式会社 PENTAX イメージング・システム事業部 〒174-8639 東京都板橋区前野町2-36-9 ☆仕様および外観の一部を予告なく変更することがあります。...
- Page 47 Julius-Vosseler-Strasse 104, 22527 Hamburg, GERMANY (HQ - http://www.pentaxeurope.com) (European Headquarters) (Germany - http://www.pentax.de) PENTAX U.K. Limited PENTAX House, Heron Drive, Langley, Slough, Berks SL3 8PN, U.K. (http://www.pentax.co.uk) PENTAX France S.A.S. 112 Quai de Bezons, B.P.204, 95106 Argenteuil Cedex, FRANCE (http://www.pentax.fr) PENTAX Italia S.r.l.