Advertisement
Available languages
Available languages
Installer: Leave this manual with the appliance. Consumer: Retain this manual for future reference.
OpERATINg INSTRUCTIONS AND OwNER'S MANUAL
MR. HEATER
MH25NG
MH25LP
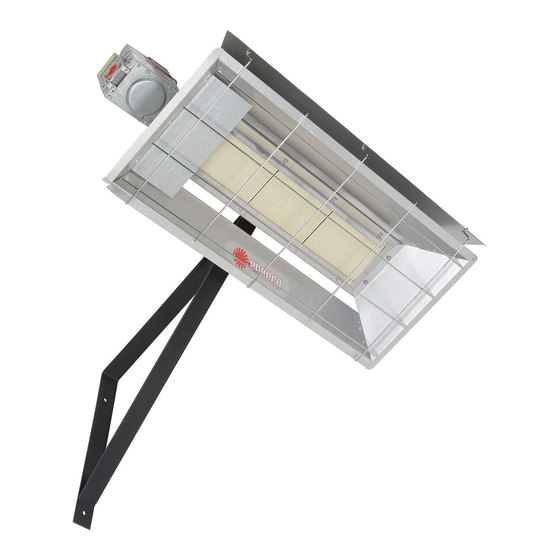
GAS FIRED INFRA-RED WORKSHOP HEATER
WARNING: If the information in this manual is not followed exactly, a fire or explosion may result causing
property damage, personal injury, or loss of life.
- Do not store or use gasoline or other flammable vapors and liquids in the vicinity of this or any other appliance.
- WHAT TO DO IF YOU SMELL GAS
• Shut off gas supply
• Do not try to light any appliance
• Do not touch an electrical switch; do not use any phone in your building.
• Immediately call your gas supplier from a neighbor's phone. Follow the gas supplier's instructions.
• If you cannot reach your gas supplier, call the fire department.
- Installation and service must be performed by a qualified installer, service agency, or the gas supplier.
WARNING: This is an unvented gas-fired heater. It uses air (oxygen) from the room in which it is installed.
Provisions for adequate combustion and ventilation air must be provided. Refer to Fresh Air for Combustion
and Ventilation section on page 3 of this manual.
WARNING: Improper installation, adjustment, alteration, service or maintenance can cause property damage,
injury or death. Read the installation, operation, and maintenance instructions thoroughly before installing or
servicing this equipment. For assistance or additional information consult a qualified installer, service agency,
or gas supplier.
MR. HEATER, INC., 4560 W. 160
Model # MH25NG/LP
READ INSTRUCTIONS CAREFULLY: Read and
follow all instructions. Place instructions in a
safe place for future reference. Do not allow
anyone who has not read these instructions to
assemble, light, adjust or operate the heater.
TH
ST., CLEVELAND, OHIO 44135 · 216-916-3000
HS25NG/LP
Installation instructions and Owner's Manual
E1
HEATSTAR
HS25NG
HS25LP
LANGUAGES
ENGLISH
Pages E1 — E16
SPANISH
Pages S1 — S16
FRENCH
Pages F1 — F16
18672
Rev. D
04/10
Advertisement

Related Manuals for Mr. Heater HS25NG/LP


Summary of Contents for Mr. Heater HS25NG/LP
- Page 1 Read the installation, operation, and maintenance instructions thoroughly before installing or servicing this equipment. For assistance or additional information consult a qualified installer, service agency, or gas supplier. MR. HEATER, INC., 4560 W. 160 Model # MH25NG/LP HS25NG/LP ST., CLEVELAND, OHIO 44135 ·...
-
Page 2: Table Of Contents
FOR LEAK TESTING. • DO NOT EXCEED 1/2 PSI INLET PRES- SURE TO HEATER. Model # MH25NG/LP HS25NG/LP DANGER: Carbon monoxide poisoning may lead to death. Carbon Monoxide Poisoning: Early signs of carbon monoxide poisoning resemble the flu, with headaches, dizziness, or nausea. If you have these signs, the heater may not be working properly. -
Page 3: Introduction
Figure 1. The basic heater THERMOSTAT CABLE THERMOSTAT Model # MH25NG/LP HS25NG/LP consists of the complete burner assembly, flue deflec- tor, grid, reflector assembly and face guard. 2. PURPOSE OF EQUIPMENT WARNINGS This heater is for indoor installation only. - Page 4 • For additional information contact Mr. Heater Toll- Free 800-251-0001—www.mrheater.com The following extra NFPA Manuals are helpful when installing this heater in a location not anticipated in this...
-
Page 5: Heater Installation
NAT. L.P. MH/HS25NG 25,000 — MH/HS25LP — 22,000 Model # MH25NG/LP HS25NG/LP combustible surfaces and toward open space, and then the other sides must have a minimum clearance of 16 inches to combustible surfaces. OPEN WORKSHOP DOOR 16” MINIMUM HEATER... - Page 6 If in doubt as to these requirements, discuss the requirements of this manual Model # MH25NG/LP HS25NG/LP with the dealer from whom the heater was purchased and your gas supplier, or call our customer service department at 1-800-251-0001.
- Page 7 (2 REQUIRED) 58” FLOOR Model # MH25NG/LP HS25NG/LP E. Position the heater as shown in Figure 3 and slide the heater mounting clip over the bracket and install the bolt through the clip and bracket. F. Thread the hex nut onto the bolt and tighten securely.
- Page 8 • To ensure the best performance from your natural gas heater make sure the supply manifold pres- sure is at least 6” W.C. WARNING: Model MH/HS25LP is designed to burn liq- uefied petroleum (LP) gas and it comes equipped with a regulator.
- Page 9 1/2” 3” NIPPLE Model # MH25NG/LP HS25NG/LP WARNING: When testing gas piping use only a soap and water solution. Do not use a match or other flame for leak testing. If during leakage check gas is smelled, turn off the gas supply and ventilate building.
-
Page 10: Startup
WRENCH BOSS GAS IN- Model # MH25NG/LP HS25NG/LP Gasket binder material used in this heater assem- bly will temporarily emit an odor and/or vapor. This condition will clear up in approximately 20 minutes and thereafter will not reoccur. Refer to Chapter 2 for ventilation. -
Page 11: Shutdown
DEPRESS TO LIGHT PILOT BURNER Model # MH25NG/LP HS25NG/LP During the initial startup of heater, an odor and, per- haps, some vapor will come from the heater. This is the gasket binding material emitting this odor and/or vapor. After approximately 20 minutes, this odor will disappear and not occur again. -
Page 12: Operator Maintenance Instructions
BOSS INLET PILOTSTAT POW- ER UNIT Figure 12. Top View of Standard Capacity Gas Control Model # MH25NG/LP HS25NG/LP PROPER FLAME ADJUSTMENT Figure 11. Proper Flame Adjustment A. Remove pilot adjustment cover screw. Refer to Figure 12. B. Turn inner adjustment screw clockwise decrease or counterclockwise pilot flame. - Page 13 4. FREQUENCY OF OPERATOR CHECKS Intermittent use. Appliances that are used seasonally should be checked before shutdown and again before the next use. Model # MH25NG/LP HS25NG/LP Table 4. Trouble Shooting Chart CAUSES partially block pilot orifice pilot out of adjustment...
- Page 14 1-800-251-0001. Our office hours are 8:30 AM – 5:00 PM, Eastern Time Zone Monday through Friday Please include the model number, date of purchase, and description of problem in all communication. Installation instructions and Owner’s Manual Model # MH25NG/LP HS25NG/LP...
-
Page 15: Replacement Parts List
14405 Wall Mounting Bracket 04432 Face Guard 09360 Thermocouple/Generator 05445 Orifice-Burner-Natural Gas ALL WARRANTY CLAIMS REQUIRE PROOF OF PURCHASE Model # MH25NG/LP HS25NG/LP ITEM NO. Installation instructions and Owner’s Manual STOCK NO. DESCRIPTION 05455 Orifice-Burner-Propane Gas 05576 Orifice-Pilot-Natural Gas 05573... - Page 16 This Warranty gives you specific legal rights, and you may have other rights which vary from state to state. Mr. Heater reserves the right to make changes at any time, without notice or obli- gation, in colors, specifications, accessories, materials and models.
- Page 17 Modelo N.° MH25NG/LP HS25NG/LP MR. HEATER, INC., 4560 W. 160 Instrucciones de instalación y manual del usuario ST., CLEVELAND, OHIO 44135 · 216-916-3000 HEATSTAR HS25NG...
- Page 18 • NO SUPERE LA PRESIÓN DE ENTRADA DE 1/2 PSI AL CALENTADOR. Modelo N.° MH25NG/LP HS25NG/LP PELIGRO: La intoxicación por monóxido de carbono puede causar la muerte. Intoxicación por monóxido de carbono: Los síntomas tempranos de intoxicación por monóxido de carbono se asemejan a la gripe, con dolor de cabeza, mareos o náuseas.
- Page 19 CABLE DEL TERMOSTATO TERMOSTATO Modelo N.° MH25NG/LP HS25NG/LP completo del quemador, un deflector de gas de combustión, una parrilla, el ensamble del reflector y un protector. 2. FINALIDAD DEL EQUIPO ADVERTENCIAS Este calentador sólo debe instalarse en interiores.
- Page 20 • Para obtener más información, comuníquese con: Mr. Heater Llame al número gratuito 800-251-0001 o visite www.mrheater.com Los siguientes manuales adicionales de la NFPA son útiles al momento de instalar este calentador en un lugar no previsto en este manual: Número...
- Page 21 EL LADO DEL REFLECTOR DEL CALENTADOR DEBE ESTAR HORIZONTAL. POSICIÓN ESPACIOS LIBRES CON RESPECTO A SUPERFICIES INFLAMABLES NORMAL DE MONTAJE ARRIBA LADOS 14” 16” 14” 16” HS25NG/LP LÍNEA DEL PISO ATRÁS ABAJO 16” 48” 16” 48” Instrucciones de instalación y manual del usuario...
- Page 22 2. INSTRUCCIONES DE MONTAJE DEL Modelo N.° MH25NG/LP HS25NG/LP CALENTADOR Después de elegir el lugar para instalar el calentador y el lugar del termostato y de verificar y asegurarse de que se cumpla con todos los requisitos de colocación...
- Page 23 (SE NECESITAN DOS) 58” PISO Modelo N.° MH25NG/LP HS25NG/LP J. Conecte los cables del termostato a la válvula de gas como se observa en la Figura 4. Consulte el Código Eléctrico Nacional NFPA70- 1993 y para las instalaciones eléctricas en Canadá, el CÓDIGO C22.1-...
- Page 24 PROFUNDIDAD MÁXIMA DE 1/2” DE LAS INSERCIONES Figura 6. Requisitos de conexión de la válvula de gas HS25NG/LP conductos de buena calidad en todas las roscas macho según se observa en la Figura 5. Si se usa gas licuado como combustible, asegúrese de que el compuesto para conductos sea resistente al gas licuado.
- Page 25 CONDUCTO RÍGIDO CON UNIÓN O UN CONECTOR FLEXIBLE AL CALENTADOR HS25NG/LP CALENTADOR NOTA: 1. USE SÓLO UN COMPUESTO PARA CONDUCTOS QUE SEA RESISTENTE A LOS...
- Page 26 TERMOSTATO DEL PILOTO Figura 9. Componentes de la válvula de gas Modelo N.° MH25NG/LP HS25NG/LP NOTA El material fijador de las juntas que se utiliza en el ensamble de este calentador emitirá temporalmente un olor o vapor. Ese estado pasará en aproximadamente 20 minutos y no volverá...
- Page 27 ENCENDER QUEMADOR DEL PILOTO Figura 10. Encendido del quemador del piloto Modelo N.° MH25NG/LP HS25NG/LP C. Oprima parcialmente la perilla y rótela hasta la posición de apagado (OFF). D. Cierre las válvulas de suministro de gas. CAPÍTULO IV INSTRUCCIONES DE...
- Page 28 UNIDAD DE POTENCIA DEL TERMOSTATO DEL PILOTO Figura 12. Vista superior del control de gas de capacidad estándar Modelo N.° MH25NG/LP HS25NG/LP AJUSTE CORRECTO DE LA LLAMA A continuación se presentan en forma de cuadro los síntomas de un sistema que no funciona...
- Page 29 Ambiente con polvo, humedad o corrosión. Dado que estos ambientes pueden hacer que el control de gas se deteriore más rápidamente, es necesario verifi- Modelo N.° MH25NG/LP HS25NG/LP CAUSAS bloqueo parcial del orificio del piloto piloto no ajustado orificio del quemador parcialmente bloqueado presión de gas baja...
- Page 30 Nuestro horario de atención es de lunes a viernes, de 8:30 a 17:00, hora del este En todas las comunicaciones recuerde incluir el número de modelo, la fecha de compra y la descripción del problema. Modelo N.° MH25NG/LP HS25NG/LP Instrucciones de instalación y manual del usuario...
- Page 31 09360 Termocupla/Generador 05445 Orificio, quemador, gas natural 22 PARA TODOS LOS RECLAMOS DE GARANTÍA SE DEBE PRESENTAR LA FACTURA DE COMPRA Modelo N.° MH25NG/LP HS25NG/LP ARTÍCULO N.° EXISTENCIA N.° DESCRIPCIÓN 05455 Orificio, quemador, gas propano 05576 Orificio, piloto, gas natural...
- Page 32 Si falta una pieza o si hay una pieza rota, llame a nuestro Departamento de atención al cliente al 800-251-0001. Envíe los Reclamos de garantía al Departamento de atención al cliente, Mr. Heater, 4560 W. 160TH ST., CLEVELAND, OHIO 44135. Incluya su nombre, dirección y número de teléfono, así...
- Page 33 Pour obtenir de l’assistance ou des renseignements supplémentaires, adressez-vous à un installateur, un fournisseur de services d’entretien ou un fournisseur en gaz qualifié. Modèle n° MH25NG/LP MR. HEATER, INC., 4560 W. 160 HS25NG/LP ST., CLEVELAND, OHIO 44135 · 216 916-3000 HEaTSTaR...
- Page 34 Introduction ... F3 Installation du radiateur ... F5 Notice d’utilisation du radiateur ... F10 Directives d’entretien à l’intention de l’utilisateur ... F12 Liste des pièces de rechange ... F15 HS25NG/LP Notice d’installation et guide d’utilisation TABLE DES MATIÈRES Titre Page...
- Page 35 Ce radiateur est conçu pour le chauffage à l’intérieur. Il ne doit pas être utilisé dans des locaux fermés de petite taille ou habités. SOUPAPE DE COMMANDE DE GAZ THERMOPILE RADIATEUR DE BASE SUPPORT MURAL HS25NG/LP PRISE DE VENTILATION PAR ASPIRATION Notice d’installation et guide d’utilisation...
- Page 36 ENTRÉE (BTU/H) LARGEUR LONGUEUR HAUTEUR POIDS 0,018 25 000 12 1/4 po 0,011 22 000 12 1/4 po HS25NG/LP Notice d’installation et guide d’utilisation Sujet connexe Distance par rapport aux surfaces combustibles Distance par rapport aux surfaces combustibles COLLECTEUR L’ORIFICE NAT.
- Page 37 être éloignés d’au moins 40 cm (16 pouces) des surfaces combustibles. PORTE DE L’ATELIER OUVERTE 40 CM (16 POUCES) MINIMUM MR. HEATER SUPPORT MURAL REMARQUE : SEUL LE CÔTÉ GAZ DE COMBUSTION DU RADIATEUR PEUT ÊTRE REMONTÉ LE RÉFLECTEUR LATÉRAL DU RADIATEUR DOIT ÊTRE HORIZONTAL.
- Page 38 5. Installez la ou les prises tel que désiré et fixez- les au moyen de 4 attaches appropriées dans HS25NG/LP Notice d’installation et guide d’utilisation...
- Page 39 (VOIR LA FIGURE 4) VIS À TÔLE Nº 6 X 1 PO (2 REQUISES – INCLUSES AVEC LE THERMOSTAT) CÔTÉ NON FINI THERMOSTAT (VOIR LES INSTRUCTIONS INCLUSES AVEC LE THERMOSTAT) HS25NG/LP Notice d’installation et guide d’utilisation CÔTÉ FINI REBORD TROUS PRÉ- PERCÉS...
- Page 40 LONGUEUR MAXIMALE DU TUYAU NOIR 1/2 PO PROFONDEUR MAXIMALE D’INSERTION DANS LA SOU- Figure 6. Exigences relatives au raccordement de HS25NG/LP Notice d’installation et guide d’utilisation LAISSEZ 2 FILETS DÉNUDÉS FILET 3/4 PO CORPS DE LA SOU- PAPE DE GAZ...
- Page 41 TUYAU RIGIDE AVEC RACCORD UNION OU RACCORD FLEXIBLE AU RADIATEUR HS25NG/LP REMARQUE : 1. N’UTILISEZ QU’UNE PÂTE À JOINT QUI EST RÉSISTANTE AUX GAZ LIQUÉFIÉS SUR LES INSTALLATIONS AU GPL. 2. LES RACCORDS ILLUSTRÉS NE SONT PAS INCLUS AVEC LE RADIATEUR.
- Page 42 OFF. Voir la figure 9. RÉGLAGE DU RÉGULATEUR DE PRESSION BLOC D’ALIMENTATION DU CAPTEUR DE VEIL- LEUSE HS25NG/LP Notice d’installation et guide d’utilisation REMARQUE RÉGULATEUR DE PRES- SION STANDARD SORTIE DE GAZ DE VEILLEUSE (DÉRIVATION DE PRESSION DIRECTEMENT EN DESSOUS) VIS DE RÉGLAGE DU DÉBIT DE...
- Page 43 C. Enfoncez légèrement le bouton et tournez-le à la position OFF (arrêt). D. Fermez les robinets d’alimentation en gaz. SOUPAPE DE Figure 10. Allumage de la veilleuse HS25NG/LP REMARQUE ALLUMER LA VEILLEUSE AVEC UNE ALLUMETTE TEL QU’INDIQUÉ Notice d’installation et guide d’utilisation...
- Page 44 DE PRESSION STANDARD (MODÈLE «A») VIS DE RÉGLAGE DU DÉBIT DE LA VEILLEUSE (SOUS LA VIS DU COU- VERCLE) du dessus HS25NG/LP Notice d’installation et guide d’utilisation 10 À 13 MILLIMÈTRES FLAMME (3/8 À 1/2 POUCE) THERMOCOUPLE flamme Tableau 4. Tableau de dépannage...
- Page 45 A. Elle ne fonctionne pas correctement lors de l’inspection ou du dépannage. B. Il est difficile de tourner ou d’enfoncer le bouton de la commande de gaz, ou si le bouton ne remonte pas lorsque relâché. HS25NG/LP SOLUTIONS remplacer régler de nouveau la veilleuse remplacer...
- Page 46 Nos heures d’ouverture sont de 8 h 30 à 17 h, HE, du lundi au vendredi Veuillez inclure le numéro de modèle, la date de l’achat et la description du problème dans toutes vos communications. Modèle n° MH25NG/LP HS25NG/LP Notice d’installation et guide d’utilisation...
- Page 47 05573 10358 11406 naturel 11406 naturel 04435A 12369 05354 05351 98593 19014 PREUVE D’ACHAT HS25NG/LP N° DE NOMEN- CLATURE Orifice-brûleur-gaz propane Orifice-veilleuse-gaz naturel Orifice-veilleuse-gaz propane Câble du thermostat Veilleuse GN Veilleuse GN Grille de rechange Joint d’étanchéité Contre-écrou Connecteur Raccord simple 3/8 po Évent à...
- Page 48 Si une pièce est endommagée ou manquante, téléphonez à notre service de soutien technique au 800-251-0001. Adressez toute réclamation relative à la garantie à Service Department, Mr. Heater, Inc., 4560 W. 160TH ST., CLEVELAND, OHIO 44135 États-Unis. Indiquez vos nom, adresse et numéro de téléphone ainsi que les détails de la réclamation.