Table of Contents
Advertisement
Available languages
Available languages
©2006 Sunbeam Products, Inc., doing business as Jarden Consumer Solutions.
All rights reserved.
Distributed by Sunbeam Products, Inc., doing business as Jarden Consumer Solutions,
Boca Raton, Florida 33431.
U.S. 1-800-MR COFFEE (1-800-672-6333)
Canada 1-800-667-8623
Visit us at www.mrcoffee.com
You will find exciting and entertaining tips and ideas,
including great recipes!
SPR-101006
©2006 Sunbeam Products, Inc., operando bajo el nombre de Jarden Consumer Solutions,
Todos los derechos reservados.
Distribuido por Sunbeam Products, Inc., operando bajo el nombre de Jarden Consumer Solutions,
Boca Ratón, Florida 33431.
Visítenos en www.mrcoffee.com
Ahí encontrará consejos e ideas excitantes y entretenidos,
¡incluyendo excelentes recetas!
Printed in China/Impreso en China
P.N. 120219
Advertisement
Chapters
Table of Contents

Related Manuals for Mr. Coffee mrx35


Summary of Contents for Mr. Coffee mrx35
- Page 1 ©2006 Sunbeam Products, Inc., doing business as Jarden Consumer Solutions. All rights reserved. Distributed by Sunbeam Products, Inc., doing business as Jarden Consumer Solutions, Boca Raton, Florida 33431. U.S. 1-800-MR COFFEE (1-800-672-6333) Canada 1-800-667-8623 Visit us at www.mrcoffee.com You will find exciting and entertaining tips and ideas, including great recipes! SPR-101006 ©2006 Sunbeam Products, Inc., operando bajo el nombre de Jarden Consumer Solutions,...
-
Page 2: User Manual
User Manual / Manual del Usuario www.mrcoffee.com Classic Edition Coffeemaker / Cafetera MR Series / Serie MR... -
Page 3: Important Safeguards
9. Do not let the power cord hang over edge of table or counter, or allow it to come into contact with hot surfaces. 10. Do not place this coffeemaker on or near a hot gas stove or electric burner or in a heated oven. -
Page 4: Introduction
To increase the length of the power cord: grasp the power cord (not the power plug) and gently lift it out of the slot, then pull it away from the coffeemaker. To decrease the length of the power cord: grasp the power cord (not the power plug), lift it out of the slot and gently feed it into the coffeemaker. -
Page 5: Table Of Contents
Brewing Coffee Later (Delay Brew) ......... 14 Cleaning and Maintaining Your Coffeemaker ....... . . 16 Troubleshooting Your MR. -
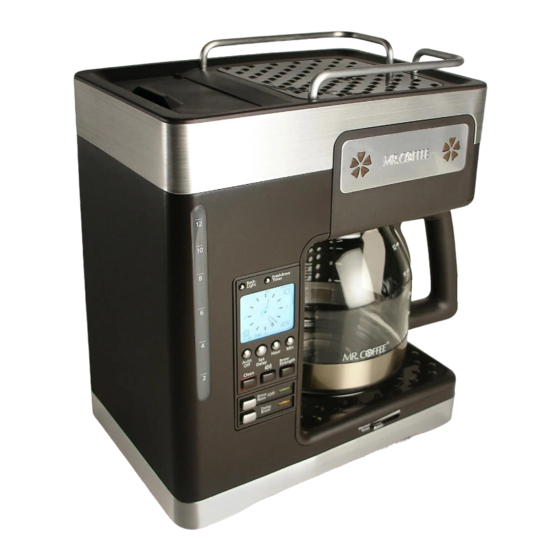
Page 6: Parts Diagram
PARTS DIAGRAM 1. Water Reservoir 2. Top Cup Rack 3. Silicone Decanter Pad 4. Removable Filter Basket 5. Pause ‘n Serve 6. Backlit Ambient Lighting 7. Decanter 8. Adjustable Warming Plate (not on thermal models) 9. Water Window 10. Programmable Clock Timer... -
Page 7: Control Panel
Cleaning Cycle Button Set Delay Button k. Adjustable Auto Shut-off Button l. Ambient Back Light Button Coffeemaker Extras (not included with all models) Water Filtration System Mr. Coffee Brand ® Permanent Filter Mr. Coffee Brand 10-12 Cup ® Basket-Style Paper Filters... -
Page 8: Coffeemaker Features And Benefits
COFFEEMAKER FEATURES AND BENEFITS Your new MR. COFFEE Coffeemaker has the following features: ® • Brewing Capacity – 12 cups/60 oz. • Removable Filter Basket – The filter basket pulls out for fast and easy cleaning and filling. • Pause ‘n Serve – Allows you up to 30 seconds to pour a cup of coffee while the coffeemaker is still brewing. -
Page 9: Clean Your Coffeemaker Before Using The First Time
10 seconds after a power outage. CLEAN YOUR COFFEEMAKER BEFORE USING THE FIRST TIME Make sure your first cup of coffee is as good as can be by cleaning your MR. COFFEE Coffeemaker before its first use. Just follow these simple steps: 1. -
Page 10: Setting The Clock And Delay Brew Time
SETTING THE CLOCK AND DELAY BREW TIME To Set the Clock: 1. Plug the power cord into a standard electrical outlet. The clock will flash on the control panel to indicate that the time has not been set yet. 2. Press and hold the HOUR and then the MINUTE buttons until you reach the current time. -
Page 11: Preparing For Use
PREPARING FOR USE Selecting and Measuring Ground Coffee For best results, use a level tablespoon for ground coffee measurement. Make sure you use medium grind coffee for a perfect brew. A. Suggested Coffee Measurement Chart 1 level tablespoon (tbsp) = 5 gr./0.17 oz. Use more or less coffee to suit your taste. - Page 12 B. Water Filtration System Congratulations! You are the owner of a MR. COFFEE This carbon-based water filter reduces chlorine up to 97% for better tasting coffee. First, look for the MR. COFFEE basket. If you do not see this symbol, please call 1-800-672-6333.
-
Page 13: Adding Water And Ground Coffee
See the Suggested Coffee Measurement Chart. 4. After following instructions in the Water Filtration System, place the MR. COFFEE filter in the pivoting filter holder. It conveniently detaches from the brew basket by pulling up at the rear pivot point. -
Page 14: Brewing Coffee Now
BREW NOW/OFF button once. The BREW NOW green light will turn on to signal that the coffeemaker is on and brewing (Figure 6). 2. To enjoy a more full flavored cup of coffee, press the Brew Strength button once. The STRONG mug icon will appear in the upper right corner of the clock display (Figure 7). -
Page 15: Brewing Coffee Later (Delay Brew)
On/Off Audible Ready Signal The coffeemaker will beep at the end of the brew and clean cycle. You may choose not to be alerted by turning the Audible Ready Signal off (Figure 10). - Page 16 Water and Ground Coffee section. 3. To activate DELAY BREW and program your coffeemaker to brew coffee at a later time, press the DELAY BREW button once (Figure 13). The yellow DELAY BREW light will turn on. The coffeemaker is now set to automatically brew coffee at the pre-set later time.
-
Page 17: Cleaning And Maintaining Your Coffeemaker
MR. COFFEE (1 - 800 - 672-6333), or online at www.mrcoffee.com. 1. Follow package instructions to prepare one batch of MR. COFFEE mixture into the water reservoir. Before decalcifying, remove the water filtration disk from the machine. - Page 18 7. Place the empty decanter back on the coffeemaker, centered on the warming plate. 8. Remove and discard the paper filter used during the cleaning cycle. If a MR. COFFEE used during cleaning, remove it and rinse it thoroughly before replacing it in the filter basket.
-
Page 19: Troubleshooting Your Mr. Coffee ® Coffeemaker
Coffeemaker has been carefully designed to give you many years of trouble-free service. ® In the unlikely event that your new coffeemaker does not operate satisfactorily, please review the following potential problems and try the steps recommended BEFORE you call an Authorized Sunbeam Service Center. - Page 20 THE COFFEE TASTES BAD THE GROUNDS ARE IN THE COFFEE Do you still have questions? You can call us toll-free at the MR. COFFEE Consumer Service Department, 1-800-MR COFFEE (1-800-672-6333) or you can visit us at POSSIBLE CAUSE • There’s a power outage.
-
Page 21: Service And Maintenance
SERVICE AND MAINTENANCE Replacement Parts • Coffee Filters – For better tasting coffee, we recommend that you use a MR. COFFEE brand 10-12 cup basket-style paper filter or a MR. COFFEE filters are available at most grocery stores. • Water Filtration - Replacement water filtration disks can be purchased through your local retailer, online at www.mrcoffee.com, or by calling 1- 800-MR-COFFEE... -
Page 22: Warranty Information
WARRANTY INFORMATION 1-YEAR LIMITED WARRANTY Sunbeam Products, Inc., doing business as Jarden Consumer Solutions, or if in Canada, Sunbeam Corporation (Canada) Limited, doing business as Jarden Consumer Solutions, (collectively “JCS”) warrants that for a period of one year from the date of purchase, this product will be free from defects in material and workmanship. -
Page 23: Medidas De Seguridad Importantes
Devuelva esta unidad solamente al Centro de Servicio Autorizado más cercano para su examen, reparación o ajuste. 7. El uso de aditamentos o accesorios que no sean productos de marca MR. COFFEE causar riesgos de daños o lesiones. -
Page 24: Introducción
Bienvenido y felicitaciones por haber comprado la nueva cafetera MR. COFFEE Su nueva cafetera de la Serie MR lo despertará por la mañana y le brindará deliciosas infusiones durante sus atareadas actividades diarias. ¡La manera de disfrutar la cafetera MR. COFFEE INSTRUCCIONES ESPECIALES PARA EL CABLE DE ALIMENTACIÓN ELÉCTRICA 1. -
Page 25: Tabla De Contenido
Limpieza y mantenimiento de la cafetera ........36 Guía de resolución de problemas de la cafetera Mr. Coffee Servicio y mantenimiento . -
Page 26: Diagrama De Piezas
DIAGRAMA DE PIEZAS 1. Depósito de agua 2. Rejilla superior para tazas 3. Almohadilla de silicona para jarra 4. Portafiltro extraíble 5. Control de pausa y servir 6. Luz posterior de ambientación 7. Jarra 8. Placa calentadora ajustable (no incluida en modelos térmicos) 9. -
Page 27: Panel De Control
Botón de luz posterior de ambientación Adicionales de la cafetera (no incluidos en todos los modelos) Sistema de filtrado de agua ™ Filtro permanente marca Mr. Coffee ® Filtros de papel para 10 a 12 tazas marca Mr. Coffee ®... -
Page 28: Funciones Y Beneficios De La Cafetera
FUNCIONES Y BENEFICIOS DE LA CAFETERA Su nueva Cafetera MR. COFFEE • Capacidad de preparación – 12 tazas/60 oz. • Portafiltro extraíble – El portafiltro se retira para realizar la limpieza y permitir un llenado fácil y rápido. • Control de pausa y servir – Le permite servirse una taza de café en 30 segundos mientras la cafetera continúa preparándolo. -
Page 29: Limpie Su Cafetera Antes De Utilizarla Por Primera Vez
LIMPIE SU CAFETERA ANTES DE UTILIZARLA POR PRIMERA VEZ Para asegurarse de que la primera taza de café sea lo más deliciosa posible, limpie su ® cafetera MR. COFFEE antes de utilizarla por primera vez. Simplemente, siga estos sencillos pasos: 1. -
Page 30: Configuración Del Reloj Y Hora De Preparación Demorada
CONFIGURACIÓN DEL RELOJ Y HORA DE PREPARACIÓN DEMORADA Para configurar el reloj: 1. Enchufe el cable de alimentación eléctrica en una toma de corriente estándar. El reloj destellará en el panel de control para indicar que la hora aún no ha sido configurada. 2. -
Page 31: Preparación Para El Uso
PREPARACIÓN PARA EL USO Cómo seleccionar y medir el café molido Para obtener mejores resultados, utilice cucharadas a ras para medir el café molido. Para obtener una preparación perfecta, asegúrese de utilizar café de molido mediano. A. Tabla de medidas de café recomendadas Para preparar 12 tazas 10 tazas... -
Page 32: Cómo Agregar Agua Y Café Molido
B. Sistema de filtrado de agua ¡Felicitaciones! Usted es propietario de un sistema de filtrado de agua MR. COFFEE filtro de agua a base de carbono mejora el gusto del café, ya que elimina hasta el 97% del cloro contenido en el agua. - Page 33 2. Utilice el filtro de café permanente ya instalado en el portafiltro o retírelo y coloque un filtro de papel para 10 a 12 tazas marca MR. COFFEE dentro del portafiltro extraíble (Figura 5). NOTA: Si utiliza filtros de papel, es importante que los lados del filtro encajen perfectamente dentro del portafiltro.
-
Page 34: Preparación Inmediata De Café
PREPARACIÓN INMEDIATA DE CAFÉ 1. Luego de completar los pasos en la sección Cómo agregar agua y café y con la jarra y el portafiltro correctamente colocados, encienda la cafetera presionando una vez el botón de PREPARACIÓN INMEDIATA/APAGADO. La luz indicadora de color verde de PREPARACIÓN INMEDIATA se encenderá... - Page 35 4. Antes de preparar una segunda jarra de café, apague la cafetera. Esto reiniciará la función del temporizador Fresh Brew . Para apagar la cafetera, presione el botón ™ de PREPARACIÓN INMEDIATA/APAGADO hasta que se apaguen todas las luces. 5. Asegúrese de que la jarra esté vacía antes de comenzar a preparar café.
-
Page 36: Preparación Demorada De Café
Placa Calentadora Ajustable La temperatura de la placa calentadora puede ajustarse de baja a alta moviendo el control deslizante hacia la derecha (Figura 12). PREPARACIÓN DEMORADA DE CAFÉ 1. Antes de que la cafetera pueda comenzar a preparar el café como se describe en la sección Configuración del reloj y hora de preparación demorada es necesario seleccionar la hora en el reloj. -
Page 37: Limpieza Y Mantenimiento De La Cafetera
MR. COFFEE ® numerosas tiendas o llamando al Departamento de Servicio al Consumidor de MR. COFFEE al 1-800-MR COFFEE (1-800-672-6333) o visitando nuestro sitio web, www.mrcoffee.com. 1. Para preparar la cantidad de solución de limpieza necesaria para limpiar la cafetera, siga las instrucciones en el envase del limpiador de cafeteras MR. - Page 38 8. Retire y deseche el filtro de papel utilizado durante el ciclo de limpieza. Si durante la operación de limpieza se utilizó un filtro permanente MR. COFFEE completamente antes de ponerlo en el portafiltro. 9. Ponga la unidad en marcha y deje que se realice un ciclo de preparación completo.
-
Page 39: Guía De Resolución De Problemas De La Cafetera Mr. Coffee
GUÍA DE RESOLUCIÓN DE PROBLEMAS DE LA CAFETERA MR. COFFEE Su cafetera MR. COFFEE ha sido cuidadosamente diseñada para brindarle muchos años de servicio sin ® problemas. En el caso poco probable de que su nueva cafetera no funcione satisfactoriamente, por favor lea los posibles problemas que se enumeran a continuación y siga los pasos recomendados ANTES de... - Page 40 EL CAFÉ TIENE MAL SABOR HAY CAFÉ MOLIDO DENTRO DEL CAFÉ LÍQUIDO ¿Aún tiene preguntas? Puede llamar sin cargo al Departamento de Servicio al Consumidor de MR. COFFEE 1-800-MR COFFEE (1-800-672-6333) o visítenos en CAUSA POSIBLE • Hay un corte de electricidad.
-
Page 41: Servicio Y Mantenimiento
Visite nuestro website en mrcoffee.com y descubra el secreto de cómo colar la taza perfecta de café. También encontrará una deliciosa variedad de recetas gourmet, consejos para fiestas y actividades y la información más reciente sobre los productos MR. COFFEE o un filtro permanente marca MR. COFFEE ®... -
Page 42: Información De Garantía
INFORMACIÓN de GARANTÍA GARANTÍA LIMITADA POR UN AÑO Sunbeam Products, Inc., operando bajo el nombre de Jarden Consumer Solutions, o si en Canadá, Sunbeam Corporation (Canada) Limited, operando bajo el nombre de Jarden Consumer Solutions (colectivamente “JCS”), garantiza por un periodo de un año desde la fecha de compra, que este producto no tendrá defectos de material ni mano de obra JCS, a su elección, reparará... - Page 43 Notes/Notas...