Table of Contents
Advertisement
Available languages
Available languages
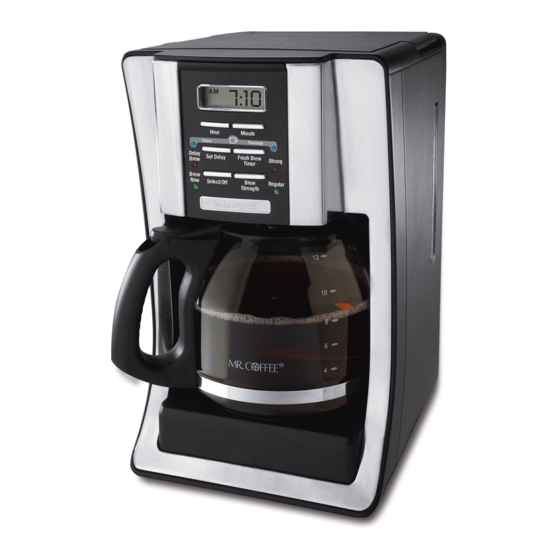
User Manual /Manual del Usuario
Coffeemaker / Cafetera
Models / Modelos
BVMC-SJX33GT and BVMC-SJX36GT
©2012 Sunbeam Products, Inc. doing business as Jarden
Consumer Solutions. All rights reserved. Distributed by
Sunbeam Products, Inc. doing business as Jarden Consumer
Solutions, Boca Raton, Florida 33431. Sunbeam products,
Inc. is a subsidiary of Jarden Corporation (NYSE: JAH).
©2012 Sunbeam Products, Inc. operando bajo el nombre de
Jarden Consumer Solutions. Todos los derechos reservados.
Distribuido por Sunbeam Products, Inc. operando bajo el
nombre de Jarden Consumer Solutions, Boca Raton, Florida
33431. Sunbeam products, Inc. es una subsidiaria de Jarden
Corporation (NYSE: JAH).
U.S. 1-800-MR COFFEE (1-800-672-6333)
Canada 1-800-667-8623
Visit us at www.mrcoffee.com
Visítenos en www.mrcoffee.com
Printed in China/Impreso en China
P.N. 139053 Rev D
www.mrcoffee.com
BVMC- SJXGT _12ESM2
GCDS-MRC26969-ZZ
BVMC-SJXGT_12ESM2.indd 1-2
9/11/12 10:53 AM
Advertisement
Chapters
Table of Contents

Related Manuals for Mr. Coffee Mr. Coffee BVMC-SJX33GT


Summary of Contents for Mr. Coffee Mr. Coffee BVMC-SJX33GT
- Page 1 Solutions, Boca Raton, Florida 33431. Sunbeam products, Inc. is a subsidiary of Jarden Corporation (NYSE: JAH). ©2012 Sunbeam Products, Inc. operando bajo el nombre de Jarden Consumer Solutions. Todos los derechos reservados. Distribuido por Sunbeam Products, Inc. operando bajo el nombre de Jarden Consumer Solutions, Boca Raton, Florida 33431.
-
Page 2: Important Safeguards
IMPORTANT SAFEGUARDS 10. Do not place this appliance on or near a hot gas stove or electric burner or in a heated oven. 11. To disconnect the appliance, turn it OFF, then To reduce the risk of fire, electric shock and/or injury to remove the power plug from the power supply. -
Page 3: Special Cord Set Instructions
Please read ALL of the instructions in this manual carefully 5. You can customize the length of the power cord so that it is the exact length you desire. To increase before you begin to use this appliance. Proper care and maintenance will ensure a long life and a trouble- the length of the power cord: grasp the power free operation for this appliance. -
Page 4: Table Of Contents
TAbLE OF CONTENTS PARTS DIAGRAM Important Safeguards.............2 Decanter Use and Care..........3 Special Cord Set Instructions..........4 Table of Contents............6 Parts Diagram..............7 Coffeemaker Features and Benefits........9 Clean Your Coffeemaker Before Using the First Time..10 Setting The Clock and Delay Brew Time......11 Preparing for Use............12 •... -
Page 5: Coffeemaker Features And Benefits
CONTROL PANEL COFFEEMAKER FEATURES AND bENEFITS Your new MR. COFFEE coffeemaker has the following ® a. Clock Display / Fresh features: Brew™ Timer Display • brewing Capacity – 12 cups – glass decanter b. Minute Button – 8 Cup – thermal decanter c. -
Page 6: Clean Your Coffeemaker Before Using The First Time
• Programmable Controls: 2. Replace all the parts and close the lid. Then, run a – Clock – The clock serves as a handy kitchen clock brew cycle with water only, without adding coffee and allows you to set the Delay Brew feature and or coffee filter. -
Page 7: Preparing For Use
“brewing Coffee Later” section. b. Water Filtration System (not included with all models) To check the programmed time, push the Using the Mr. Coffee carbon-based water filter in the ® Mr. Coffee ® coffeemaker during the brewing process helps SET DELAY button. The display will show remove up to 97% of the chlorine from the water and the time you have programmed the coffee improves the taste of your coffee. -
Page 8: Adding Water And Ground Coffee
water reservoir with GLASS and THERMAL markings, C. Adding Water and Ground Coffee showing the MAXIMUM amount of water that can 1. Open the brew basket lid. For be used for these corresponding decanters. Do not your convenience, you can lift fill past the “12 cup MAX line”... -
Page 9: Brewing Coffee Later (Delay Brew)
NOTE FOR ThERMAL USERS: If you 5. Make sure the decanter is empty before starting to are choosing to use your coffeemaker brew coffee. as a thermal and have purchased a 6. Be sure to turn your coffeemaker off when no Mr. -
Page 10: Cleaning And Maintaining Your Coffeemaker
3. To activate DELAY BREW and program Remove the filter basket, permanent filter (not included your coffeemaker to brew coffee at a on all models), decanter and decanter lid and wash later time, press the SELECT/OFF button them in a solution of hot water and mild liquid soap. twice (Figure 10). -
Page 11: Suggested Decalcifying Interval
5. Turn the coffeemaker off and let stand for 30 minutes. Water Filtration Disk Replacement 6. Run the remainder of the cleaning solution through Your water filtration disk will need to be replaced the coffeemaker. once a month (approx. 30 brew cycles). If the machine 7. -
Page 12: Troubleshooting Your Mr. Coffee ® Coffeemaker
In the unlikely event that your new coffeemaker does MAINTAINING” not operate satisfactorily, please review the following SECTION. potential problems and try the steps recommended BEFORE you call an Authorized Sunbeam Service Center. THE FILTER The filter basket INSERT FILTER BASKET BASKET is not properly CORRECTLY. -
Page 13: Service And Maintenance
All repairs ARE IN THE properly seated WITHIN THE FILTER and replacements must be made by Sunbeam or an COFFEE in the basket. BASKET. authorized Sunbeam Service Center. If you live in the... -
Page 14: Warranty Information
1-YEAR LIMITED WARRANTY We welcome your questions, comments or suggestions. Sunbeam Products, Inc. doing business as Jarden In all your communications, please include your Consumer Solutions or if in Canada, Sunbeam complete name, address and telephone number and a Corporation (Canada) Limited doing business as Jarden description of the problem. - Page 15 In the U.S.A., this warranty is offered by Sunbeam JCS disclaims all other warranties, conditions or Products, Inc. doing business as Jarden Consumer representations, express, implied, statutory or otherwise.
- Page 16 ADvERTENCIAS DE 8. No utilice la unidad a la intemperie o aire libre. 9. No permita que el cable eléctrico de la unidad SEGURIDAD cuelgue del borde de una mesa o mostrador, ni que haga contacto con superficies calientes. 10. No coloque este electrodoméstico cerca o encima Para disminuir el riesgo de un incendio, descarga eléctrica de ninguna superficie caliente, ya sea eléctrica o de y/o lesión a las personas, siempre deben obedecerse las...
- Page 17 • Descarte la jarra de inmediato si en alguna ocasión 2. Se puede adquirir y utilizar una extensión eléctrica hierve hasta evaporarse todo su contenido. si se usa con precaución. • Proteja la jarra contra golpes secos, rasguños o 3. Si se utiliza una extensión eléctrica, la calificación maltrato.
- Page 18 TAbLA DE CONTENIDO DIAGRAMA DE PARTES Advertencias de Seguridad.........30 Uso y Cuidado de la Jarra..........31 Instrucciones Especiales Sobre el Cable Eléctrico..32 Tabla de Contenido............34 Diagrama de Partes............35 Características y Beneficios de la Cafetera....37 Limpie su Cafatera Antes de Utilizarla por Primera Vez..39 Programando la Hora del Reloj y el Período de Demora del Colado..............39 Preparándose para Utilizar la Cafetera......41...
-
Page 19: Características Y Beneficios De La Cafetera
PANEL DE CONTROLES CARACTERÍSTICAS Y bENEFICIOS DE LA CAFETERA Su nueva Cafetera MR. COFFEE cuenta con las ® a. Pantalla del Reloj/ siguientes características: Pantalla del Contador • Capacidad de preparación Regresivo del Colado – 12 tazas – Serie con jarra de vidrio b. -
Page 20: Limpie Su Cafatera Antes De Utilizarla Por Primera Vez
• Apagado Automático en Dos horas – Mantiene su LIMPIE SU CAFETERA ANTES DE UTILIZARLA POR café caliente durante dos horas, y luego se apaga PRIMERA vEZ automáticamente. Asegúrese de que su primera taza de café sea tan • Funciones de control programables adicionales: buena como sea posible limpiando su Cafetera –... -
Page 21: Preparándose Para Utilizar La Cafetera
NOTA: El oprimir cualquier botón antes PREPARÁNDOSE PARA UTILIZAR LA CAFETERA de programar el reloj hará que el reloj Seleccionando y Midiendo el Café Molido comience a marcar la hora a partir de las Para resultados idóneos, utilice una cucharada nivelada 12:00 a.m. - Page 22 Para utilizar el sistema de filtración de agua en su C. Añadiendo Agua y Café Molido Cafetera MR. COFFEE , favor seguir los siguientes pasos: ® 1. Levante y abra la tapa de 1. Utilizando el indicador rojo en el filtro de agua la canasta del filtro.
-
Page 23: Colando Café Ahora
correspondientes. No llene más allá de la marca cafetera está encendida y está colando. “12 cup MAX” para la jarra de vidrio o de la marca La luz verde de REGULAR STRENGTH “8 cup MAX” para la jarra térmica en la ventana (INTENSIDAD REGULAR DEL COLADO) para agua ni pase la marca correspondiente GLASS/ se encenderá... -
Page 24: Colando Café Luego (Demora Del Colado)
3. Luego de que la borra o café molido usado se haya en pantalla la función del CONTADOR REGRESIVO DEL enfriado, abra cuidadosamente la canasta del filtro Colado. y descártela. COLANDO CAFÉ LUEGO NOTA: La cubierta de la regadera está caliente luego del colado.Permita siempre que la cafetera se enfríe 1. -
Page 25: Limpiando Y Dándole Mantenimiento A Su Cafetera
4. A la hora preseleccionada, la luz verde de LIMPIANDO Y DÁNDOLE MANTENIMIENTO A SU COLAR AHORA se encenderá y la luz ambar de CAFETERA DEMORA DEL COLADO se apagará, indicando Limpieza Diaria de su Cafetera MR. COFFEE ® que el colado ha comenzado a la intensidad del Siempre desenchufe la cafetera y permita que se enfríe colado seleccionada. - Page 26 NOTA: Se puede utilizar 4 tazas o 20 onzas de vinagre Intervalo de Limpieza Sugerido blanco doméstico sin diluir como sustituto para el La frecuencia de limpieza depende de la dureza del limpiador. agua utilizada. La siguiente tabla ofrece un programa 2.
-
Page 27: Resolviendo Problemas Con Su Cafetera Mr. Coffee
SEGÚN SE INDICA EN CUELA potenciales y siga los pasos recomendados antes de llamar a LENTAMENTE limpiada. LA SECCIÓN “DÁNDOLE un Centro de Servicio Autorizado Sunbeam MANTENIMIENTO A SU CAFETERA”. PRObLEMA CAUSA POSIbLE SOLUCIÓN LA CANASTA La canasta... - Page 28 PRObLEMA CAUSA POSIbLE SOLUCIÓN PRObLEMA CAUSA POSIbLE SOLUCIÓN LA CANASTA La jarra se APAGUE LA UNIDAD Y HAY BORRA O El filtro no COLOQUE EL FILTRO DEL FILTRO SE retiró del plato DESCONÉCTELA DÉJELA CAFÉ MOLIDO está asentado CORRECTAMENTE ENFRIAR. RECOJA LO DESBORDA calefactor por correctamente...
-
Page 29: Servicio Y Mantenimiento
Si hace falta reparar su cafetera, no la devuelva a la tienda donde la adquirió. Todas las reparaciones deben ser efectuadas por Sunbeam o por un Centro de Servicio Autorizado Sunbeam. Si usted vive en los EE.UU. o en el Canadá, por favor llámenos a los siguientes números de teléfono libres de cargo... - Page 30 JCS o a un GARANTÍA LIMITADA POR UN AÑO Centro de Servicio autorizado por JCS. Asimismo, la Sunbeam Products, Inc. operando bajo el nombre de garantía no cubre actos fortuitos tales como incendios, Jarden Consumer Solutions, o en Canadá, Sunbeam inundaciones, huracanes y tornados.
- Page 31 En los Estados Unidos, esta garantía es ofrecida por Sunbeam Products, Inc. operando bajo el nombre de Jarden Consumer Solutions, Boca Ratón, Florida 33431. En Canadá, esta garantía es ofrecida por Sunbeam...