HP Z440 User Manual
Hide thumbs
Also See for Z440:
- Technical white paper (21 pages) ,
- Maintenance and service manual (132 pages)
Table of Contents
Advertisement
Advertisement
Table of Contents
Troubleshooting

Related Manuals for HP Z440


Summary of Contents for HP Z440
- Page 1 HP Z440, Z640, and Z840 Workstation Series User Guide...
- Page 2 Linux® is the registered trademark of Linus Company, L.P. change without notice. The only warranties for Torvalds in the U.S. and other countries. HP products and services are set forth in the Microsoft and Windows are either registered Third Edition: August 2015 express warranty statements accompanying trademarks or trademarks of Microsoft such products and services.
- Page 3 About this guide This guide provides setup and troubleshooting information for the HP Z Workstation series. It includes these topics: Guide topics Locating HP resources on page 1 Workstation features on page 5 Setting up the workstation on page 12...
- Page 4 About this guide...
-
Page 5: Table Of Contents
Product updates ..............................4 2 Workstation features ............................ 5 HP Z440 Workstation components ........................5 HP Z440 Workstation front panel components .................. 5 HP Z440 Workstation rear panel components ................... 6 HP Z640 Workstation components ........................7 HP Z640 Workstation front panel components .................. 7 HP Z640 Workstation rear panel components ................... - Page 6 ........................35 Using HP PC Hardware Diagnostics ................35 How to access and run HP PC Hardware Diagnostics ........35 Downloading HP PC Hardware Diagnostics to a USB device ....... 36 Before you call for technical support ................36 Backing up, restoring, and recovering in Windows 10 ...........
- Page 7 HP Installer Kit for Linux (HPIKL) ......................... 43 Setting up Red Hat Enterprise Linux ........................43 HPIKL driver disc ..........................44 Installing with the HP Red Hat Linux driver disc ................44 Setting up SUSE Linux Enterprise Desktop (SLED) ..................... 45 Setting up preloaded SLED ....................... 45 Installing SLED with the DVD Installer Kit ..................
- Page 8 During operation ......................54 Customer Self Repair ...................... 55 More troubleshooting options ..................55 10 Routine care .............................. 56 General cleaning safety precautions ........................56 Recommended cleaning products ........................56 Cleaning the chassis ............................57 Cleaning the keyboard ............................57 Cleaning the monitor ............................
-
Page 9: Locating Hp Resources
Locating HP resources This section provides information on the following resources for your HP workstation: ● Product information ● Product support ● Product documentation ● Product diagnostics ● Product updates Product information Topic Location Technical specifications Go to http://www.hp.com/go/quickspecs. In the left pane, select your region and then select Workstations. -
Page 10: Product Support
You can find your HP Limited Warranty located with the user guides on your product and/or on the CD or DVD provided in the box. In some countries or regions, HP may provide a printed warranty in the box. For countries or regions where the warranty is not provided in printed format, you can request a copy from http://www.hp.com/go/orderdocuments. -
Page 11: Product Documentation
To learn how to remove and replace workstation components, go to http://www.hp.com/ go/sml. Product notifications Subscriber's Choice is an HP program that allows you to sign up to receive driver and software alerts, proactive change notifications (PCNs), the HP newsletter, customer advisories, and more. Sign up at http://www.hp.com/go/subscriberschoice. Technical specifications QuickSpecs for HP Workstations include information about the operating system, power supply, memory, CPU, and many other system components. -
Page 12: Product Updates
Select Settings > Change PC Settings. Operating systems For information, go to the following locations: ● Go to http://www.hp.com/go/quickspecs. In the left pane, select your region and then select Workstations. ● Windows operating systems, go to http://www.support.microsoft.com. ●... -
Page 13: Workstation Features
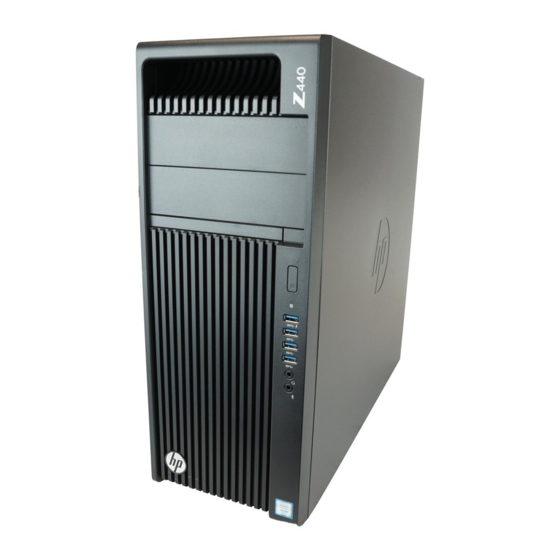
HP Z640 Workstation components ● HP Z840 Workstation components ● Product specifications HP Z440 Workstation components HP Z440 Workstation front panel components Optical drive bays USB 3.0 charging port (1) Optical drive USB 3.0 ports (3) Audio-out (headphone)/Audio-in Power button... -
Page 14: Hp Z440 Workstation Rear Panel Components
HP Z440 Workstation rear panel components Power supply Built-In Self-Test Audio line-in jack (blue) (BIST) LED PS/2 keyboard connector (purple) PCI/PCIe card slots PS/2 mouse connector (green) Power cord connector USB 2.0 ports (2, black) Universal chassis clamp opening USB 3.0 ports (4, blue) -
Page 15: Hp Z640 Workstation Components
HP Z640 Workstation components HP Z640 Workstation front panel components Optical drive bays USB 3.0 charging port (1) Optical drive USB 3.0 ports (3) Audio-out (headphone)/Audio-in Power button (microphone) combo jack Hard drive activity light Microphone jack HP Z640 Workstation components... -
Page 16: Hp Z640 Workstation Rear Panel Components
HP Z640 Workstation rear panel components Power supply Built-In Self-Test AMT-enabled network jack (BIST) LED (orange) Rear power button Audio line-out jack (green) PS/2 keyboard connector (purple) Audio line-in jack (blue) PS/2 mouse connector (light green) PCI/PCIe card slots USB 2.0 ports (2, black) Power cord connector USB 3.0 ports (4, blue) -
Page 17: Hp Z840 Workstation Components
HP Z840 Workstation components HP Z840 Workstation front panel components Optical drive USB 3.0 charging port (1) Optical drive bays USB 3.0 ports (3) Audio-out (headphone)/Audio-in Power button (microphone) combo jack Hard drive activity light Microphone jack HP Z840 Workstation components... -
Page 18: Hp Z840 Workstation Rear Panel Components
HP Z840 Workstation rear panel components Power supply Built-In Self-Test (BIST) USB 2.0 ports (2, black) Rear power button USB 3.0 ports (4, blue) Network jacks (2, orange) Serial connector (teal blue) Bottom connector is AMT enabled PS/2 keyboard connector (purple) -
Page 19: Product Specifications
(17.51 in) (18.50 in) (20.70 in) Environmental specifications Characteristic HP Z440, Z640, and Z840 Workstations Operating: 5°C to 35°C (40°F to 95°F) Temperature Non-operating: -40°C to 60°C (-40°F to 140°F) NOTE: Derate by 1°C (1.8°F) for every 305 m (1,000 ft) altitude over 1,524 m (5,000 ft). -
Page 20: Setting Up The Workstation
Setting up the workstation This chapter describes how to set up your workstation. ● Ensuring proper ventilation ● Setup procedures ● Adding monitors ● Installing optional components ● Security ● Product recycling Ensuring proper ventilation Proper ventilation for the system is important for workstation operation. Follow these guidelines: ●... -
Page 21: Setup Procedures
The grounding pin is an important safety feature. NOTE: An HP Z840 Workstation with a 1125 W power supply might require more power than the typical office environment can supply. For details, see the Site Preparation Guide for the workstation at http://www.hp.com/support/workstation_manuals. -
Page 22: Adding Monitors
Determine the kind of graphics performance you want. ● Note the type of graphics connector used by each monitor. HP provides graphics cards with DisplayPort (DP) and DVI interfaces, but you can use adapters and third-party cards to interface to other graphics formats, including DVI-I, HDMI, or VGA. -
Page 23: Finding Supported Graphics Cards
Dual Link DVI (DL-DVI) or DisplayPort output. To get native resolution with DVI, you must use a DL-DVI cable, not standard DVI-I or DVI-D cables. HP workstations do not support all graphics cards. Be sure that a new graphics card is supported before purchasing it. See... -
Page 24: Matching Graphics Cards To Monitor Connectors
This interface is a dual-monitor graphics interface card that supports two VGA, two DVI, or two DP monitors. NOTE: HP graphics cards include monitor cable adapters unless otherwise indicated. DisplayPort connections have the highest performance; VGA connections have the lowest. -
Page 25: Connecting And Configuring Monitors
● Graphics card with VGA and DL-DVI output — If the workstation does not have a PCIe graphics card, but has one or more SVGA and/or DL-DVI outputs, you can connect a monitor to each output. ● Graphics card with DMS-59 output — If the workstation has a PCIe graphics card with a DMS-59 output, use the appropriate adapter to connect your monitor. -
Page 26: Using A Third-Party Graphics Configuration Utility
Security Some HP workstations have a lock on the side access panel. The key for this lock is shipped attached to the back panel of the workstation chassis. Additional security features reduce the risk of theft and alert when there has been a chassis intrusion. See the Maintenance and Service Guide for your workstation at http://www.hp.com/support/... -
Page 27: Product Recycling
Product recycling HP encourages customers to recycle used electronic hardware, HP original print cartridges, and rechargeable batteries. For information about recycling HP components or products, go to http://www.hp.com/go/recycle. Product recycling... -
Page 28: Setting Up, Backing Up, Restoring, And Recovering Windows 7
Backing up, restoring, and recovering Windows 7 CAUTION: Do not add optional hardware or third-party devices to the HP workstation until the operating system is successfully installed. Adding hardware might cause errors and prevent the operating system from installing correctly. -
Page 29: Transferring Files And Settings
See Backing up your information on page NOTE: HP recommends that you print the recovery procedures and save them for later use, in case of system instability. Backing up, restoring, and recovering Windows 7... -
Page 30: Backing Up Your Information
Backing up your information NOTE: Windows includes the User Account Control feature to improve the security of your workstation. You may be prompted by User Account Control for your permission or password when you perform certain tasks. To continue a task, select the appropriate option. For information about User Account Control, see Help and Support: select Start and then select Help and Support. -
Page 31: System Recovery
CAUTION: System Recovery deletes all data and programs that you have created or installed. A Windows system from the HP factory ships with a recovery partition. You can use the recovery partition to recover the factory operating system. Turn off the workstation. If necessary, press and hold the power button until the workstation turns off. - Page 32 To order a Windows 7 operating system DVD and Driver DVD, go to the HP website. For U.S. support, go to http://www.hp.com/cgi-bin/hpsupport/index.pl. For worldwide support, go to http://www8.hp.com/us/en/ contact-hp/ww-contact-us.html. You can also order the DVDs by calling support. To initiate recovery using a Windows 7 operating system DVD: NOTE: This recovery process takes several minutes.
-
Page 33: Setting Up, Backing Up, Restoring, And Recovering Windows 8
Internet, Microsoft activates your operating system. This process takes about 15 to 30 minutes. Carefully read and follow the instructions on the screen. We recommend that you register your workstation with HP, so you can receive important software updates, request support, and sign up for special offers. -
Page 34: Downloading Windows 8 Updates
For more details about the tools provided, see Help and Support. From the Start screen, type help, and then select Help and Support. HP recommends that you print the recovery procedures and save them for later use, in case of system instability. - Page 35 ● Store personal files in the Documents library, and back it up regularly. ● Back up templates that are stored in their associated programs. ● Save customized settings that appear in a window, toolbar, or menu bar by taking a screen shot of your settings.
-
Page 36: Creating Recovery Media And Backups
Recovery Media creation is finished. On most systems, this partition is 10 GB in size. HP recommends that you not delete this recovery partition. If the partition is deleted, you will be unable to restore the Windows 8 factory recovery partition to the hard drive using the recovery USB drive. -
Page 37: Using Windows 8 Refresh
Windows. The Reset recovery tool reinstalls the operating system and HP programs and drivers that were installed at the factory. Software not installed at the factory must be reinstalled. Any personal files must be restored from backups you made. -
Page 38: Using Windows 8 Reset
If possible, back up all personal files. If possible, check for the presence of the HP Recovery partition: from the Start screen, type This PC, and then select This PC. NOTE: If the HP Recovery partition is not listed, or you cannot check for its presence, you must recover using the recovery media that you created. -
Page 39: Recovery Using The Windows 8 Recovery Usb Flash Drive
The recovery tool reinstalls the operating system and the HP programs and drivers that were installed at the factory. You must reinstall all other software. -
Page 40: Recovery Using Windows 8 Restore Media
NOTE: The driver disc will load prerequisite software, and then allow you to load drivers. Install the Hardware Enabling Drivers first. HP recommends installing all available drivers. You can download applications that come with the workstation at http://www.hp.com. Chapter 5 Setting up, backing up, restoring, and recovering Windows 8... -
Page 41: Setting Up, Backing Up, Restoring, And Recovering Windows 10
5 to 10 minutes. Carefully read and follow the instructions on the screen to complete the initial Windows setup. We recommend that you register your workstation with HP during operating system set up so you can receive important software updates, facilitate support questions, and sign up for special offers. -
Page 42: Finding More Information
U.S., Canadian, and various international regulations. If you encounter issues There are several means to diagnose and resolve potential issues. HP provides several proprietary diagnostics tools but recommends a sequential troubleshooting approach that addresses the most basic root cause to the more complex. -
Page 43: Blink Or Beep Codes: Interpreting Post Diagnostic Front Panel Leds And Audible Codes
Guide (English only) for interpretation and recommended action. Using HP PC Hardware Diagnostics The HP PC Hardware Diagnostic tools simplify the process of diagnosing hardware issues and expedite the support process when issues are found. The tools save time by pinpointing the component that needs to be replaced. -
Page 44: Downloading Hp Pc Hardware Diagnostics To A Usb Device
Instructions for downloading HP PC Hardware Diagnostics (UEFI) are provided in English only. There are two options to download HP PC Hardware Diagnostics to a USB device: Option 1: HP PC Diagnostics homepage— Provides access to the latest UEFI version Go to http://hp.com/go/techcenter/pcdiags. -
Page 45: Backing Up, Restoring, And Recovering In Windows 10
(if internet access is also available). ◦ If you have HP Support Assistant, you may access it from the Start screen by clicking the HP Support Assistant app, clicking My computer, and then clicking Diagnostics. -
Page 46: Creating Recovery Media And Backups
Use HP Recovery Manager to create HP Recovery media after you successfully set up the workstation. This step creates a backup of the HP Recovery partition on the workstation. The backup can be used to reinstall the original operating system in cases where the hard drive is corrupted or has been replaced. -
Page 47: Using Windows Tools
● On select products, if you want to recover the workstation’s original factory partition and content, or if you have replaced the hard drive, you can use the Factory Reset option of HP Recovery media. For more information, see Recovering using HP Recovery Manager on page ●... - Page 48 HP Recovery Manager software allows you to recover the workstation to its original factory state by using the HP Recovery media that you either created or that you obtained from HP, or by using the HP Recovery partition (select products only). If you have not already created recovery media, see...
- Page 49 Using HP Recovery media to recover You can use HP Recovery media to recover the original system. This method can be used if your system does not have an HP Recovery partition or if the hard drive is not working properly.
-
Page 50: Setting Up And Restoring Linux
HP certifies and supports Red Hat ® Enterprise Linux (RHEL) on HP workstations. ● HP certifies and supports SUSE Linux Enterprise Desktop (SLED) on HP workstations. ● HP certifies and supports Canonical Ubuntu on HP Workstations. ● HP offers a SLED 11 preload on some Z series Workstations. -
Page 51: Hp Installer Kit For Linux (Hpikl)
HP Installer Kit for Linux (HPIKL) The HP Installer Kit for Linux helps users install certified versions of RHEL, SLED, or Ubuntu on HP workstations. It is available as an operating system option on all HP workstations. ● The kit contains tested drivers that augment and/or replace those found in RHEL, SLED, or Ubuntu, to enable proper use and behavior on HP workstations. -
Page 52: Hpikl Driver Disc
The driver disc is used during this phase. All content added by HP is in the /HP directory on the disc. You can use it to build your own image or to browse the HP content. -
Page 53: Setting Up Suse Linux Enterprise Desktop (Sled)
Setting up SUSE Linux Enterprise Desktop (SLED) HP offers a 64-bit SLED 11 preload on some Z series Workstations and supports 64-bit SLED 11 on other workstations. Various versions of SLED are certified and supported by SUSE on HP workstations. For more information, go to the SUSE certification bulletin search page at https://www.suse.com/yessearch/Search.jsp. -
Page 54: Restoring Sled (Preloaded Systems Only)
The HP Installer Kit for Linux driver disk for Ubuntu relies on the same mechanisms in order to satisfy dependencies during installation. So the same internet access is needed, as well as capability to elevate from the current user session to administrator privileges. -
Page 55: Restoring Ubuntu (Preloaded Systems Only)
Ubuntu is available at no cost from www.ubuntu.com. Restart the workstation. Insert your HP driver disc. The HPIKL installation software automatically starts. When prompted for the administrator password, type the password in the field. Follow the onscreen instructions to install the drivers appropriate to your hardware configuration. -
Page 56: Proprietary Graphics Drivers
Third-party proprietary graphics drivers supported by HP and the graphics vendors are available with the HP Installer Kit for Linux, with the SLED 11 and Ubuntu preloads on Z series Workstations, and from HP Workstation Support at http://www.hp.com/go/workstationsupport. -
Page 57: Updating The Workstation
Updating the BIOS ● Upgrading device drivers HP is constantly working on improving your total workstation experience. To ensure that the workstation leverages the latest enhancements, HP recommends that you install the latest BIOS, driver, and software updates on a regular basis. -
Page 58: Upgrading Bios
HP workstation. If you did not purchase your device from HP, HP recommends that you go to the HP website first to see if your device and its drivers have been tested for HP workstation compatibility. If no driver is available, go to the device manufacturer's website to download the latest drivers. -
Page 59: Diagnostics And Minor Troubleshooting
(tower and desktop configurations) or on a pull-out card on the side of the display (all-in-one configurations). For a listing of all worldwide support phone numbers, go to http://www.hp.com/support, select your region, and click Connect with HP in the upper-right corner. -
Page 60: Locating Id Labels
To locate warranty information, go to http://www.hp.com/support/warranty-lookuptool. To locate an existing Care Pack, go to http://www.hp.com/go/lookuptool. To extend a standard product warranty, go to http://www.hp.com/hps/carepack. HP Care Pack Services offer upgraded service levels to extend and expand a standard product warranty. -
Page 61: Hp Support Center
HP Chat Support enables you to electronically submit a support ticket to HP over the web. When you submit a support ticket, HP Chat Support collects information about the workstation and passes it to an online support specialist. -
Page 62: Helpful Hints
Verify that the workstation is on and the power light is on. ● If you have installed an operating system other than the factory-installed operating system, confirm that it is supported on your system by going to http://www.hp.com/go/quickspecs. ● Verify that the internal display panel is lit. -
Page 63: Customer Self Repair
NOTE: Some components are not eligible for Customer Self Repair and must be returned to HP for service. Call support for further instructions before attempting to remove or repair these components. More troubleshooting options The following additional information about troubleshooting techniques and tools is provided in the Maintenance and Service Guide at http://www.hp.com/support/workstation_manuals:... -
Page 64: Routine Care
10 Routine care ● General cleaning safety precautions ● Recommended cleaning products ● Cleaning the chassis ● Cleaning the keyboard ● Cleaning the monitor ● Cleaning the mouse General cleaning safety precautions ● Never use solvents or flammable solutions to clean the workstation. ●... -
Page 65: Cleaning The Chassis
Cleaning the chassis ● Follow the safety precautions in the Maintenance and Service Guide for your workstation before cleaning the workstation. ● To remove light stains or dirt, use plain water with a clean, lint-free cloth or swab. ● For heavier stains, use a soft microfiber cloth or chamois moistened with mild dish washing liquid diluted with water. -
Page 66: Cleaning The Mouse
Cleaning the mouse Follow the safety precautions in the Maintenance and Service Guide for your workstation before cleaning the mouse. If the mouse has an on/off switch, turn it off. Wipe the body of the mouse with a soft microfiber cloth or chamois moistened with alcohol-free glass cleaning fluid or water with mild soap solution. -
Page 67: 11 Accessibility
Supported assistive technologies HP products support a wide variety of operating system assistive technologies and can be configured to work with additional assistive technologies. Use the Search feature on your device to locate more information about assistive features. -
Page 68: Index
Updating drivers 50 Graphics cards Updating the BIOS 50 Types 16 Windows 10 hard drive recovery 29, 30, 31, 32 backup and restore 37 HP PC Hardware Diagnostics (UEFI) Windows 7 downloading 36 setup 20 HP resources 1 Windows 8 Refresh 29...